您好,登录后才能下订单哦!
密码登录
登录注册
点击 登录注册 即表示同意《亿速云用户服务条款》
这篇文章主要介绍“如何安装streamlit框架”,在日常操作中,相信很多人在如何安装streamlit框架问题上存在疑惑,小编查阅了各式资料,整理出简单好用的操作方法,希望对大家解答”如何安装streamlit框架”的疑惑有所帮助!接下来,请跟着小编一起来学习吧!
streamlit框架的安装非常简单,使用pip就可以安装:
pip install streamlit
安装完成之后,可以使用命令进行版本验证:
streamlit --version
在这篇文章当中,我会用一个实际工作中的例子简单介绍streamlit框架的使用流程。
Collaborative-Distillation是一个支持高分辨率的图像风格化方案,该模型的输入是风格图片以及待处理的图片,输出是风格化之后的图片。
在这个代码仓库当中,我们需要使用比较复杂的命令行命令来进行风格化操作:
# use original VGG-19, normal images
CUDA_VISIBLE_DEVICES=0 python WCT.py --debug --mode original

# use original VGG-19, ultra-res images
CUDA_VISIBLE_DEVICES=0 python WCT.py --debug --mode original --UHD

# use our pruned VGG-19, normal images
CUDA_VISIBLE_DEVICES=0 python WCT.py --debug --mode 16x

# use our pruned VGG-19, ultra-res images
CUDA_VISIBLE_DEVICES=0 python WCT.py --debug --mode 16x --UHD

# If your RAM cannot afford some large images, you can change the content and style size via '--content_size' and '--style_size'
CUDA_VISIBLE_DEVICES=0 python WCT.py --debug --mode 16x --UHD --content_size 3000 --style_size 2000
但是这样的操作对于用户来说相当复杂,所以我们可以使用streamlit编写一个demo页面,方便用户使用。
在这个demo页面当中,会用到streamlit的以下几种组件:
streamlit.file_uploader:文件上传组件,具体见下图

该组件支持拖拽上传文件和文件管理器选择文件,相对来说比较方便,使用方法如下列代码所示:
style_file = st.file_uploader("请上传风格化图片")

if style_file:
    stringio = style_file.getvalue()
    style_file_path = 'style_file/'+ style_file.name
    with open(style_file_path,'wb') as f:
        f.write(stringio)
使用文件上传组件上传文件之后,可以使用上面的代码将文件保存到特定路径等待使用。
streamlit.image:图片显示组件,具体见下图:

该组件可以在demo页面中根据图片路径显示图片。
style_file_path = 'style_file/'+ style_file.name
st.image(style_file_path)
streamlit.write:文字显示组件,该组件可以在网页上显示一些提示信息。
st.write('高分辨率风格化demo')streamlit.button:按钮组件,点击之后可以进行一些任务。
if st.button('开始进行风格化处理'):
	style_func()
streamlit.progress:进度显示组件,可以用来显示任务的进度。

for i in range(0,100,10):
	st.progress(i + 1)
streamlit中还有一些重要的组件,例如:
streamlit.cache:数据缓存组件,该组件可以作为装饰器使用,用处是缓存数据,加快数据载入速度。可以用在需要反复加载数据或者进行计算的函数当中。
@st.cache
def load_dataset(data_link):
    dataset = pd.read_csv(data_link)
    return dataset
streamlit.audio:音频展示组件,可以根据音频地址播放音频。

with open('audio.mp3','rb') as f:
	st.audio(f,format="audio/mp3")
streamlit.audio:选择组件,该组件可以让用户从多个选项中选择一项。
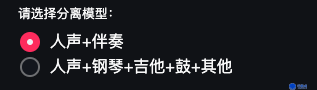
model_choose = st.radio('请选择分离模型:',['人声+伴奏','人声+钢琴+吉他+鼓+其他'],0)其中参数0表示默认选择第一项。
streamlit支持的组件还是很多的,如果感兴趣,请参考官方文档。
这个demo页面的主要功能是让用户分别上传style图片和content图片,然后后台进行风格化操作,风格化操作完成之后显示结果图片。这样用户就可以快速的进行风格化操作并知道结果。
streamlit应用是用python语言编写的。在python文件开头,需要导入streamlit包。
import streamlit as st
接着进行文件的上传与预处理:
style_file = st.file_uploader("请上传风格化图片")
content_file = st.file_uploader("请上传待处理图片")
image_slot = st.empty()

if style_file:
    stringio = style_file.getvalue()
    style_file_path = 'style_file/'+ style_file.name
    with open(style_file_path,'wb') as f:
        f.write(stringio)
    image_slot.image(style_file_path)

if content_file:
    stringio = content_file.getvalue()
    content_file_path = 'content_file/'+ content_file.name
    with open(content_file_path,'wb') as f:
        f.write(stringio)

if content_file and style_file:
    img1 = Image.open( style_file_path)
    img1 = img1.resize((640, 640))

    img2 = Image.open( content_file_path)
    img2 = img2.resize((640, 640))
    new_img = Image.new('RGB', (1280, 640), 255)
    new_img.paste(img1,(0,0))
    new_img.paste(img2,(640,0))
    new_img.save('concrate_file/' + os.path.basename(style_file_path))
    image_slot.image('concrate_file/' + os.path.basename(style_file_path))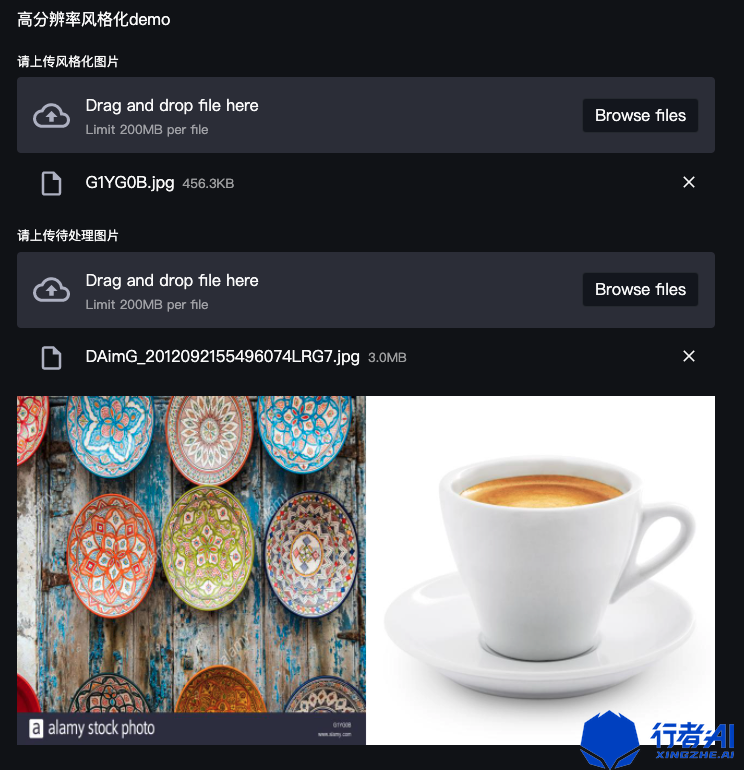
最后写一个按钮,执行风格化操作,并显示最终结果,同时添加一个进度条:
if st.button('开始进行风格化处理'):
    my_bar = st.progress(10)

    UHD_content_folder_path = 'PytorchWCT/content/UHD_content'
    output_path = WCT_func.process(content_file_path,style_file_path)
    for i in range(0,100,10):
        my_bar.progress(i + 1)
    my_bar.progress(100)
    st.write('风格化之后的图片')
    st.image(output_path)
streamlit框架的运行方式非常简单,直接在命令行执行:
$ streamlit run streamlit_demo.py
就可以在浏览器中进行访问了。

streamlit框架非常适合快速编写流程不太复杂且需要可视化操作的demo,作者从开始编写到编写完成这个demo用时不到半个小时,编写代码不到50行,而且运行部署起来非常方便,页面看起来要比使用flask之类的框架渲染出的网页美观许多,实乃算法工程师的利器。
到此,关于“如何安装streamlit框架”的学习就结束了,希望能够解决大家的疑惑。理论与实践的搭配能更好的帮助大家学习,快去试试吧!若想继续学习更多相关知识,请继续关注亿速云网站,小编会继续努力为大家带来更多实用的文章!
免责声明:本站发布的内容(图片、视频和文字)以原创、转载和分享为主,文章观点不代表本网站立场,如果涉及侵权请联系站长邮箱:is@yisu.com进行举报,并提供相关证据,一经查实,将立刻删除涉嫌侵权内容。