您好,登录后才能下订单哦!
这篇文章主要介绍了MVC3中辅助方法怎么用,具有一定借鉴价值,感兴趣的朋友可以参考下,希望大家阅读完这篇文章之后大有收获,下面让小编带着大家一起了解一下。
1,
@Html.TextBox("txt", "hello", new { style = "width:1000px;height:1000px;" })生成标签:
<input id="txt" name="txt" type="text" value="hello" />
2,
特殊属性(class:c#保留关键字)
@Html.TextBox("txt", "hello", new { style = "width:1000px;height:1000px;",@class="aa" })生成标签:
<input class="aa" id="txt" name="txt" type="text" value="hello" />
3,
带连接字符的属性(例如:data_result)
@Html.TextArea("text", "hello", new { data_result ="data"})生成标签:
<textarea cols="20" data-result="data" id="text" name="text" rows="2">hello</textarea>
4,
@using (Html.BeginForm())
{
    <input type="submit" value="Create" />
}
生成标签:
<form action="/storemanager" method="post">
<input type="submit" value="Create" />
</form>
==================添加输入元素
----@Html.TextBox
@Html.TextBox("Title", string.Empty)
//单行输入
生成标签:
<input id="Title" name="Title" type="text" value="" />
----@Html.TextArea
@Html.TextArea("Title", string.Empty)
//多行输入
生成标签:
<textarea cols="20" id="Title" name="Title" rows="2">
----@Html.Label
@Html.Label("Title","请输入:")生成标签:
<label for="Title">请输入:</label>
---- @Html.DropDownList
控制器代码:
public ActionResult Create2()
{
    //单选                     集合 ,值字段,文本字段,选定的值
    ViewBag.Genre = new SelectList(db.Genres, "GenreId", "Name",1);
    return View();
}
视图代码:
@Html.DropDownList("Genre",string.Empty) 
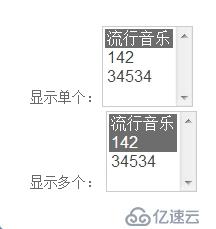
---- @Html.ListBox(可以多项选择)
@{
    List<string> listbox = new List<string>();
    listbox.Add("a");
    listbox.Add("b");
    listbox.Add("c");
 }
 @Html.ListBox("listitem", new SelectList(listbox,"a"))
控制器代码:
//public ActionResult Create2()
{
    //单选    集合 ,值字段,文本字段,选定的值
    ViewBag.Genre = new SelectList(db.Genres, "GenreId", "Name",1);
    //多选
    ViewBag.Genre2 = new MultiSelectList(db.Genres, "GenreId", "Name", new List<string>() { "1", "2" });
    return View();
}
视图代码:
@Html.ListBox("Genre")
@Html.ListBox("Genre2")
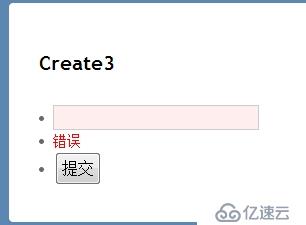
----@Html.ValidationMessage()
控制器代码:
 public ActionResult Create3()
        {
            return View();
        }

        [HttpPost]
        public ActionResult Create3(string text)
        {
            if (string.IsNullOrEmpty(text))
            {
                ModelState.AddModelError("text", "错误");
                return View();
            }
            else
            {
                return RedirectToAction("Index");
            }

        }
视图代码:
@{
    ViewBag.Title = "Create3";
}
<h3>Create3</h3>
@using (Html.BeginForm())
{
    <li>@Html.TextBox("text")</li>
    <li>@Html.ValidationMessage("text")</li>
    <li><input type="submit" value="提交" /></li>
} 
感谢你能够认真阅读完这篇文章,希望小编分享的“MVC3中辅助方法怎么用”这篇文章对大家有帮助,同时也希望大家多多支持亿速云,关注亿速云行业资讯频道,更多相关知识等着你来学习!
免责声明:本站发布的内容(图片、视频和文字)以原创、转载和分享为主,文章观点不代表本网站立场,如果涉及侵权请联系站长邮箱:is@yisu.com进行举报,并提供相关证据,一经查实,将立刻删除涉嫌侵权内容。