您好,登录后才能下订单哦!
密码登录
登录注册
点击 登录注册 即表示同意《亿速云用户服务条款》
定制需求为:
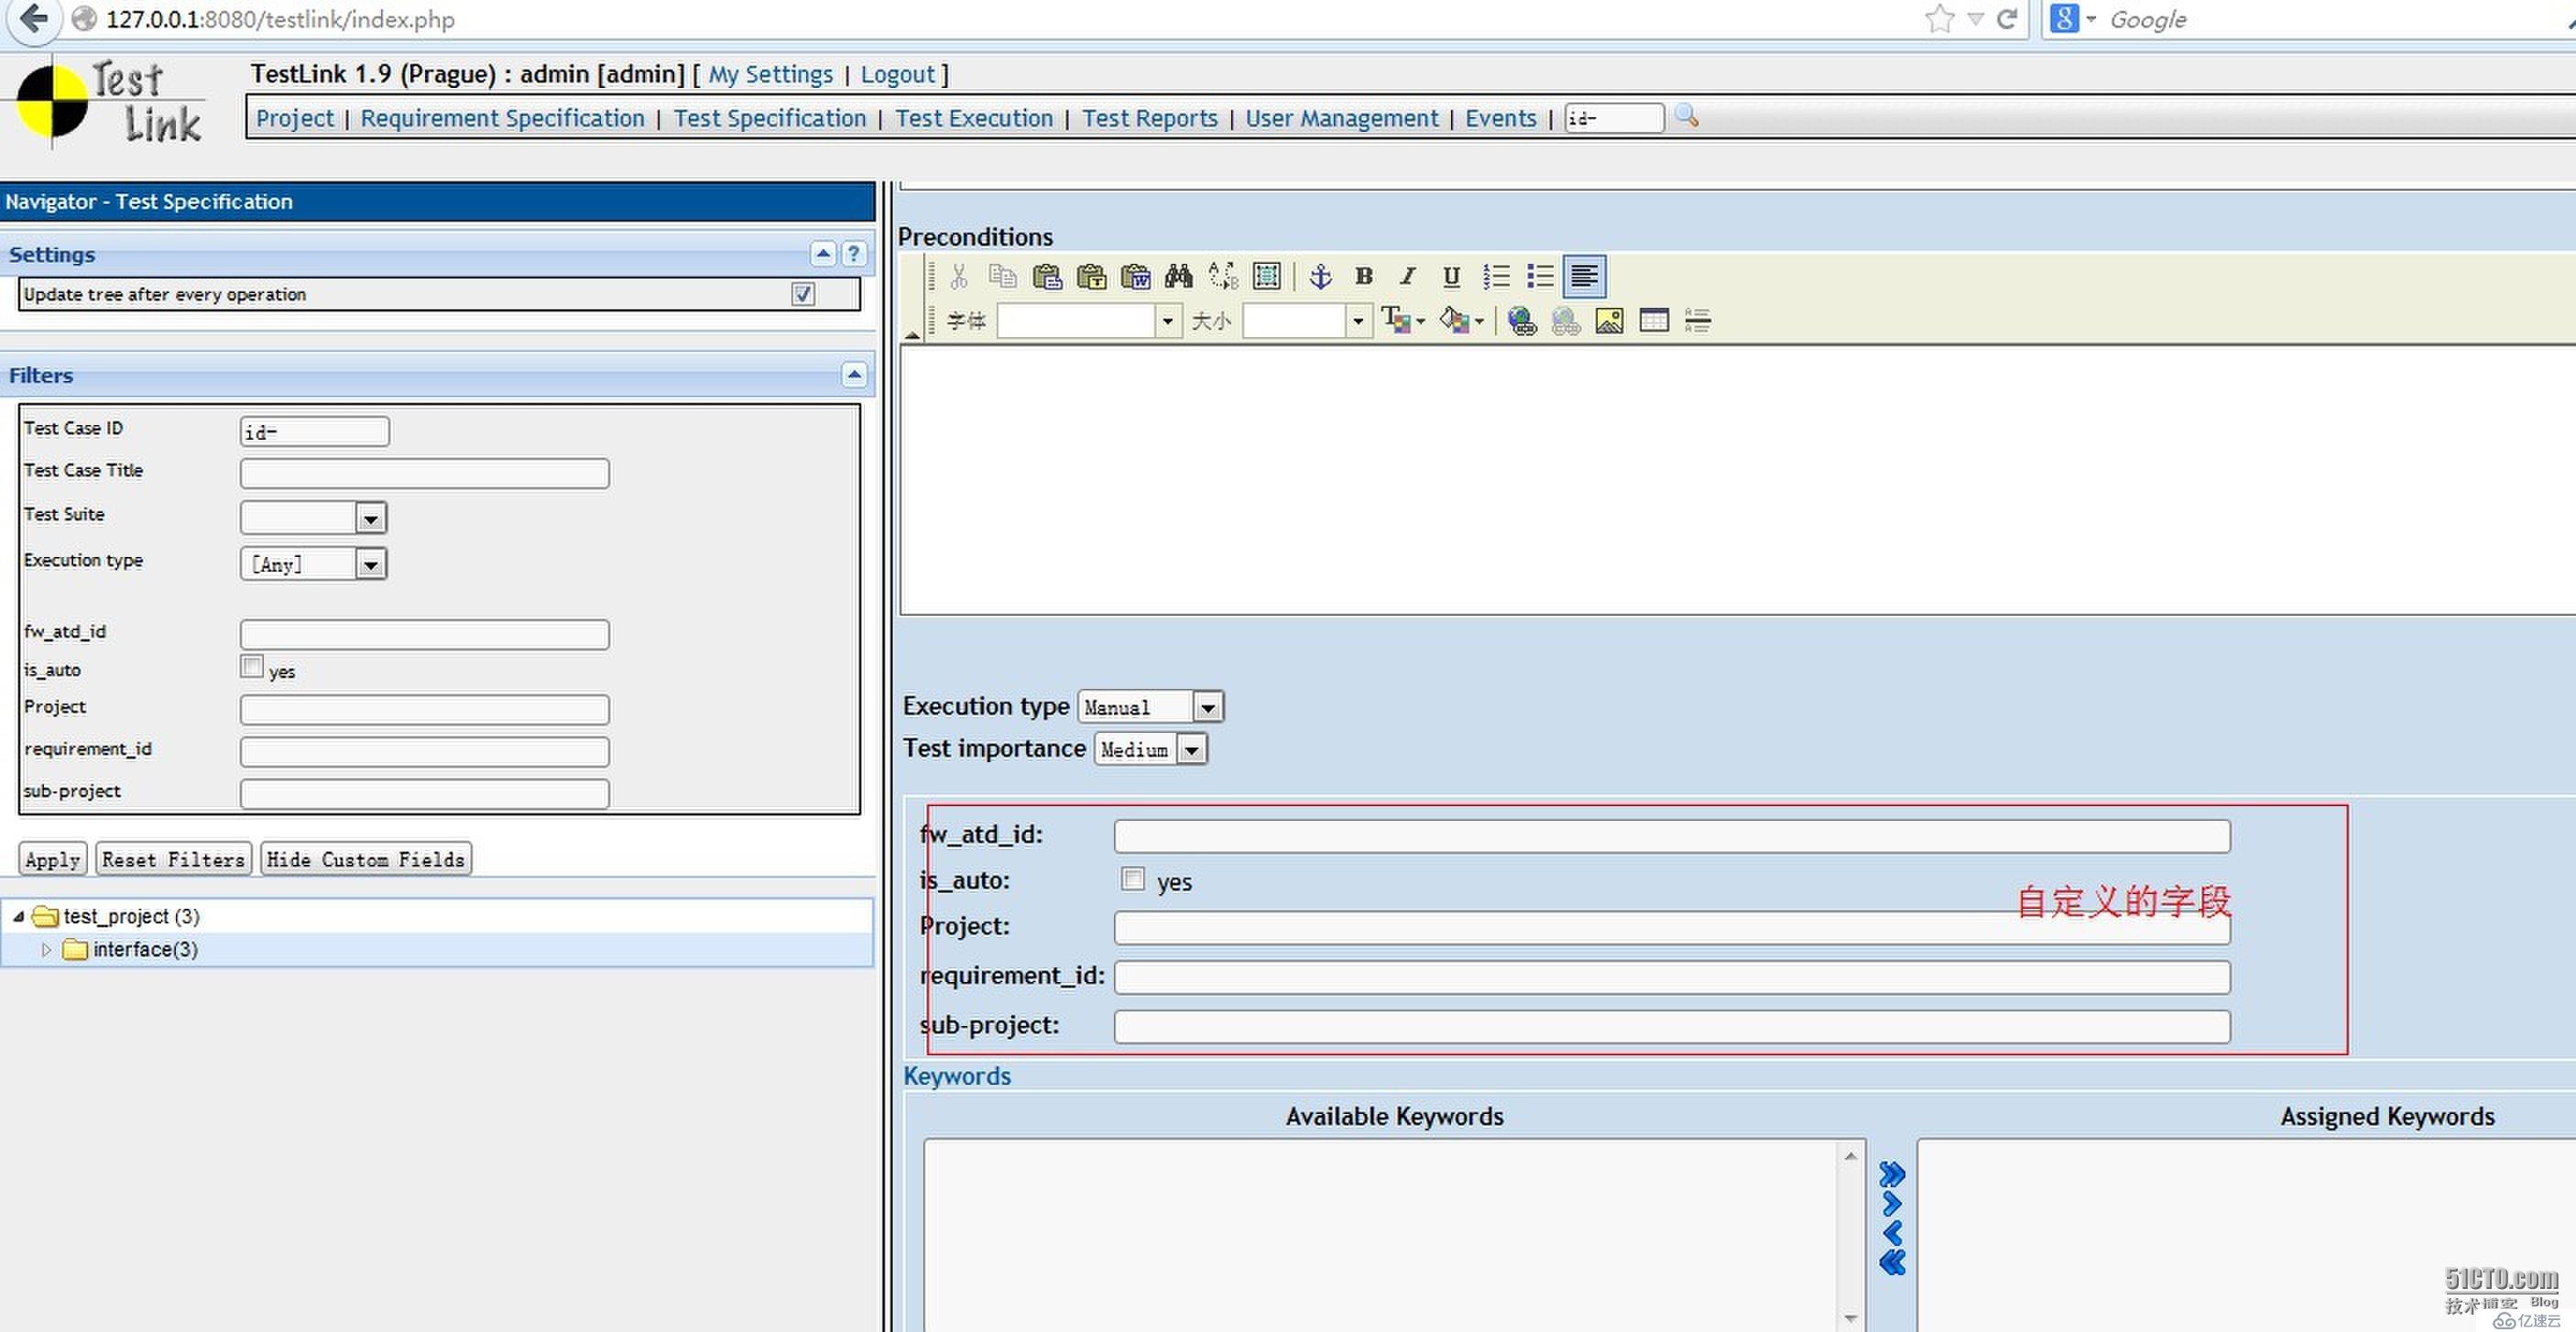
1.在测试用例中添加自定义字段
2.测试用例模板自定义css样式
3.在测试执行中增加测试结果字段
解决方式
1.测试用例自定义字段添加。
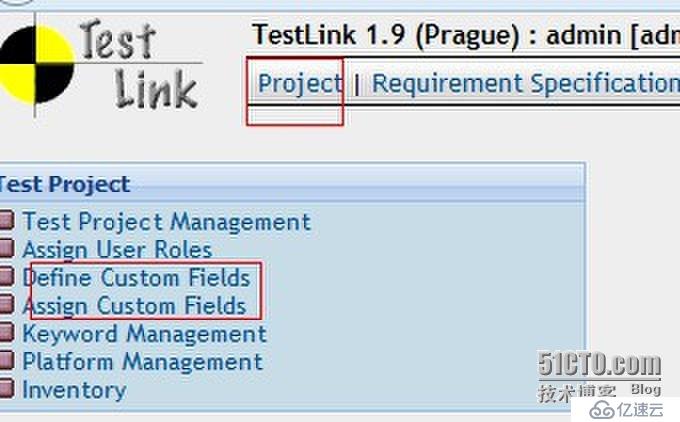
在project页面中选定custom fields选项卡;增加自定义字段;指派自定义字段。


结果图如下所示:

2.测试执行结果定制:
先看看效果图

操作步骤如下:
首先,修改cfg/const.inc.php
$tlCfg->results['status_code'] = array (
    'failed'        => 'f',
    'blocked'       => 'b',
    'passed'        => 'p',
    'not_run'       => 'n',
    'not_available' => 'x',
    'unknown'       => 'u',
    'all'           => 'a',
    'auto_passed'   => 'y',
    'auto_failed'   => 'z'
);
$tlCfg->results['status_label'] = array(
    'not_run'          => 'test_status_not_run',
    'passed'           => 'test_status_passed',
    'failed'           => 'test_status_failed',
    'blocked'          => 'test_status_blocked',
//    'all'              => 'test_status_all_status',
//    'not_available' => 'test_status_not_available',
//    'unknown'       => 'test_status_unknown'
    'auto_passed'      => 'test_status_auto_passed',
    'auto_failed'      => 'test_status_auto_failed'
);
$tlCfg->results['status_label_for_exec_ui'] = array(
    'not_run'          => 'test_status_not_run',
    'passed'          => 'test_status_passed',
    'failed'          => 'test_status_failed',
    'blocked'         => 'test_status_blocked',
    'auto_passed'      => 'test_status_auto_passed',
    'auto_failed'      => 'test_status_auto_failed'
);
$tlCfg->results['charts']['status_colour'] = array(
     'not_run'          => '000000',
    'passed'           => '006400',
    'failed'           => 'B22222',
    'blocked'          => '00008B',
    'auto_passed'   => '006400',
    'auto_failed'   => 'B22222'
);
其次,在custom_config.inc.php中添加
$tlCfg->results['status_code'] = array (
         "failed"        => 'f',
         "blocked"       => 'b',
         "passed"        => 'p',
         "not_run"       => 'n',
         "not_available" => 'x',
         "unknown"       => 'u',
         "all"           => 'a',
         "auto_passed"   => 'y',
         "auto_failed"   => 'z'
 );
 $tlCfg->results['status_label'] = array(
         "passed"                => "test_status_passed",
         "failed"                => "test_status_failed",
         "blocked"               => "test_status_blocked",
         "not_run"               => "test_status_not_run",
      //   "all"                   => "test_status_all_status",
      //   "not_available"    => "test_status_not_available",
       //  "unknown"          => "test_status_unknown",
         "auto_passed"      => "test_status_auto_passed",
         "auto_failed"      => "test_status_auto_failed"
 );
 $tlCfg->results['status_label_for_exec_ui'] = array(
         "passed"  => "test_status_passed",
         "failed"  => "test_status_failed",
         "blocked" => "test_status_blocked",
         "not_run" => "test_status_not_run",
     //    "not_available" => "test_status_not_available",
         "auto_passed"      => "test_status_auto_passed",
         "auto_failed"      => "test_status_auto_failed"
 );
 $tlCfg->results['default_status'] = "not_run";
再次,修改\locale\en_GB\strings.txt
// Status (used wide)
$TLS_test_status_all = "All";
$TLS_test_status_any = "Any";
$TLS_test_status_not_run = "Not Run";
$TLS_test_status_blocked = "Blocked";
$TLS_test_status_failed = "Failed";
$TLS_test_status_passed = "Passed";
$TLS_test_status_not_available = "Not Available";
$TLS_test_status_unknown = "Unknown";
$TLS_test_status_auto_failed = "Auto_Failed";
$TLS_test_status_auto_passed = "Auto_Passed";
最后,编写自己的testlink.css
1.1 拷贝default中所有目录到myTheme
1.2修改config.inc.php中的theme路径
/* [GUI LAYOUT] */
/** GUI themes (base for CSS and p_w_picpaths)- modify if you create own one */
$tlCfg->theme_dir = 'gui/themes/myTheme/';
1.3修改testlink.css
/* ***** Execution & Results ********************************************************* */
div.passed, div.failed, div.blocked, div.not_run, div.auto_passed, div.auto_failed {
    color:             white;
    margin:         8px;
    padding:         6px;
    text-align:     center;
}
div.passed {
    background:        #006400; /* darkgreen */
}
div.failed {
    background:        #B22222; /* firebrick (red) */
}
div.blocked {
    background:        #00008B; /* darkblue */
}
div.not_run {
    background:        black;
}
.auto_passed, div.auto_passed {
    color:             white;
    background:        #006400; /* darkgreen */
}
.auto_failed, div.auto_failed {
    color:             white;
    background:        #B22222; /* firebrick (red) */
}
3.如何修改自定义的测试用例模板的样式
暂时没有找到修改固有模板和自定义字段顺序的方法,以及删除固有板块如summary,keywords的方法
目前只能通过修改testlink.css中的.custom_fieldxx去掉bold,将padding改为0px。这样会变得稍微能看一点。
免责声明:本站发布的内容(图片、视频和文字)以原创、转载和分享为主,文章观点不代表本网站立场,如果涉及侵权请联系站长邮箱:is@yisu.com进行举报,并提供相关证据,一经查实,将立刻删除涉嫌侵权内容。