您好,登录后才能下订单哦!
小编给大家分享一下使用bootstrap实现年月日的时间选择的方法,相信大部分人都还不怎么了解,因此分享这篇文章给大家参考一下,希望大家阅读完这篇文章后大有收获,下面让我们一起去了解一下吧!
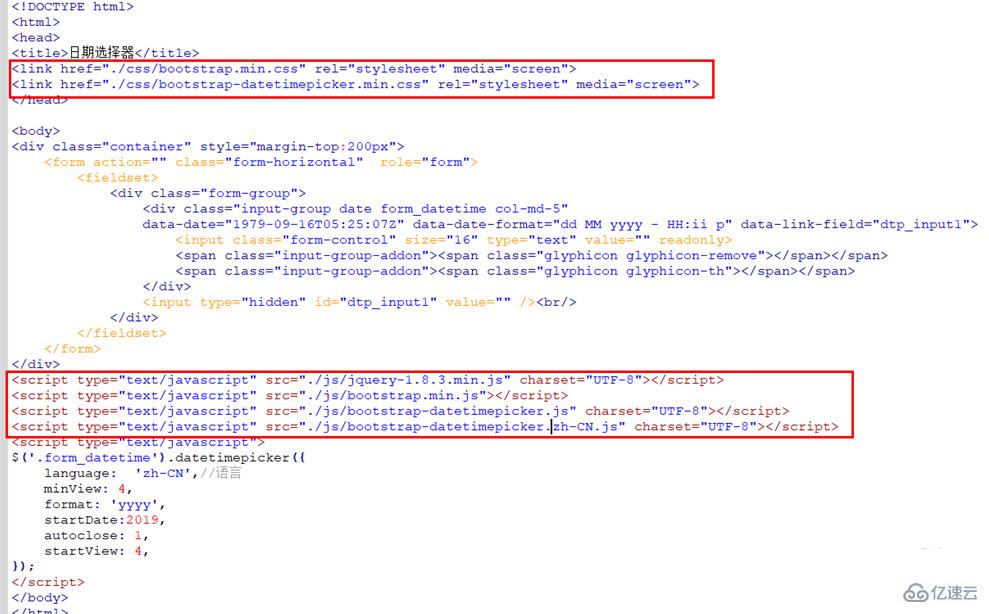
使用bootstrap实现时间选择,页面需要加载以下文件:
1、CSS文件:bootstrap.min.css、bootstrap-datetimepicker.min.css
2、JS文件:jquery-1.8.3.min.js、bootstrap.min.js、bootstrap-datetimepicker.js、bootstrap-datetimepicker.zh-CN.js
 使用bootstrap实现年份的选择。
bootstrap配置代码如下:
<script type="text/javascript">
$('.form_datetime').datetimepicker({
    language:  'zh-CN',
    minView: 4,         format: 'yyyy',
    startDate:2019,
    autoclose: 1,
    startView: 4,
});
</script>
使用bootstrap实现月份的选择。
bootstrap配置代码如下:
<script type="text/javascript">
$('.form_datetime').datetimepicker({
    format: 'mm',
    autoclose:true,
    startView:3,
    minView:3,
    maxView:3,
    initialDate:new Date(),
    language:'zh-CN'
});
</script>
使用bootstrap实现年月日的选择。
bootstrap配置代码如下:
<script type="text/javascript">
$('.form_datetime').datetimepicker({
     format: 'yyyymmdd',
     weekStart: 1,
     autoclose: true,
     startView: 2,
     minView: 2,
    language:'zh-CN'
});
</script>
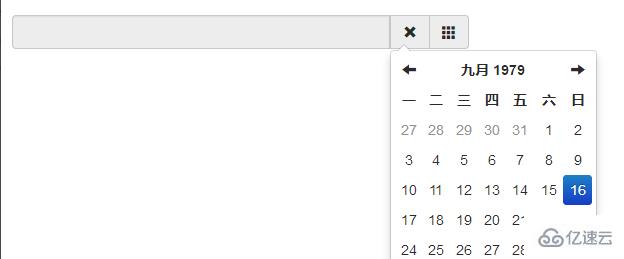
实现的效果如下:

以上是使用bootstrap实现年月日的时间选择的方法的所有内容,感谢各位的阅读!相信大家都有了一定的了解,希望分享的内容对大家有所帮助,如果还想学习更多知识,欢迎关注亿速云行业资讯频道!
免责声明:本站发布的内容(图片、视频和文字)以原创、转载和分享为主,文章观点不代表本网站立场,如果涉及侵权请联系站长邮箱:is@yisu.com进行举报,并提供相关证据,一经查实,将立刻删除涉嫌侵权内容。