您好,登录后才能下订单哦!
开源的Wiki引擎Apache JSPWiki,基于标准 JEE 组件(Java、servlet、JSP)构建,支持模板、CSS样式、插件、细粒度安全控制、autocomplete等功能,简单易用、功能丰富,非常适合用来搭建简易的企业wiki平台。
推荐部署在Tomcat服务器,要求Tomcat 8.x或更高、JDK 1.8或更高版本。安装步骤如下:
选择Apache mirror地址,进入binaries/webapp/目录,下载JSPWiki.war。
安装程序将把设置写到 $TOMCAT_HOME/temp/jspwiki-custom.properties,还会创建一个admin帐户(密码随机生成)和一个 Admin 组,注意保存页面提示的密码。
您可以在系统属性或web.xml的context-param内定义jspwiki.custom.config来指定jspwiki-custom.properties的位置。
也可以将jspwiki-custom.properties移动到$TOMCAT_HOME/webapp/appname/WEB-INF目录,但这不利于升级。
默认,创建的用户、组保存在WEB-INF目录下的userdatabase.xml、groupdatabase.xml文件内。
jspwiki-custom.properties内容如下:
#Wed Feb 26 23:19:26 CST 2020
jspwiki.basicAttachmentProvider.storageDir=C\:\\\\Work\\\\wikipages
jspwiki.fileSystemProvider.pageDir=C\:\\\\Work\\\\wikipages
jspwiki.pageProvider=VersioningFileProvider
jspwiki.applicationName=iTRunnerWiki
jspwiki.workDir=C\:\\\\\\\\Work\\\\\\\\apache-tomcat-9.0.14\\\\\\\\temp
为了便于升级,最好在jspwiki-custom.properties内指定用户、组的保存位置:
jspwiki.xmlUserDatabaseFile
jspwiki.xmlGroupDatabaseFile
也可以使用数据库:
jspwiki.userdatabase = org.apache.wiki.auth.user.JDBCUserDatabase
jspwiki.groupdatabase = org.apache.wiki.auth.authorize.JDBCGroupDatabase下载您选择语言的wikipages,然后解压将内容拷贝到前面指定的jspwiki.fileSystemProvider.pageDir目录。启动tomcat。
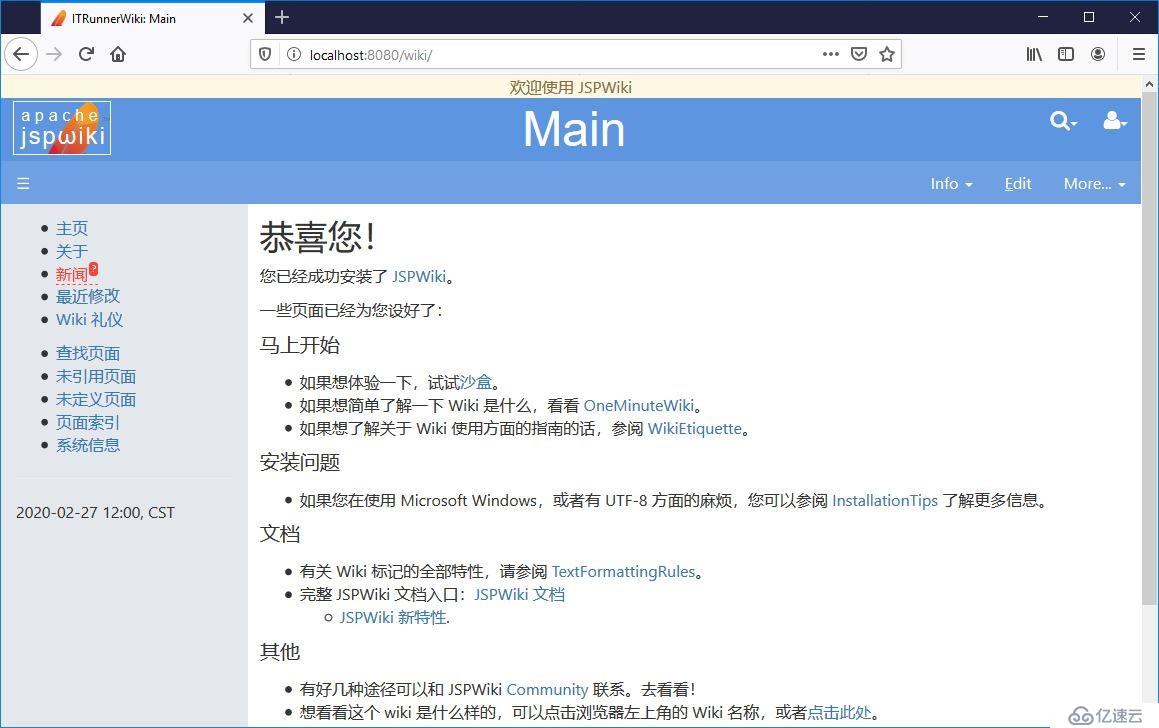
您将进入Main页面,可以学习JSPWiki知识,可以编辑这些页面。
要查看jspwiki.properties支持的配置项,可以访问官网,也可以解压WEB-INF/lib/jspwiki-main.jar,ini目录内含有此文件,其中包含所有属性。
下面列出一些常用的属性:
jspwiki.baseURL=http://www.itrunner.org/wiki

#  If this property is set to "true", then page titles are rendered
#  using an extra space between every capital letter.
jspwiki.breakTitleWithSpaces=true

# Set the default page
jspwiki.frontPage=Main

# Set the default template used by the Wiki engine
jspwiki.templateDir=default

# Set position of the favorites menu (aka left menu, sidebar)
# The value determines the css-class used to change the position of the #favorites block
# Possible values: fav-left or fav-right
# Default value is fav-left
jspwiki.defaultprefs.template.orientation=fav-right

#
#  By default JSPWiki accepts all types of attachments.  However, you
#  can allow some types only, or forbid some other types.
# These allow/forbid statements are not enforced for users with AdminPermissions.
#
#  These both are space-separated lists of file suffixes
#
#  Example: Allow only PNG, JPG, ZIP and JAR file attachments
jspwiki.attachment.allowed=.png .jpg .zip .jar

#  Example: Forbid HTML, PHP, ASP and EXE
jspwiki.attachment.forbidden=.html .htm .php .asp .exe

# Example: Attachment links to HTML, HTM and MP3 files would force a download rather then opening the attachment
jspwiki.attachment.forceDownload= .html .htm

# Inline all JPG files, PNG files, GIF files
jspwiki.translatorReader.inlinePattern.1 = *.jpg
jspwiki.translatorReader.inlinePattern.2 = *.png
jspwiki.translatorReader.inlinePattern.3 = *.gifJSPWiki 包含一套丰富、灵活的安全功能。
默认策略文件jspwiki.policy位于WEB-INF目录下,可以使用配置属性指定自定义策略文件位置:
jspwiki.policy.file=jspwiki-custom.policyJSPWiki Security支持Role、Group,其中Role包含以下五种:
最初创建的admin用户属于Admin角色、Admin组,拥有全部权限。
初始策略很宽松,匿名用户可以注册、登录,可以查看、修改、创建页面。默认策略如下表:
| Permission | Anonymous users | Asserted users (with cookie) | Authenticated users | Admin group |
|---|---|---|---|---|
| View all pages | x | x | x | x |
| Edit all pages | x | x | x | x |
| Upload attachments to all pages | x | x | ||
| Modify all pages (edit + upload) | x | x | ||
| Comment on all existing pages | x | x | x | x |
| Create new pages | x | x | x | x |
| Rename all pages | x | x | ||
| Delete all pages | x | |||
| View all groups | x | x | x | |
| Edit all groups | x | x | ||
| Rename all groups | x | x | ||
| Delete all groups | x | |||
| Create new groups | x | x | ||
| Create profile | x | x | x | x |
| Edit user preferences | x | x | ||
| Edit user profile | x | x |
策略分为四种主要权限类型:
某些权限意味着其他权限:
除在policy文件统一配置权限外,还可以在每个页面内单独设置权限,如:
[{ALLOW edit Admin}]
[{ALLOW view All}]
可将权限授予角色、组或用户。
安全原因,AdminPages默认是未启用的。要启用添加以下配置:
jspwiki-x.adminui.enable=true
jspwiki-x.securityconfig.enable=true
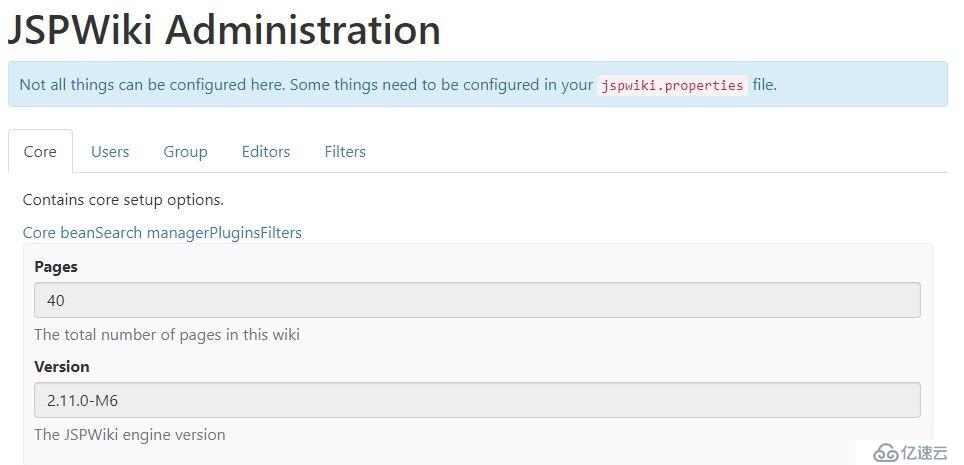
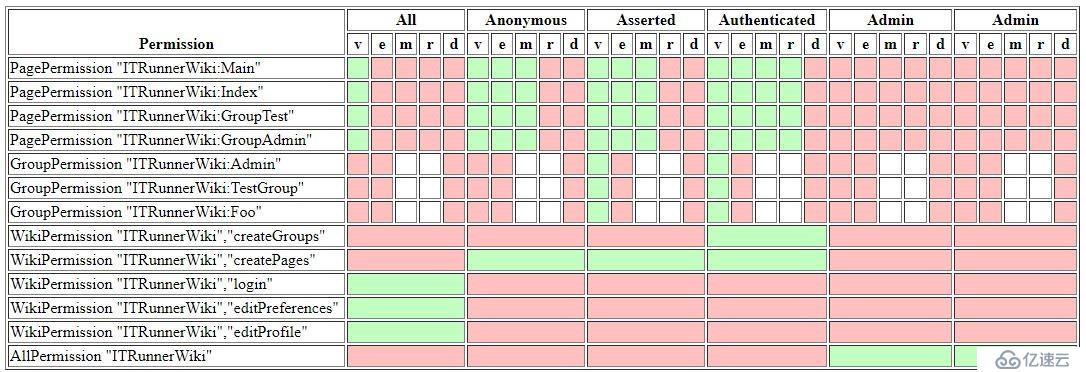
有两个管理页面,路径分别为:
Admin.jsp可以创建、编辑用户和组:
SecurityConfig.jsp检查 JSPWiki 的安全配置,允许查看当前 Wiki 中的用户、组和 ACL 配置:
JSPWiki提供了友好的编辑界面:
支持两种模式:plain和wysiwyg,默认为plain。点击水滴按钮弹出工具栏:
选中某一工具会输出相应的wiki语句,plugin、style、font、special character、ACL等工具还会显示支持的选项,在您熟悉wiki语法后,可以脱离工具栏,直接输入时同样如此,非常方便。
编辑wiki时点击Help会显示如下信息:
----             水平分隔线
\\               强制断行
[link]           创建 "link" 的超链接,其中 "link" 可以是内部 Wiki 名称(Wiki 页面名称)或者外部链接(http://)
[text|link]      创建一个显示文本和实际超链接不同的超链接,其中“text”为要 显示的文本;“link”为实际的超链接。
[text|wiki:link] 创建一个显示文本和实际超链接不同的超链接,并且超链接指向指定的 Wiki(比如 JSPWiki、MediaWiki 等等)。
                 这种链接支持 Wiki 之间的链接。

*                创建一个项目列表('*' 必需为所在行第一个字符)。用连续多个星号(**)表示次级项目符号。
#                创建一个编号列表('#' 必需为所在行第一个字符)。用连续多个#号(##,###)表示缩进/次级编号。

!, !!, !!!       在行首加上感叹号(!)生成标题。感叹号越多表示标题越大。
__text__         文本加粗。
''text''         给文本斜体效果(注意是单引号 ')
{{text}}         使文本变为等款字体。
;term:def        用 'def' 定义 'term'。用空的 'term' 可以表示简短注释(如,;:Created on 2008/02/28)。

|text|more text 生成表格。两条竖线“||”表示表格标题。
更多的Wiki Syntax请查看官网。
CSS styles
Following styles are supported by the standard jspwiki.css file:
Dynamic styles
例如:
JSPWiki官方页面的LeftMenu,组合使用了%%list-unstyled-hover,%%accordion:
%%list-unstyled-hover

%%accordion
!General
* [News]
* [Getting Started]
* [Wiki Syntax]
* [Downloads]
* [ReleaseNotes|NewIn]
* [FAQ]
* [License|http://www.apache.org/licenses/]

!Community
* [Getting Started]
* [Getting Involved]
* [Documentation]
* [Legacy site|http://www.ecyrd.com/JSPWiki/]
* [Mailing lists|Mailing Lists]
* [Social media|Social Media]
* [People]
!Development
* [Browse sources|https://github.com/apache/jspwiki]
* [JavaDoc|http://jspwiki.apache.org/apidocs/index.html]
* [Binary compatibility reports|http://jspwiki.apache.org/japicmp/index.html]
* [Get and build source|Building from source code]
* [Issue tracker|https://issues.apache.org/jira/browse/JSPWIKI]
* [Jenkins build|https://builds.apache.org/job/JSPWiki/]
* [Sonar Analysis|https://sonarcloud.io/dashboard?id=jspwiki-builder]
* [ChangeLog|https://jspwiki.apache.org/development/changelog.html]
* [Other stuff]

!PMC
* [How to release]
* [Board Reports]

!Special Pages
* [Recent Changes]
* [Search]
* [Page Index|PageIndex]
* [SystemInfo]

!Referenced by
[{ReferringPagesPlugin max=20, maxwidth=50}]
/%
/%
无边框表格:
%%table-noborder
|| Column 1 || Column 2 || Column 3
| Text     | Text     | Text
/%
JSPWiki支持自定义样式,比如:
%%add-css
table {
margin: 20px;
width: 100%;
text-align: center;
}
table td {
text-align: center;
}
/%
还可以添加属性, 如:
[{Image src='Main/tool.JPG' style='text-align: center; width: 800px;'}]JSPWiki提供很多的插件,在此不一一列举,比如常用的目录插件 [{TableOfContents}]、ACL插件 [{ALLOW plugin principal }]、Image插件 [{Image src='image.jpg'}]。
预留页面是一些特殊用途的固定名称页面,比如CopyrightNotice、LeftMenu、LeftMenuFooter,在Wiki Template中会用到。
当前JSPWiki提供了default、210、raw、reader四套模板,位于war的templates目录下,用户可自定义模板。
免责声明:本站发布的内容(图片、视频和文字)以原创、转载和分享为主,文章观点不代表本网站立场,如果涉及侵权请联系站长邮箱:is@yisu.com进行举报,并提供相关证据,一经查实,将立刻删除涉嫌侵权内容。