您好,登录后才能下订单哦!
密码登录
登录注册
点击 登录注册 即表示同意《亿速云用户服务条款》
这篇文章主要为大家展示了怎么实现PyQt5文本输入框自动补全QLineEdit,内容简而易懂,希望大家可以学习一下,学习完之后肯定会有收获的,下面让小编带大家一起来看看吧。
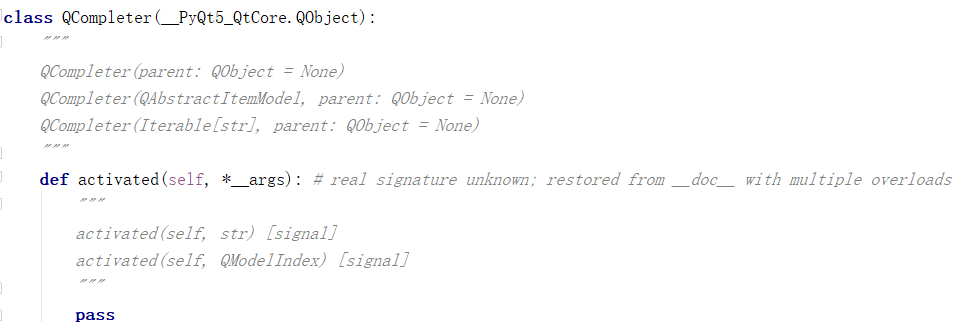
一、QCompleter类
自动补全会用到的一个类
主要代码
  def init_lineedit(self):
    # 增加自动补全
    self.completer = QCompleter(items_list)
    # 设置匹配模式 有三种: Qt.MatchStartsWith 开头匹配(默认) Qt.MatchContains 内容匹配 Qt.MatchEndsWith 结尾匹配
    self.completer.setFilterMode(Qt.MatchContains)
    # 设置补全模式 有三种: QCompleter.PopupCompletion(默认) QCompleter.InlineCompletion  QCompleter.UnfilteredPopupCompletion
    self.completer.setCompletionMode(QCompleter.PopupCompletion)
    # 给lineedit设置补全器
    self.lineedit.setCompleter(self.completer)


  def init_combobox(self):
    # 增加选项元素
    for i in range(len(items_list)):
      self.combobox.addItem(items_list[i])
    self.combobox.setCurrentIndex(-1)

    # 增加自动补全
    self.completer = QCompleter(items_list)
    self.completer.setFilterMode(Qt.MatchContains)
    self.completer.setCompletionMode(QCompleter.PopupCompletion)
    self.combobox.setCompleter(self.completer)
完整代码:
import sys
from PyQt5.QtWidgets import *
from PyQt5.QtGui import *
from PyQt5.QtCore import *
################################################
items_list=["C","C++","Java","Python","JavaScript","C#","Swift","go","Ruby","Lua","PHP"]
################################################
class Widget(QWidget):
def __init__(self, *args, **kwargs):
super(Widget, self).__init__(*args, **kwargs)
layout = QHBoxLayout(self)
self.lineedit = QLineEdit(self, minimumWidth=200)
self.combobox = QComboBox(self, minimumWidth=200)
self.combobox.setEditable(True)
layout.addWidget(QLabel("QLineEdit", self))
layout.addWidget(self.lineedit)
layout.addItem(QSpacerItem(20, 20, QSizePolicy.Expanding, QSizePolicy.Minimum))
layout.addWidget(QLabel("QComboBox", self))
layout.addWidget(self.combobox)
#初始化combobox
self.init_lineedit()
self.init_combobox()
#增加选中事件
self.combobox.activated.connect(self.on_combobox_Activate)
def init_lineedit(self):
# 增加自动补全
self.completer = QCompleter(items_list)
# 设置匹配模式 有三种: Qt.MatchStartsWith 开头匹配(默认) Qt.MatchContains 内容匹配 Qt.MatchEndsWith 结尾匹配
self.completer.setFilterMode(Qt.MatchContains)
# 设置补全模式 有三种: QCompleter.PopupCompletion(默认) QCompleter.InlineCompletion QCompleter.UnfilteredPopupCompletion
self.completer.setCompletionMode(QCompleter.PopupCompletion)
# 给lineedit设置补全器
self.lineedit.setCompleter(self.completer)
def init_combobox(self):
# 增加选项元素
for i in range(len(items_list)):
self.combobox.addItem(items_list[i])
self.combobox.setCurrentIndex(-1)
# 增加自动补全
self.completer = QCompleter(items_list)
self.completer.setFilterMode(Qt.MatchContains)
self.completer.setCompletionMode(QCompleter.PopupCompletion)
self.combobox.setCompleter(self.completer)
def on_combobox_Activate(self, index):
print(self.combobox.count())
print(self.combobox.currentIndex())
print(self.combobox.currentText())
print(self.combobox.currentData())
print(self.combobox.itemData(self.combobox.currentIndex()))
print(self.combobox.itemText(self.combobox.currentIndex()))
print(self.combobox.itemText(index))
if __name__ == "__main__":
app = QApplication(sys.argv)
w = Widget()
w.show()
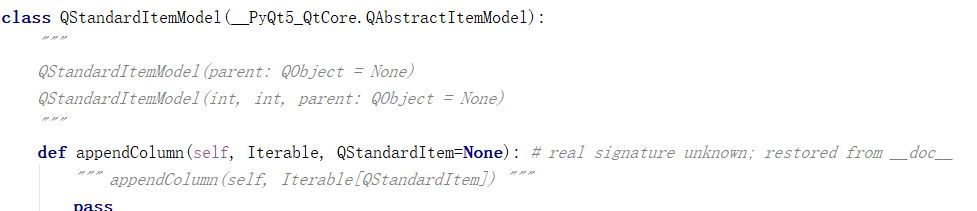
sys.exit(app.exec_())二、QStandardItemModel类
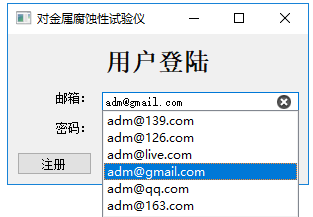
最终效果
import sys

# from PyQt5.Qt import QCompleter
from PyQt5.Qt import QStandardItemModel
from PyQt5.QtCore import Qt
from PyQt5.QtCore import pyqtSlot
from PyQt5.QtCore import pyqtSignal
from PyQt5.QtWidgets import QFrame
from PyQt5.QtWidgets import QLabel
from PyQt5.QtWidgets import QWidget
from PyQt5.QtWidgets import QLineEdit
from PyQt5.QtWidgets import QTextEdit
from PyQt5.QtWidgets import QCompleter
from PyQt5.QtWidgets import QSizePolicy
from PyQt5.QtWidgets import QMainWindow
from PyQt5.QtWidgets import QPushButton
from PyQt5.QtWidgets import QGridLayout
from PyQt5.QtWidgets import QApplication

from View import interface

class MainWindow(QMainWindow):

  def __init__(self):
    super(MainWindow,self).__init__(None)
    self.setWindowTitle("对金属腐蚀性试验仪")
    self.initUI()

  def initUI(self):
    layout = QGridLayout()
    layout.setSpacing(10)
    self.loginLabel = QLabel("邮箱:")
    self.loginLabel.setAlignment(Qt.AlignRight)
    self.loginLabel.setStyleSheet("color:rgb(20,20,20,255);font-size:16px;font-weight:bold:text")

    self.loginTxt = QLineEdit()
    self.loginTxt.setText("admin")
    self.loginTxt.setPlaceholderText("User Name")
    self.loginTxt.setClearButtonEnabled(True)
    self.loginTxt.textChanged.connect(self.on_loginTxt_textChanged) #绑定槽函数
    self.m_model = QStandardItemModel(0, 1, self)
    m_completer = QCompleter(self.m_model, self)
    self.loginTxt.setCompleter(m_completer)
    m_completer.activated[str].connect(self.onTxtChoosed)


    self.pwdLabel = QLabel("密码:")
    self.pwdLabel.setAlignment(Qt.AlignRight)
    self.pwdTxt = QLineEdit()
    self.pwdTxt.setContextMenuPolicy(Qt.NoContextMenu) #禁止复制粘贴
    self.pwdTxt.setPlaceholderText("Password")
    self.pwdTxt.setText("admin")
    self.pwdTxt.setEchoMode(QLineEdit.Password)
    self.pwdTxt.setClearButtonEnabled(True)
    self.registeredBtn = QPushButton("注册")
    self.loginBtn = QPushButton("登陆")

    self.headLabel = QLabel("用户登陆")
    self.headLabel.resize(300,30)
    self.headLabel.setAlignment(Qt.AlignCenter)
    self.headLabel.setStyleSheet("color:rgb(10,10,10,255);font-size:25px;font-weight:bold;font-family:Roman times;")

    self.headLabel.setSizePolicy(QSizePolicy.Expanding,QSizePolicy.Expanding)
    layout.addWidget(self.headLabel,0,0,1,2)
    policy = self.headLabel.sizePolicy()
    print(policy.verticalPolicy())
    policy.setVerticalPolicy(1)
    print(policy.verticalPolicy())
    # policy.setVerticalPolicy(1)
    layout.addWidget(self.loginLabel,1,0)
    layout.addWidget(self.loginTxt,1,1)
    layout.addWidget(self.pwdLabel,2,0)
    layout.addWidget(self.pwdTxt,2,1)
    layout.addWidget(self.registeredBtn,3,0)
    layout.addWidget(self.loginBtn,3,1)

    frame = QFrame(self)
    frame.setLayout(layout)
    self.setCentralWidget(frame)
    self.resize(300,150)

  def onTxtChoosed(self, txt):
    self.loginTxt.setText(txt)

  @pyqtSlot(str)
  def on_loginTxt_textChanged(self, text):
    if '@' in self.loginTxt.text():
      return

    emaillist = ["@163.com", "@qq.com", "@gmail.com", "@live.com", "@126.com", "@139.com"]
    self.m_model.removeRows(0, self.m_model.rowCount())
    for i in range(0, len(emaillist)):
      self.m_model.insertRow(0)
      self.m_model.setData(self.m_model.index(0, 0), text + emaillist[i])

if __name__ == '__main__':
  app = QApplication(sys.argv)
  mainWindow = MainWindow()
  mainWindow.show()
  mainWindow.activateWindow()
  mainWindow.raise_()
  app.exec_()
  del mainWindow
  del app
QStandardItemModel类为存储自定义数据提供了一个通用模型。
QStandardItemModel可以用作标准Qt数据类型的存储库。它是模型/视图类之一,是Qt的模型/视图框架的一部分。
QStandardItemModel提供了一个经典的基于项目的方法来处理模型。 QStandardItemModel中的项目由QStandardItem提供。
QStandardItemModel实现了QAbstractItemModel接口,这意味着该模型可用于在支持该接口的任何视图(如QListView,QTableView和QTreeView以及您自己的自定义视图)中提供数据。为了提高性能和灵活性,您可能希望子类QAbstractItemModel为不同类型的数据存储库提供支持。例如,QDirModel为底层文件系统提供了一个模型接口。
当你想要一个列表或树时,你通常会创建一个空的QStandardItemModel并使用appendRow()向模型添加项目,使用item()来访问项目。如果您的模型表示一个表格,您通常会将表格的维度传递给QStandardItemModel构造函数,并使用setItem()将项目放入表格中。您还可以使用setRowCount()和setColumnCount()来更改模型的尺寸。要插入项目,请使用insertRow()或insertColumn(),并删除项目,请使用removeRow()或removeColumn()。
您可以使用setHorizontalHeaderLabels()和setVerticalHeaderLabels()来设置模型的标题标签。
您可以使用findItems()在模型中搜索项目,并通过调用sort()对模型进行排序。
调用clear()从模型中移除所有项目。
2.2 代码理解
   self.loginTxt = QLineEdit()
    self.loginTxt.setText("admin")
    self.loginTxt.setPlaceholderText("User Name")
    self.loginTxt.setClearButtonEnabled(True)
0    self.loginTxt.textChanged.connect(self.on_loginTxt_textChanged) #绑定槽函数
1    self.m_model = QStandardItemModel(0, 1, self)
2    m_completer = QCompleter(self.m_model, self)
3    self.loginTxt.setCompleter(m_completer)
4    m_completer.activated[str].connect(self.onTxtChoosed)


  def onTxtChoosed(self, txt):
    self.loginTxt.setText(txt)

  @pyqtSlot(str)
  def on_loginTxt_textChanged(self, text):
    if '@' in self.loginTxt.text():
      return

    emaillist = ["@163.com", "@qq.com", "@gmail.com", "@live.com", "@126.com", "@139.com"]
    self.m_model.removeRows(0, self.m_model.rowCount())
    for i in range(0, len(emaillist)):
      self.m_model.insertRow(0)
      self.m_model.setData(self.m_model.index(0, 0), text + emaillist[i])
0-将文本改变信号连接到on_loginTxt_textChanged 函数处理
以上就是关于怎么实现PyQt5文本输入框自动补全QLineEdit的内容,如果你们有学习到知识或者技能,可以把它分享出去让更多的人看到。
免责声明:本站发布的内容(图片、视频和文字)以原创、转载和分享为主,文章观点不代表本网站立场,如果涉及侵权请联系站长邮箱:is@yisu.com进行举报,并提供相关证据,一经查实,将立刻删除涉嫌侵权内容。