您好,登录后才能下订单哦!
密码登录
登录注册
点击 登录注册 即表示同意《亿速云用户服务条款》
第一部分:UI界面设计
界面效果图如下:
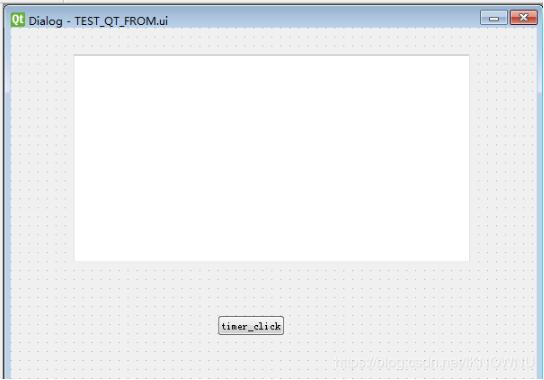
ui文件(可拉动控件自行创建一个button和text)
<?xml version="1.0" encoding="UTF-8"?>
<ui version="4.0">
 <class>Dialog</class>
 <widget class="QDialog" name="Dialog">
 <property name="geometry">
  <rect>
  <x>0</x>
  <y>0</y>
  <width>585</width>
  <height>394</height>
  </rect>
 </property>
 <property name="windowTitle">
  <string>Dialog</string>
 </property>
 <widget class="QPushButton" name="pushButton">
  <property name="geometry">
  <rect>
   <x>230</x>
   <y>320</y>
   <width>75</width>
   <height>23</height>
  </rect>
  </property>
  <property name="text">
  <string>timer_click</string>
  </property>
 </widget>
 <widget class="QTextEdit" name="textEdit">
  <property name="geometry">
  <rect>
   <x>70</x>
   <y>30</y>
   <width>441</width>
   <height>231</height>
  </rect>
  </property>
 </widget>
 </widget>
 <resources/>
 <connections>
 <connection>
  <sender>pushButton</sender>
  <signal>clicked()</signal>
  <receiver>Dialog</receiver>
  <slot>timer_click()</slot>
  <hints>
  <hint type="sourcelabel">
   <x>217</x>
   <y>229</y>
  </hint>
  <hint type="destinationlabel">
   <x>250</x>
   <y>241</y>
  </hint>
  </hints>
 </connection>
 </connections>
 <slots>
 <slot>timer_click()</slot>
 </slots>
</ui>
生成的py文件
# -*- coding: utf-8 -*-

# Form implementation generated from reading ui file 'TEST_QT_FROM.ui'
#
# Created by: PyQt5 UI code generator 5.11.3
#
# WARNING! All changes made in this file will be lost!

from PyQt5 import QtCore, QtGui, QtWidgets

class Ui_Dialog(object):
  def setupUi(self, Dialog):
    Dialog.setObjectName("Dialog")
    Dialog.resize(585, 394)
    self.pushButton = QtWidgets.QPushButton(Dialog)
    self.pushButton.setGeometry(QtCore.QRect(230, 320, 75, 23))
    self.pushButton.setObjectName("pushButton")
    self.textEdit = QtWidgets.QTextEdit(Dialog)
    self.textEdit.setGeometry(QtCore.QRect(70, 30, 441, 231))
    self.textEdit.setObjectName("textEdit")

    self.retranslateUi(Dialog)
    self.pushButton.clicked.connect(Dialog.timer_click)
    QtCore.QMetaObject.connectSlotsByName(Dialog)

  def retranslateUi(self, Dialog):
    _translate = QtCore.QCoreApplication.translate
    Dialog.setWindowTitle(_translate("Dialog", "Dialog"))
    self.pushButton.setText(_translate("Dialog", "timer_click"))
第二部分:主要逻辑代码
from PyQt5 import QtWidgets, QtCore
from testqt.TEST_QT_FROM import Ui_Dialog
import sys
from PyQt5.QtCore import *
import time


# 继承QThread
class Runthread(QtCore.QThread):
  # python3,pyqt5与之前的版本有些不一样
  # 通过类成员对象定义信号对象
  _signal = pyqtSignal(str)

  def __init__(self):
    super(Runthread, self).__init__()

  def __del__(self):
    self.wait()

  def run(self):
    print("run 666")
    self._signal.emit("run 666"); # 信号发送


class TestQtFromC(QtWidgets.QWidget, Ui_Dialog):
  text =""
  def __init__(self):
    super(TestQtFromC, self).__init__()
    self.setupUi(self)

  #click
  def timer_click(self):
    self.thread = Runthread() # 创建线程
    self.thread._signal.connect(self.callbacklog) # 连接信号
    self.thread.start() # 开始线程

  # callback
  def callbacklog(self, msg):
    self.text =self.text+time.strftime("%Y-%m-%d %H:%M:%S ", time.localtime())+msg+ "\n"
    print(self.text)
    # 回调数据输出到文本框
    self.textEdit.setText(self.text);


if __name__ == "__main__":
  app = QtWidgets.QApplication(sys.argv)
  mTestQtFromC = TestQtFromC()
  mTestQtFromC.show()
  sys.exit(app.exec_())
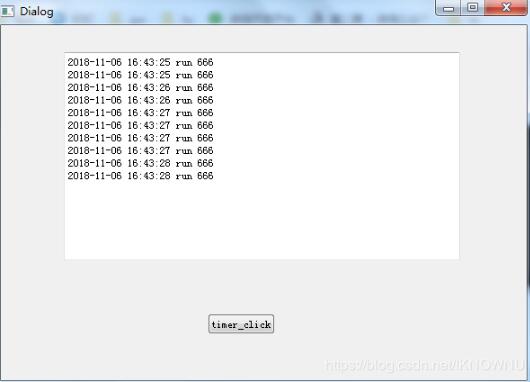
第三部分:运行效果图
点击click就可刷新界面了
以上这篇python之线程通过信号pyqtSignal刷新ui的方法就是小编分享给大家的全部内容了,希望能给大家一个参考,也希望大家多多支持亿速云。
免责声明:本站发布的内容(图片、视频和文字)以原创、转载和分享为主,文章观点不代表本网站立场,如果涉及侵权请联系站长邮箱:is@yisu.com进行举报,并提供相关证据,一经查实,将立刻删除涉嫌侵权内容。