您好,登录后才能下订单哦!
密码登录
登录注册
点击 登录注册 即表示同意《亿速云用户服务条款》
本篇文章为大家展示了使用vue怎么实现一个分页组功能,内容简明扼要并且容易理解,绝对能使你眼前一亮,通过这篇文章的详细介绍希望你能有所收获。
文件的目录:
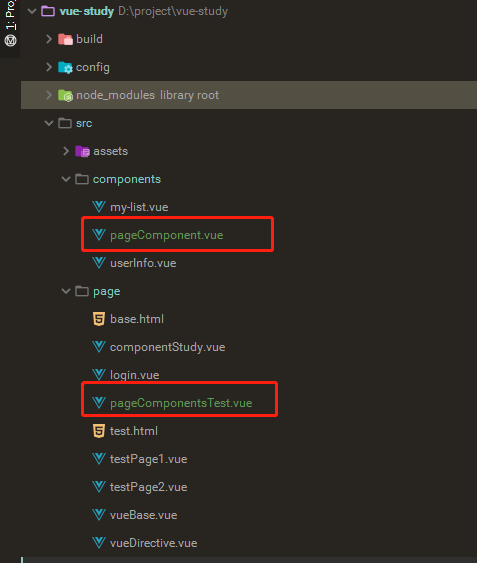
我们在 pageComponentsTest.vue 页面引入了 pageComponent.vue 分页组件。整体思路是通过 props
来达到组件的灵活通用的效果,整体语法是使用vue的VM语法。
pageComponent.vue实现
首先实现一个分页,需要知道数据总条数,一个页面显示的数据条数和当前显示第几页的数据。那么我们在 pageComponent.vue 里面的 props 就有了。看下面的代码:
props: {
   // 分页配置
   pageConfig: {
    type: Object, require: true, default() {
     return {
      pageSize: 10,   //一页的数据条数
      pageNo: 0,    //当前页的索引
      total: 0,     //总的数据条数
      pageTotal: 0   //总的页数
     }
    }
   }
根据用户入参,我们可以使用计算属性来计算一个总页数的变量:
computed: {
   //计算总页数,如果传了pageTotal,直接取pageTotal的值,如果传了total,那么根据pageSize去计算
   pageTotal(){
    const config = this.pageConfig
    if(config.pageTotal){
     return config.pageTotal
    }else {
     if(config.pageSize && config.total){
      return Math.ceil(config.total/config.pageSize)
     }else {
      return 0
     }
    }
   }
  }
有了总页数,和当前页,就需要各种判断来实现我们的html部分了,这里分4中情况
总页数小于8,只需要直接遍历到8就行了。
总页数大于8,但当前页小于4的。
总页数大于8,当前页靠后的。
总页数大于8,当前页在中间的。
下面看具体的实现:
<!--上一页-->
   <button @click="prePage" :disabled="currentPage === 1">上一页</button>
   <!--总页数小于8的-->
   <template v-if="pageTotal <= showPageNo">
    <button v-for="i in pageTotal" @click="changeCurrentPage(i)" :class="{active:i === currentPage}" :key="i">{{i}}</button>
   </template>
   <template v-else-if="currentPage < 4">
    <button v-for="i in 6" @click="changeCurrentPage(i)" :class="{active:i === currentPage}" :key="i">{{i}}</button>
    <button :disabled="true">···</button>
    <button>{{pageTotal}}</button>
   </template>
   <template v-else-if="currentPage > pageTotal - 4">
    <button>1</button>
    <button :disabled="true">···</button>
    <button v-for="i in 6" @click="changeCurrentPage(i + (pageTotal - 6))" :class="{active:(i + (pageTotal - 6)) === currentPage}" :key="i">{{i + (pageTotal - 6)}}</button>
   </template>
   <template v-else>
    <button>1</button>
    <button :disabled="true">···</button>
    <button @click="changeCurrentPage(currentPage - 2)">{{currentPage - 2}}</button>
    <button @click="changeCurrentPage(currentPage - 1)">{{currentPage - 1}}</button>
    <button class="active">{{currentPage}}</button>
    <button @click="changeCurrentPage(currentPage + 1)">{{currentPage + 1}}</button>
    <button @click="changeCurrentPage(currentPage + 2)">{{currentPage + 2}}</button>
    <button :disabled="true">···</button>
    <button @click="changeCurrentPage(pageTotal)">{{pageTotal}}</button>
   </template>
   <!--下一页-->
   <button @click="nextPage" :disabled="currentPage === pageTotal">下一页</button>
可以看到页面上需要实现3个方法,分别是上下页,和点击页面的方法。
methods: {
   prePage(){
    this.currentPage -= 1
    this.$emit('changeCurrentPage',this.currentPage)
   },
   nextPage(){
    this.currentPage += 1
    this.$emit('changeCurrentPage',this.currentPage)
   },
   changeCurrentPage(i){
    this.currentPage = i
    this.$emit('changeCurrentPage',this.currentPage)
   }
  }
以上就是 pageComponent.vue 的大致实现了,每次页面改变,都会触发一个 changeCurrentPage 方法的回调,用来通知当前使用组件的页面当前页已经改变。
pageComponentsTest.vue的实现
引用页面就比较简单了,只要传入组件需要的对应的参数,就能显示我们的组件了。 引用部分:
<template>
 <div class="pageComponentsTest">
  <page-component :page-config="pageConfigTotal" @changeCurrentPage="changePage"></page-component>
  <page-component :page-config="pageConfigPageTotal"></page-component>
 </div>
</template>
配合入参部分:
{
  name: "pageComponentsTest",
  data() {
   return {
    pageConfigTotal:{total:21,pageSize:10,pageNo:1},
    pageConfigPageTotal:{total:21,pageSize:10,pageNo:1,pageTotal:50}
   }
  },
  components:{'page-component':pageComponent},
  methods: {
   changePage(page){
    this.pageConfigTotal.pageNo = page
   }
  }
 }
上述内容就是使用vue怎么实现一个分页组功能,你们学到知识或技能了吗?如果还想学到更多技能或者丰富自己的知识储备,欢迎关注亿速云行业资讯频道。
免责声明:本站发布的内容(图片、视频和文字)以原创、转载和分享为主,文章观点不代表本网站立场,如果涉及侵权请联系站长邮箱:is@yisu.com进行举报,并提供相关证据,一经查实,将立刻删除涉嫌侵权内容。