您好,登录后才能下订单哦!
密码登录
登录注册
点击 登录注册 即表示同意《亿速云用户服务条款》
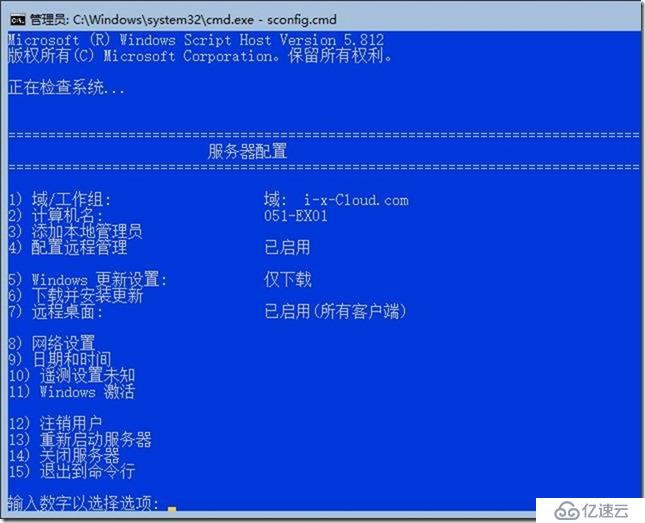
《系统工程师实战培训》
-07-部署邮件系统
-01-Exchange Server 2019 on Win 2019 Core
作者:学 无 止 境
QQ交流群:454544014
https://docs.microsoft.com/zh-cn/Exchange/plan-and-deploy/prerequisites?view=exchserver-2019
http://www.exchangecn.com/exchange2019/20181125_6001.html
//创建共享
\\10.1.1.100\Soft
.NET Framework 4.7.2
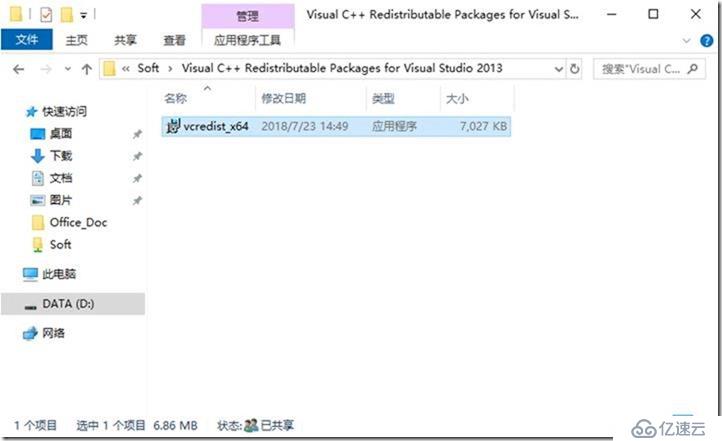
Visual C++ Redistributable Packages for Visual Studio 2013
Unified Communications Managed API 4.0
//映射网络共享(在三台Exchange 2019服务器上)
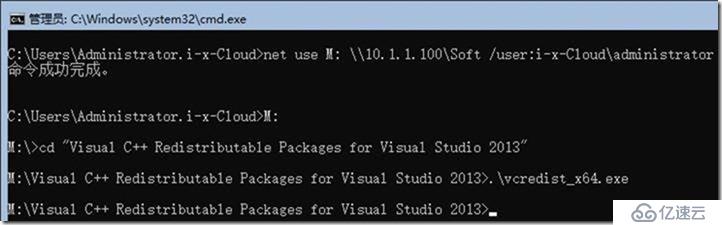
PS C:\> net use M: \\10.1.1.100\Soft /user:i-x-Cloud\administrator
命令成功完成。

用于准备 Active Directory 的 Exchange 2019 必备组件
a. .NET Framework 4.7.2 或更高版本
Windows 2019 Core 不需要安装配置 .NET Framework 4.7.2(默认)
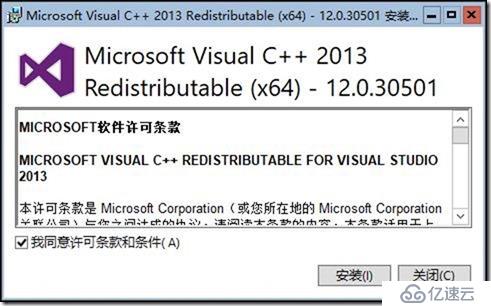
b. Visual C++ Redistributable Packages for Visual Studio 2013
C:\Users\Administrator.i-x-Cloud>net use M: \\10.1.1.100\Soft /user:i-x-Cloud\administrator
命令成功完成。
C:\Users\Administrator.i-x-Cloud>M:
M:\>cd "Visual C++ Redistributable Packages for Visual Studio 2013"
M:\Visual C++ Redistributable Packages for Visual Studio 2013>.\vcredist_x64.exe
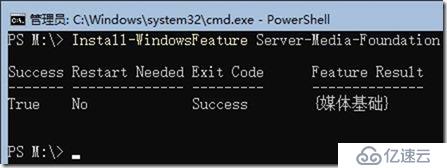
Install-WindowsFeature Server-Media-Foundation
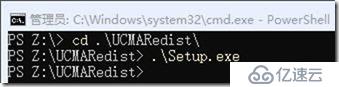
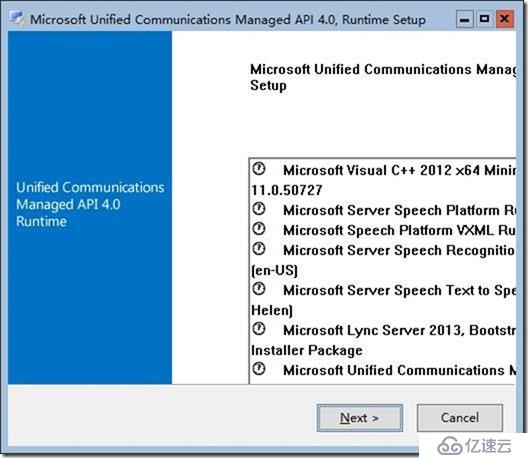
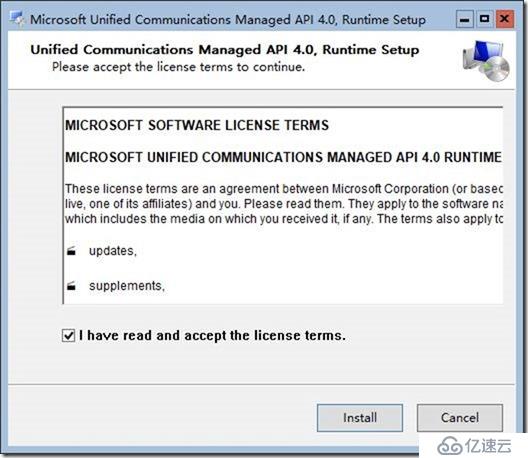
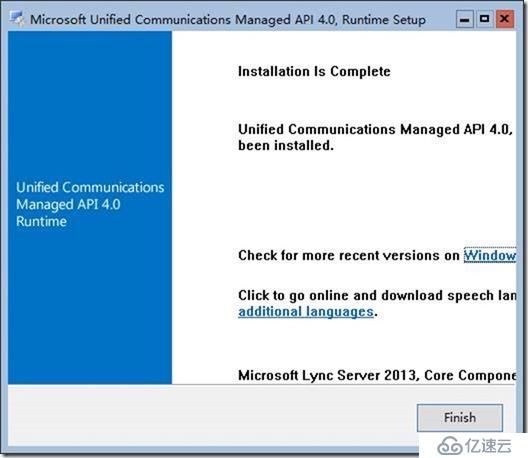
c. 安装 Unified Communications Managed API 4.0。
此程序包可供下载并位于 Exchange Server 媒体的 \UCMARedist 文件夹中。
//挂载Exchange 2019 ISO
mu_exchange_server_2019_x64_dvd_5fa4d915.iso
PS Z:\> cd .\UCMARedist\
PS Z:\UCMARedist> .\Setup.exe
PS Z:\UCMARedist>
PowerShell
cd \
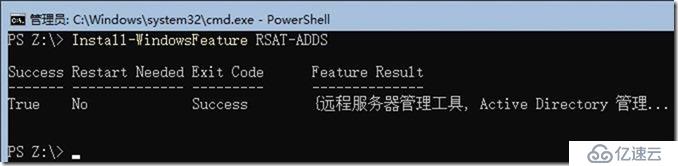
Install-WindowsFeature RSAT-ADDS
服务器核心:(Server Core:)
复制
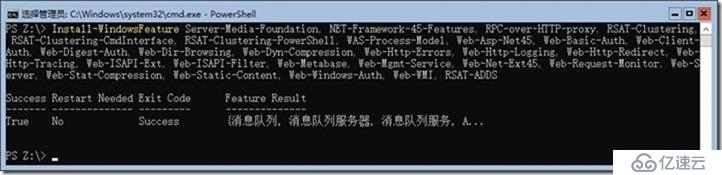
Install-WindowsFeature Server-Media-Foundation, NET-Framework-45-Features, RPC-over-HTTP-proxy, RSAT-Clustering, RSAT-Clustering-CmdInterface, RSAT-Clustering-PowerShell, WAS-Process-Model, Web-Asp-Net45, Web-Basic-Auth, Web-Client-Auth, Web-Digest-Auth, Web-Dir-Browsing, Web-Dyn-Compression, Web-Http-Errors, Web-Http-Logging, Web-Http-Redirect, Web-Http-Tracing, Web-ISAPI-Ext, Web-ISAPI-Filter, Web-Metabase, Web-Mgmt-Service, Web-Net-Ext45, Web-Request-Monitor, Web-Server, Web-Stat-Compression, Web-Static-Content, Web-Windows-Auth, Web-WMI, RSAT-ADDS

如果遇到以下情况,请重启,再安装。(有的重启一次,可以。)
如果重启5次不能解决,请退域,再加域(或者恢复快照),再次重做以上步骤。
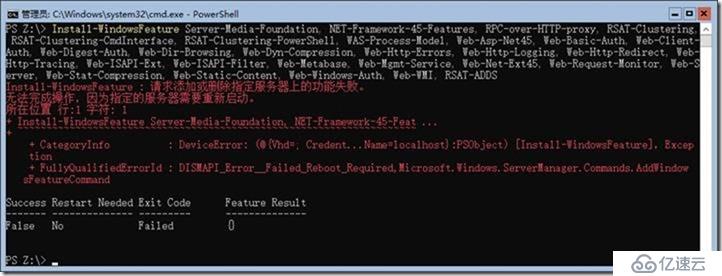
恢复快照,开机,再做以下步骤后,解决问题。

Install-WindowsFeature Server-Media-Foundation, NET-Framework-45-Features, RPC-over-HTTP-proxy, RSAT-Clustering, RSAT-Clustering-CmdInterface, RSAT-Clustering-PowerShell, WAS-Process-Model, Web-Asp-Net45, Web-Basic-Auth, Web-Client-Auth, Web-Digest-Auth, Web-Dir-Browsing, Web-Dyn-Compression, Web-Http-Errors, Web-Http-Logging, Web-Http-Redirect, Web-Http-Tracing, Web-ISAPI-Ext, Web-ISAPI-Filter, Web-Metabase, Web-Mgmt-Service, Web-Net-Ext45, Web-Request-Monitor, Web-Server, Web-Stat-Compression, Web-Static-Content, Web-Windows-Auth, Web-WMI, RSAT-ADDS
下载软件
Exchange Server 内部版本号和发行日期
https://docs.microsoft.com/zh-cn/Exchange/new-features/build-numbers-and-release-dates?view=exchserver-2019
Get-ExchangeServer | Format-List Name,Edition,AdminDisplayVersion
产品名称 发布日期 内部版本号 (短格式) 内部版本号 (长格式)
Exchange Server 2019 CU1 2019 年 2 月 12 日 15.2.330.5 15.02.0330.005
挂载ISO ,三台机一样操作。
mu_exchange_server_2019_x64_dvd_5fa4d915.ISO
PS C:\Users\Administrator.i-x-Cloud> z:
PS Z:\>
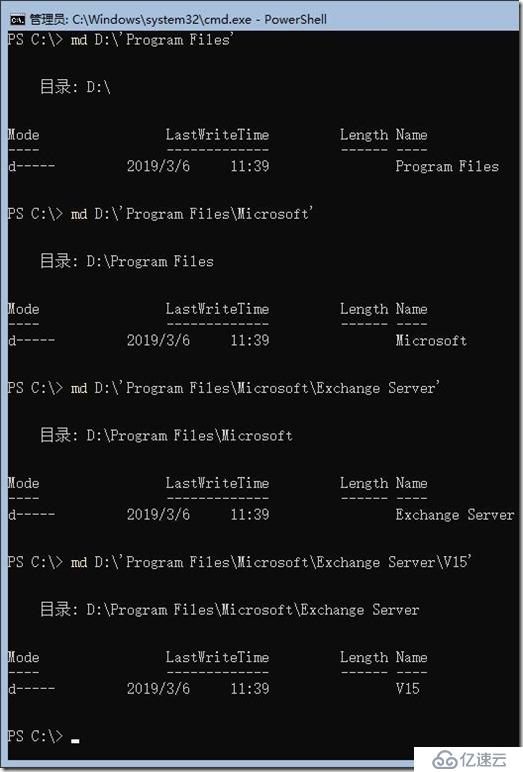
//创建目录,三台机一样操作。
md C:\Program Files\Microsoft\Exchange Server\V15
PowerShell
md D:\'Program Files'
md D:\'Program Files\Microsoft'
md D:\'Program Files\Microsoft\Exchange Server'
md D:\'Program Files\Microsoft\Exchange Server\V15'
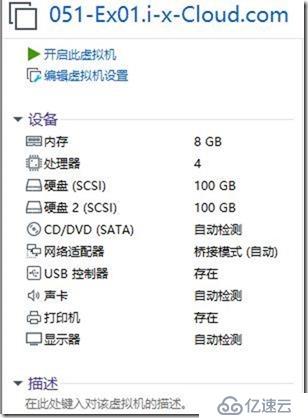
安装第1台Exchange 2019
挂载Exchange 2019 IS0
PowerShell
Z:
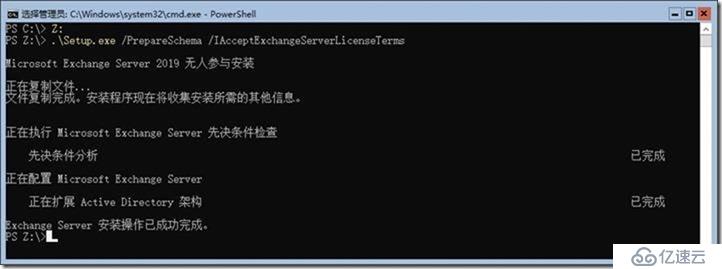
Extend the Active Directory schema
The first step in getting your organization ready for Exchange 2019 is to extend the Active
Directory schema by running the following command:
“.\Setup.exe /PrepareSchema /IAcceptExchangeServerLicenseTerms”
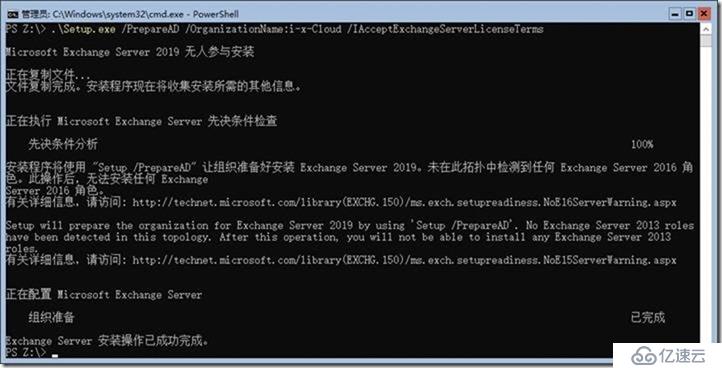
Prepare Active Directory
The second step that Exchange will create containers, objects, and other items in Active
Directory that Exchange Server will use to store information by running the following command:
“.\Setup.exe /PrepareAD /OrganizationName:”i-x-Cloud” /IAcceptExchangeServerLicenseTerms”
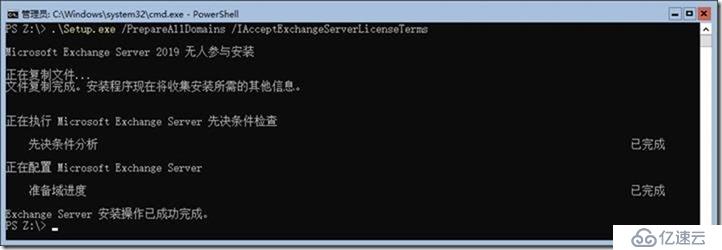
Prepare Active Directory domains
The final step is to prepare the Active Directory domains where Exchange will be installed or
where mail-enabled users will be located by running the following command:
“.\Setup.exe /PrepareAllDomains /IAcceptExchangeServerLicenseTerms”
Installation of Exchange Server 2019
After rebooting the server mount the Exchange Server 2019 ISO image in your VM.
Use the following command to start Exchange Server installation. The PowerShell command will
also install the required OS components for Exchange:
.\Setup.exe /m:install /roles:m /IAcceptExchangeServerLicenseTerms /InstallWindowsComponents //参考
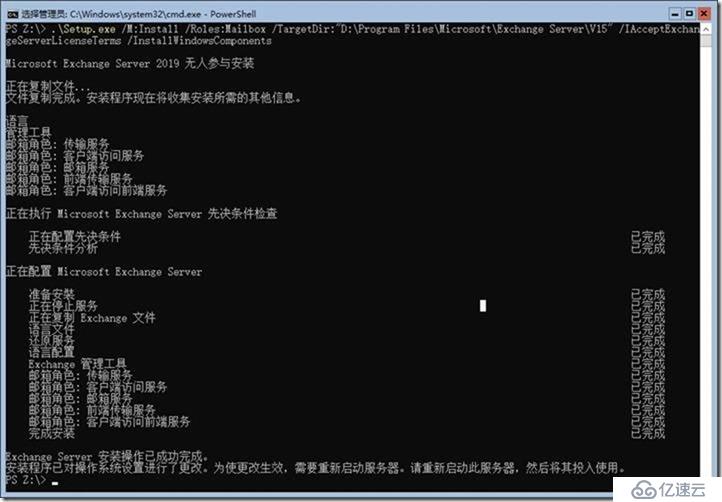
.\Setup.exe /M:Install /Roles:Mailbox /TargetDir:"D:\Program Files\Microsoft\Exchange Server\V15" /IAcceptExchangeServerLicenseTerms /InstallWindowsComponents
12:10 开始
13:45 开始
重启
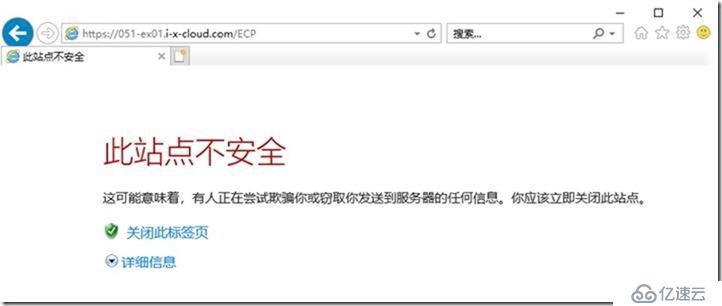
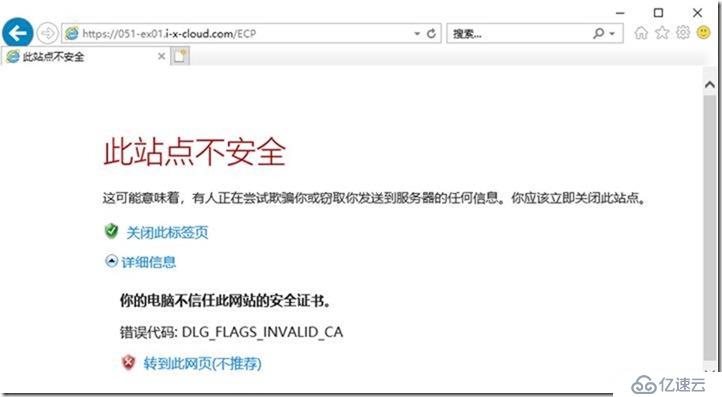
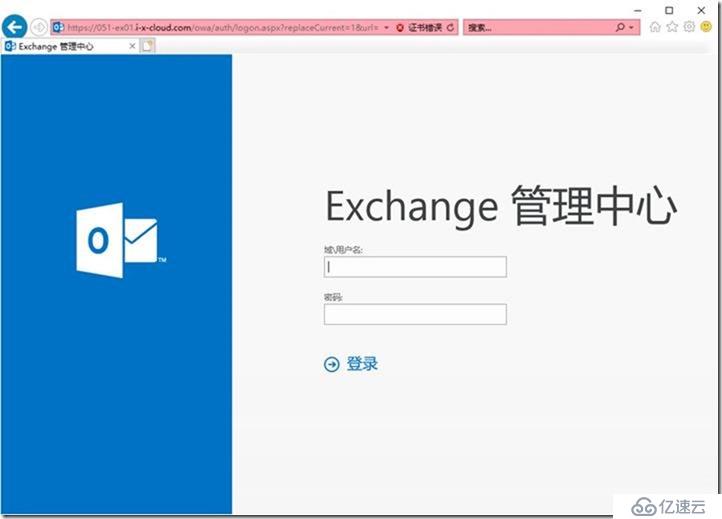
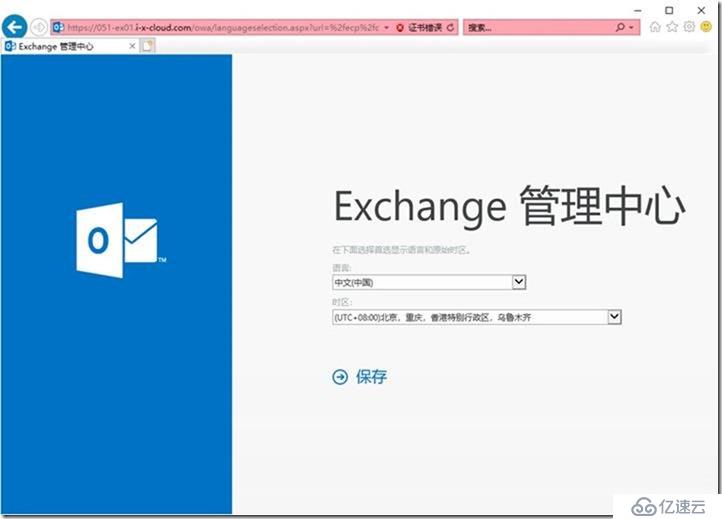
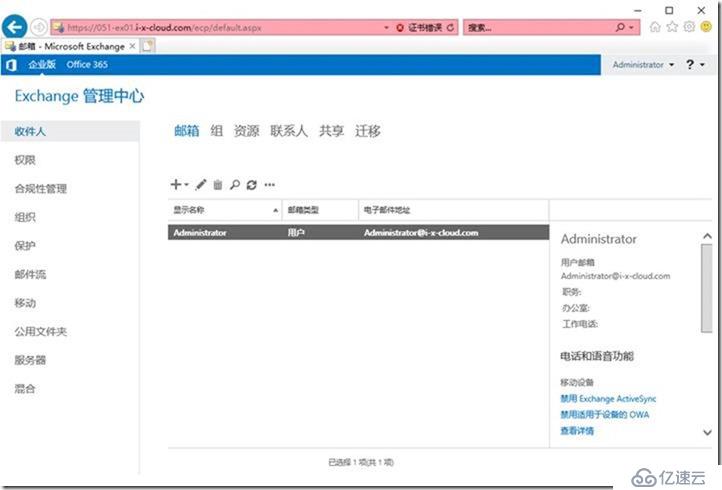
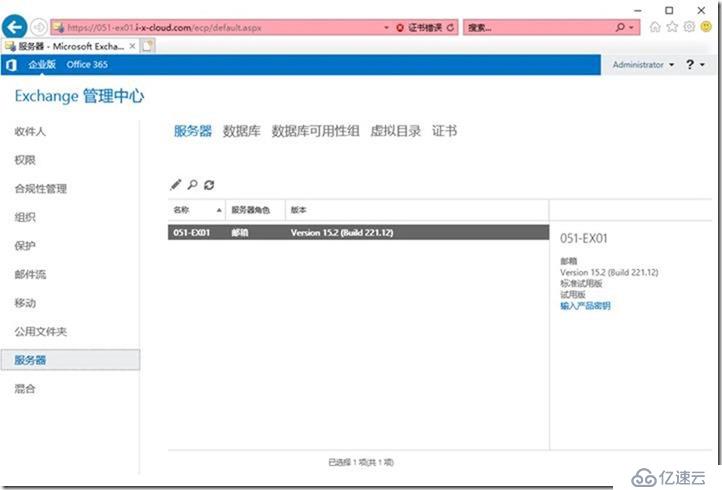
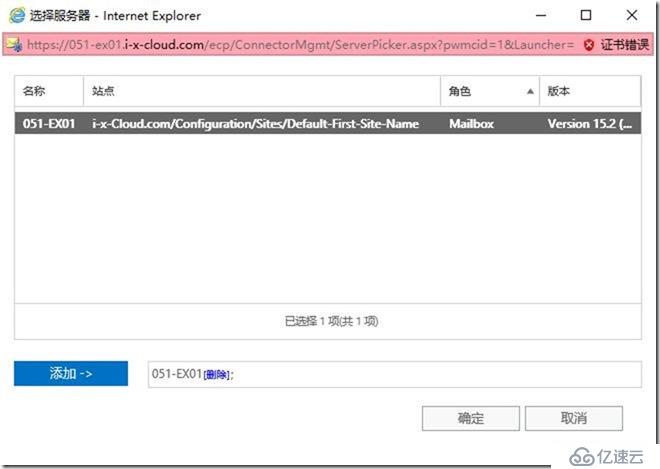
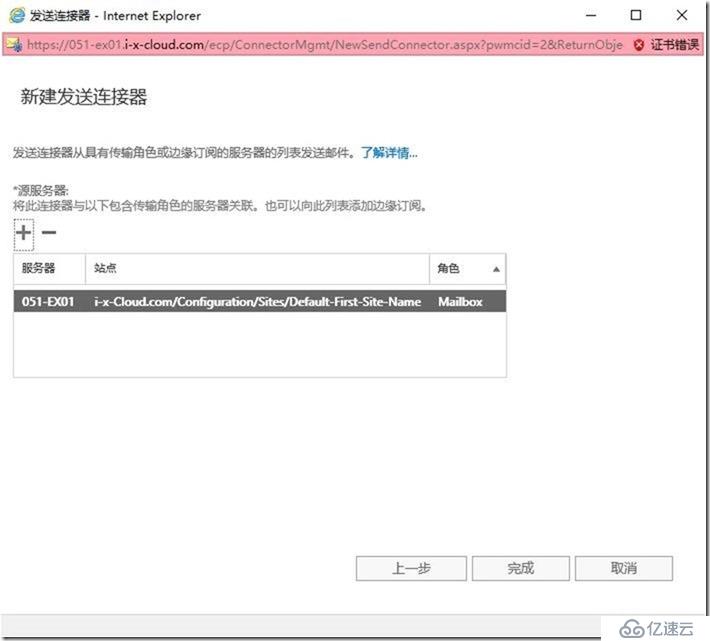
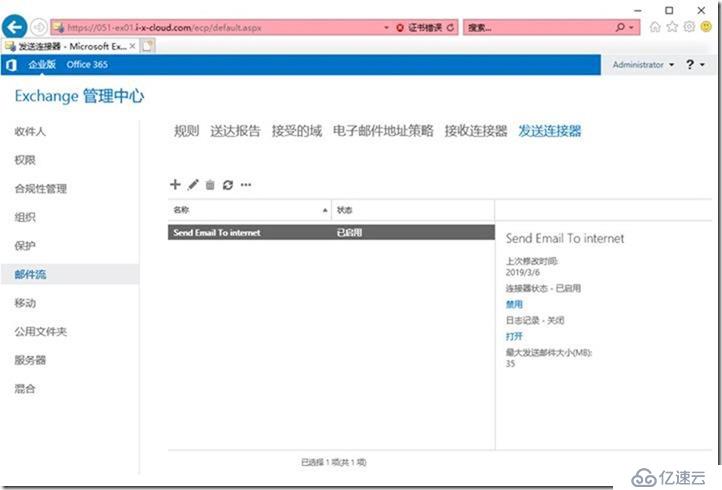
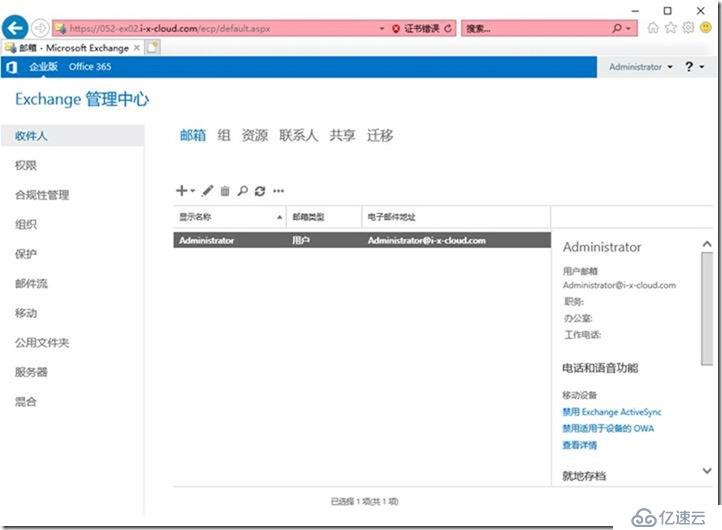
https://051-ex01.i-x-cloud.com/ECP

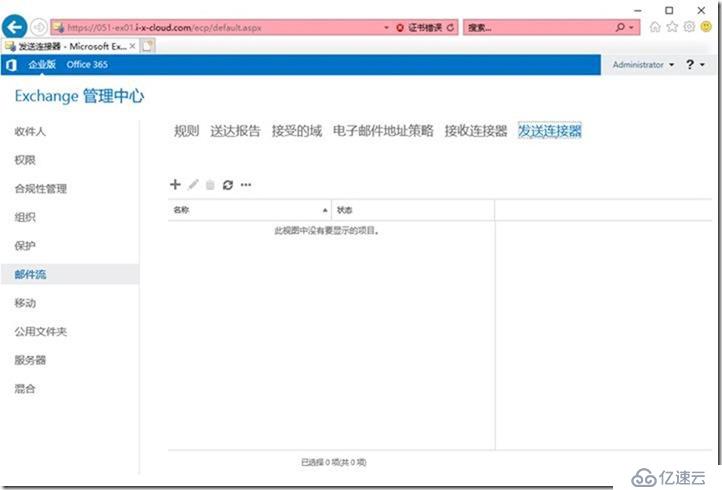
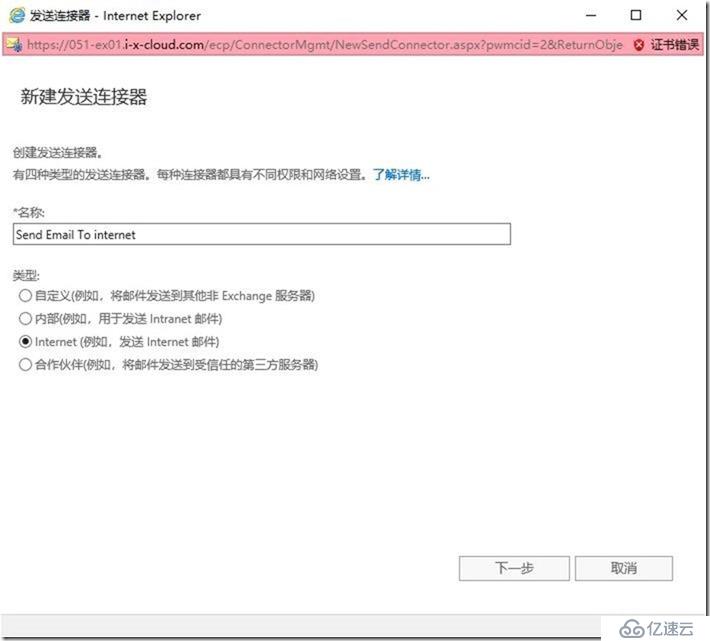
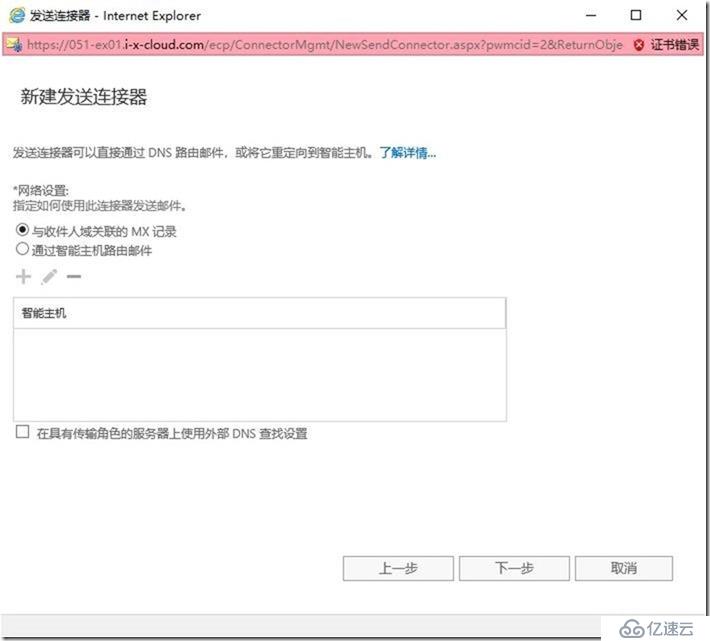
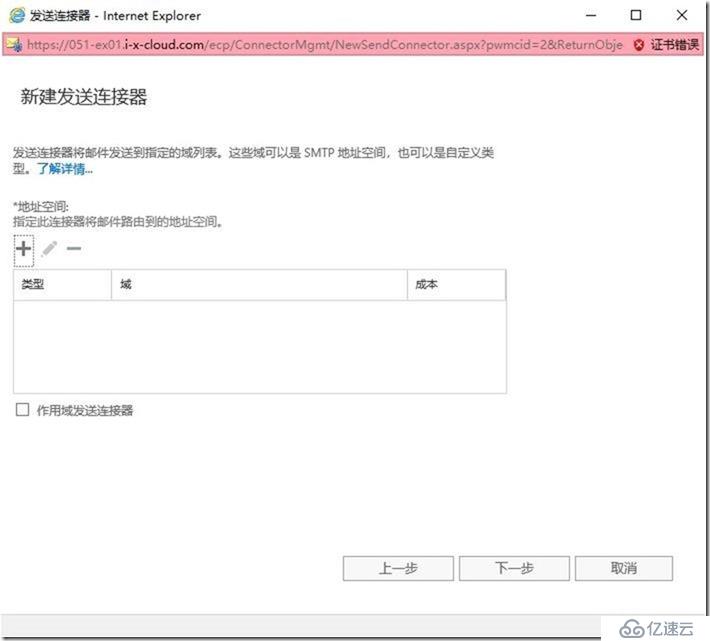
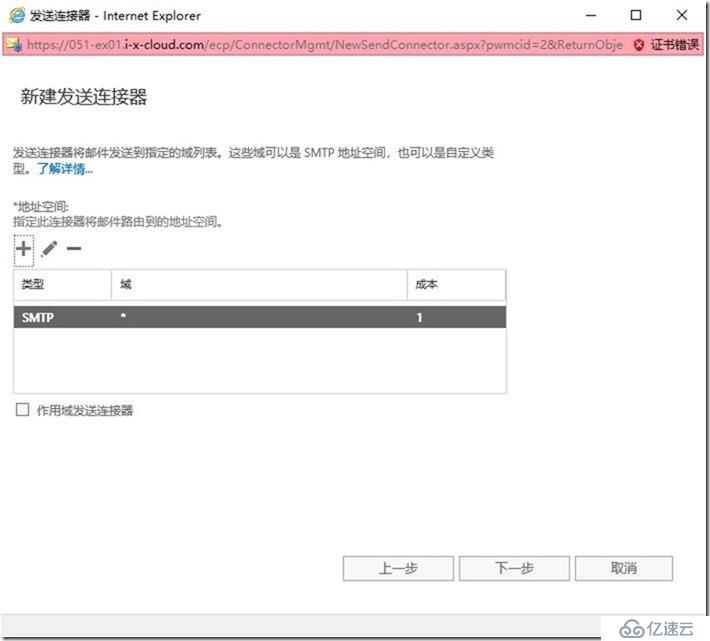
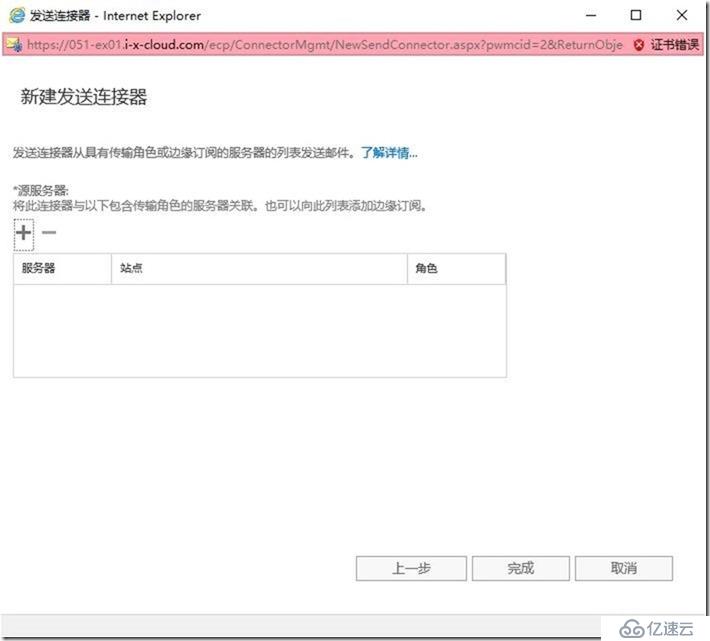
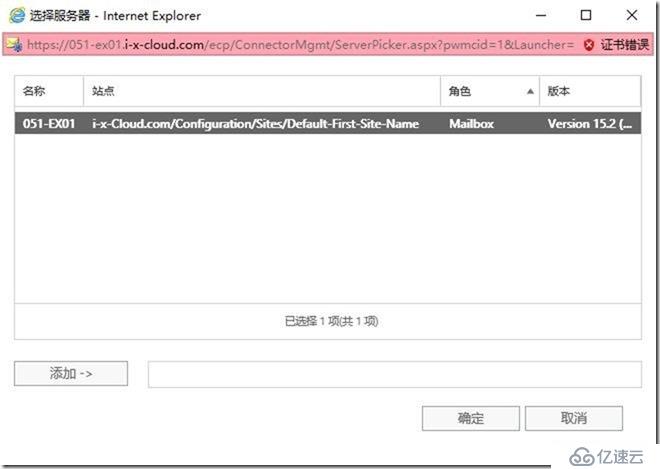
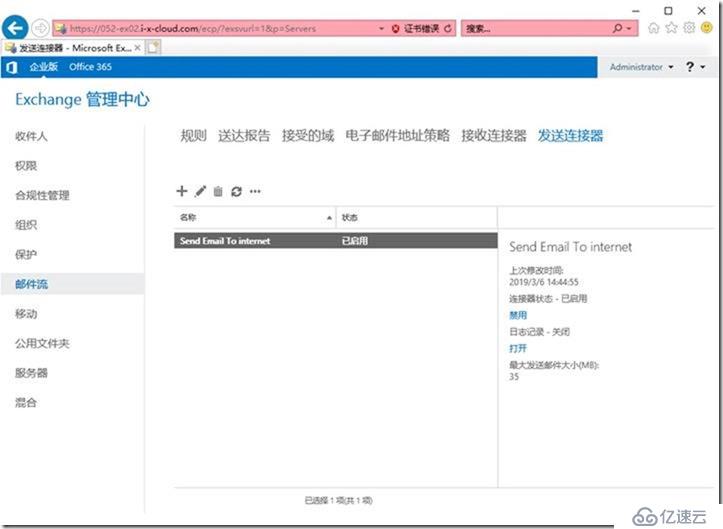
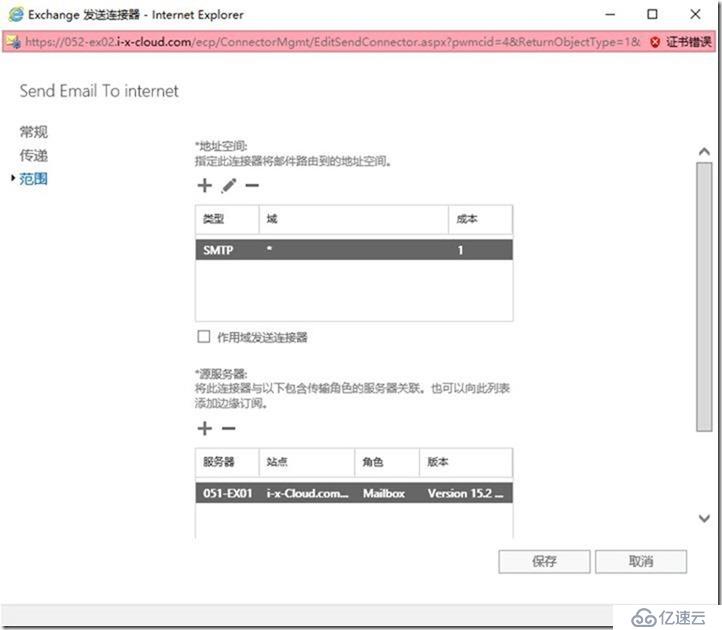
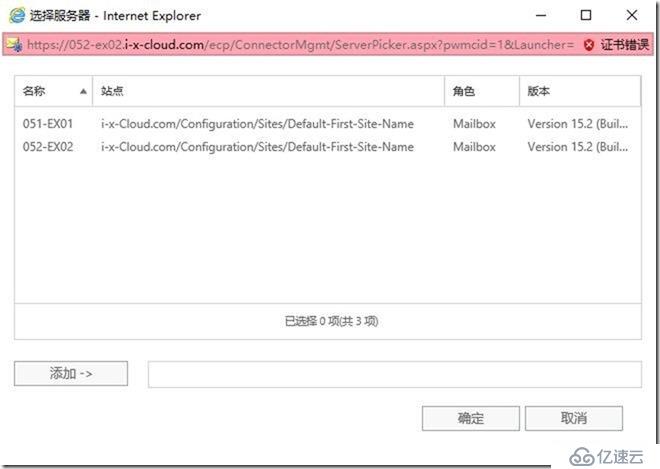
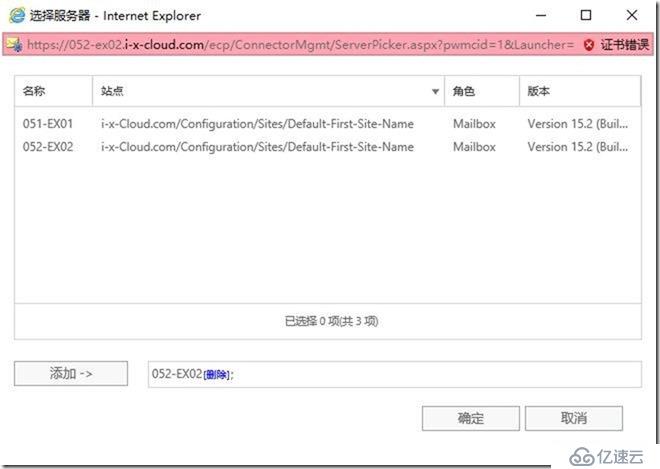
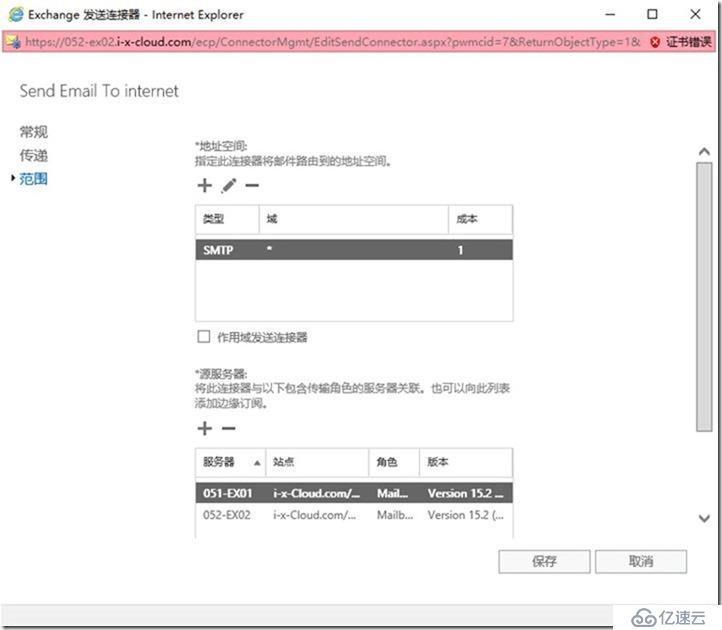
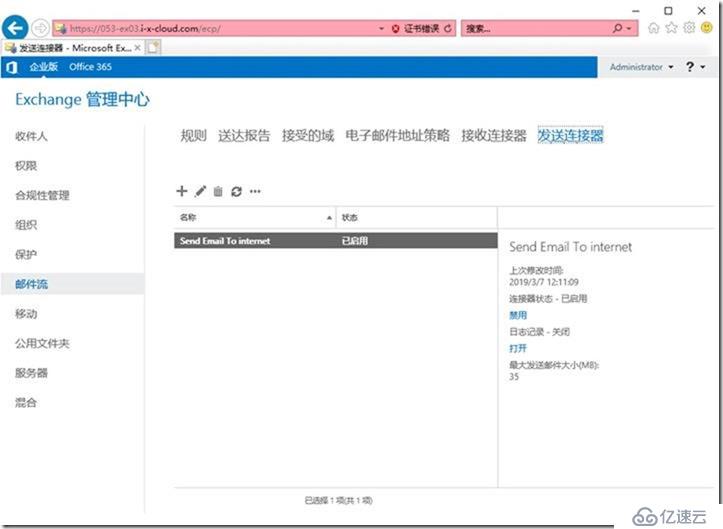
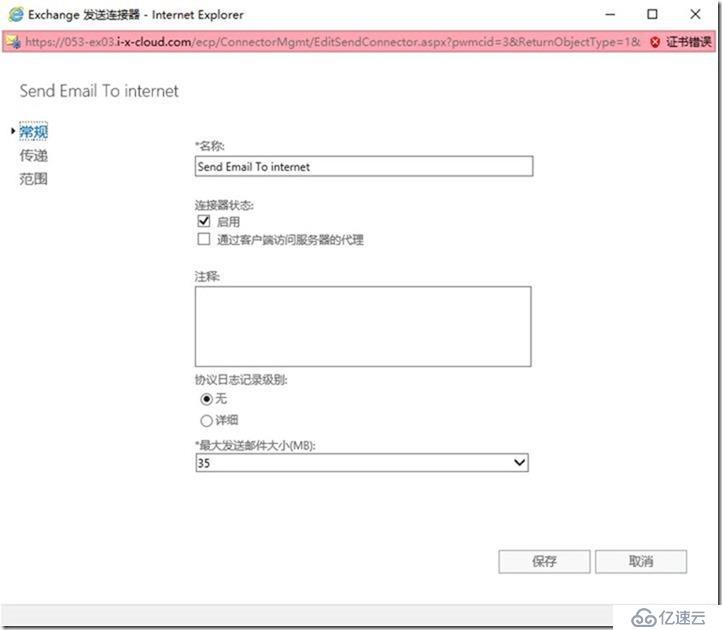
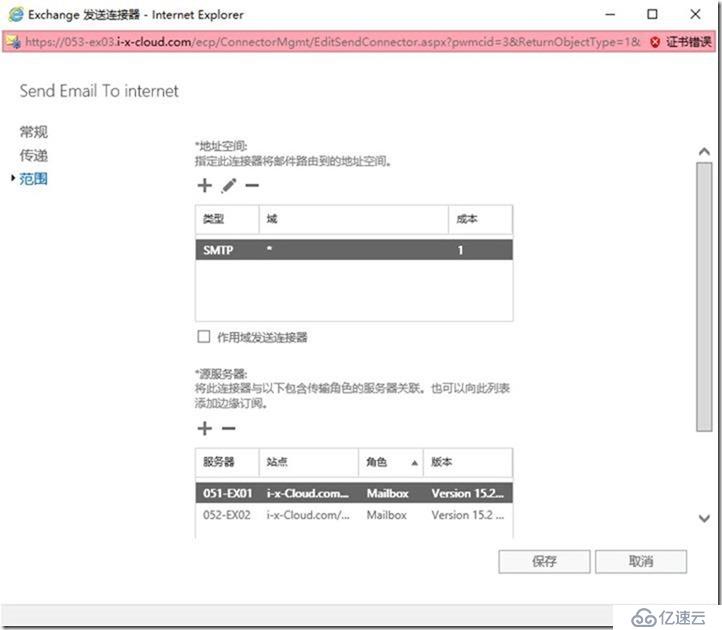
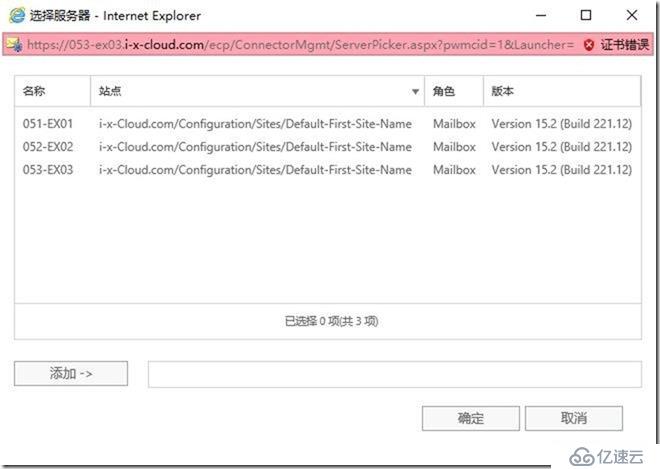
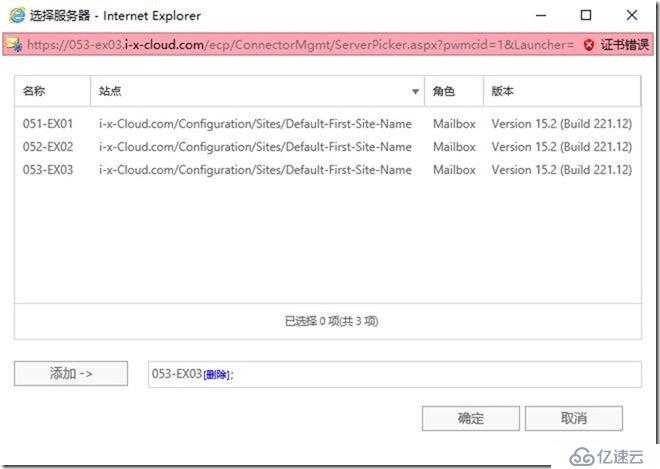
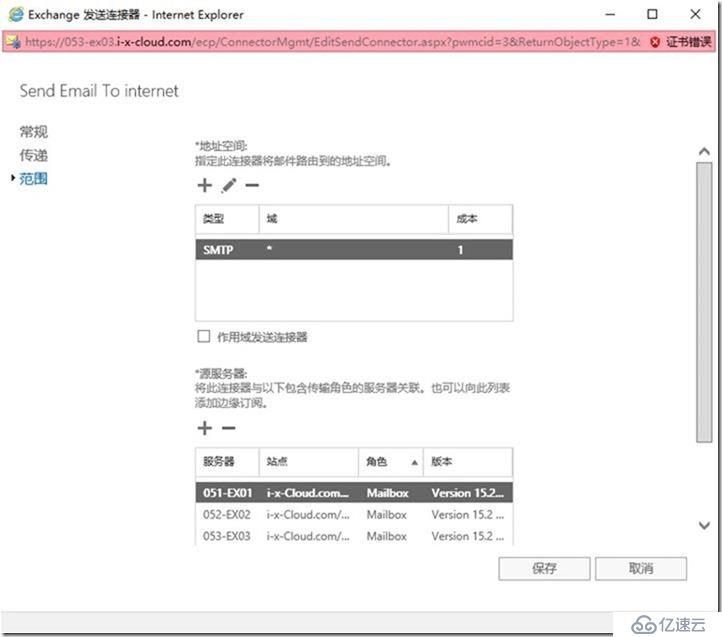
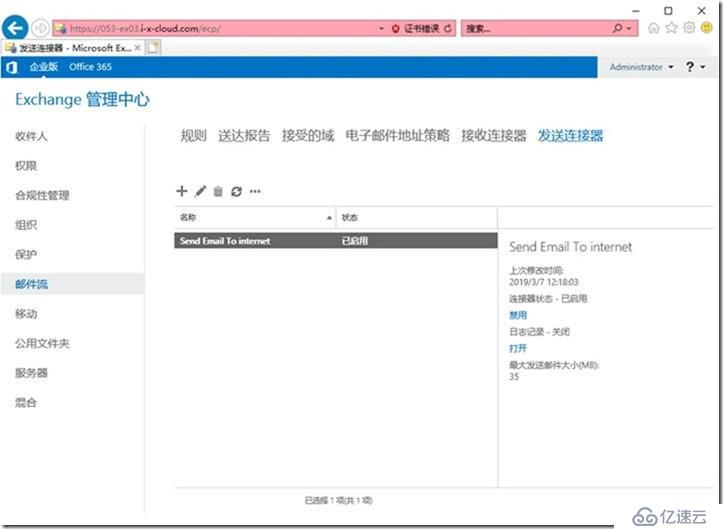
//新建发送连接器

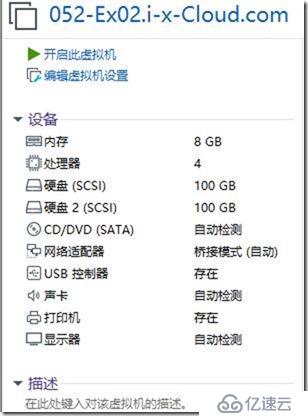
安装第2台Exchange 2019
挂载Exchange 2019 IS0
PowerShell
C:
Z:
Installation of Exchange Server 2019
After rebooting the server mount the Exchange Server 2019 ISO image in your VM.
Use the following command to start Exchange Server installation. The PowerShell command will
also install the required OS components for Exchange:
.\Setup.exe /m:install /roles:m /IAcceptExchangeServerLicenseTerms /InstallWindowsComponents
.\Setup.exe /M:Install /Roles:Mailbox /TargetDir:"D:\Program Files\Microsoft\Exchange Server\V15" /IAcceptExchangeServerLicenseTerms /InstallWindowsComponents
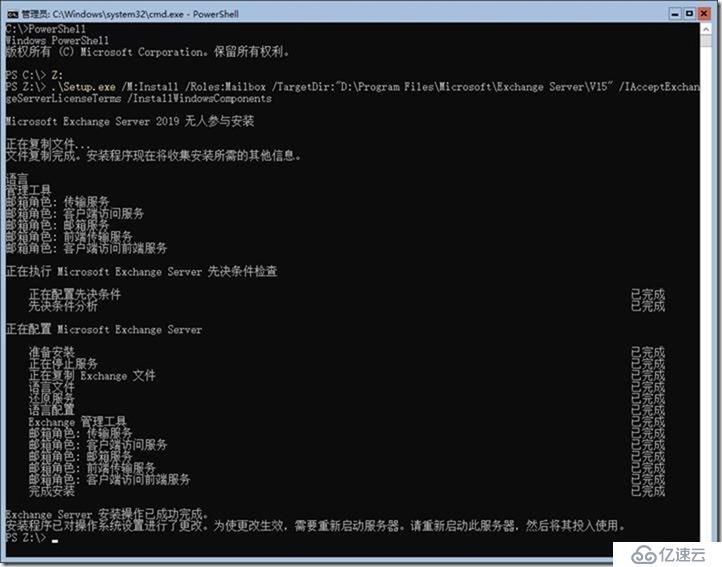
重启
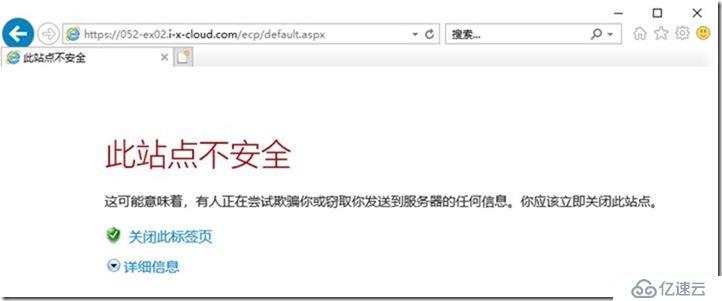
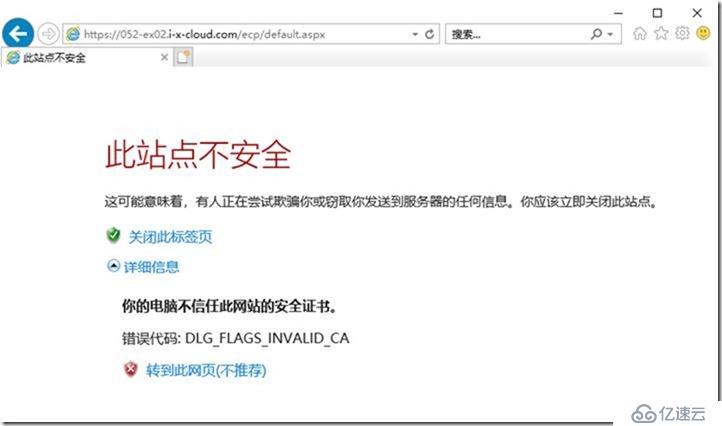
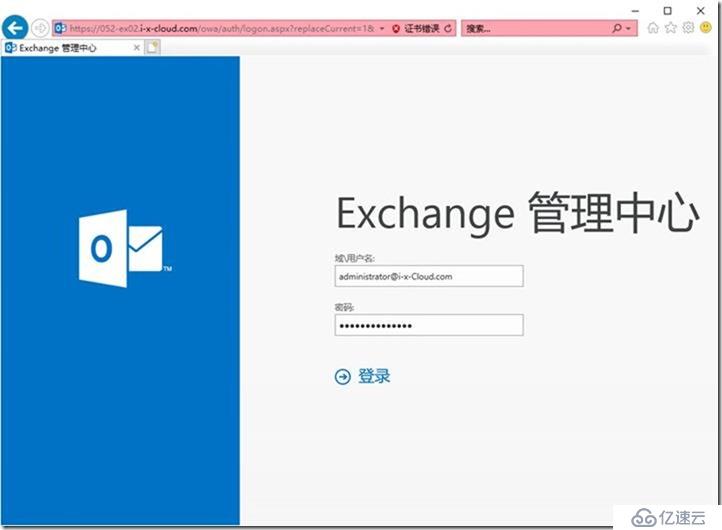
https://052-ex02.i-x-cloud.com/ecp
administrator@i-x-Cloud.com

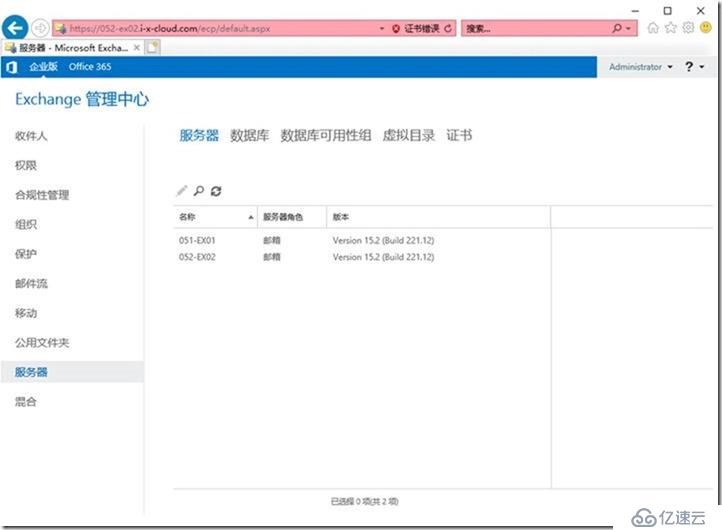
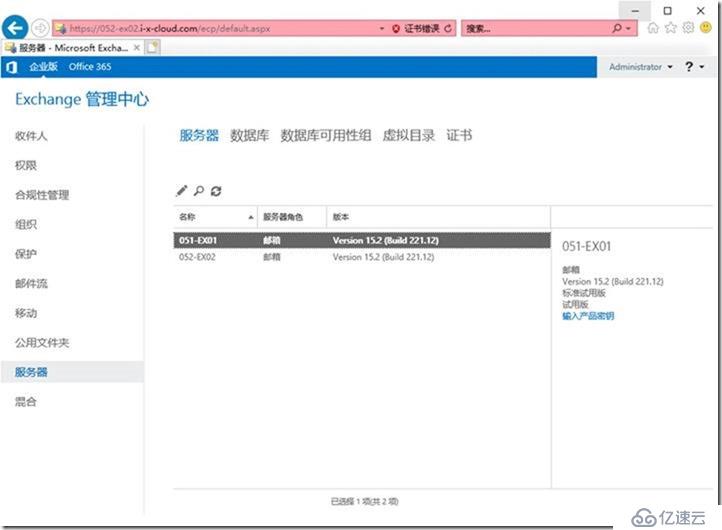


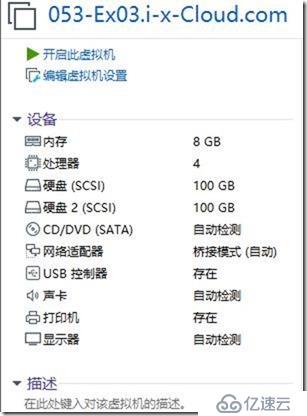
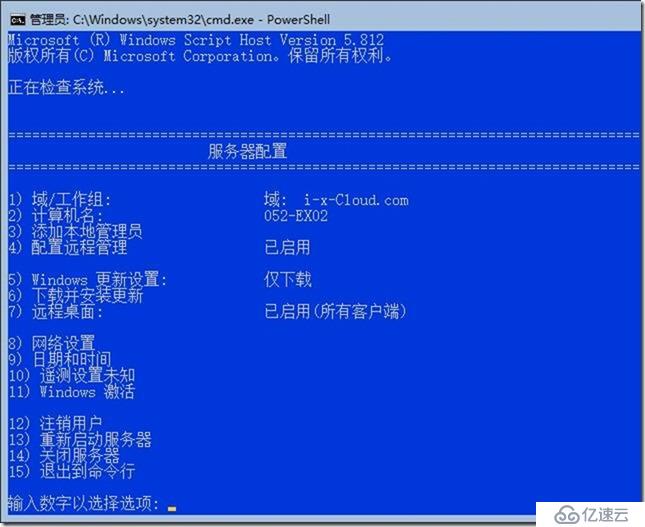
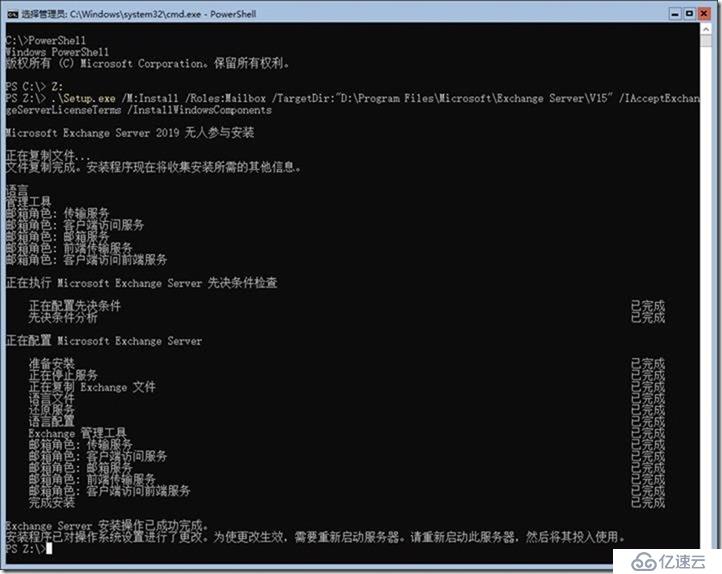
安装第3台Exchange 2019
挂载Exchange 2019 IS0
PowerShell
C:
Z:
Installation of Exchange Server 2019
After rebooting the server mount the Exchange Server 2019 ISO image in your VM.
Use the following command to start Exchange Server installation. The PowerShell command will
also install the required OS components for Exchange:
.\Setup.exe /m:install /roles:m /IAcceptExchangeServerLicenseTerms /InstallWindowsComponents
.\Setup.exe /M:Install /Roles:Mailbox /TargetDir:"D:\Program Files\Microsoft\Exchange Server\V15" /IAcceptExchangeServerLicenseTerms /InstallWindowsComponents
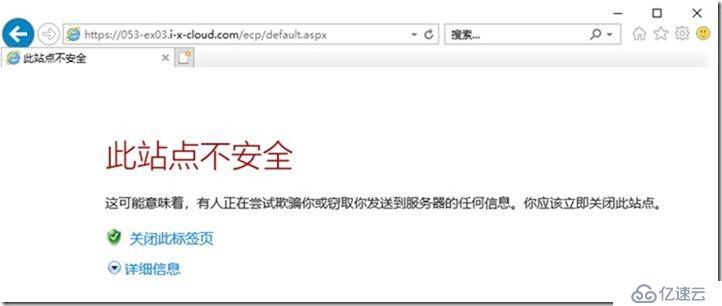
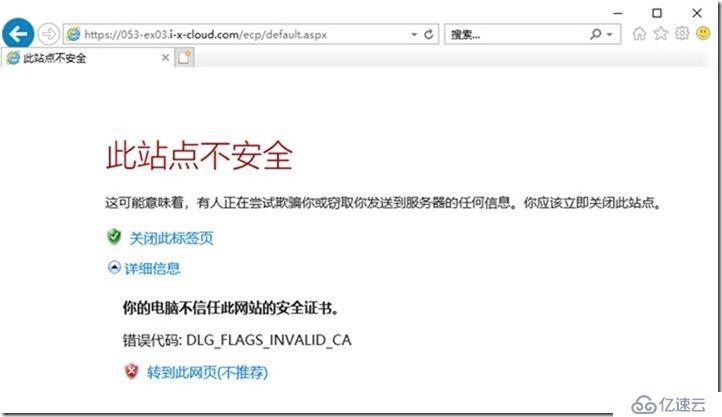
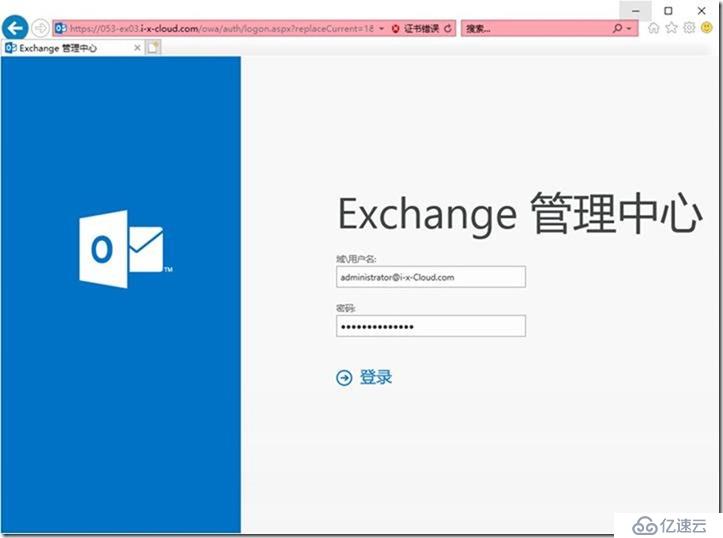
https://053-ex03.i-x-cloud.com/ecp
administrator@i-x-Cloud.com


关机
快照
011-DC01
012-DC02
013-DC03
021-CA01
031-WSUS01
041-OOS01
051-Ex01
052-Ex02
053-Ex03
100-Admin01
006-041-051-052-053-OK
接下去配置3台Exchange 2016服务器,以及高可用。
本文已完成!
免责声明:本站发布的内容(图片、视频和文字)以原创、转载和分享为主,文章观点不代表本网站立场,如果涉及侵权请联系站长邮箱:is@yisu.com进行举报,并提供相关证据,一经查实,将立刻删除涉嫌侵权内容。