您好,登录后才能下订单哦!
小编给大家分享一下Python如何实现可自定义大小的截屏功能,相信大部分人都还不怎么了解,因此分享这篇文章给大家参考一下,希望大家阅读完这篇文章后大有收获,下面让我们一起去了解一下吧!
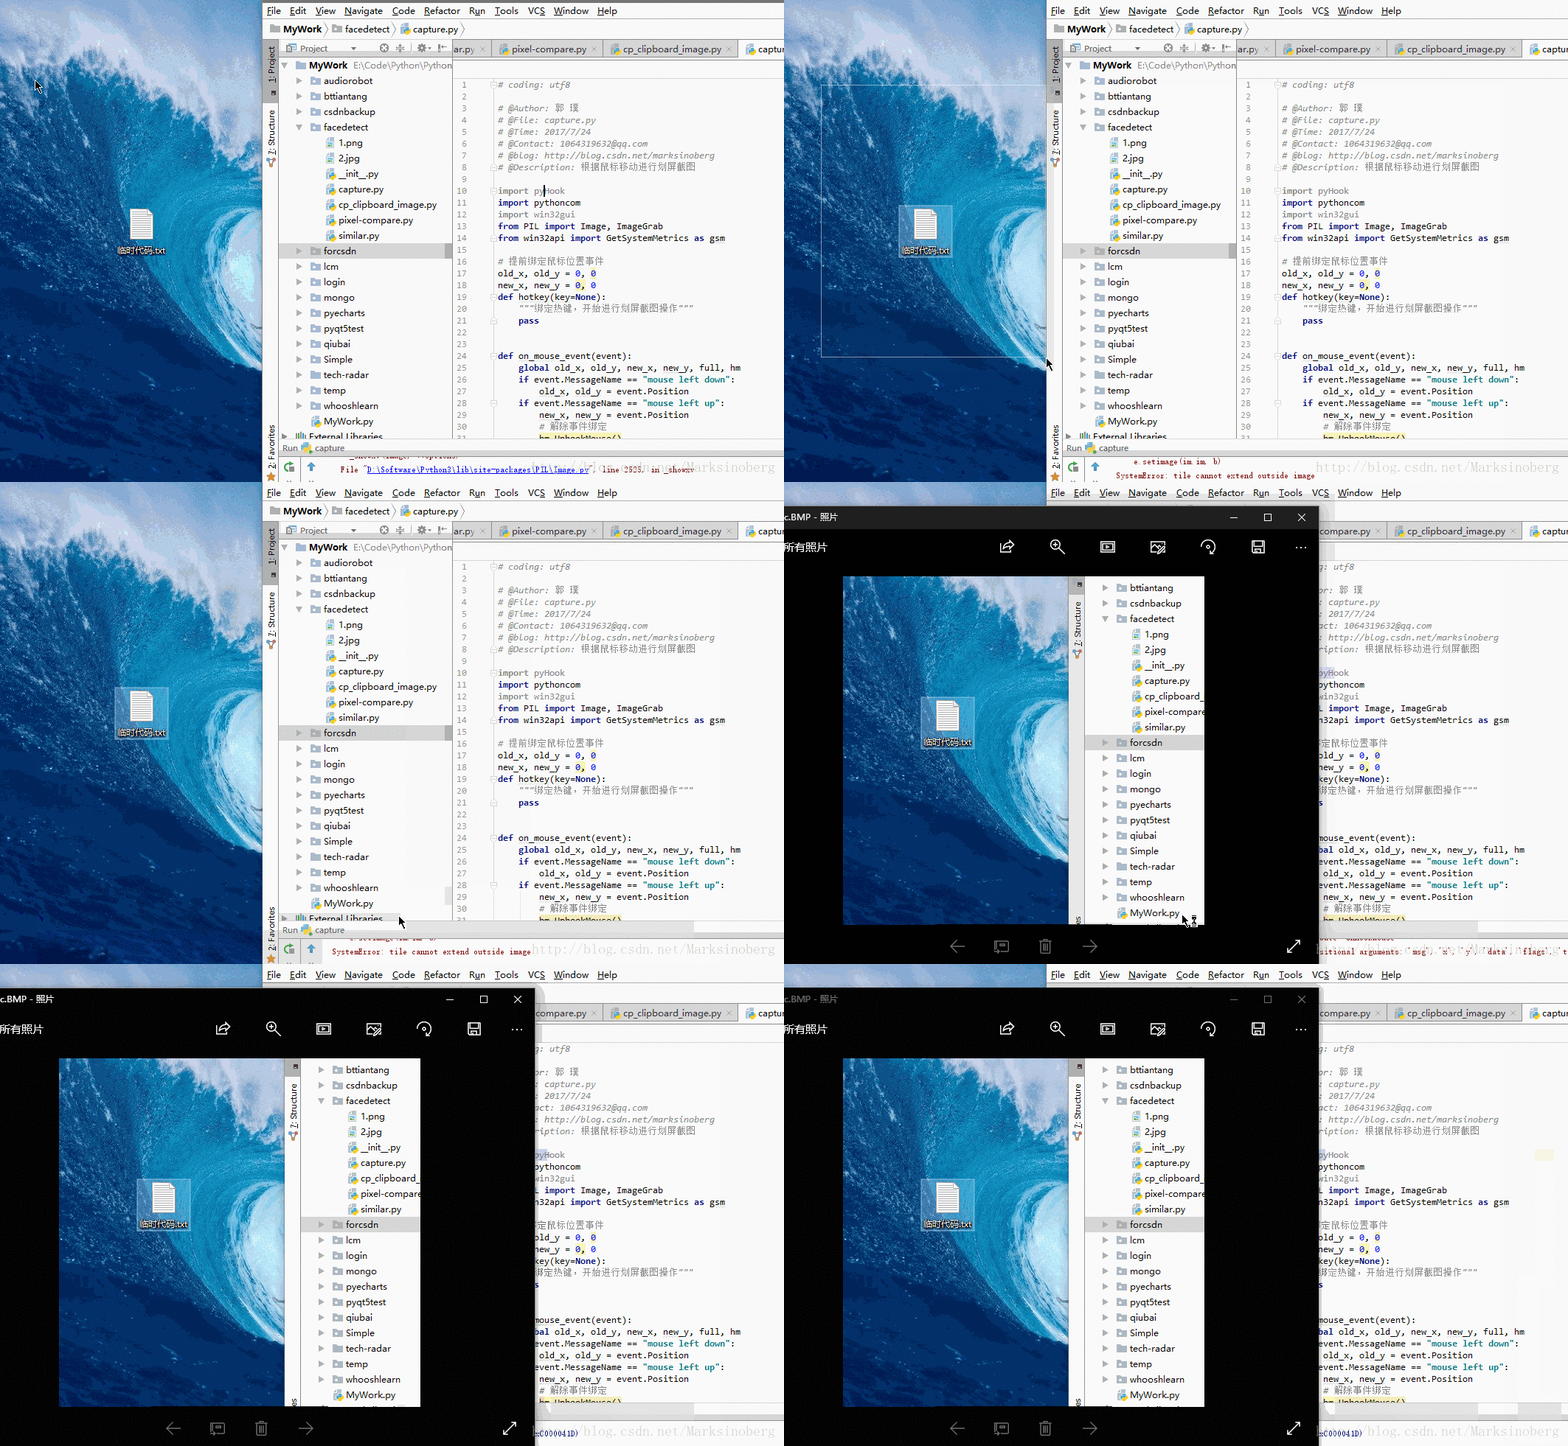
大致需要做出这样的效果。

虽然已经很久不写Python代码了,但是没办法,盛情难却啊,只好硬着头皮上了。
关于这个需求,蝈蝈想了想,脑海里大概有这么几个实现的方式。
① 调用QQ的截图工具。
② 自己写一个。
这第一个嘛,应了那句老话。理想很丰满,现实很骨感。因为被集成的缘故,剖不出来是没办法用的,自认为技术还不到家的蝈蝈很快放弃了这个方法。
那么只能自己写一个了。从谷哥那了解到PIL的ImageGrab可以很方便的截图,默认截图是全屏范围,当然也可以传递一个Bbox元组来实现截图的范围截图。于是思路就很明确了:获取鼠标位置,调用ImageGrab截图
获取鼠标位置
这个嘛,其实还是很简单的。借助pyHook就可以啦。
global old_x, old_y, new_x, new_y, full, hm
  if event.MessageName == "mouse left down":
    old_x, old_y = event.Position
  if event.MessageName == "mouse left up":
    new_x, new_y = event.Position
按下鼠标的那一刻开始记录初始坐标,然后鼠标抬起的那一刻更新结束坐标。这两个坐标的范围就是要截图的范围。这里面需要注意的就是鼠标坐标默认从左上角(0, 0)开始。
截图的具体实现
关于具体实现,无非是一个full标记,默认也是截全屏的图,当full为False的时候,按照两次鼠标的绝对位置实现范围截图。
# 划屏
  if full:
    image = ImageGrab.grab((0, 0, gsm(0), gsm(1)))
  else:
    image = ImageGrab.grab((old_x, old_y, new_x, new_y))
  image.show()
好啦,核心功能已经做好啦。为了方便蛐蛐进行自定义的拓展,蝈蝈把源码发给了他。
# coding: utf8
# @Author: 郭 璞
# @File: capture.py
# @Time: 2017/7/24
# @Contact: 1064319632@qq.com
# @blog: http://blog.csdn.net/marksinoberg
# @Description: 根据鼠标移动进行划屏截图
import pyHook
import pythoncom
import win32gui
from PIL import Image, ImageGrab
from win32api import GetSystemMetrics as gsm
# 提前绑定鼠标位置事件
old_x, old_y = 0, 0
new_x, new_y = 0, 0
def hotkey(key=None):
  """绑定热键,开始进行划屏截图操作"""
  pass
def on_mouse_event(event):
  global old_x, old_y, new_x, new_y, full, hm
  if event.MessageName == "mouse left down":
    old_x, old_y = event.Position
  if event.MessageName == "mouse left up":
    new_x, new_y = event.Position
    # 解除事件绑定
    hm.UnhookMouse()
    hm = None
  # 划屏
  if full:
    image = ImageGrab.grab((0, 0, gsm(0), gsm(1)))
  else:
    image = ImageGrab.grab((old_x, old_y, new_x, new_y))
  image.show()
full = False
hm = None
def capture():
  hm = pyHook.HookManager()
  hm.SubscribeMouseAll(on_mouse_event)
  hm.HookMouse()
  pythoncom.PumpMessages()
capture()
核心功能已经算是完成了,虽然貌似并没有什么太大的用处。

因为就要走了,所以蝈蝈没有多少时间来润色,只能这样匆匆交差了。除了代码,蝈蝈特意嘱咐了下面这几句话:
① 增加保存到本地功能。
② 绑定系统快捷键,这样打游戏的时候也可以截图。
③ 增加蒙层,截图的时候提供更好的用户体验。
蛐蛐听完之后,貌似也有了自己的想法,然后就自己琢磨去了。其实他不知道的是,蝈蝈对于截到的图的另一层处理。
简易图片相似度分析
# coding: utf8
# @Author: 郭 璞
# @File: similar.py
# @Time: 2017/7/23
# @Contact: 1064319632@qq.com
# @blog: http://blog.csdn.net/marksinoberg
# @Description: 两张图片相似度计算实现。
from PIL import Image
def pixel_way(img1, img2):
  image1 = Image.open(img1, 'r')
  image2 = Image.open(img2, 'r')
  return get_pixel_details(image1)==get_pixel_details(image2)
def get_pixel_details(img):
  pixels = img.load()
  r, g, b = 0, 0, 0
  counter = 0
  for x in range(img.size[0]):
    for y in range(img.size[1]):
      counter += 1
      r1, g1, b1 = pixels[x, y]
      r += r1
      g += g1
      b += b1
  return (r/counter, g/counter, b/counter)
if __name__ == '__main__':
  image1 = r'./1.png'
  image2 = r'./1.png'
  img = Image.open(image1, 'r')
  img.resize((256,256)).convert("RGB")
  print(pixel_way(image1, image2))
图片像素直方图
# coding: utf8
# @Author: 郭 璞
# @File: pixel-compare.py
# @Time: 2017/7/24
# @Contact: 1064319632@qq.com
# @blog: http://blog.csdn.net/marksinoberg
# @Description: 计算RGB值相关
from PIL import Image
from PIL import ImageDraw
im = Image.open('1.png')
im = im.convert("L")
width, height = im.size
pix = im.load()
a = [0]*256
for w in range(width):
  for h in range(height):
    p = pix[w, h]
    a[p] = a[p] + 1
x = max(a)
print(a, "---", len(a), '-----', x)
image = Image.new('RGB', (256, 256), (255, 255, 255))
draw = ImageDraw.Draw(image)
for k in range(256):
  a[k] = a[k]*200/x
  source = (k, 255)
  target = (k, 255-a[k])
  draw.line([source, target], (100, 100, 100))
image.show()
以上是“Python如何实现可自定义大小的截屏功能”这篇文章的所有内容,感谢各位的阅读!相信大家都有了一定的了解,希望分享的内容对大家有所帮助,如果还想学习更多知识,欢迎关注亿速云行业资讯频道!
免责声明:本站发布的内容(图片、视频和文字)以原创、转载和分享为主,文章观点不代表本网站立场,如果涉及侵权请联系站长邮箱:is@yisu.com进行举报,并提供相关证据,一经查实,将立刻删除涉嫌侵权内容。