您好,登录后才能下订单哦!
本文介绍了Vue生命周期和手动挂载,分享给大家,具体如下:
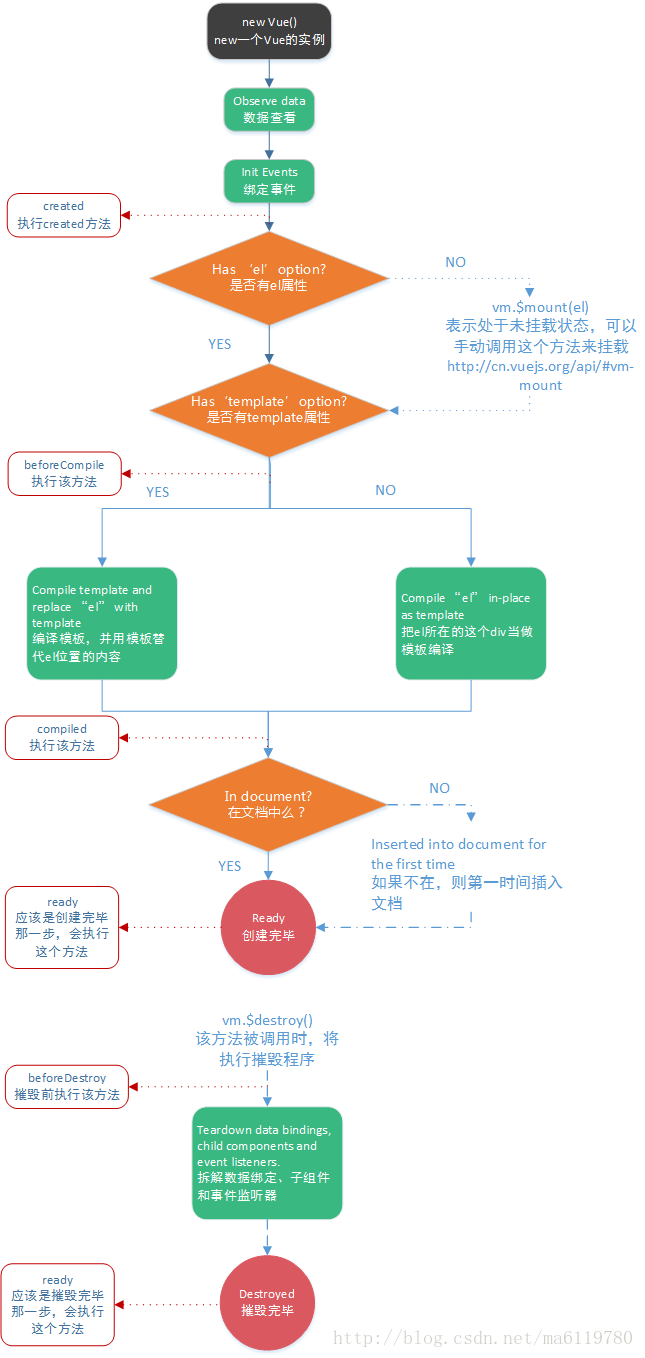
1、vue的生命周期:

2、$mount()手动挂载
当Vue实例没有el属性时,则该实例尚没有挂载到某个dom中;
假如需要延迟挂载,可以在之后手动调用vm.$mount()方法来挂载。
例如:
方法一:
<div id="app">
 {{name}}
</div>
<button onclick="test()">挂载</button>
<script>
 var obj= {name: '张三'}
 var vm = new Vue({
  data: obj
 })
 function test() {
  vm.$mount("#app");
 }
方法二:
Vue.extend()用以创建没有挂载的的子类,可以使用该子累创建多个实例
var app= Vue.extend({
 template: '<p>{{firstName}} {{lastName}}</p>',
   data: function () {
    return {
    firstName: 'Walter',
    lastName: 'White'
    }
    }
   })
 // 创建 app实例,并挂载到一个元素上。
 new app().$mount('#app')
下面我们使用自动插入label
手动挂载插件:https://vuefe.cn/api/#Vue-extend
动手写代码
1、先移除user-name.vue 里显示错误的label,因为我们要手动插入
<label class="label label-danger">用户不合法</label>
2、先看一下我们插件validate.js的全部代码,然后我们再分析
export default{
  install(Vue){

    Vue.prototype.checkUserName = (value) => {
      if(value == ""){
        return true; // 如果没有填写,默认为true
      }

      if(/\w{6,20}/.test(value)){
        return true;
      }else{
        return false;
      }
    }

    Vue.prototype.errorLabel = null;
    Vue.prototype.hasError = false;

    Vue.directive("uname",{
      bind(){
        let errorTpl = Vue.extend({
          template:'<label class="label label-danger">用户不合法</label>'
        });
        // 实例化并挂载
        Vue.errorLabel = (new errorTpl()).$mount().$el;
      },
      update(el,binding,vnode){
        if(/\w{6,20}/.test(el.value)){
          // 验证通过
          if (Vue.hasError){
            el.parentNode.removeChild(Vue.errorLabel);
            Vue.hasError = !Vue.hasError;
          }
        }else{
          // 验证没有通过
          if (!Vue.hasError){
            el.parentNode.appendChild(Vue.errorLabel);
            Vue.hasError = ! Vue.hasError;
          }

        }
      },
    })
  }
}
3、定义了2个prototype
Vue.prototype.errorLabel = null;
Vue.prototype.hasError = false;
errorLabel错误提示模板,我们在要bind() 方法中创建,然后挂载到它上面;hasError 是辅助属性,方便我们用来判断当前是有错误还是没有错误。
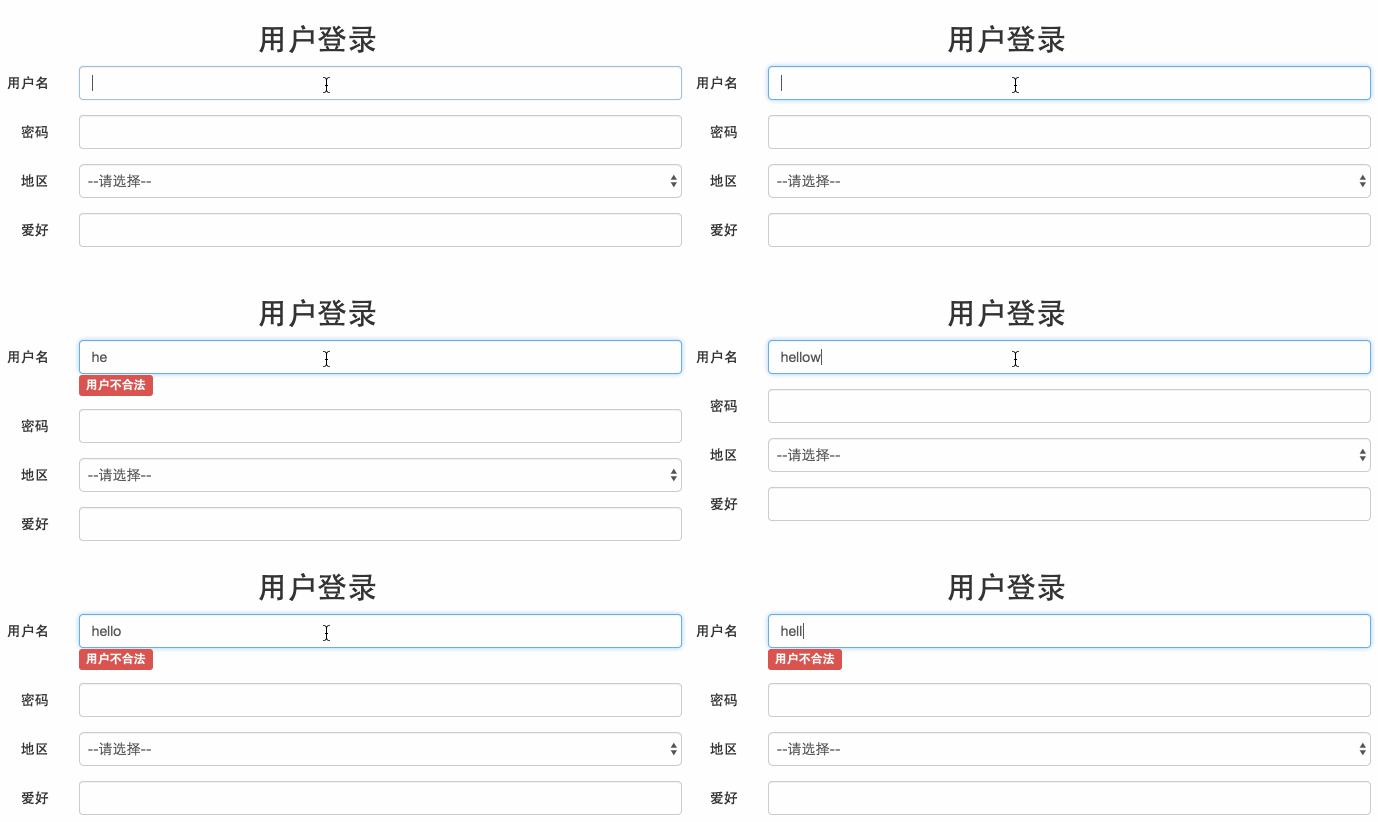
4、在update() 方法中,实时监听用户的输入,然后移除/添加 错误模板
 update(el,binding,vnode){
   if(/\w{6,20}/.test(el.value)){
     // 验证通过
     if (Vue.hasError){
       el.parentNode.removeChild(Vue.errorLabel);
       Vue.hasError = !Vue.hasError;
     }
   }else{
     // 验证没有通过
     if (!Vue.hasError){
       el.parentNode.appendChild(Vue.errorLabel);
       Vue.hasError = ! Vue.hasError;
     }
   }
 },
5、演示效果如下图

以上就是本文的全部内容,希望对大家的学习有所帮助,也希望大家多多支持亿速云。
免责声明:本站发布的内容(图片、视频和文字)以原创、转载和分享为主,文章观点不代表本网站立场,如果涉及侵权请联系站长邮箱:is@yisu.com进行举报,并提供相关证据,一经查实,将立刻删除涉嫌侵权内容。