您好,登录后才能下订单哦!
密码登录
登录注册
点击 登录注册 即表示同意《亿速云用户服务条款》
1.修改pom.xml文件
<project xmlns="http://maven.apache.org/POM/4.0.0" xmlns:xsi="http://www.w3.org/2001/XMLSchema-instance" xsi:schemaLocation="http://maven.apache.org/POM/4.0.0 http://maven.apache.org/xsd/maven-4.0.0.xsd">
 <modelVersion>4.0.0</modelVersion>
 <groupId>top.ytheng</groupId>
 <artifactId>springboot-demo</artifactId>
 <version>0.0.1</version>
 <packaging>war</packaging>

 <parent>
    <groupId>org.springframework.boot</groupId>
    <artifactId>spring-boot-starter-parent</artifactId>
    <version>2.0.5.RELEASE</version>
    <relativePath/> <!-- lookup parent from repository -->
  </parent>


  <properties>
    <project.build.sourceEncoding>UTF-8</project.build.sourceEncoding>
    <project.reporting.outputEncoding>UTF-8</project.reporting.outputEncoding>
    <java.version>1.8</java.version>
  </properties>

  <dependencies>
    <dependency>
      <groupId>org.springframework.boot</groupId>
      <artifactId>spring-boot-starter-web</artifactId>
    </dependency>

    <dependency>
      <groupId>org.springframework.boot</groupId>
      <artifactId>spring-boot-starter-test</artifactId>
      <scope>test</scope>
    </dependency>

    <dependency>
      <groupId>org.springframework.boot</groupId>
      <artifactId>spring-boot-starter-thymeleaf</artifactId>
    </dependency>

    <dependency>
      <groupId>org.springframework.boot</groupId>
      <artifactId>spring-boot-devtools</artifactId>
      <optional>true</optional>
       <scope>true</scope>
    </dependency>
  </dependencies>

  <build>
    <finalName>myspringboot</finalName>
    <plugins>
      <plugin>
        <groupId>org.springframework.boot</groupId>
        <artifactId>spring-boot-maven-plugin</artifactId>
      </plugin>
      <plugin>
        <artifactId>maven-compiler-plugin</artifactId>
        <configuration>
          <source>1.8</source>
          <target>1.8</target>
        </configuration>
      </plugin>
    </plugins>
  </build>
</project>
2.添加控制器Controller
package top.ytheng.demo.controller;

import org.springframework.stereotype.Controller;
import org.springframework.web.bind.annotation.RequestMapping;
import org.springframework.web.bind.annotation.ResponseBody;


@Controller
@RequestMapping("/file")
public class FileController {

  @RequestMapping("/testpath")
  @ResponseBody
  private Object testPath() {
    return "Success";
  }

}
3.添加启动类
package top.ytheng.demo;

import org.springframework.boot.SpringApplication;
import org.springframework.boot.autoconfigure.SpringBootApplication;
import org.springframework.boot.builder.SpringApplicationBuilder;
import org.springframework.boot.web.servlet.support.SpringBootServletInitializer;

@SpringBootApplication
public class DemoApplication extends SpringBootServletInitializer {

  @Override
  protected SpringApplicationBuilder configure(SpringApplicationBuilder application) {
    return application.sources(DemoApplication.class);
  }

  public static void main(String[] args) throws Exception {
    SpringApplication.run(DemoApplication.class, args);
  }
}
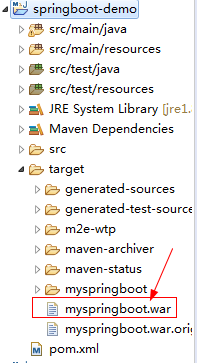
4.右键项目依次执行Run As -> Maven Clean 和 Maven Install,会在target目录下生成war包
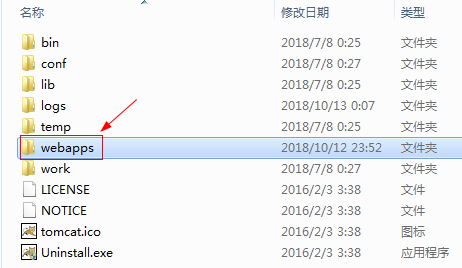
5.安装Tomcat(注意:项目里面的端口和Tomcat保持一致,建议为8080,否则到时访问url会报错)
将War包拷贝到Tomcat的webapps目录下面
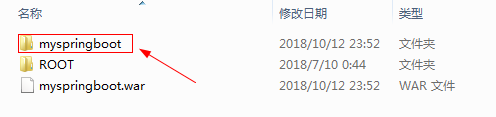
启动Tomca,会自动将War包生成文件夹
6.访问路径
注意:访问路径要加上项目名称
http://localhost:8080/myspringboot/file/testpath
以上就是本文的全部内容,希望对大家的学习有所帮助,也希望大家多多支持亿速云。
免责声明:本站发布的内容(图片、视频和文字)以原创、转载和分享为主,文章观点不代表本网站立场,如果涉及侵权请联系站长邮箱:is@yisu.com进行举报,并提供相关证据,一经查实,将立刻删除涉嫌侵权内容。