您好,登录后才能下订单哦!
密码登录
登录注册
点击 登录注册 即表示同意《亿速云用户服务条款》
今天就跟大家聊聊有关springboot中怎么利用mybatis+druid配置动态数据源,可能很多人都不太了解,为了让大家更加了解,小编给大家总结了以下内容,希望大家根据这篇文章可以有所收获。
一、建数据库和表
1.数据库demo1放一张user表
SET FOREIGN_KEY_CHECKS=0;
-- ----------------------------
-- Table structure for user
-- ----------------------------
DROP TABLE IF EXISTS `user`;
CREATE TABLE `user` (
`id` int(11) NOT NULL,
`name` varchar(255) DEFAULT NULL,
PRIMARY KEY (`id`)
) ENGINE=InnoDB DEFAULT CHARSET=utf8;

-- ----------------------------
-- Records of user
-- ----------------------------
INSERT INTO `user` VALUES ('1', 'aa');
INSERT INTO `user` VALUES ('2', 'bb');
2.数据库demo2放一张role表
SET FOREIGN_KEY_CHECKS=0;
-- ----------------------------
-- Table structure for role
-- ----------------------------
DROP TABLE IF EXISTS `role`;
CREATE TABLE `role` (
`id` int(11) NOT NULL,
`name` varchar(255) DEFAULT NULL,
PRIMARY KEY (`id`)
) ENGINE=InnoDB DEFAULT CHARSET=utf8;
-- ----------------------------
-- Records of role
-- ----------------------------
INSERT INTO `role` VALUES ('1', 'CC');
INSERT INTO `role` VALUES ('2', 'DD');
二、pom.xml引入包
<dependency>
<groupId>org.springframework.boot</groupId>
<artifactId>spring-boot-starter-web</artifactId>
</dependency>
<dependency>
<groupId>org.springframework.boot</groupId>
<artifactId>spring-boot-starter-test</artifactId>
<scope>test</scope>
</dependency>
<dependency>
<groupId>org.springframework.boot</groupId>
<artifactId>spring-boot-starter-thymeleaf</artifactId>
</dependency>
<dependency>
<groupId>mysql</groupId>
<artifactId>mysql-connector-java</artifactId>
<scope>runtime</scope>
</dependency>
<dependency>
<groupId>mysql</groupId>
<artifactId>mysql-connector-java</artifactId>
</dependency>
<dependency>
<groupId>org.springframework.boot</groupId>
<artifactId>spring-boot-starter-jdbc</artifactId>
</dependency>
<dependency>
<groupId>org.mybatis.spring.boot</groupId>
<artifactId>mybatis-spring-boot-starter</artifactId>
<version>2.0.1</version>
</dependency>
<!-- aop -->
<dependency>
<groupId>org.aspectj</groupId>
<artifactId>aspectjweaver</artifactId>
</dependency>
<!-- alibaba druid-->
<dependency>
<groupId>com.alibaba</groupId>
<artifactId>druid-spring-boot-starter</artifactId>
<version>1.1.10</version>
</dependency>
<!-- dynamic-->
<dependency>
<groupId>com.typesafe.dynamicdatasource</groupId>
<artifactId>dynamic-data-source_2.11</artifactId>
</dependency>
三、用generator插件生成user、role两张表的实体类、mapper.java、mapper.xml
User.java
Role.java
UserMapper.java
RoleMapper.java
UserMapper.xml
RoleMapper.xml
四、配置application.yml
server:
port: 8088
mybatis:
mapper-locations: classpath:mapper/*.xml
spring:
datasource:
db1:
url: jdbc:mysql://localhost:3306/demo1?useUnicode=true&characterEncoding=utf8&serverTimezone=GMT
username: root
password: root
type: com.alibaba.druid.pool.DruidDataSource
#驱动包
driver-class-name: com.mysql.cj.jdbc.Driver
#初始连接数
initial-size: 5
#最小空闲数
min-idle: 5
#最大活动数
max-active: 20
#等待超时时间
max-wait: 60000
#配置间隔多久才进行一次检测,检测需要关闭的空闲连接,单位是毫秒
time-between-eviction-runs-millis: 60000
# 配置一个连接在池中最小生存的时间,单位是毫秒
min-evictable-idle-time-millis: 300000
#验证数据库连接的查询语句,MYSQL是select 1
validation-query: SELECT 1 FROM DUAL
#空闲时测试,testOnBorrow和testOnReturn在生产环境一般是不开启的,主要是性能考虑。失效连接主要通过testWhileIdle保证
test-while-idle: true
test-on-borrow: false
test-on-return: false
#打开PSCache,并指定每个链接上的PSCache大小
pool-prepared-statements: true
max-pool-prepared-statement-per-connection-size: 20
#配置监控统计拦截的filters,去掉后监控界面sql无法统计,‘wall'用于防火墙,此处是filter修改的地方
filters: stat,wall
#通过connectproperties属性来打开mergesql功能:慢sql记录
connection-properties: druid.stat.mergeSql=true;druid.stat.slowSqlMillis=5000
#合并多个DruidDataSource
useGlobalDataSourceStat: true
db2:
url: jdbc:mysql://localhost:3306/demo2?useUnicode=true&characterEncoding=utf8&serverTimezone=GMT
username: root
password: root
type: com.alibaba.druid.pool.DruidDataSource
#驱动包
driver-class-name: com.mysql.cj.jdbc.Driver
#初始连接数
initial-size: 5
#最小空闲数
min-idle: 5
#最大活动数
max-active: 20
#等待超时时间
max-wait: 60000
#配置间隔多久才进行一次检测,检测需要关闭的空闲连接,单位是毫秒
time-between-eviction-runs-millis: 60000
# 配置一个连接在池中最小生存的时间,单位是毫秒
min-evictable-idle-time-millis: 300000
#验证数据库连接的查询语句,MYSQL是select 1
validation-query: SELECT 1 FROM DUAL
#空闲时测试,testOnBorrow和testOnReturn在生产环境一般是不开启的,主要是性能考虑。失效连接主要通过testWhileIdle保证
test-while-idle: true
test-on-borrow: false
test-on-return: false
#打开PSCache,并指定每个链接上的PSCache大小
pool-prepared-statements: true
max-pool-prepared-statement-per-connection-size: 20
#配置监控统计拦截的filters,去掉后监控界面sql无法统计,‘wall'用于防火墙,此处是filter修改的地方
filters: stat,wall
#通过connectproperties属性来打开mergesql功能:慢sql记录
connection-properties: druid.stat.mergeSql=true;druid.stat.slowSqlMillis=5000
#合并多个DruidDataSource
useGlobalDataSourceStat: true
五、启动类扫描mapper.java文件
@SpringBootApplication
@MapperScan("com.example.demo.dao")
public class DemoApplication {
public static void main(String[] args) {
SpringApplication.run(DemoApplication.class, args);
}
}
六、定义DataSourceConfig, 将application.yml中的配置导入DataSource中,并注入到bean
@Configuration
public class DataSourceConfig {
//从配置文件配置数据源
@Primary
@Bean(name="datasource1")
@ConfigurationProperties("spring.datasource.db1")
public DataSource dataSource1(){
return new DruidDataSource();
}
//从配置文件配置数据源
@Bean(name="datasource2")
@ConfigurationProperties("spring.datasource.db2")
public DataSource dataSource2(){
return new DruidDataSource();
}
//动态数据源 进行数据源切换
@Bean(name="dynamicDataSource")
public DataSource dynamicDataSource(){
DynamicDataSource dynamicDatasource=new DynamicDataSource();
//设置默认数据源
dynamicDatasource.setDefaultTargetDataSource(dataSource1());
//配置多数据源
Map<Object,Object> dsMap=new HashMap<>();
dsMap.put("datasource1",dataSource1());
dsMap.put("datasource2",dataSource2());
//将多数据源放到数据源池中
dynamicDatasource.setTargetDataSources(dsMap);
return dynamicDatasource;
}
}
七、定义动态数据源切换类DynamicDataSourceContextHolder
public class DynamicDataSourceContextHolder {
private static final ThreadLocal<String> contextHolder=new ThreadLocal<>();
//设置数据源名称
public static void setDB(String dbType){
contextHolder.set(dbType);
}
//获取数据源名称
public static String getDB(){
return contextHolder.get();
}
//清除数据源名
public static void clearDB(){
contextHolder.remove();
}
}
八、定义获取动态数据源类DynamicDataSource
public class DynamicDataSource extends AbstractRoutingDataSource {
@Override
protected Object determineCurrentLookupKey() {
return DynamicDataSourceContextHolder.getDB();
}
}
九、定义mybatis配置类,将DynamicDataSource放入SqlSessionFactoryBean中
@EnableTransactionManagement
@Configuration
public class MyBatisConfig {
@Resource(name = "dynamicDataSource")
private DataSource dynamicDataSource;
@Bean
public SqlSessionFactory sqlSessionFactory() throws Exception {
SqlSessionFactoryBean sqlSessionFactoryBean = new SqlSessionFactoryBean();
sqlSessionFactoryBean.setDataSource(dynamicDataSource);//将动态数据源bean配置到sqlsessionfactory
sqlSessionFactoryBean.setMapperLocations(new PathMatchingResourcePatternResolver().getResources("classpath:mapper/*.xml"));
return sqlSessionFactoryBean.getObject();
}
@Bean
public PlatformTransactionManager platformTransactionManager() {
return new DataSourceTransactionManager(dynamicDataSource);
}
}
十、定义用于切换数据源的注解TargetDataSource
@Target({ElementType.METHOD,ElementType.TYPE})
@Retention(RetentionPolicy.RUNTIME)
@Documented
public @interface TargetDataSource {
String value() default "datasource1";
}
十一、定义切面DynamicDataSourceAspect,用于拦截注解,并执行数据源切换功能
@Aspect
@Component
public class DynamicDataSourceAspect {
@Before("@annotation(targetDataSource)")
public void beforeSwitchDS(JoinPoint point,TargetDataSource targetDataSource){
DynamicDataSourceContextHolder.setDB(targetDataSource.value());
}
@After("@annotation(targetDataSource)")
public void afterSwitchDS(JoinPoint point,TargetDataSource targetDataSource){
DynamicDataSourceContextHolder.clearDB();
}
}
十二、测试类Test
@RestController
public class Test {
@Autowired
private RoleMapper roleMapper;
@Autowired
private UserMapper userMapper;
//未使用TargetDataSource注解,则使用默认数据源,即datasource1
@RequestMapping("/ds1")
public String selectDataSource1(){
return userMapper.selectByPrimaryKey(1).toString();
}
//使用了注解,则数据源为注解中指定的datasource2
@RequestMapping("/ds2")
@TargetDataSource("datasource2")
public String selectDataSource2(){
return roleMapper.selectByPrimaryKey(1).toString();
}
}
测试
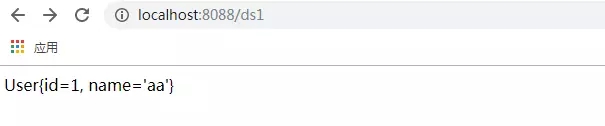
1.输入
http://localhost:8088/ds1
返回
↓
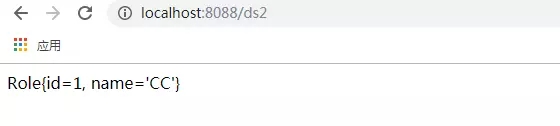
2.输入
http://localhost:8088/ds2
返回
↓
看完上述内容,你们对springboot中怎么利用mybatis+druid配置动态数据源有进一步的了解吗?如果还想了解更多知识或者相关内容,请关注亿速云行业资讯频道,感谢大家的支持。
免责声明:本站发布的内容(图片、视频和文字)以原创、转载和分享为主,文章观点不代表本网站立场,如果涉及侵权请联系站长邮箱:is@yisu.com进行举报,并提供相关证据,一经查实,将立刻删除涉嫌侵权内容。