您好,登录后才能下订单哦!
密码登录
登录注册
点击 登录注册 即表示同意《亿速云用户服务条款》
本文实例讲述了Android开发之TextView使用intent传递信息,实现注册界面功能。分享给大家供大家参考,具体如下:
使用intent在活动间传递值
首先是 MainActuvity 活动(注册界面 写完个人信息点击注册 )
跳转到 In 活动 (通过 intent 获得 MainActivity 中的信息 )
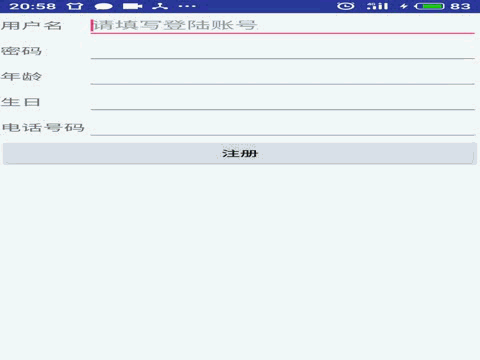
效果图如下:
MainActivity 实现:
Java代码:
public class Home extends AppCompatActivity {
  //用于存放个人注册信息
  EditText user_name ;
  EditText user_code ;
  EditText user_year ;
  EditText user_birth ;
  EditText user_phone ;
  //注册按钮 点击跳转
  Button button01 ;
  public void onCreate(Bundle savedInstanceState) {
    super.onCreate(savedInstanceState);
    setContentView(R.layout.activity_main);//显示manLayout
    user_name = (EditText) findViewById(R.id.ed_name);
    user_code = (EditText) findViewById(R.id.ed_code);
    user_year = (EditText) findViewById(R.id.ed_year);
    user_birth = (EditText) findViewById(R.id.ed_birth);
    user_phone = (EditText) findViewById(R.id.ed_phone);
    button01 = (Button) findViewById(R.id.bn_01);
    //通过 intent 实现活动间的信息传递
    button01.setOnClickListener(new View.OnClickListener() {
      @Override
      public void onClick(View v) {
        Intent intent01 = new Intent(Home.this,In.class);
        intent01.putExtra("name",user_name.getText().toString());
        intent01.putExtra("code",user_code.getText().toString());
        intent01.putExtra("year",user_year.getText().toString());
        intent01.putExtra("birth",user_birth.getText().toString());
        intent01.putExtra("phone",user_phone.getText().toString());
        startActivity(intent01);
      }
    });
  }
}
XML布局文件:
<TableLayout
  android:id="@+id/root"
  xmlns:android="http://schemas.android.com/apk/res/android"
  xmlns:app="http://schemas.android.com/apk/res-auto"
  xmlns:tools="http://schemas.android.com/tools"
  android:layout_width="match_parent"
  android:layout_height="match_parent"
  android:stretchColumns="1">
  <TableRow>
    <TextView
      android:id="@+id/tv_name"
      android:layout_width="match_parent"
      android:layout_height="wrap_content"
      android:text="用户名"
      android:textSize="16sp"/>
    <EditText
      android:id="@+id/ed_name"
      android:layout_width="match_parent"
      android:layout_height="wrap_content"
      android:hint="请填写登陆账号"
      android:selectAllOnFocus="true"/>
  </TableRow>
  <TableRow>
    <TextView
      android:id="@+id/tv_code"
      android:layout_width="match_parent"
      android:layout_height="wrap_content"
      android:text="密码"
      android:textSize="16sp"/>
    <!--android:inputType="numberPassword"表示只能接受数字密码-->
    <EditText
      android:id="@+id/ed_code"
      android:layout_width="match_parent"
      android:layout_height="wrap_content"
      android:inputType="numberPassword"/>
  </TableRow>
  <TableRow>
    <TextView
      android:id="@+id/tv_year"
      android:layout_width="match_parent"
      android:layout_height="wrap_content"
      android:text="年龄"
      android:textSize="16sp"/>
    <!--android:inputType="numberPassword"表示是数值输入框-->
    <EditText
      android:id="@+id/ed_year"
      android:layout_width="match_parent"
      android:layout_height="wrap_content"
      android:inputType="number"/>
  </TableRow>
  <TableRow>
    <TextView
      android:id="@+id/tv_birth"
      android:layout_width="match_parent"
      android:layout_height="wrap_content"
      android:text="生日"
      android:textSize="16sp"/>
    <!--android:inputType="numberPassword"表示日期输入框-->
    <EditText
      android:id="@+id/ed_birth"
      android:layout_width="match_parent"
      android:layout_height="wrap_content"
      android:inputType="date"/>
  </TableRow>
  <TableRow>
    <TextView
      android:id="@+id/tv_phone"
      android:layout_width="match_parent"
      android:layout_height="wrap_content"
      android:text="电话号码"
      android:textSize="16sp"/>
    <!--android:inputType="numberPassword"表示电话号码输入框-->
    <EditText
      android:id="@+id/ed_phone"
      android:layout_width="match_parent"
      android:layout_height="wrap_content"
      android:selectAllOnFocus="true"
      android:inputType="phone"/>
  </TableRow>
  <Button
    android:id="@+id/bn_01"
    android:layout_width="wrap_content"
    android:layout_height="wrap_content"
    android:text="注册"/>
</TableLayout>
In 活动:
Java代码:
public class In extends AppCompatActivity {
  @Override
  protected void onCreate(Bundle savedInstanceState) {
    super.onCreate(savedInstanceState);
    setContentView(R.layout.activity_in);
    //获得MainActivity传进来的数据
    Intent intent01 = getIntent();
    //放置传入的信息
    TextView textView01 = (TextView) findViewById(R.id.In_tv_01);
    textView01.setText( intent01.getStringExtra("name") + "\n"
        + intent01.getStringExtra("code") + "\n"
        + intent01.getStringExtra("year") + "\n"
        + intent01.getStringExtra("birth") + "\n"
        + intent01.getStringExtra("phone") );
  }
}
XML:
<?xml version="1.0" encoding="utf-8"?>
<android.support.constraint.ConstraintLayout xmlns:android="http://schemas.android.com/apk/res/android"
  xmlns:app="http://schemas.android.com/apk/res-auto"
  xmlns:tools="http://schemas.android.com/tools"
  android:layout_width="match_parent"
  android:layout_height="match_parent"
  tools:context=".In">
  <!--//放置前一个活动传递进来的信息-->
  <TextView
    android:id="@+id/In_tv_01"
    android:layout_width="match_parent"
    android:layout_height="wrap_content" />
</android.support.constraint.ConstraintLayout>
更多关于Android相关内容感兴趣的读者可查看本站专题:《Android开发入门与进阶教程》、《Android调试技巧与常见问题解决方法汇总》、《Android基本组件用法总结》、《Android视图View技巧总结》、《Android布局layout技巧总结》及《Android控件用法总结》
希望本文所述对大家Android程序设计有所帮助。
免责声明:本站发布的内容(图片、视频和文字)以原创、转载和分享为主,文章观点不代表本网站立场,如果涉及侵权请联系站长邮箱:is@yisu.com进行举报,并提供相关证据,一经查实,将立刻删除涉嫌侵权内容。