您好,登录后才能下订单哦!
密码登录
登录注册
点击 登录注册 即表示同意《亿速云用户服务条款》
本篇文章给大家分享的是有关怎么在Java中使用Swagger2自动生成一个对外接口,小编觉得挺实用的,因此分享给大家学习,希望大家阅读完这篇文章后可以有所收获,话不多说,跟着小编一起来看看吧。
一、使用传统的springmvc整合swagger2
1、maven依赖
<!--springfox依赖-->
    <dependency>
      <groupId>com.fasterxml.jackson.core</groupId>
      <artifactId>jackson-core</artifactId>
      <version>2.8.0</version>
    </dependency>
    <dependency>
      <groupId>com.fasterxml.jackson.core</groupId>
      <artifactId>jackson-databind</artifactId>
      <version>2.6.3</version>
    </dependency>
    <dependency>
      <groupId>com.fasterxml.jackson.core</groupId>
      <artifactId>jackson-annotations</artifactId>
      <version>2.6.3</version>
    </dependency>
    <dependency>
      <groupId>io.springfox</groupId>
      <artifactId>springfox-swagger2</artifactId>
      <version>2.4.0</version>
    </dependency>
    <dependency>
      <groupId>io.springfox</groupId>
      <artifactId>springfox-swagger-ui</artifactId>
      <version>2.4.0</version>
    </dependency>
2、spring-mvc.xml 中添加映射静态的配置(其实我项目中把这个去掉也可以,不知道什么情况):
<!-- swagger静态文件路径 -->
  <mvc:resources location="classpath:/META-INF/resources/" mapping="swagger-ui.html"/>
  <mvc:resources location="classpath:/META-INF/resources/webjars/" mapping="/webjars/**"/>
注意:基本的springmvc配置我就不贴了,需要注意的是,如果你看到swagger-ui.html 界面出来,但却一片空白,请检查下你web.xml中拦截器的配置,一定要springmvc先拦截到,然后界面才会显示的。
3、然后是swagger2的配置类:
@Configuration
@EnableSwagger2
public class SwaggerConfig extends WebMvcConfigurationSupport {
@Bean
public Docket createRestApi() {
return new Docket(DocumentationType.SWAGGER_2)
.apiInfo(apiInfo())
.select()
.apis(RequestHandlerSelectors.basePackage("net.laoyeyey.yyblog"))
.paths(PathSelectors.any())
.build();
}
private ApiInfo apiInfo() {
return new ApiInfoBuilder()
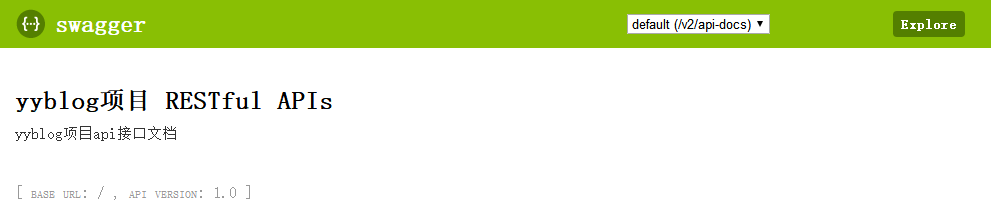
.title("yyblog项目 RESTful APIs")
.description("yyblog项目api接口文档")
.version("1.0")
.build();
}
}注意:paths如果在生产情况下可以调整为PathSelectors.none(),即不显示所有接口信息;
4、接口信息配置
即在SpringMvc的Controller中配置相关的接口信息
@Controller
@RequestMapping(value = "aitou")
@Api(description = "测试服务-账户信息查询")
public class DailyOperationDataController {
  Logger      logger  = Logger.getLogger(DailyOperationDataController.class);
  @Autowired
  private DailyOperationDataService DailyOperationDataService;
  /*
   * @ApiOperation(value = "接口说明", httpMethod ="接口请求方式", response ="接口返回参数类型", notes ="接口发布说明"
   * @ApiParam(required = "是否必须参数", name ="参数名称", value ="参数具体描述"
   */
  @ApiOperation(value = "账户信息查询接口")
  @RequestMapping(method ={RequestMethod.POST,RequestMethod.GET}, value="/query/dailydata/{dataDate}")
  @ResponseBody
  public DailyOperationDataDto getDailyReportByDataDate(@PathVariable("dataDate") String dataDate) {
    try {
      return DailyOperationDataService.getDailyReportByDataDate(dataDate);
    } catch (Exception e) {
      logger.error(e.getMessage(), e);
    }

    return null;
  }

}
注:通常情况下swagger2会将扫描包下所有的接口展示出来,这里我是对外的接口是单独一个包,避免展示过多的接口,当然接口方法也可以让它不展示。可以在下面看到相关的注解中有写。
常用的一些注解
@Api:用在类上,说明该类的作用
@ApiOperation:用在方法上,说明方法的作用
@ApiImplicitParams:用在方法上包含一组参数说明
@ApiImplicitParam:用在 @ApiImplicitParams 注解中,指定一个请求参数的各个方面
paramType:参数放在哪个地方
· header --> 请求参数的获取:@RequestHeader
· query -->请求参数的获取:@RequestParam
· path(用于restful接口)--> 请求参数的获取:@PathVariable
· body(不常用)
· form(不常用)
name:参数名
dataType:参数类型
required:参数是否必须传
value:参数的意思
defaultValue:参数的默认值
@ApiResponses:用于表示一组响应
@ApiResponse:用在@ApiResponses中,一般用于表达一个错误的响应信息
code:数字,例如400
message:信息,例如"请求参数没填好"
response:抛出异常的类
@ApiParam:单个参数描述
@ApiModel:描述一个Model的信息,用对象来接收参数(这种一般用在post创建的时候,使用@RequestBody这样的场景,请求参数无法使用@ApiImplicitParam注解进行描述的时候)
@ApiModelProperty:描述一个model的属性
@ApiProperty:用对象接收参数时,描述对象的一个字段
@ApiIgnore:使用该注解忽略这个API
基本上就是上面这些了,是不是很easy,下面看下效果图


二、使用springboot整合swagger2
上面说了使用传统的springmvc整合swagger2,在说说最近比较流行的springboot的方式,其实原理都是一样的。
1、maven依赖
<!--springfox依赖 -->
    <dependency>
      <groupId>io.springfox</groupId>
      <artifactId>springfox-swagger2</artifactId>
      <version>2.7.0</version>
    </dependency>
    <dependency>
      <groupId>io.springfox</groupId>
      <artifactId>springfox-swagger-ui</artifactId>
      <version>2.7.0</version>
    </dependency>
这个是我最近用springboot写的个人项目中的内用,版本用的2.7.0
2、添加静态资源配置
@Configuration
public class WebMvcConfig extends WebMvcConfigurerAdapter {/**
   * 配置静态资源路径以及上传文件的路径
   *
   * @param registry
   */
  @Override
  public void addResourceHandlers(ResourceHandlerRegistry registry) {
    registry.addResourceHandler("/static/**").addResourceLocations("classpath:/static/");
    registry.addResourceHandler("/upload/**").addResourceLocations(environment.getProperty("spring.resources.static-locations"));
    /*swagger-ui*/
    registry.addResourceHandler("swagger-ui.html").addResourceLocations("classpath:/META-INF/resources/");
    registry.addResourceHandler("/webjars/**").addResourceLocations("classpath:/META-INF/resources/webjars/");
  }

}
其实就是最后两句,如果你不配置这个的话,访问swagger-ui.html会出现500,还是404的错误来着,记不清了,应该是404.
3、swagger2的配置类
和上面一样,基本上没区别
@Configuration
@EnableSwagger2
@EnableWebMvc
public class SwaggerConfig extends WebMvcConfigurationSupport {

  @Bean
  public Docket createRestApi() {
    return new Docket(DocumentationType.SWAGGER_2)
        .apiInfo(apiInfo())
        .select()
        .apis(RequestHandlerSelectors.basePackage("net.laoyeye.yyblog.web.frontend"))
        .paths(PathSelectors.none())
        .build();
  }

  private ApiInfo apiInfo() {
    return new ApiInfoBuilder()
        .title("yyblog项目 RESTful APIs")
        .description("yyblog项目api接口文档")
        .version("1.0")
        .build();
  }


}
注意,我上面有说path的问题哦,直接拷贝不显示api的,(#^.^#)
4、接口的配置
/**
* 前台文章Controller
* @author 小卖铺的老爷爷
* @date 2018年5月5日
* @website www.laoyeye.net
*/
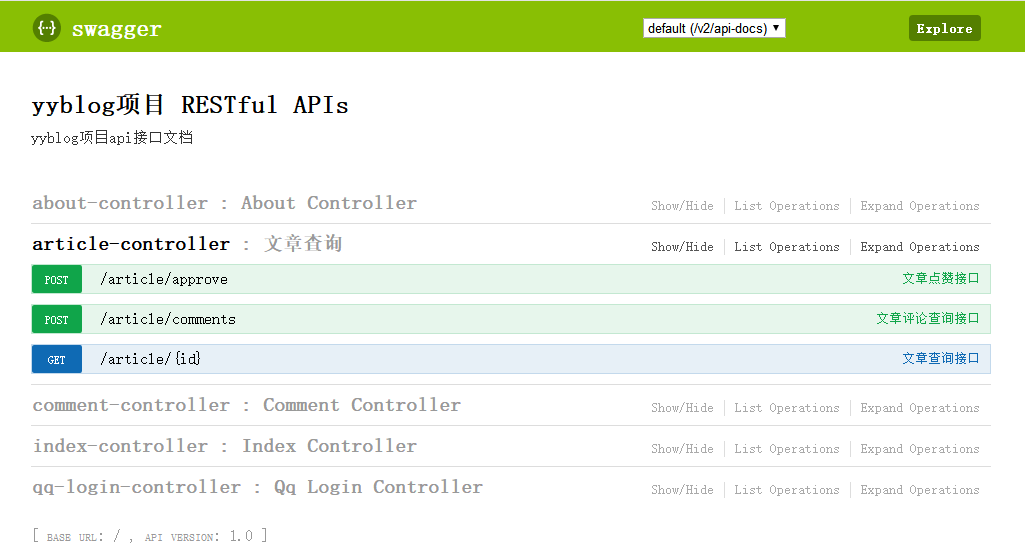
@Api(description="文章查询")
@Controller
@RequestMapping("/article")
public class ArticleController {
@Autowired
private ArticleService articleService;
@Autowired
private SettingService settingService;
@Autowired
private CateService cateService;
@Autowired
private TagReferService tagReferService;
@Autowired
private UserService userService;
@Autowired
private ArticleMapper articleMapper;
@Autowired
private CommentService commentService;
@ApiOperation(value="文章查询接口")
@ApiImplicitParam(name = "id", value = "文章ID", required = true, dataType = "Long")
@GetMapping("/{id}")
public String index(Model model, @PathVariable("id") Long id) {
try {
articleService.updateViewsById(id);
} catch (Exception ignore) {
}
List<Setting> settings = settingService.listAll();
Map<String,Object> map = new HashMap<String,Object>();
for (Setting setting : settings) {
map.put(setting.getCode(), setting.getValue());
}
Article article = articleService.getArticleById(id);
model.addAttribute("settings", map);
model.addAttribute("cateList", cateService.listAllCate());
model.addAttribute("article", article);
model.addAttribute("tags", tagReferService.listNameByArticleId(article.getId()));
model.addAttribute("author", userService.getNicknameById(article.getAuthorId()));
//回头改
model.addAttribute("articles", articleMapper.listArticleByTitle(null));
model.addAttribute("similars", articleMapper.listArticleByTitle(null));
CommentQuery query = new CommentQuery();
query.setLimit(10);
query.setPage(1);
query.setArticleId(id);
model.addAttribute("comments", commentService.listCommentByArticleId(query));
return "frontend/article";
}
@ApiOperation(value="文章评论查询接口")
@PostMapping("/comments")
@ResponseBody
public DataGridResult comments(CommentQuery query) {
//设置默认10
query.setLimit(10);
return commentService.listCommentByArticleId(query);
}
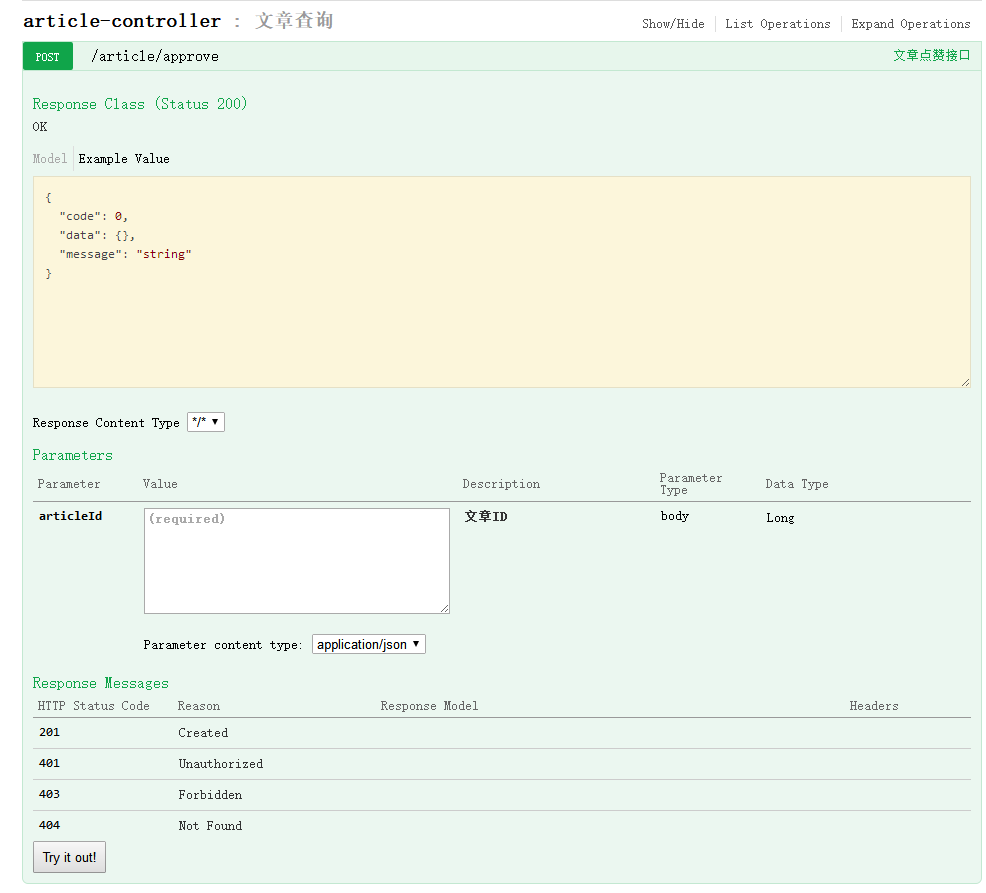
@ApiOperation(value="文章点赞接口")
@ApiImplicitParam(name = "articleId", value = "文章ID", required = true, dataType = "Long")
@PostMapping("/approve")
@ResponseBody
public YYBlogResult approve(@RequestParam Long articleId) {
return articleService.updateApproveCntById(articleId);
}
}最后同样来个效果图,和上面一样。
PathSelectors.none()的时候
PathSelectors.any()的时候
以上就是怎么在Java中使用Swagger2自动生成一个对外接口,小编相信有部分知识点可能是我们日常工作会见到或用到的。希望你能通过这篇文章学到更多知识。更多详情敬请关注亿速云行业资讯频道。
免责声明:本站发布的内容(图片、视频和文字)以原创、转载和分享为主,文章观点不代表本网站立场,如果涉及侵权请联系站长邮箱:is@yisu.com进行举报,并提供相关证据,一经查实,将立刻删除涉嫌侵权内容。