您好,登录后才能下订单哦!
Note:这篇文章是基于Android Studio 3.01版本的,NDK是R16。
step1:创建一个包含C++的项目


其他默认就可以了。
C++ Standard
指定编译库的环境,其中Toolchain Default使用的是默认的CMake环境;C++ 11也就是C++环境。两种环境都可以编库,至于区别,后续会跟进,当前博文使用的是CMake环境。
Exceptions Support
如果选中复选框,则表示当前项目支持C++异常处理,如果支持,在项目Module级别的build.gradle文件中会增加一个标识 -fexceptions到cppFlags属性中,并且在so库构建时,gradle会把该属性值传递给CMake进行构建。
Runtime Type Information Support
同理,选中复选框,项目支持RTTI,属性cppFlags增加标识-frtti
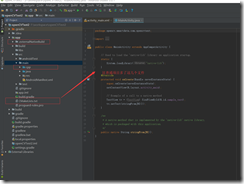
切换到project 模式,生成的目录的结构如下:


3、认识CMakeLists.txt构建脚本文件
CMakeLists.txt文件用于配置JNI项目属性,主要用于声明CMake使用版本、so库名称、C/CPP文件路径等信息,下面是该文件内容:
# For more information about using CMake with Android Studio, read the
# documentation: https://d.android.com/studio/projects/add-native-code.html

# Sets the minimum version of CMake required to build the native library.

cmake_minimum_required(VERSION 3.4.1)

# Creates and names a library, sets it as either STATIC
# or SHARED, and provides the relative paths to its source code.
# You can define multiple libraries, and CMake builds them for you.
# Gradle automatically packages shared libraries with your APK.

add_library( # Sets the name of the library.
    native-lib

    # Sets the library as a shared library.
    SHARED

    # Provides a relative path to your source file(s).
    src/main/cpp/native-lib.cpp )

# Searches for a specified prebuilt library and stores the path as a
# variable. Because CMake includes system libraries in the search path by
# default, you only need to specify the name of the public NDK library
# you want to add. CMake verifies that the library exists before
# completing its build.

find_library( # Sets the name of the path variable.
    log-lib

    # Specifies the name of the NDK library that
    # you want CMake to locate.
    log )

# Specifies libraries CMake should link to your target library. You
# can link multiple libraries, such as libraries you define in this
# build script, prebuilt third-party libraries, or system libraries.

target_link_libraries( # Specifies the target library.
      native-lib

      # Links the target library to the log library
      # included in the NDK.
      ${log-lib} )
cmake_minimum_required(VERSION 3.4.1)
CMake最小版本使用的是3.4.1。
add_library()
配置so库信息(为当前当前脚本文件添加库)
native-lib
这个是声明引用so库的名称,在项目中,如果需要使用这个so文件,引用的名称就是这个。值得注意的是,实际上生成的so文件名称是libnative-lib。当Run项目或者build项目是,在Module级别的build文件下的intermediates\transforms\mergeJniLibs\debug\folders\2000\1f\main下会生成相应的so库文件。
SHARED
这个参数表示共享so库文件,也就是在Run项目或者build项目时会在目录intermediates\transforms\mergeJniLibs\debug\folders\2000\1f\main下生成so库文。此外,so库文件都会在打包到.apk里面,可以通过选择菜单栏的Build->Analyze Apk...*查看apk中是否存在so库文件,一般它会存放在lib目录下。
src/main/cpp/native-lib.cpp
构建so库的源文件。
STATIC:静态库,是目标文件的归档文件,在链接其它目标的时候使用。
SHARED:动态库,会被动态链接,在运行时被加载。
MODULE:模块库,是不会被链接到其它目标中的插件,但是可能会在运行时使用dlopen-系列的函数动态链接。
头文件
也可以配置头文件路径,方法是(注意这里指定的是目录而非文件):
include_directories([AFTER|BEFORE] [SYSTEM] dir1 [dir2 ...])
下面的配置实际上与自定义的JNI项目(自定义的so库)没有太大关系。
find_library()
这个方法与我们要创建的so库无关而是使用NDK的Apis或者库,默认情况下Android平台集成了很多NDK库文件,所以这些文件是没有必要打包到apk里面去的。直接声明想要使用的库名称即可(猜测:貌似是在Sytem/libs目录下)。在这里不需要指定库的路径,因为这个路径已经是CMake路径搜索的一部分。如示例中使用的是log相关的so库。
log-lib
这个指定的是在NDK库中每个类型的库会存放一个特定的位置,而log库存放在log-lib中
log
指定使用log库
target_link_libraries()
如果你本地的库(native-lib)想要调用log库的方法,那么就需要配置这个属性,意思是把NDK库关联到本地库。
native-lib
要被关联的库名称
${log-lib}
要关联的库名称,要用大括号包裹,前面还要有$符号去引用。
实际上,我们可以自己创建CMakeLists.txt文件,而且路径不受限制,只要在build.gradle中配置externalNativeBuild.cmake.path来指定该文件路径即可。
add_subdirectory 可以执行子路径的CMakeLists.txt
添加自定义的C++库mathlib
创建源文件
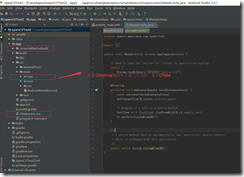
我的项目名称为OpenCVTest,所以右键这个项目点击New->Module,然后选Android Library,输入库的名称MathLib,然后Finish,系统就会生成对应的模块,并构建好初始的目录树。系统将库命名为MathLib,但是目录树中还是小写的mathlib。这个时候系统会自动在顶级settings.gradle添加对于这个新模块的include语句。并且在模块目录下构建好了初始的build.gradle。
现在我们开始创建自己的C++库,首先右键mathlib目录下的src/main,然后选择New->Directory,输入cpp并确定。这个目录就是我们要创建的库的源文件的位置。
右键add,点击New->C/C++ Source File,输入add.cpp,并选中Create an associated header。
在.cpp文件中定义好一个简单的加法函数,并在.h文件中添加好对应声明。
add.cpp
#include "add.h"
int add(int a,int b) {
 return a + b;
}
add.h
#ifndef OPENCVTEST_ADD_H
#define OPENCVTEST_ADD_H
int add(int a,int b);
#endif //OPENCVTEST_ADD_H
将源文件关联到构建系统中
我们用CMake来构建C++库,然后CMake又要和gradle结合,在Android Studio里面协作管理C++和Java的代码。
我们在模块mathlib的根目录下创建一个名为CMakeLists.txt的文件,写入
cmake_minimum_required(VERSION 3.4.1)
add_library(add SHARED
   src/main/cpp/add.cpp)
set(distribution_DIR ${CMAKE_CURRENT_SOURCE_DIR}/../distribution)
set_target_properties(add PROPERTIES
      LIBRARY_OUTPUT_DIRECTORY
      ${distribution_DIR}/libs/${ANDROID_ABI})
target_include_directories(add
       PUBLIC ${CMAKE_CURRENT_SOURCE_DIR}/src/main/cpp)

add_custom_command(TARGET add POST_BUILD
     COMMAND "${CMAKE_COMMAND}" -E
     copy "${CMAKE_CURRENT_SOURCE_DIR}/src/main/cpp/add.h"
     "${distribution_DIR}/include/mathlib/add.h"
#     **** the following 2 lines are for potential future debug purpose ****
#     COMMAND "${CMAKE_COMMAND}" -E
#     remove_directory "${CMAKE_CURRENT_BINARY_DIR}"
     COMMENT "Copying gmath to output directory")
set可以自定义变量。这里定义生成so文件的目录
set_target_properties 命令的意思是设置目标的一些属性来改变它们构建的方式。这个命令中设置了 add的ARCHIVE_OUTPUT_DIRECTORY 属性。也就是改变了输出路径。
add_custom_command 命令是自定义命令。命令中把头文件也复制到了 distribution_DIR 中。
target_include_directories,它对创建的库设置include路径,针对目标来设置,可以避免与其他库的冲突,并且此时对自定义的库设置好了此路径后,后续导入这个库就不需要再次设置了。但对于预构建的库,就需要设置,稍后会有详细讲解。
接下来我们在模块mathlib的build.gradle中的defaultConfig{}中添加如下语句:
externalNativeBuild {
   cmake {
    arguments '-DANDROID_PLATFORM=android-19',
      '-DANDROID_TOOLCHAIN=clang', '-DANDROID_STL=gnustl_static'
    targets 'add'
   }
  }
这里arguments是编译参数,而targets则是相比于add_subdirectory更高权限的方法。一般来说可以把它删去,即默认构建所有目标。
然后在android{}最后添加如下语句,将CMakeLists.txt关联起来。
externalNativeBuild {
  cmake {
   path 'CMakeLists.txt'
  }
 }
C++库已经创建好了,接下来就要在主模块中使用它了。
为了使用自定义C++库,我们需要一个中间人,它从Android本身的Java程序中获取请求,然后使用我们的C++库中的函数计算得到结果,并将数据传回Android本身的Java程序中。
创建一个中间文件native-math.cpp
#include <jni.h>
#include <string>
#include "mathlib/add.h"

extern "C"
JNIEXPORT jstring

JNICALL
Java_com_example_bill_opencvtest_MainActivity_stringFromJNI(
  JNIEnv *env,
  jobject /* this */) {
 std::string hello = "Hello from C++ From Android openCVTest";
 return env->NewStringUTF(hello.c_str());
}
extern "C"
JNIEXPORT jint JNICALL
Java_com_example_bill_opencvtest_MainActivity_addFromCpp(JNIEnv *env, jobject instance, jint a,
               jint b) {

 // TODO
 return add(a,b);
}
在app/CMakeLists.txt 加上这个自定义库的引用
set(distribution_DIR ${CMAKE_SOURCE_DIR}/../distribution)
include_directories(${distribution_DIR}/include)
add_library(lib_add SHARED IMPORTED)
set_target_properties(lib_add PROPERTIES IMPORTED_LOCATION
      ${distribution_DIR}/libs/${ANDROID_ABI}/libadd.so)
add_library( # Sets the name of the library.
    native-math

    # Sets the library as a shared library.
    SHARED

    # Provides a relative path to your source file(s).
    src/main/cpp/native-math.cpp )

find_library( # Sets the name of the path variable.
    log-lib

    # Specifies the name of the NDK library that
    # you want CMake to locate.
    log )
set_target_properties(native-math PROPERTIES
      LIBRARY_OUTPUT_DIRECTORY
      ${distribution_DIR}/libs/${ANDROID_ABI})
target_link_libraries( # Specifies the target library.
      native-math
      android
      log
      lib_add
      # Links the target library to the log library
      # included in the NDK.
      ${log-lib} )
在模块app的局部build.gradle中,像之前一样添加好对应的语句:
defaultConfig{}中:
externalNativeBuild {
   cmake {
    arguments '-DANDROID_PLATFORM=android-19',
      '-DANDROID_TOOLCHAIN=clang', '-DANDROID_STL=gnustl_static'
   }
  }
  ndk {
   //abiFilters 'armeabi-v7a','x86_64'
  }
其中ndk指定abi平台
ABI(Application binary interface)应用程序二进制接口。不同的CPU 与指令集的每种组合都有定义的 ABI (应用程序二进制接口),一段程序只有遵循这个接口规范才能在该 CPU 上运行,所以同样的程序代码为了兼容多个不同的CPU,需要为不同的 ABI 构建不同的库文件。当然对于CPU来说,不同的架构并不意味着一定互不兼容。
armeabi设备只兼容armeabi;
armeabi-v7a设备兼容armeabi-v7a、armeabi;
arm64-v8a设备兼容arm64-v8a、armeabi-v7a、armeabi;
X86设备兼容X86、armeabi;
X86_64设备兼容X86_64、X86、armeabi;
mips64设备兼容mips64、mips;
mips只兼容mips;
接着在src/main/java/*/MainActivity.java中的MainActivity类下面,加载库,以及设置好对应的方法声明:
static {
  System.loadLibrary("native-math");
 }
 /**
  * A native method that is implemented by the 'native-lib' native library,
  * which is packaged with this application.
  */
 public native String stringFromJNI();

 public native int addFromCpp(int a, int b);
然后就可以在onCreate方法中使用这个C++库定义的函数,在Java中对应的函数了
super.onCreate(savedInstanceState);
  setContentView(R.layout.activity_main);
  // Example of a call to a native method
  TextView tv = (TextView) findViewById(R.id.sample_text);
  tv.setText(stringFromJNI() + "____" + addFromCpp(2,88));
最后别忘了在项目中添加模块的依赖关系才可以正常运行这个Android App。右键项目OpenCVTest,选择Open Module Settings。选择app->Dependencies,添加Module dependency,选择mathlib,确定即可
添加OpenCV库的支持
导入OpenCV进项目
从OpenCV的官网将OpenCV4Android 3.4下载下来,解压到某个目录。
点击Android Studio的File->New->Import Module,然后选择路径为OpenCV-android-sdk/sdk/java,确定。并在导入之后,修改build.gradle中的SDK版本。
在Open Module Settings中添加模块的依赖关系,使app依赖openCVLibrary340。
现在已经可以在.java文件中看得到OpenCV的自动补全了。
配置OpenCV的C++预构建库
把包含文件夹OpenCV-android-sdk/sdk/native/jni/include和预构建库文件夹OpenCV-android-sdk/sdk/native/libs也复制到项目的distribution中。
由于之前已经在添加C++库时修改了app的build.gradle,所以这个步骤现在不需要再执行了。
由于OpenCV是预构建库,所以没有编译的过程,因此模块openCVLibrary320中不需要添加CMakeLists.txt等。我们直接在app模块中根目录下的CMakeLists.txt导入OpenCV的库即可。
set(libs "${CMAKE_SOURCE_DIR}/src/main/jniLibs")
include_directories(${distribution_DIR}/include)
# set add lib
add_library(libopencv_java3 SHARED IMPORTED )
set_target_properties(libopencv_java3 PROPERTIES
 IMPORTED_LOCATION "${libs}/${ANDROID_ABI}/libopencv_java3.so")
add_library( # Sets the name of the library.
    native-opencv

    # Sets the library as a shared library.
    SHARED

    # Provides a relative path to your source file(s).
    src/main/cpp/native-opencv.cpp )
set_target_properties(native-opencv PROPERTIES
      LIBRARY_OUTPUT_DIRECTORY
      ${distribution_DIR}/libs/${ANDROID_ABI})
target_link_libraries( # Specifies the target library.
      native-opencv
      android
      log
      libopencv_java3
      # Links the target library to the log library
      # included in the NDK.
      ${log-lib} )
需要注意的是.so使用SHARED,.a使用STATIC。
注意:预构建库:so文件和.a文件必须copy在src/main/jniLibs这个目录,才可以自动被打包。其他路径都不可以,连source这个命令也不起作用
现在可以使用openCV库了,新建一个文件native-opencv.cpp
//
// Created by bill on 2018/1/13.
//
#include <jni.h>
#include <opencv2/opencv.hpp>
#include <vector>

using namespace cv;
using namespace std;

extern "C"
JNIEXPORT void JNICALL
Java_com_example_bill_opencvtest_MainActivity_nativeProcessFrame(JNIEnv *env, jobject instance,
  jlong addrGray, jlong addrRGBA) {
// TODO
 Mat& gray = *(Mat *) addrGray;
 Mat& rgba = *(Mat *) addrRGBA;
 vector<KeyPoint> v;

 Ptr<ORB> orb = ORB::create();
 orb->detect(gray, v, cv::Mat());

 for (int i = 0; i < v.size(); ++i) {
  const KeyPoint& kp = v[i];
  circle(rgba, Point(kp.pt.x, kp.pt.y), 10, Scalar(255,0,0,255));
 }
}
现在就可以在src/main/java/*/MainActivity.java中按照同样的方法,载入库,写上方法声明。最后,如下所示。
static {
  System.loadLibrary("native-opencv");
  System.loadLibrary("native-math");
 }
 /**
  * A native method that is implemented by the 'native-lib' native library,
  * which is packaged with this application.
  */
 public native String stringFromJNI();

 public native int addFromCpp(int a, int b);
 private native void nativeProcessFrame(long addrGray, long addrRGBA);
完整的MainActivity
package com.example.bill.opencvtest;

import android.app.Activity;
import android.os.Bundle;
import android.util.Log;
import android.view.WindowManager;
import android.widget.TextView;

import org.opencv.android.CameraBridgeViewBase;
import org.opencv.android.OpenCVLoader;
import org.opencv.core.CvType;
import org.opencv.core.Mat;

public class MainActivity extends Activity implements CameraBridgeViewBase.CvCameraViewListener2{
 static {
  System.loadLibrary("native-opencv");
  System.loadLibrary("native-math");
 }
 /**
  * A native method that is implemented by the 'native-lib' native library,
  * which is packaged with this application.
  */
 public native String stringFromJNI();

 public native int addFromCpp(int a, int b);
 private native void nativeProcessFrame(long addrGray, long addrRGBA);

 private static final String TAG = "MainActivity";

 private Mat rgba;
 private Mat gray;
 private CameraBridgeViewBase mOpenCvCameraView;

 @Override
 protected void onCreate(Bundle savedInstanceState) {
  super.onCreate(savedInstanceState);
  setContentView(R.layout.activity_main);
  // Example of a call to a native method
  TextView tv = (TextView) findViewById(R.id.sample_text);
  tv.setText(stringFromJNI() + "____" + addFromCpp(2,88));
  getWindow().addFlags(WindowManager.LayoutParams.FLAG_KEEP_SCREEN_ON);

  mOpenCvCameraView = (CameraBridgeViewBase) findViewById(R.id.activity_camera_view);
  mOpenCvCameraView.setVisibility(CameraBridgeViewBase.VISIBLE);
  mOpenCvCameraView.setCvCameraViewListener(this);
 }

 @Override
 public void onPause() {
  super.onPause();
  if (mOpenCvCameraView != null){
   mOpenCvCameraView.disableView();
  }
 }

 @Override
 public void onResume()
 {
  super.onResume();
  if (!OpenCVLoader.initDebug()) {
   Log.d(TAG, "Internal OpenCV library not found. Using OpenCV Manager for initialization");
  } else {
   Log.d(TAG, "OpenCV library found inside package. Using it!");
   mOpenCvCameraView.enableView();
  }
 }

 public void onDestroy() {
  super.onDestroy();
  if (mOpenCvCameraView != null){
   mOpenCvCameraView.disableView();
  }
 }

 public void onCameraViewStarted(int width, int height){
  rgba = new Mat(height, width, CvType.CV_8UC4);
  gray = new Mat(height, width, CvType.CV_8UC1);
 }

 public void onCameraViewStopped() {
  rgba.release();
  gray.release();
 }

 public Mat onCameraFrame(CameraBridgeViewBase.CvCameraViewFrame inputFrame){
  rgba = inputFrame.rgba();
  gray = inputFrame.gray();
  nativeProcessFrame(gray.getNativeObjAddr(), rgba.getNativeObjAddr());
  return rgba;
 }
}
activity_main.xml
<?xml version="1.0" encoding="utf-8"?>
<android.support.constraint.ConstraintLayout xmlns:android="http://schemas.android.com/apk/res/android"
 xmlns:app="http://schemas.android.com/apk/res-auto"
 xmlns:tools="http://schemas.android.com/tools"
 xmlns:opencv="http://schemas.android.com/apk/res-auto"
 android:layout_width="match_parent"
 android:layout_height="match_parent"
 tools:context="com.example.bill.opencvtest.MainActivity">

 <TextView
  android:id="@+id/sample_text"
  android:layout_width="wrap_content"
  android:layout_height="wrap_content"
  android:text="Hello World!"
  app:layout_constraintBottom_toBottomOf="parent"
  app:layout_constraintLeft_toLeftOf="parent"
  app:layout_constraintRight_toRightOf="parent"
  app:layout_constraintTop_toTopOf="parent" />
 <org.opencv.android.JavaCameraView
  android:layout_width="match_parent"
  android:layout_height="match_parent"
  android:id="@+id/activity_camera_view"
  opencv:show_fps="true"
  opencv:camera_id="any"/>
</android.support.constraint.ConstraintLayout>
为了愉快的使用OpenCV Library,可以直接在AndroidManifest.xml里面加入如下权限
<?xml version="1.0" encoding="utf-8"?>
<manifest xmlns:android="http://schemas.android.com/apk/res/android"
 package="com.example.bill.opencvtest">

 <uses-permission android:name="android.permission.READ_EXTERNAL_STORAGE" />
 <uses-permission android:name="android.permission.CAMERA"/>
 <uses-feature android:name="android.hardware.camera"/>
 <uses-feature android:name="android.hardware.camera.autofocus"/>
 <uses-feature android:name="android.hardware.camera.front"/>
 <uses-feature android:name="android.hardware.camera.front.autofocus"/>

 <application
  android:allowBackup="true"
  android:icon="@mipmap/ic_launcher"
  android:label="@string/app_name"
  android:roundIcon="@mipmap/ic_launcher_round"
  android:supportsRtl="true"
  android:theme="@style/AppTheme">
  <activity android:name=".MainActivity"
   android:screenOrientation="landscape"
   android:configChanges="keyboardHidden|orientation">
   <intent-filter>
    <action android:name="android.intent.action.MAIN" />

    <category android:name="android.intent.category.LAUNCHER" />
   </intent-filter>
  </activity>
 </application>
</manifest>
总结
以上所述是小编给大家介绍的Android Studio中通过CMake使用NDK并编译自定义库和添加预编译库,希望对大家有所帮助,如果大家有任何疑问请给我留言,小编会及时回复大家的。在此也非常感谢大家对亿速云网站的支持!
免责声明:本站发布的内容(图片、视频和文字)以原创、转载和分享为主,文章观点不代表本网站立场,如果涉及侵权请联系站长邮箱:is@yisu.com进行举报,并提供相关证据,一经查实,将立刻删除涉嫌侵权内容。