жӮЁеҘҪпјҢзҷ»еҪ•еҗҺжүҚиғҪдёӢи®ўеҚ•е“ҰпјҒ
еҜҶз Ғзҷ»еҪ•
зҷ»еҪ•жіЁеҶҢ
зӮ№еҮ» зҷ»еҪ•жіЁеҶҢ еҚіиЎЁзӨәеҗҢж„ҸгҖҠдәҝйҖҹдә‘з”ЁжҲ·жңҚеҠЎжқЎж¬ҫгҖӢ
е°Ҹзј–з»ҷеӨ§е®¶еҲҶдә«дёҖдёӢеҰӮдҪ•дҪҝз”ЁSpring BootдёҠдј ж–Ү件еҠҹиғҪпјҢеёҢжңӣеӨ§е®¶йҳ…иҜ»е®ҢиҝҷзҜҮж–Үз« д№ӢеҗҺйғҪжңүжүҖ收иҺ·пјҢдёӢйқўи®©жҲ‘们дёҖиө·еҺ»жҺўи®Ёеҗ§пјҒ
1гҖҒpomеҢ…й…ҚзҪ®
жҲ‘们дҪҝз”ЁSpring BootжңҖж–°зүҲжң¬1.5.9гҖҒjdkдҪҝз”Ё1.8гҖҒtomcat8.0гҖӮ
<parent>
 <groupId>org.springframework.boot</groupId>
 <artifactId>spring-boot-starter-parent</artifactId>
 <version>1.5.9.RELEASE</version>
</parent>
<properties>
 <java.version>1.8</java.version>
</properties>
<dependencies>
 <dependency>
 <groupId>org.springframework.boot</groupId>
 <artifactId>spring-boot-starter-web</artifactId>
 </dependency>
 <dependency>
 <groupId>org.springframework.boot</groupId>
 <artifactId>spring-boot-starter-thymeleaf</artifactId>
 </dependency>
 <dependency>
 <groupId>org.springframework.boot</groupId>
 <artifactId>spring-boot-devtools</artifactId>
 <optional>true</optional>
 </dependency>
</dependencies>
еј•е…ҘдәҶ spring-boot-starter-thymeleaf еҒҡйЎөйқўжЁЎжқҝеј•ж“ҺпјҢеҶҷдёҖдәӣз®ҖеҚ•зҡ„дёҠдј зӨәдҫӢгҖӮ
2гҖҒеҗҜеҠЁзұ»и®ҫзҪ®
@SpringBootApplication
public class FileUploadWebApplication {
 public static void main(String[] args) throws Exception {
 SpringApplication.run(FileUploadWebApplication.class, args);
 }
 //Tomcat large file upload connection reset
 @Bean
 public TomcatEmbeddedServletContainerFactory tomcatEmbedded() {
 TomcatEmbeddedServletContainerFactory tomcat = new TomcatEmbeddedServletContainerFactory();
 tomcat.addConnectorCustomizers((TomcatConnectorCustomizer) connector -> {
  if ((connector.getProtocolHandler() instanceof AbstractHttp11Protocol<?>)) {
  //-1 means unlimited
  ((AbstractHttp11Protocol<?>) connector.getProtocolHandler()).setMaxSwallowSize(-1);
  }
 });
 return tomcat;
 }
}tomcatEmbeddedиҝҷж®өд»Јз ҒжҳҜдёәдәҶи§ЈеҶіпјҢдёҠдј ж–Ү件еӨ§дәҺ10MеҮәзҺ°иҝһжҺҘйҮҚзҪ®зҡ„й—®йўҳгҖӮжӯӨејӮеёёеҶ…е®№GlobalExceptionд№ҹжҚ•иҺ·дёҚеҲ°гҖӮ
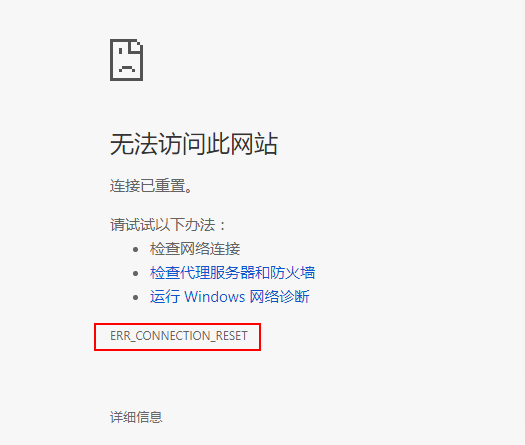
иҜҰз»ҶеҶ…е®№еҸӮиҖғпјҡ Tomcat large file upload connection reset
3гҖҒзј–еҶҷеүҚз«ҜйЎөйқў
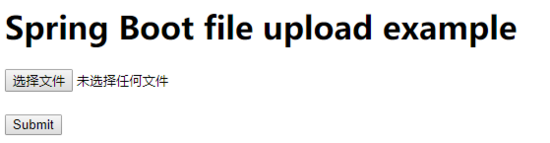
дёҠдј йЎөйқў
<!DOCTYPE html>
<html xmlns:th="http://www.thymeleaf.org">
<body>
<h2>Spring Boot file upload example</h2>
<form method="POST" action="/upload" enctype="multipart/form-data">
 <input type="file" name="file" /><br/><br/>
 <input type="submit" value="Submit" />
</form>
</body>
</html>
йқһеёёз®ҖеҚ•зҡ„дёҖдёӘPostиҜ·жұӮпјҢдёҖдёӘйҖүжӢ©жЎҶйҖүжӢ©ж–Ү件пјҢдёҖдёӘжҸҗдәӨжҢүй’®пјҢж•ҲжһңеҰӮдёӢпјҡ
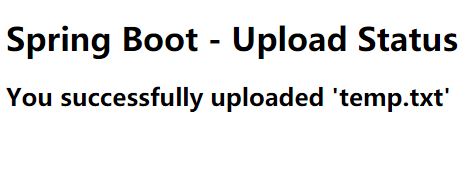
дёҠдј з»“жһңеұ•зӨәйЎөйқўпјҡ
<!DOCTYPE html>
<html lang="en" xmlns:th="http://www.thymeleaf.org">
<body>
<h2>Spring Boot - Upload Status</h2>
<div th:if="${message}">
 <h3 th:text="${message}"/>
</div>
</body>
</html>ж•ҲжһңеӣҫеҰӮдёӢпјҡ
4гҖҒзј–еҶҷдёҠдј жҺ§еҲ¶зұ»
и®ҝй—®localhostиҮӘеҠЁи·іиҪ¬еҲ°дёҠдј йЎөйқўпјҡ
@GetMapping("/")
public String index() {
 return "upload";
}дёҠдј дёҡеҠЎеӨ„зҗҶ
@PostMapping("/upload")
public String singleFileUpload(@RequestParam("file") MultipartFile file,
    RedirectAttributes redirectAttributes) {
 if (file.isEmpty()) {
 redirectAttributes.addFlashAttribute("message", "Please select a file to upload");
 return "redirect:uploadStatus";
 }
 try {
 // Get the file and save it somewhere
 byte[] bytes = file.getBytes();
 Path path = Paths.get(UPLOADED_FOLDER + file.getOriginalFilename());
 Files.write(path, bytes);
 redirectAttributes.addFlashAttribute("message",
  "You successfully uploaded '" + file.getOriginalFilename() + "'");
 } catch (IOException e) {
 e.printStackTrace();
 }
 return "redirect:/uploadStatus";
}дёҠйқўд»Јз Ғзҡ„ж„ҸжҖқе°ұжҳҜпјҢйҖҡиҝҮ MultipartFile иҜ»еҸ–ж–Ү件дҝЎжҒҜпјҢеҰӮжһңж–Ү件дёәз©әи·іиҪ¬еҲ°з»“жһңйЎө并з»ҷеҮәжҸҗзӨәпјӣеҰӮжһңдёҚдёәз©әиҜ»еҸ–ж–Ү件жөҒ并еҶҷе…ҘеҲ°жҢҮе®ҡзӣ®еҪ•пјҢжңҖеҗҺе°Ҷз»“жһңеұ•зӨәеҲ°йЎөйқўгҖӮ
MultipartFile жҳҜSpringдёҠдј ж–Ү件зҡ„е°ҒиЈ…зұ»пјҢеҢ…еҗ«дәҶж–Ү件зҡ„дәҢиҝӣеҲ¶жөҒе’Ңж–Ү件еұһжҖ§зӯүдҝЎжҒҜпјҢеңЁй…ҚзҪ®ж–Ү件дёӯд№ҹеҸҜеҜ№зӣёе…іеұһжҖ§иҝӣиЎҢй…ҚзҪ®пјҢеҹәжң¬зҡ„й…ҚзҪ®дҝЎжҒҜеҰӮдёӢпјҡ
spring.http.multipart.enabled=true #й»ҳи®Өж”ҜжҢҒж–Ү件дёҠдј . spring.http.multipart.file-size-threshold=0 #ж”ҜжҢҒж–Ү件еҶҷе…ҘзЈҒзӣҳ. spring.http.multipart.location= # дёҠдј ж–Ү件зҡ„дёҙж—¶зӣ®еҪ• spring.http.multipart.max-file-size=1Mb # жңҖеӨ§ж”ҜжҢҒж–Ү件еӨ§е°Ҹ spring.http.multipart.max-request-size=10Mb # жңҖеӨ§ж”ҜжҢҒиҜ·жұӮеӨ§е°Ҹ
жңҖеёёз”Ёзҡ„жҳҜжңҖеҗҺдёӨдёӘй…ҚзҪ®еҶ…е®№пјҢйҷҗеҲ¶ж–Ү件дёҠдј еӨ§е°ҸпјҢдёҠдј ж—¶и¶…иҝҮеӨ§е°ҸдјҡжҠӣеҮәејӮеёёпјҡ

жӣҙеӨҡй…ҚзҪ®дҝЎжҒҜеҸӮиҖғиҝҷйҮҢпјҡ Common application properties
5гҖҒејӮеёёеӨ„зҗҶ
@ControllerAdvice
public class GlobalExceptionHandler {

 @ExceptionHandler(MultipartException.class)
 public String handleError1(MultipartException e, RedirectAttributes redirectAttributes) {
 redirectAttributes.addFlashAttribute("message", e.getCause().getMessage());
 return "redirect:/uploadStatus";
 }
}и®ҫзҪ®дёҖдёӘ @ControllerAdvice з”ЁжқҘзӣ‘жҺ§ Multipart дёҠдј зҡ„ж–Ү件еӨ§е°ҸжҳҜеҗҰеҸ—йҷҗпјҢеҪ“еҮәзҺ°жӯӨејӮеёёж—¶еңЁеүҚз«ҜйЎөйқўз»ҷеҮәжҸҗзӨәгҖӮеҲ©з”Ё @ControllerAdvice еҸҜд»ҘеҒҡеҫҲеӨҡдёңиҘҝпјҢжҜ”еҰӮе…ЁеұҖзҡ„з»ҹдёҖејӮеёёеӨ„зҗҶзӯүпјҢж„ҹе…ҙи¶Јзҡ„еҗҢеӯҰеҸҜд»ҘдёӢжқҘдәҶи§ЈгҖӮ
зңӢе®ҢдәҶиҝҷзҜҮж–Үз« пјҢзӣёдҝЎдҪ еҜ№вҖңеҰӮдҪ•дҪҝз”ЁSpring BootдёҠдј ж–Ү件еҠҹиғҪвҖқжңүдәҶдёҖе®ҡзҡ„дәҶи§ЈпјҢеҰӮжһңжғідәҶи§ЈжӣҙеӨҡзӣёе…ізҹҘиҜҶпјҢж¬ўиҝҺе…іжіЁдәҝйҖҹдә‘иЎҢдёҡиө„и®Ҝйў‘йҒ“пјҢж„ҹи°ўеҗ„дҪҚзҡ„йҳ…иҜ»пјҒ
е…ҚиҙЈеЈ°жҳҺпјҡжң¬з«ҷеҸ‘еёғзҡ„еҶ…е®№пјҲеӣҫзүҮгҖҒи§Ҷйў‘е’Ңж–Үеӯ—пјүд»ҘеҺҹеҲӣгҖҒиҪ¬иҪҪе’ҢеҲҶдә«дёәдё»пјҢж–Үз« и§ӮзӮ№дёҚд»ЈиЎЁжң¬зҪ‘з«ҷз«ӢеңәпјҢеҰӮжһңж¶үеҸҠдҫөжқғиҜ·иҒ”зі»з«ҷй•ҝйӮ®з®ұпјҡis@yisu.comиҝӣиЎҢдёҫжҠҘпјҢ并жҸҗдҫӣзӣёе…іиҜҒжҚ®пјҢдёҖз»ҸжҹҘе®һпјҢе°Ҷз«ӢеҲ»еҲ йҷӨж¶үе«ҢдҫөжқғеҶ…е®№гҖӮ
жӮЁеҘҪпјҢзҷ»еҪ•еҗҺжүҚиғҪдёӢи®ўеҚ•е“ҰпјҒ