您好,登录后才能下订单哦!
密码登录
登录注册
点击 登录注册 即表示同意《亿速云用户服务条款》
1》Android Studio 安装ButterKnife插件
同安装其他插件类似,如下:
1.1》打开Plugins界面

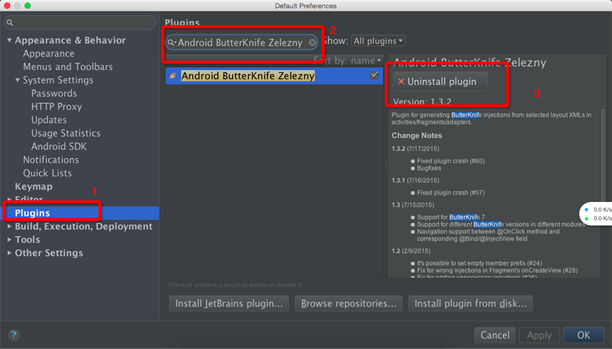
按照上图中1,2,3指示操作(注意:这里我的Android Studio中已经安装了该插件,所以显示的内容不太一样)。然后重启Android Studio。
2》在项目上使用该开源项目(以Android Studio 为例)
2.1》在bulid.gradle中添加依赖
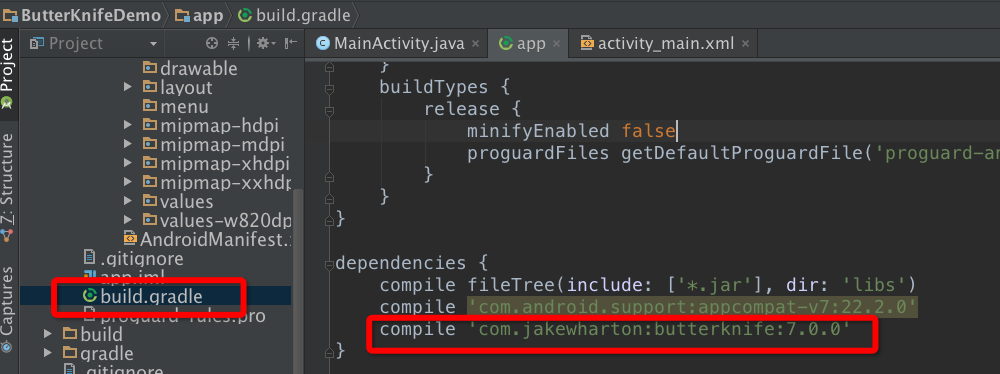
重新编译一下该项目,通过后继续操作。
2.2》在代码中就可以使用注解的方式了
2.2.1》示例布局文件如下:
<LinearLayout xmlns:android="http://schemas.android.com/apk/res/android"
  xmlns:tools="http://schemas.android.com/tools"
  android:layout_width="match_parent"
  android:layout_height="match_parent"
  android:orientation="vertical"
  android:paddingBottom="@dimen/activity_vertical_margin"
  android:paddingLeft="@dimen/activity_horizontal_margin"
  android:paddingRight="@dimen/activity_horizontal_margin"
  android:paddingTop="@dimen/activity_vertical_margin"
  tools:context=".MainActivity">

  <TextView
    android:id="@+id/text_veiw_tv1"
    android:layout_width="match_parent"
    android:layout_height="wrap_content"
    android:text="TextView 1" />

  <Button
    android:id="@+id/button_bt1"
    android:layout_width="match_parent"
    android:layout_height="wrap_content"
    android:text="Button1" />

  <TextView

    android:id="@+id/text_veiw_tv2"
    android:layout_width="match_parent"
    android:layout_height="wrap_content"
    android:text="TextView 2" />


  <Button
    android:id="@+id/button_bt2"
    android:layout_width="match_parent"
    android:layout_height="wrap_content"
    android:text="Button2" />


</LinearLayout>
2.2.2》在代码中使用注解
选择上述布局文件名,右键
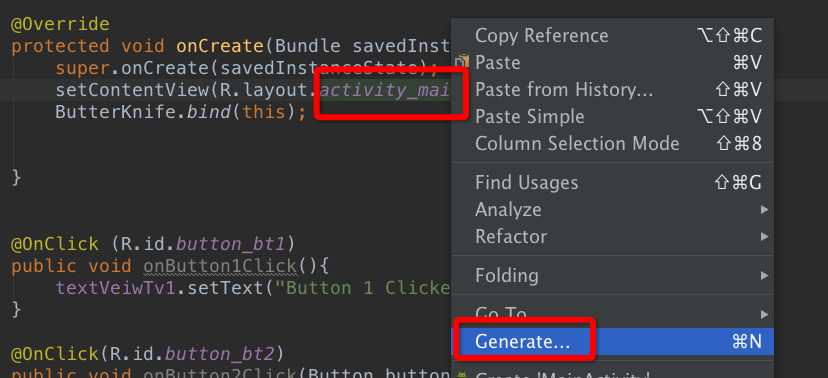
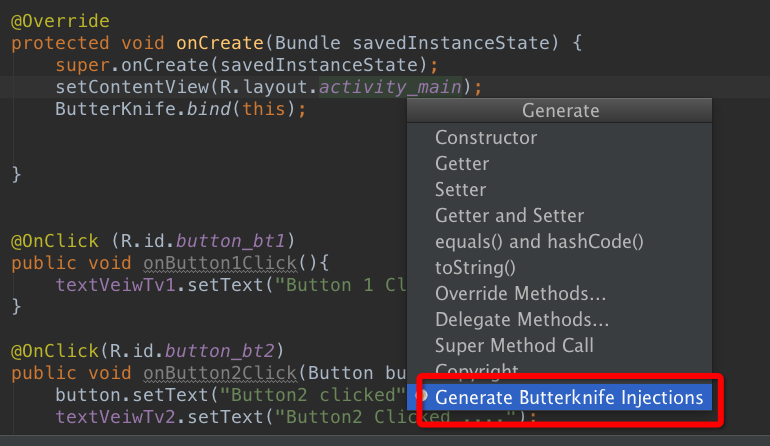
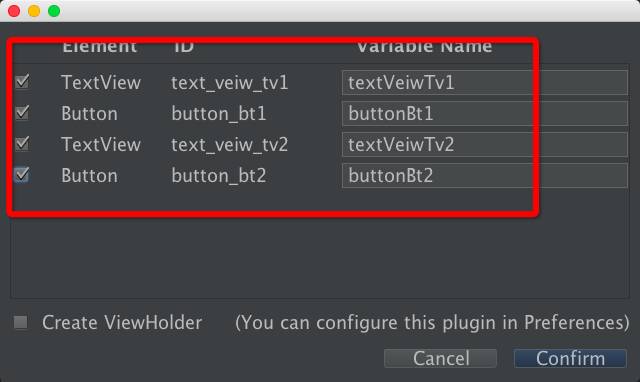
选择“Confirm”后,就会自动生成各个在布局文件中带有id 属性的view的注解形式
如下所示:
@Bind(R.id.text_veiw_tv1)
TextView textVeiwTv1;
@Bind(R.id.text_veiw_tv2)
TextView textVeiwTv2;
@Bind(R.id.button_bt1)
Button buttonBt1;
@Bind(R.id.button_bt2)
Button buttonBt2;

@Override
protected void onCreate(Bundle savedInstanceState) {
  super.onCreate(savedInstanceState);
  setContentView(R.layout.activity_main);
  ButterKnife.bind(this);


}
标注如下:
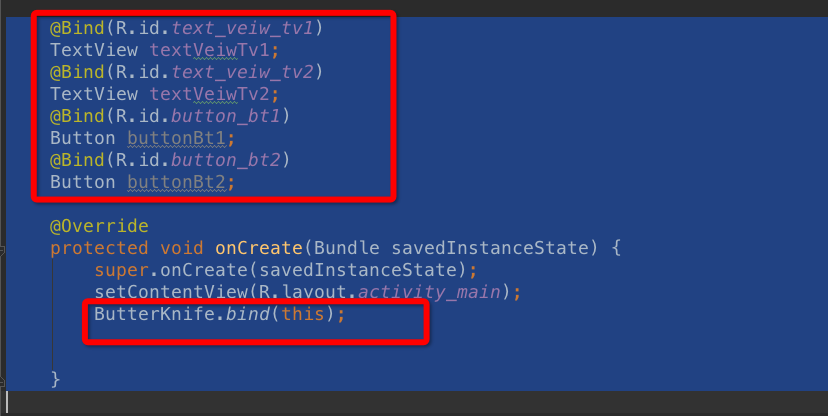
以上就是本文的全部内容,希望对大家的学习有所帮助,也希望大家多多支持亿速云。
免责声明:本站发布的内容(图片、视频和文字)以原创、转载和分享为主,文章观点不代表本网站立场,如果涉及侵权请联系站长邮箱:is@yisu.com进行举报,并提供相关证据,一经查实,将立刻删除涉嫌侵权内容。