您好,登录后才能下订单哦!
密码登录
登录注册
点击 登录注册 即表示同意《亿速云用户服务条款》
小编给大家分享一下Android如何实现自定义组件跟随自己手指主动画圆,希望大家阅读完这篇文章之后都有所收获,下面让我们一起去探讨吧!
具体内容如下
首先自己定义一个View子类:
package com.example.androidtest0.myView;

import android.content.Context;
import android.graphics.Canvas;
import android.graphics.Color;
import android.graphics.Paint;
import android.util.AttributeSet;
import android.view.MotionEvent;
import android.view.View;

public class DrawView extends View {
 public float currentX = 40;
 public float currentY = 50;
 //定义、并创建画笔
 Paint p = new Paint();
 public DrawView(Context context) {
 super(context);
 }

 public DrawView(Context context, AttributeSet attrs) {
 super(context, attrs);
 }

 @Override
 protected void onDraw(Canvas canvas) {
 super.onDraw(canvas);
 //设置画笔的颜色
 p.setColor(Color.RED);
 //绘制一个小球
 canvas.drawCircle(currentX, currentY, 15, p);
 }

 /**
 * 为该组件的触碰事件重写事件处理方法
 */
 @Override
 public boolean onTouchEvent(MotionEvent event) {
 //改动currentX、currentY两个属性
 currentX = event.getX();
 currentY = event.getY();
 //通知当前组件重绘自己
 invalidate();
 return true;
 }


}
主界面XML:
custom_layout.xml
<?xml version="1.0" encoding="utf-8"?>
<LinearLayout xmlns:android="http://schemas.android.com/apk/res/android"
  android:layout_width="match_parent"
  android:layout_height="match_parent"
  android:id="@+id/root"
  android:orientation="vertical" >

</LinearLayout>
主activity:
package com.example.androidtest0;

import com.example.androidtest0.myView.DrawView;

import android.app.Activity;
import android.os.Bundle;
import android.widget.LinearLayout;

public class CustomView extends Activity {
 @Override
 protected void onCreate(Bundle savedInstanceState) {
 super.onCreate(savedInstanceState);
 setContentView(R.layout.custom_layout);
 //获取布局文件里LinearLayout容器
 LinearLayout root = (LinearLayout)findViewById(R.id.root);
 //创建DrawView组件
 final DrawView drawView = new DrawView(this);
 //设置自己定义组件的最小宽度、高度
 drawView.setMinimumWidth(10);
 drawView.setMinimumHeight(10);
 root.addView(drawView);
 }
}
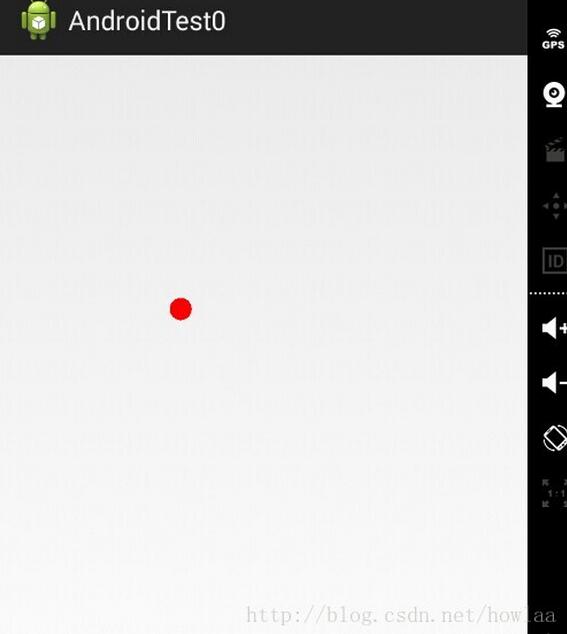
效果:

除此之外:
还能够用XML的方式:也是首先建一个View的子类。和上面一样。
然后主界面XML例如以下:
<?xml version="1.0" encoding="utf-8"?>
<LinearLayout xmlns:android="http://schemas.android.com/apk/res/android"
  android:layout_width="match_parent"
  android:layout_height="match_parent"
  android:id="@+id/root"
  android:orientation="vertical" >

  <com.example.androidtest0.myView.DrawView
    android:layout_width="match_parent" android:layout_height="match_parent"
    />
</LinearLayout>
主activity文件例如以下:
package com.example.androidtest0;

import com.example.androidtest0.myView.DrawView;

import android.app.Activity;
import android.os.Bundle;
import android.widget.LinearLayout;

public class CustomView extends Activity {
 @Override
 protected void onCreate(Bundle savedInstanceState) {
 super.onCreate(savedInstanceState);
 setContentView(R.layout.custom_layout);
 }
}
看完了这篇文章,相信你对“Android如何实现自定义组件跟随自己手指主动画圆”有了一定的了解,如果想了解更多相关知识,欢迎关注亿速云行业资讯频道,感谢各位的阅读!
免责声明:本站发布的内容(图片、视频和文字)以原创、转载和分享为主,文章观点不代表本网站立场,如果涉及侵权请联系站长邮箱:is@yisu.com进行举报,并提供相关证据,一经查实,将立刻删除涉嫌侵权内容。