您好,登录后才能下订单哦!
密码登录
登录注册
点击 登录注册 即表示同意《亿速云用户服务条款》
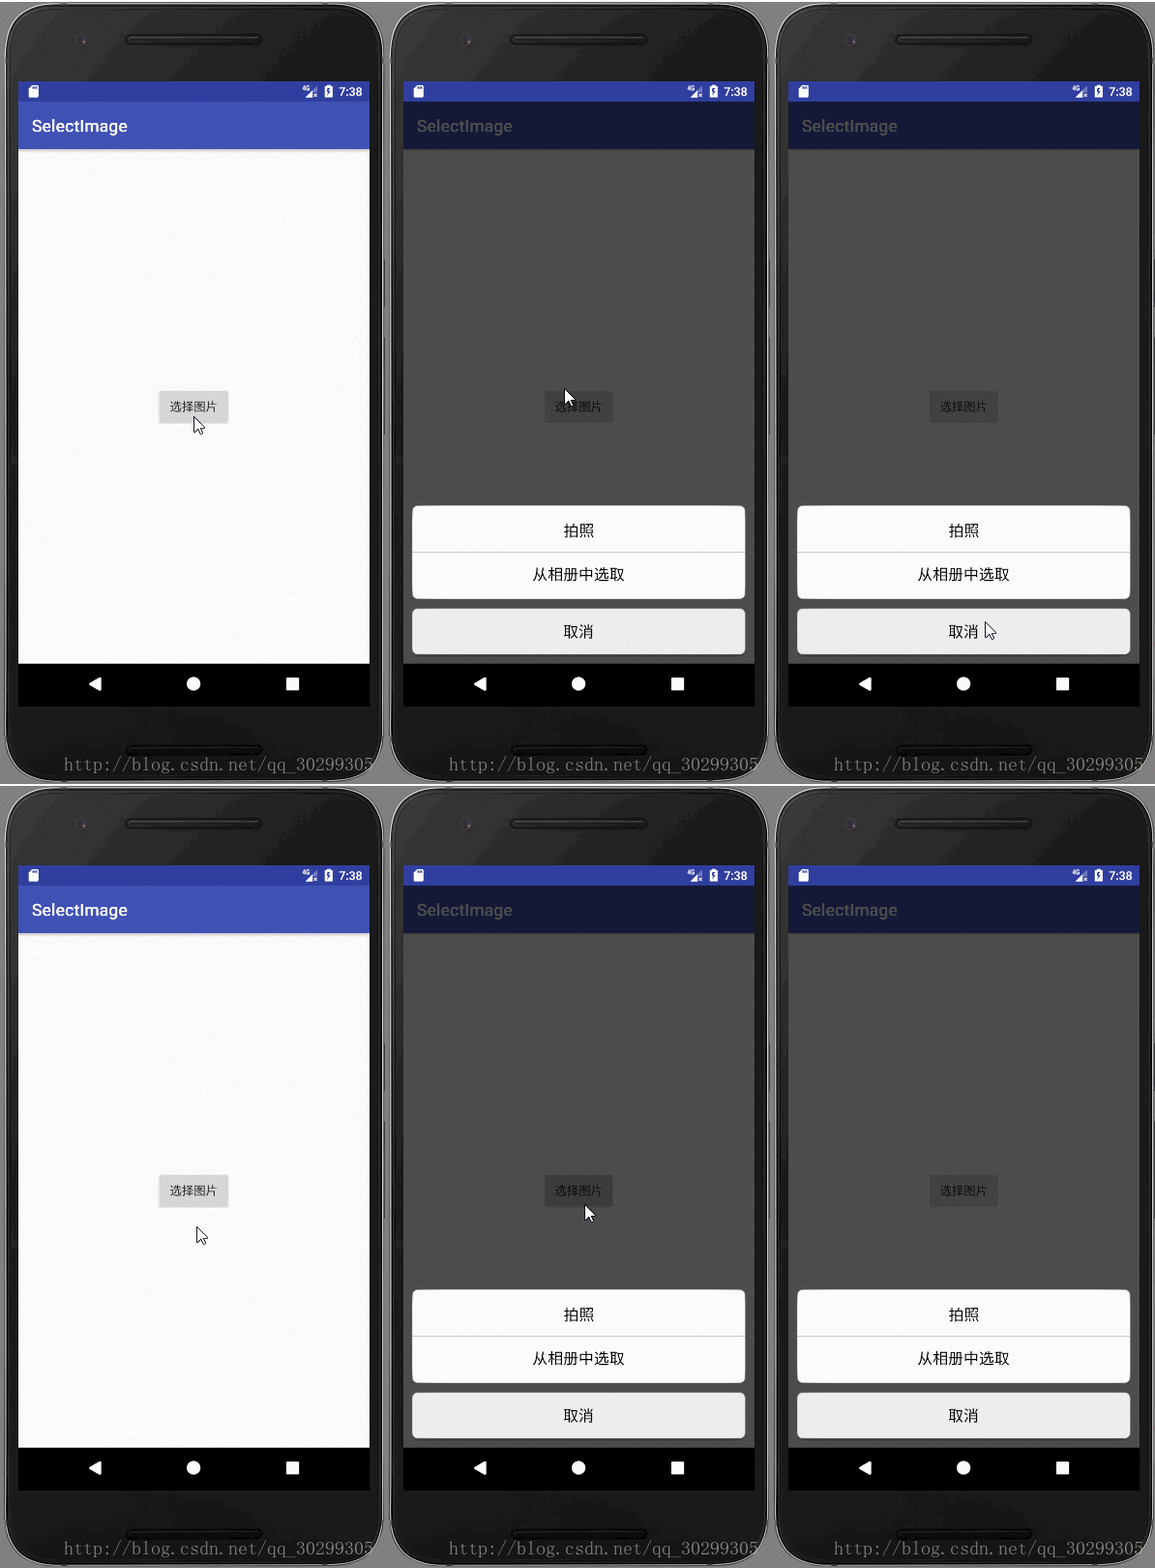
本文实例为大家分享了Android实现底部弹窗效果的具体代码,供大家参考,具体内容如下

源代码地址:https://github.com/luoye123/Box
东西很简单,我就直接亮代码了:
1、activity_main.xml
<?xml version="1.0" encoding="utf-8"?>
<LinearLayout
 xmlns:android="http://schemas.android.com/apk/res/android"
 android:layout_width="fill_parent"
 android:layout_height="fill_parent"
 android:gravity="center"
 android:id="@+id/ll_image">

 <Button
 android:id="@+id/bt_select_image"
 android:layout_width="wrap_content"
 android:layout_height="wrap_content"
 android:text="选择图片" />
</LinearLayout>
2、MainActivity.java
public class MainActivity extends AppCompatActivity implements View.OnClickListener {

 private SelectPicPopupWindow menuWindow;

 @Override
 protected void onCreate(Bundle savedInstanceState) {
 super.onCreate(savedInstanceState);
 setContentView(R.layout.activity_main);
 findViewById(R.id.bt_select_image).setOnClickListener(this);
 }

 @Override
 public void onClick(View view) {
 switch (view.getId()) {
  case R.id.bt_select_image:
  //TODO implement
  selectImgs();
 }
 }
 private void selectImgs(){

 menuWindow = new SelectPicPopupWindow(MainActivity.this, itemsOnClick);
 //设置弹窗位置
 menuWindow.showAtLocation(MainActivity.this.findViewById(R.id.ll_image), Gravity.BOTTOM | Gravity.CENTER_HORIZONTAL, 0, 0);
 }

 private View.OnClickListener itemsOnClick = new View.OnClickListener() {
 public void onClick(View v) {
  menuWindow.dismiss();
  switch (v.getId()) {
  case R.id.item_popupwindows_camera: //点击拍照按钮

   break;
  case R.id.item_popupwindows_Photo: //点击从相册中选择按钮


   break;
  default:
   break;
  }
 }

 };
}
3、关键代码:SelectPicPopupWindow.java
 **public class SelectPicPopupWindow extends PopupWindow {

  private Button item_popupwindows_camera, //弹窗拍照按钮
   item_popupwindows_Photo,  //弹窗从相册选择按钮
   item_popupwindows_cancel;  //弹窗取消按钮
  private View menuview;

  /**
  * 上传图片*************************
  * @param context
  * @param itemsOnclick
  */
  public SelectPicPopupWindow(Activity context, View.OnClickListener itemsOnclick){
  super(context);
  LayoutInflater inflater = (LayoutInflater) context.getSystemService(Context.LAYOUT_INFLATER_SERVICE);
  menuview = inflater.inflate(R.layout.item_popupwindows,null);
  item_popupwindows_camera = (Button) menuview.findViewById(R.id.item_popupwindows_camera); //拍照按钮
  item_popupwindows_cancel = (Button) menuview.findViewById(R.id.item_popupwindows_cancel); //取消按钮
  item_**popupwindows_Photo = (Button) menuview.findViewById(R.id.item_popupwindows_Photo); //图库按钮

  /**
   * 取消按钮销毁事件
   */
  item_popupwindows_cancel.setOnClickListener(new View.OnClickListener() {
   public void onClick(View view) {
   dismiss();
   }
  });
  item_popupwindows_camera.setOnClickListener(itemsOnclick);
  item_popupwindows_Photo.setOnClickListener(itemsOnclick);
  //设置SelectPicPopupWindow的View
  this.setContentView(menuview);
  //设置SelectPicPopupWindow**弹出窗体的宽
  this.setWidth(ViewGroup.LayoutParams.FILL_PARENT);
  //设置SelectPicPopupWindow弹出窗体的高
  //修改高度显示,解决被手机底部虚拟键挡住的问题 by黄海杰 at:2015-4-30
  this.setHeight(ViewGroup.LayoutParams.MATCH_PARENT);
  //设置SelectPicPopupWindow弹出窗体可点击
  this.setFocusable(true);
  //设置SelectPicPopupWindow弹出窗体动画效果
  //this.setAnimationStyle(R.style);
  //实例化一个ColorDrawable颜色为半透明
  ColorDrawable dw = new ColorDrawable(0xb0000000);
  //设置SelectPicPopupWindow弹出窗体的背景
  this.setBackgroundDrawable(dw);
  //menuview添加ontouchlistener监听判断获取触屏位置如果在选择框外面则销毁弹出框
  menuview.setOnTouchListener(new View.OnTouchListener() {
   public boolean onTouch(View view, MotionEvent motionEvent) {
   int height = menuview.findViewById(R.id.ll_popup).getTop();
   int y = (int) motionEvent.getY();
   if (motionEvent.getAction() == MotionEvent.ACTION_UP){
    if (y<height){
    dismiss();
    }
   }
   return true;
   }
  });
  }
 }**
写的不好,请见谅,,下一期完成后期的工作!
以上就是本文的全部内容,希望对大家的学习有所帮助,也希望大家多多支持亿速云。
免责声明:本站发布的内容(图片、视频和文字)以原创、转载和分享为主,文章观点不代表本网站立场,如果涉及侵权请联系站长邮箱:is@yisu.com进行举报,并提供相关证据,一经查实,将立刻删除涉嫌侵权内容。