您好,登录后才能下订单哦!
密码登录
登录注册
点击 登录注册 即表示同意《亿速云用户服务条款》

nginx的静态处理能力很强,动态处理能力不足,所以要把动态的页面交给Apache,实现动静分离。
[root@localhost ~]# yum install httpd httpd-devel -y ##安装apacher软件包

[root@localhost ~]# systemctl start httpd.service  ##开启服务

[root@localhost ~]# firewall-cmd --permanent --zone=public  --add-service=http  ##永久允许http服务
success

[root@localhost ~]# firewall-cmd --permanent --zone=public  --add-service=https  ##永久允许https服务
success

[root@localhost ~]# firewall-cmd --reload  ##重新加载防火墙
success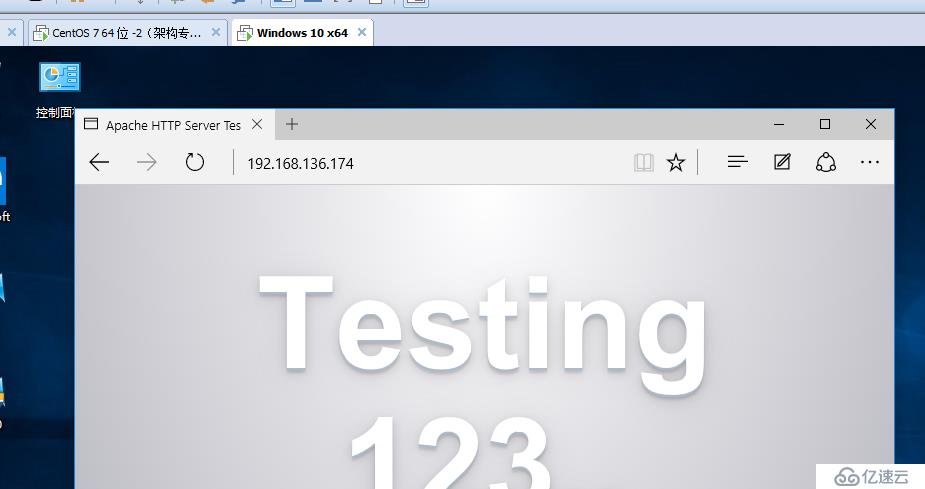
MariaDB数据库管理系统是MySQL的一个分支,主要由开源社区在维护,采用GPL授权许可 MariaDB的目的是完全兼容MySQL,包括API和命令行,使之能轻松成为MySQL的代替品。在存储引擎方面,使用XtraDB(英语:XtraDB)来代替MySQL的InnoDB。 MariaDB由MySQL的创始人Michael Widenius(英语:Michael Widenius)主导开发,他早前曾以10亿美元的价格,将自己创建的公司MySQL AB卖给了SUN,此后,随着SUN被甲骨文收购,MySQL的所有权也落入Oracle的手中。MariaDB名称来自Michael Widenius的女儿Maria的名字。
yum install mariadb mariadb-server mariadb-libs mariadb-devel -y  #安装数据库组件
[root@localhost ~]# systemctl start  mariadb
[root@localhost ~]# netstat -natap | grep 3306
tcp 0 0 0.0.0.0:3306 0.0.0.0:* LISTEN 15154/mysqld [root@localhost ~]# mysql_secure_installation
NOTE: RUNNING ALL PARTS OF THIS SCRIPT IS RECOMMENDED FOR ALL MariaDB
SERVERS IN PRODUCTION USE! PLEASE READ EACH STEP CAREFULLY!
In order to log into MariaDB to secure it, we'll need the current
password for the root user. If you've just installed MariaDB, and
you haven't set the root password yet, the password will be blank,
so you should just press enter here.
Enter current password for root (enter for none): ##按回车
Set root password? [Y/n] y ##是否设置密码
New password: #输入你的密码
Re-enter new password:
Remove anonymous users? [Y/n] y ##是否删除匿名用户,不删
Disallow root login remotely? [Y/n] n ##是否让root用户远程登录
Remove test database and access to it? [Y/n] n ##是否删除测试数据库
Reload privilege tables now? [Y/n] y ##是否加载里面的属性列表yum -y install php
##建立php和mysql关联
yum install php-mysql -y
##安装php插件
yum install -y php-gd php-ldap php-odbc php-pear php-xml php-xmlrpc php-mbstring php-snmp php-soap curl curl-devel php-bcmath
cd /var/www/html
vim index.php ##写上PHP网页
<?php
phpinfo();
?>
[root@localhost html]# systemctl restart httpd.service 
[root@localhost ~]# yum install pcre-devel zlib-devel gcc gcc-c++ -y  ##安装环境包

[root@localhost ~]# useradd -M -s /sbin/nologin nginx ##创建程序性用户

[root@localhost ~]# mkdir /chen ##创建挂载点
[root@localhost ~]# mount.cifs //192.168.100.23/LNMP /chen ##挂载
Password for root@//192.168.100.23/LNMP:

[root@localhost chen]# tar zxvf nginx-1.12.2.tar.gz -C /opt/  ##解压

[root@localhost chen]# cd /opt/
[root@localhost opt]# ls
nginx-1.12.2  rh
[root@localhost opt]# cd nginx-1.12.2/
[root@localhost nginx-1.12.2]# ls
auto     CHANGES.ru  configure  html     man     src
CHANGES  conf        contrib    LICENSE  README

./configure \  ##安装组件
--prefix=/usr/local/nginx \  ##指定路径
--user=nginx \  ##指定用户
--group=nginx \  ##指定组
--with-http_stub_status_module  ##状态统计模块

[root@localhost nginx-1.12.2]# make && make install  ##编译

[root@localhost nginx-1.12.2]# ln -s /usr/local/nginx/sbin/nginx /usr/local/sbin/  ##做软连接
[root@localhost nginx-1.12.2]# nginx -t  ##检查语法
nginx: the configuration file /usr/local/nginx/conf/nginx.conf syntax is ok
nginx: configuration file /usr/local/nginx/conf/nginx.conf test is successful[root@localhost nginx-1.12.2]# cd /etc/init.d/
[root@localhost init.d]# vim nginx
#!/bin/bash
#chkconfig: - 99 20 #注释信息
#description: Nginx Service Control Script
PROG="/usr/local/nginx/sbin/nginx" #这个变量,指向我的命令文件
PIDF="/usr/local/nginx/logs/nginx.pid" #这个变量,指向nginx的进程号
case "$1" in
start)
$PROG
;;
stop)
kill -s QUIT $(cat $PIDF)
;;
restart)
$0 stop
$0 start
;;
reload)
kill -s HUP $(cat $PIDF)
;;
*)
echo "Usage: $0 {start|stop|restart|reload}"
exit 1
esac
exit 0[root@localhost init.d]# chmod +x nginx
[root@localhost init.d]# chkconfig --add nginx
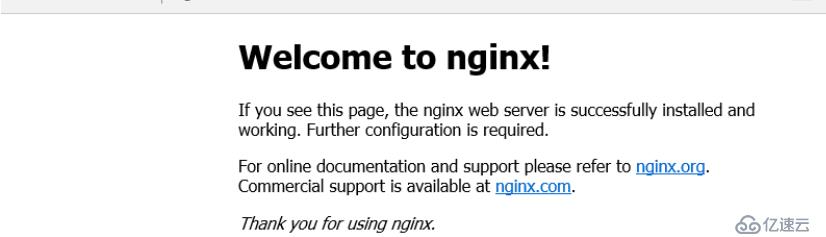
[root@localhost init.d]# service nginx start
[root@localhost init.d]# netstat -ntap | grep nginx
tcp 0 0 0.0.0.0:80 0.0.0.0:* LISTEN 17544/nginx: master
[root@localhost init.d]# systemctl stop firewalld.service
[root@localhost init.d]# setenforce 0
[root@localhost init.d]# yum install elinks -y
[root@localhost init.d]# elinks http://192.168.136.162/ ##测试网站有没有生效
[root@localhost init.d]# vim /usr/local/nginx/conf/nginx.conf
 59         location ~ \.php$ {
 60             proxy_pass   http://192.168.136.174;  ##在sever这个区域,修改地址,把动态的请求转给174处理
 61         }

[root@localhost init.d]# service nginx stop
[root@localhost init.d]# service nginx start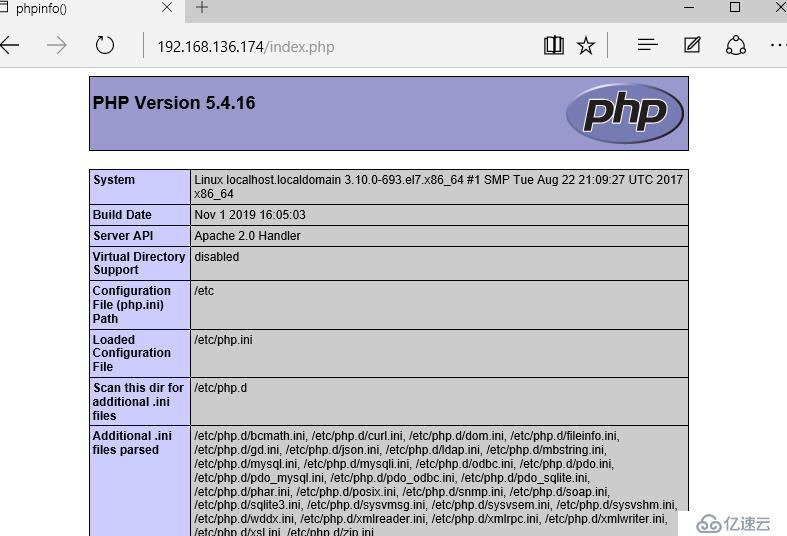
免责声明:本站发布的内容(图片、视频和文字)以原创、转载和分享为主,文章观点不代表本网站立场,如果涉及侵权请联系站长邮箱:is@yisu.com进行举报,并提供相关证据,一经查实,将立刻删除涉嫌侵权内容。