您好,登录后才能下订单哦!
这篇文章主要为大家展示了springboot~nexus项目打包需要注意哪些地方,内容简而易懂,希望大家可以学习一下,学习完之后肯定会有收获的,下面让小编带大家一起来看看吧。
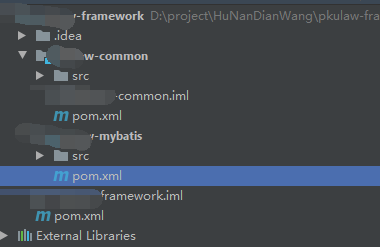
一个使用maven制作框架包时,会有一个主项目,然后它有多个子项目框架组成,很少一个工具包一个工程,像springboot,springcloud都是这种结构,主项目用来管理一些依赖包的版本,这对于框架型项目来说是很必要的,而对于业务项目来说,因为目前都是推荐使用微服务的轻量方式,所以不建议用多项目绑定一个大项目的方式,而都是一个服务一个项目。

主pom文件
主项目的pom文件用来管理依赖包版本,一般在dependencyManagement节点去声明它们的版本号,这样在子项目里可以不声明相同包的版本信息了
 <dependencyManagement>
    <dependencies>
      <!--spring boot 版本-->
      <dependency>
        <groupId>org.springframework.boot</groupId>
        <artifactId>spring-boot-dependencies</artifactId>
        <version>${spring-boot-dependencies.version}</version>
        <type>pom</type>
        <scope>import</scope>
      </dependency>

      <!--阿里巴巴组件-->
      <dependency>
        <groupId>com.alibaba.cloud</groupId>
        <artifactId>spring-cloud-alibaba-dependencies</artifactId>
        <version>${spring-cloud-alibaba-dependencies.version}</version>
        <type>pom</type>
        <scope>import</scope>
      </dependency>

      <!--spring cloud 版本-->
      <dependency>
        <groupId>org.springframework.cloud</groupId>
        <artifactId>spring-cloud-dependencies</artifactId>
        <version>${spring-cloud.version}</version>
        <type>pom</type>
        <scope>import</scope>
      </dependency>

      <!-- Spring Boot Web 依赖 -->
      <dependency>
        <groupId>org.springframework.boot</groupId>
        <artifactId>spring-boot-starter-web</artifactId>
        <version>${spring-boot-dependencies.version}</version>
        <exclusions>
          <!-- 排除Tomcat 以使用 Undertow -->
          <exclusion>
            <groupId>org.springframework.boot</groupId>
            <artifactId>spring-boot-starter-tomcat</artifactId>
          </exclusion>
        </exclusions>
      </dependency>


      <!-- Google 编码助手 -->
      <dependency>
        <groupId>com.google.guava</groupId>
        <artifactId>guava</artifactId>
        <version>${guava.version}</version>
      </dependency>


      <!-- Mysql 驱动 -->
      <dependency>
        <groupId>mysql</groupId>
        <artifactId>mysql-connector-java</artifactId>
        <version>${mysql.drive.version}</version>
      </dependency>


      <!-- HikariCP 连接池 -->
      <dependency>
        <groupId>com.zaxxer</groupId>
        <artifactId>HikariCP</artifactId>
        <version>${HikariCP.version}</version>
      </dependency>

      <!-- MyBatis 增强工具 -->
      <dependency>
        <groupId>com.baomidou</groupId>
        <artifactId>mybatis-plus-boot-starter</artifactId>
        <version>${mybatis-plus-boot-starter.version}</version>
      </dependency>


      <!-- Alibaba json解析器 -->
      <dependency>
        <groupId>com.alibaba</groupId>
        <artifactId>fastjson</artifactId>
        <version>${fastjson.version}</version>
      </dependency>


      <!-- 接口文档 -->
      <dependency>
        <groupId>io.springfox</groupId>
        <artifactId>springfox-swagger2</artifactId>
        <version>${springfox-swagger2.version}</version>
      </dependency>


      <!-- 接口文档 UI -->
      <dependency>
        <groupId>io.springfox</groupId>
        <artifactId>springfox-swagger-ui</artifactId>
        <version>${springfox-swagger2.version}</version>
      </dependency>

      <!-- HTTP 客户端请求 -->
      <dependency>
        <groupId>org.apache.httpcomponents</groupId>
        <artifactId>httpclient</artifactId>
        <version>${httpclient.version}</version>
      </dependency>


      <!-- Feign 客户端请求 -->
      <dependency>
        <groupId>io.github.openfeign</groupId>
        <artifactId>feign-httpclient</artifactId>
        <version>${feign-httpclient.version}</version>
      </dependency>
    </dependencies>
  </dependencyManagement>
如果项目希望进行发布到nexus私服上,需要配置distributionManagement节点的信息,它对应你的.m2/settings.xml里的profile节点信息
 <distributionManagement>
    <repository>
      <id>releases</id>
      <name>Nexus Release Repository</name>
      <url>http://192.168.0.203:8081/repository/maven-releases/</url>
    </repository>
    <snapshotRepository>
      <id>snapshots</id>
      <name>Nexus Snapshot Repository</name>
      <url>http://192.168.0.203:8081/repository/maven-snapshots/</url>
    </snapshotRepository>
使用deploy发布项目
第一次把工具包发到nexus时,需要在点击主项目的 deploy它会把主项目和其子项目同时发到nexus上面,后续可以只deploy修改的项目

在具体项目里使用它
直接在项目的pom里,添加对应的工具包即可,工具包的项目依赖你不需要关心
 <dependency>
      <groupId>com.lind</groupId>
      <artifactId>lind-common</artifactId>
      <version>${lind-common.version}</version>
 </dependency>
注意:对于框架型项目,需要保存你的工具包依赖的项目也在nexus上面,否则会导致加载失败。
以上就是关于springboot~nexus项目打包需要注意哪些地方的内容,如果你们有学习到知识或者技能,可以把它分享出去让更多的人看到。
免责声明:本站发布的内容(图片、视频和文字)以原创、转载和分享为主,文章观点不代表本网站立场,如果涉及侵权请联系站长邮箱:is@yisu.com进行举报,并提供相关证据,一经查实,将立刻删除涉嫌侵权内容。