您好,登录后才能下订单哦!
这篇文章主要介绍“怎么实现两个ABAP系统之间互连”,在日常操作中,相信很多人在怎么实现两个ABAP系统之间互连问题上存在疑惑,小编查阅了各式资料,整理出简单好用的操作方法,希望对大家解答”怎么实现两个ABAP系统之间互连”的疑惑有所帮助!接下来,请跟着小编一起来学习吧!
场景:SAP云平台上的两个ABAP系统实例,一个作为数据的提供者-provision system;另一个作为数据的消费者 - client system,后者从前者读取数据,并显示
实现步骤概述:
(1) client System创建outbound communication. (2) 在provision系统创建inbound communication. (3) Create a Service Consumption Model, and save this locally as a $metadata XML file; From this you will create proxy artefacts in the client system, representing the remote service, and use this model to generate an abstract entity. (4) 创建一个remote client proxy (5) 在client System创建一个OData服务,使用Fiori Elements消费并展示从provision系统取回的数据

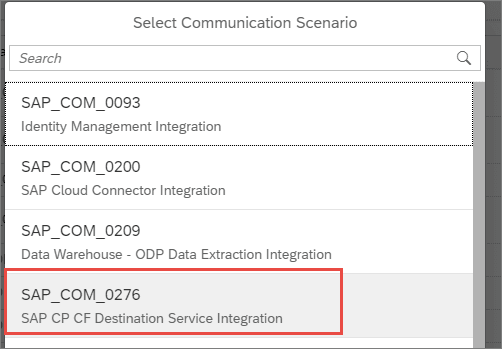
SAP标准发布的Communication Scenario SAP_COM_0276,提供了SAP Cloud Platform ABAP实例同远端的ABAP On-Premises系统或者第三方系统集成的可能性。
A communication arrangement specifies the metadata for a specific communication scenario, such as your host system and the authentication method. This metadata is contained in a service key. You can then define one or more specific destinations for this arrangement.
Communication Arrangement为Communication Scenario指定了必须的元数据,包括通信系统和消息认证方式等信息,这些元数据以Service key的形式存储。可以基于Communication Arrangement创建Destination.
在SAP云平台CloudFoundry环境里创建一个Destination服务实例:


基于这个Destination服务创建一个新的Destination实例:


url字段维护成provision System的url,确保连接能够成功建立。

给Destination service创建一个新的service key,将其内容保存在本地:

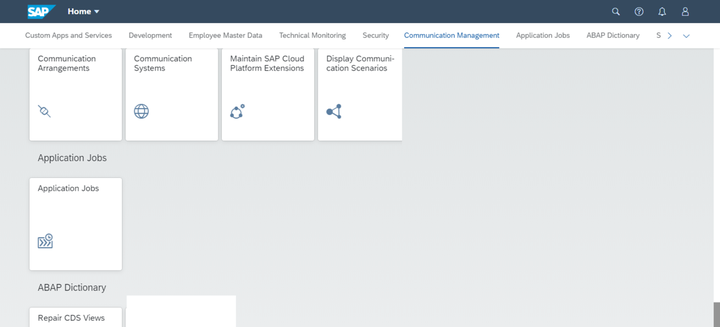
在client System上打开ABAP service instance的dashboard:


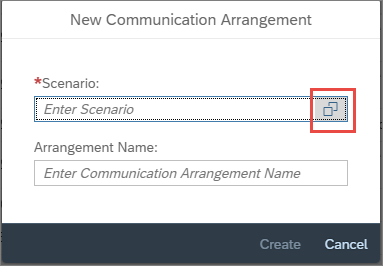
在Communication Arrangement tile里,创建一个新的实例:

从Communication Scenario下拉列表里,选择之前介绍的SAP_COM_0276: SAP CP CF Destination Service integration:


选择好Communication Scenario后,维护Communication Arrangement的名称,比如OUTBOUND_XXX.
在Communication Arrangement的additional properties里,将service instance name的值从默认值OUTBOUND_XXX改成更便于记忆的值,比如Outbound-For-Tutorials_XXX.
最后一步,在ABAP client System上创建ABAP 实现类:
CLASS ZCL_OUTPUT_HTTP_XXX DEFINITION
  PUBLIC
  FINAL
  CREATE PUBLIC .
  PUBLIC SECTION.
    INTERFACES if_oo_adt_classrun.
  PROTECTED SECTION.
  PRIVATE SECTION.
ENDCLASS.
CLASS ZCL_OUTPUT_HTTP_XXX IMPLEMENTATION.
  METHOD if_oo_adt_classrun~main.
     TRY.
        DATA(lo_destination) = cl_http_destination_provider=>create_by_cloud_destination(
          i_name                  = 'A4C_ACCESS_XXX_HTTP'
          i_service_instance_name = 'Outbound-For-Tutorial-XXX'
          i_authn_mode = if_a4c_cp_service=>service_specific ).
        DATA(lo_http_client) = cl_web_http_client_manager=>create_by_http_destination( i_destination = lo_destination ).
        DATA(lo_request) = lo_http_client->get_http_request( ).
        DATA(lo_response) = lo_http_client->execute( i_method = if_web_http_client=>get ).
          out->write( lo_response->get_text( ) ).
      CATCH cx_root INTO DATA(lx_exception).
        out->write( lx_exception->get_text( ) ).
      ENDTRY.
  ENDMETHOD.
ENDCLASS.
第18行的参数i_name的值,就是之前在SAP Cloud Platform里创建的Destination名称。

i_service_instance_name, 就是创建的Communication Arrangement additional properties里创建的Service instance name的值。

执行ABAP类,测试结果如下:

到此,关于“怎么实现两个ABAP系统之间互连”的学习就结束了,希望能够解决大家的疑惑。理论与实践的搭配能更好的帮助大家学习,快去试试吧!若想继续学习更多相关知识,请继续关注亿速云网站,小编会继续努力为大家带来更多实用的文章!
免责声明:本站发布的内容(图片、视频和文字)以原创、转载和分享为主,文章观点不代表本网站立场,如果涉及侵权请联系站长邮箱:is@yisu.com进行举报,并提供相关证据,一经查实,将立刻删除涉嫌侵权内容。