您好,登录后才能下订单哦!
密码登录
登录注册
点击 登录注册 即表示同意《亿速云用户服务条款》
这篇文章给大家介绍CentOS 7.4下安装nginx的步骤是什么,内容非常详细,感兴趣的小伙伴们可以参考借鉴,希望对大家能有所帮助。
一、安装nginx依赖的软件
nginx是C写的,需要用GCC编译;nginx中的rewrite module需要PCRE;nginx中的gzip module需要zlib;nginx中的HTTP SSL module需要OpenSSL。
已安装的GCC版本信息如下:
[root@VM_2_13_centos ~]# gcc -v
Using built-in specs.
COLLECT_GCC=gcc
COLLECT_LTO_WRAPPER=/usr/libexec/gcc/x86_64-redhat-linux/4.8.5/lto-wrapper
Target: x86_64-redhat-linux
Configured with: ../configure --prefix=/usr --mandir=/usr/share/man --infodir=/usr/share/info --with-bugurl=http://bugzilla.redhat.com/bugzilla --enable-bootstrap --enable-shared --enable-threads=posix --enable-checking=release --with-system-zlib --enable-__cxa_atexit --disable-libunwind-exceptions --enable-gnu-unique-object --enable-linker-build-id --with-linker-hash-style=gnu --enable-languages=c,c++,objc,obj-c++,java,fortran,ada,go,lto --enable-plugin --enable-initfini-array --disable-libgcj --with-isl=/builddir/build/BUILD/gcc-4.8.5-20150702/obj-x86_64-redhat-linux/isl-install --with-cloog=/builddir/build/BUILD/gcc-4.8.5-20150702/obj-x86_64-redhat-linux/cloog-install --enable-gnu-indirect-function --with-tune=generic --with-arch_32=x86-64 --build=x86_64-redhat-linux
Thread model: posix
gcc version 4.8.5 20150623 (Red Hat 4.8.5-16) (GCC)
1、zlib源码安装:
zlib下载官网:http://www.zlib.net/
下载zlib最新版本1.2.11源码:
[root@VM_2_13_centos stalker]# wget http://prdownloads.sourceforge.net/libpng/zlib-1.2.11.tar.gz
解压并进入zlib代码根目录:
[root@VM_2_13_centos stalker]# tar zxvf zlib-1.2.11.tar.gz
[root@VM_2_13_centos stalker]# cd zlib-1.2.11
配置、编译、安装:
[root@VM_2_13_centos zlib-1.2.11]# ./configure
[root@VM_2_13_centos zlib-1.2.11]# make
[root@VM_2_13_centos zlib-1.2.11]# make install
rm -f /usr/local/lib/libz.a
cp libz.a /usr/local/lib
chmod 644 /usr/local/lib/libz.a
cp libz.so.1.2.11 /usr/local/lib
chmod 755 /usr/local/lib/libz.so.1.2.11
rm -f /usr/local/share/man/man3/zlib.3
cp zlib.3 /usr/local/share/man/man3
chmod 644 /usr/local/share/man/man3/zlib.3
rm -f /usr/local/lib/pkgconfig/zlib.pc
cp zlib.pc /usr/local/lib/pkgconfig
chmod 644 /usr/local/lib/pkgconfig/zlib.pc
rm -f /usr/local/include/zlib.h /usr/local/include/zconf.h
cp zlib.h zconf.h /usr/local/include
chmod 644 /usr/local/include/zlib.h /usr/local/include/zconf.h
[root@VM_2_13_centos zlib-1.2.11]# whereis zlib
zlib: /usr/include/zlib.h /usr/share/man/man3/zlib.3.gz
2、PCRE源码安装:
PCRE官网:http://www.pcre.org/
下载PCRE最新版本8.41源码:
[root@VM_2_13_centos stalker]# wget http://downloads.sourceforge.net/project/pcre/pcre/8.41/pcre-8.41.tar.gz
解压并进入PCRE代码根目录:
[root@VM_2_13_centos stalker]# tar zxvf pcre-8.41.tar.gz
[root@VM_2_13_centos stalker]# cd pcre-8.41
配置、编译、安装:
[root@VM_2_13_centos pcre-8.41]# ./configure
[root@VM_2_13_centos pcre-8.41]# make
[root@VM_2_13_centos pcre-8.41]# make install
查看版本:
[root@VM_2_13_centos pcre-8.41]# pcre-config --version
8.41
说明安装成功。
3、OpenSSL源码安装:
OpenSSL官网:https://www.openssl.org/
下载OpenSSL版本1.0.2n源码:
[root@VM_2_13_centos stalker]# wget https://www.openssl.org/source/openssl-1.0.2n.tar.gz
解压并进入openssl代码根目录:
[root@VM_2_13_centos stalker]# tar zxvf openssl-1.0.2n.tar.gz
[root@VM_2_13_centos stalker]# cd openssl-1.0.2n
配置、编译、安装:
[root@VM_2_13_centos openssl-1.0.2n]# ./config
[root@VM_2_13_centos openssl-1.0.2n]# make
[root@VM_2_13_centos openssl-1.0.2n]# make install
二、源码安装nginx
下载nginx最新稳定版本1.12.2源码:
[root@VM_2_13_centos stalker]# wget wget http://nginx.org/download/nginx-1.12.2.tar.gz
解压并进入nginx代码根目录:
[root@VM_2_13_centos stalker]# tar zxvf nginx-1.12.2.tar.gz
[root@VM_2_13_centos stalker]# cd nginx-1.12.2
配置:
[root@VM_2_13_centos nginx-1.12.2]# ./configure --with-http_ssl_module --with-pcre=../pcre-8.41 --with-zlib=../zlib-1.2.11
./configure之后的正确信息如下:
Configuration summary
+ using PCRE library: ../pcre-8.41
+ using system OpenSSL library
+ using zlib library: ../zlib-1.2.11
nginx path prefix: "/usr/local/nginx"
nginx binary file: "/usr/local/nginx/sbin/nginx"
nginx modules path: "/usr/local/nginx/modules"
nginx configuration prefix: "/usr/local/nginx/conf"
nginx configuration file: "/usr/local/nginx/conf/nginx.conf"
nginx pid file: "/usr/local/nginx/logs/nginx.pid"
nginx error log file: "/usr/local/nginx/logs/error.log"
nginx http access log file: "/usr/local/nginx/logs/access.log"
nginx http client request body temporary files: "client_body_temp"
nginx http proxy temporary files: "proxy_temp"
nginx http fastcgi temporary files: "fastcgi_temp"
nginx http uwsgi temporary files: "uwsgi_temp"
nginx http scgi temporary files: "scgi_temp"
如果./configure提示OpenSSL找不到:
checking for OpenSSL library ... not found
checking for OpenSSL library in /usr/local/ ... not found
checking for OpenSSL library in /usr/pkg/ ... not found
checking for OpenSSL library in /opt/local/ ... not found
./configure: error: SSL modules require the OpenSSL library.
You can either do not enable the modules, or install the OpenSSL library
into the system, or build the OpenSSL library statically from the source
with nginx by using --with-openssl=<path> option.
按照提示说明,--with-openssl=<source path>即可。
[root@VM_2_13_centos nginx-1.12.2]# ./configure --with-http_ssl_module --with-pcre=../pcre-8.41 --with-zlib=../zlib-1.2.11 --with-openssl=../openssl-1.0.2n
这样就配置正确,信息如下:
Configuration summary
+ using PCRE library: ../pcre-8.41
+ using OpenSSL library: ../openssl-1.0.2n
+ using zlib library: ../zlib-1.2.11
nginx path prefix: "/usr/local/nginx"
nginx binary file: "/usr/local/nginx/sbin/nginx"
nginx modules path: "/usr/local/nginx/modules"
nginx configuration prefix: "/usr/local/nginx/conf"
nginx configuration file: "/usr/local/nginx/conf/nginx.conf"
nginx pid file: "/usr/local/nginx/logs/nginx.pid"
nginx error log file: "/usr/local/nginx/logs/error.log"
nginx http access log file: "/usr/local/nginx/logs/access.log"
nginx http client request body temporary files: "client_body_temp"
nginx http proxy temporary files: "proxy_temp"
nginx http fastcgi temporary files: "fastcgi_temp"
nginx http uwsgi temporary files: "uwsgi_temp"
nginx http scgi temporary files: "scgi_temp"
编译安装:
[root@VM_2_13_centos nginx-1.12.2]# make
[root@VM_2_13_centos nginx-1.12.2]# make install
检查nginx.conf配置正确性:
[root@VM_2_13_centos ~]# /usr/local/nginx/sbin/nginx -t
nginx: the configuration file /usr/local/nginx/conf/nginx.conf syntax is ok
nginx: configuration file /usr/local/nginx/conf/nginx.conf test is successful
启动nginx:
[root@VM_2_13_centos ~]# /usr/local/nginx/sbin/nginx
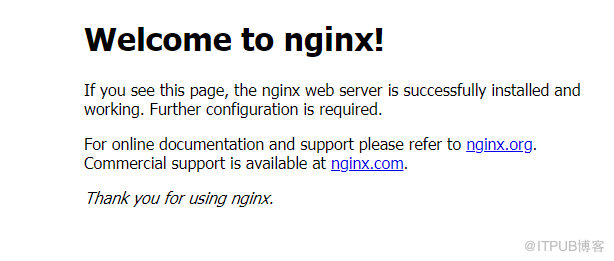
在浏览器中输入主机IP地址看到如下的页面说明nginx安装成功
nginx加入到开机自动启动
先编辑系统启动脚本vim /etc/rc.local 这个文件是系统启动后会自动执行的,我们就将启动命令加入到这个文件中
[root@VM_2_13_centos ~]# vim /etc/rc.local
/usr/local/nginx/sbin/nginx -c /usr/local/nginx/conf/nginx.conf & >/tmp/nginx.log 2>&1
查看nginx的进程
[root@VM_2_13_centos ~]# ps -ef | grep nginx
root 16976 16360 0 18:03 pts/2 00:00:00 grep --color=auto nginx
root 25192 1 0 13:25 ? 00:00:00 nginx: master process /usr/local/nginx/sbin/nginx
nobody 25769 25192 0 13:37 ? 00:00:00 nginx: worker process
修改全局的环境变量
[root@VM_2_13_centos ~]# vim /etc/profile
export PATH=$PATH:/usr/local/mysql/bin:/usr/local/nginx/sbin
Nginx的默认安装位置
/usr/local/nginx
/usr/local/nginx/conf/nginx.conf //nginx的配置文件
/usr/local/nginx/html //默认的网页文件
相关连接:
CentOS 7.4 搭建LNMP(Linux+Nginx+MySQL+PHP):
https://blog.csdn.net/u014558668/article/details/79314878
CentOS 7.4 使用yum源安装PHP 5.4.16
https://blog.csdn.net/u014558668/article/details/79315641
CentOS 7下安装mongodb和php扩展mongodb:
https://blog.csdn.net/username11211/article/details/52945488
CentOS 7下安装php-redis扩展及简单使用:
https://blog.csdn.net/baidu_30000217/article/details/51481138
关于CentOS 7.4下安装nginx的步骤是什么就分享到这里了,希望以上内容可以对大家有一定的帮助,可以学到更多知识。如果觉得文章不错,可以把它分享出去让更多的人看到。
免责声明:本站发布的内容(图片、视频和文字)以原创、转载和分享为主,文章观点不代表本网站立场,如果涉及侵权请联系站长邮箱:is@yisu.com进行举报,并提供相关证据,一经查实,将立刻删除涉嫌侵权内容。