您好,登录后才能下订单哦!
密码登录
登录注册
点击 登录注册 即表示同意《亿速云用户服务条款》
今天就跟大家聊聊有关使用python openCV实现绘画板,可能很多人都不太了解,为了让大家更加了解,小编给大家总结了以下内容,希望大家根据这篇文章可以有所收获。
import numpy as np
import cv2
def nothing(x):
  pass
cv2.namedWindow('image')
img = np.zeros((512,512,3),np.uint8)
cv2.createTrackbar('R','image',0,255,nothing)
cv2.createTrackbar('G','image',0,255,nothing)
cv2.createTrackbar('B','image',0,255,nothing)
drawing = False
mode = True
ix,iy = -1,-1
def drawing_fragment(event,x,y,flags,param):
  r = cv2.getTrackbarPos('R','image')
  g = cv2.getTrackbarPos('G','image')
  b = cv2.getTrackbarPos('B','image')
  color = (b,g,r)
  global drawing,ix,iy,mode
  if event == cv2.EVENT_LBUTTONDOWN:
    drawing = True
    ix = x
    iy = y
  elif event == cv2.EVENT_MOUSEMOVE:
    if drawing:
      if mode:
        cv2.rectangle(img,(ix,iy),(x,y),color,-1)
      else:
        cv2.circle(img,(x,y),5,color,-1)
  elif event == cv2.EVENT_LBUTTONUP:
    drawing = False

cv2.setMouseCallback('image',drawing_fragment)
while True:
  cv2.imshow('image',img)
  k = cv2.waitKey(2)
  if k == 27:
    break
  elif k == ord('q'):
    mode = not mode
cv2.destroyAllWindows()
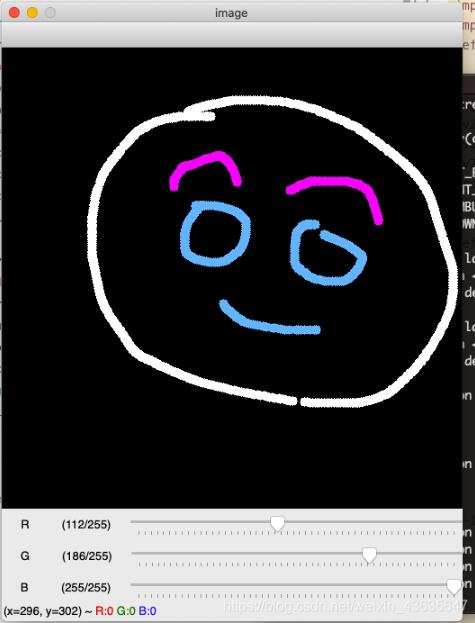
测试效果

看完上述内容,你们对使用python openCV实现绘画板有进一步的了解吗?如果还想了解更多知识或者相关内容,请关注亿速云行业资讯频道,感谢大家的支持。
免责声明:本站发布的内容(图片、视频和文字)以原创、转载和分享为主,文章观点不代表本网站立场,如果涉及侵权请联系站长邮箱:is@yisu.com进行举报,并提供相关证据,一经查实,将立刻删除涉嫌侵权内容。