您好,登录后才能下订单哦!
本篇文章给大家分享的是有关Intellij搭建springmvc时常见问题的解决方法,小编觉得挺实用的,因此分享给大家学习,希望大家阅读完这篇文章后可以有所收获,话不多说,跟着小编一起来看看吧。
注意是maven的webapp:
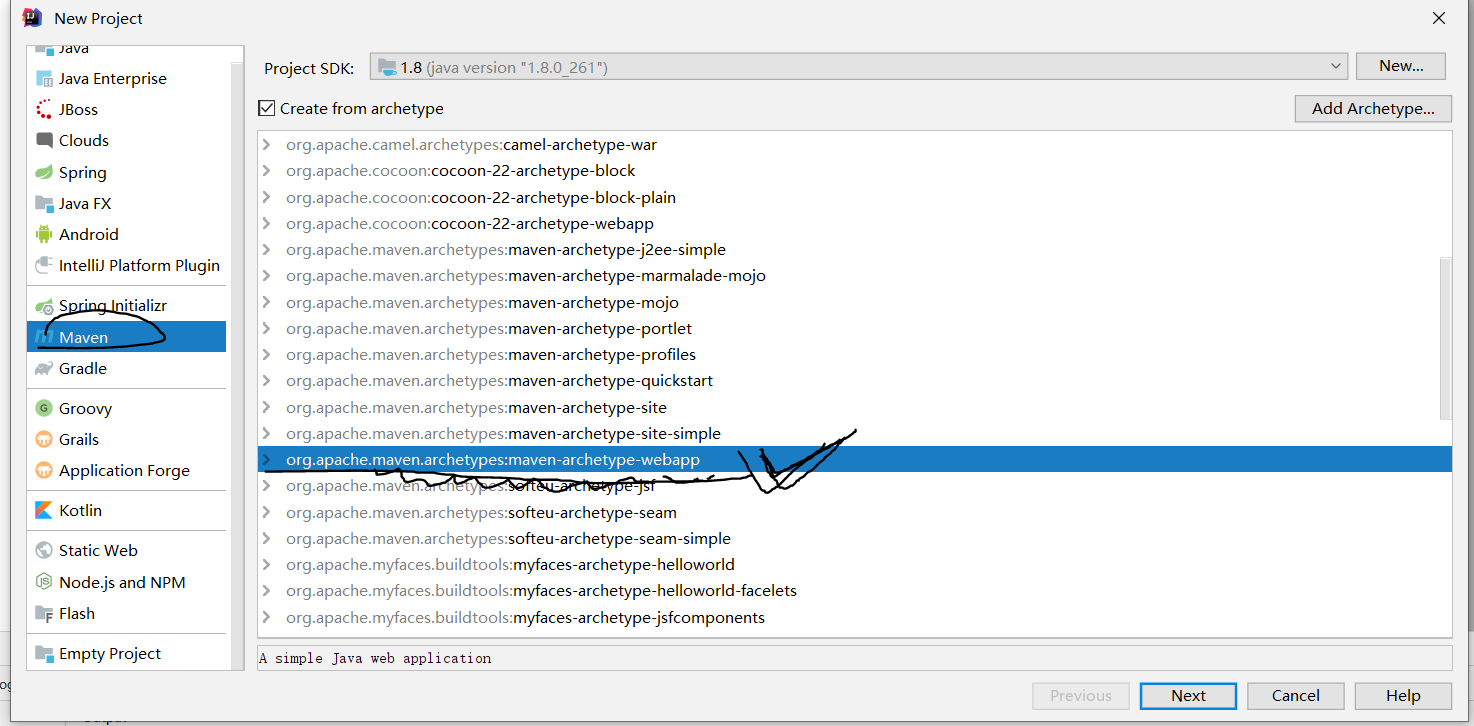
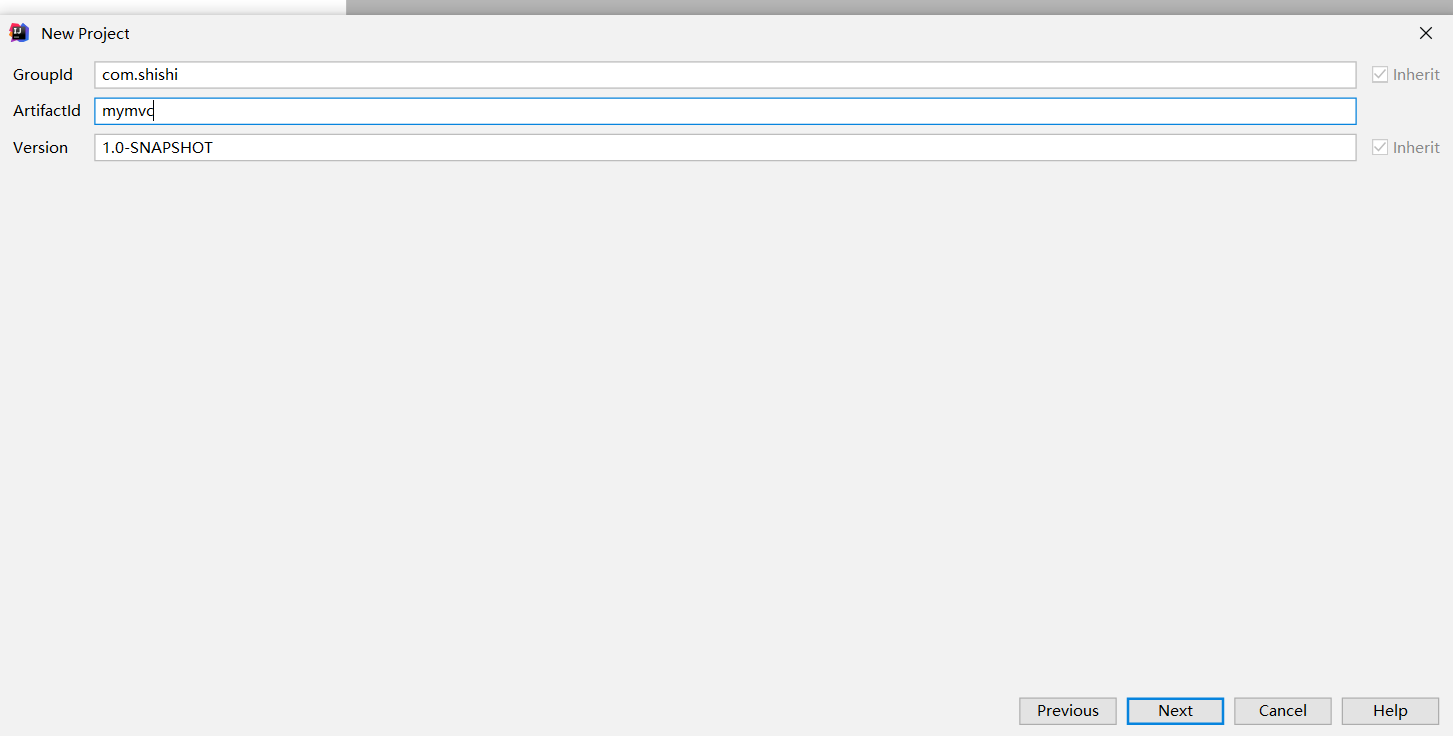
选择maven下一步下一步。
maven下载过慢在setting中加入镜像。 我也有疑问这是什么鬼格式,但是证明,格式不用调整,直接粘贴进去:
<mirror>

   <id>
    nexus-aliyun
   </id>
  <mirrorOf>
  *
  </mirrorOf>
  <name>
    Nexus aliyun
  </name>
  <url>
    http://maven.aliyun.com/nexus/content/groups/public
  </url>
</mirror>
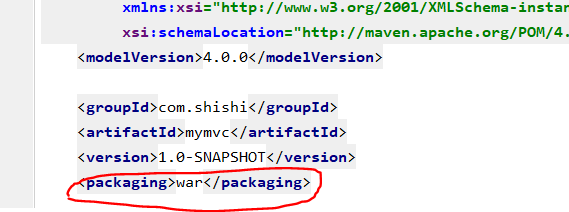
我在这里踩了一个特郁闷的坑,注意看这里,没有package war, 这里有毒,导致我的tomcat一直加不进去artifacts
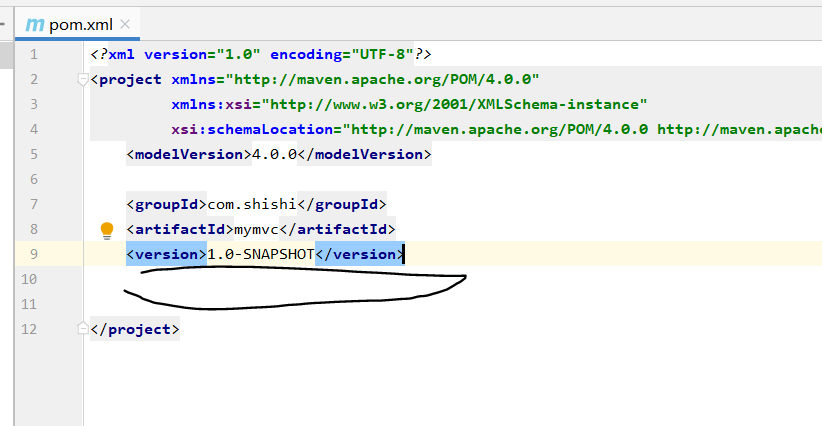
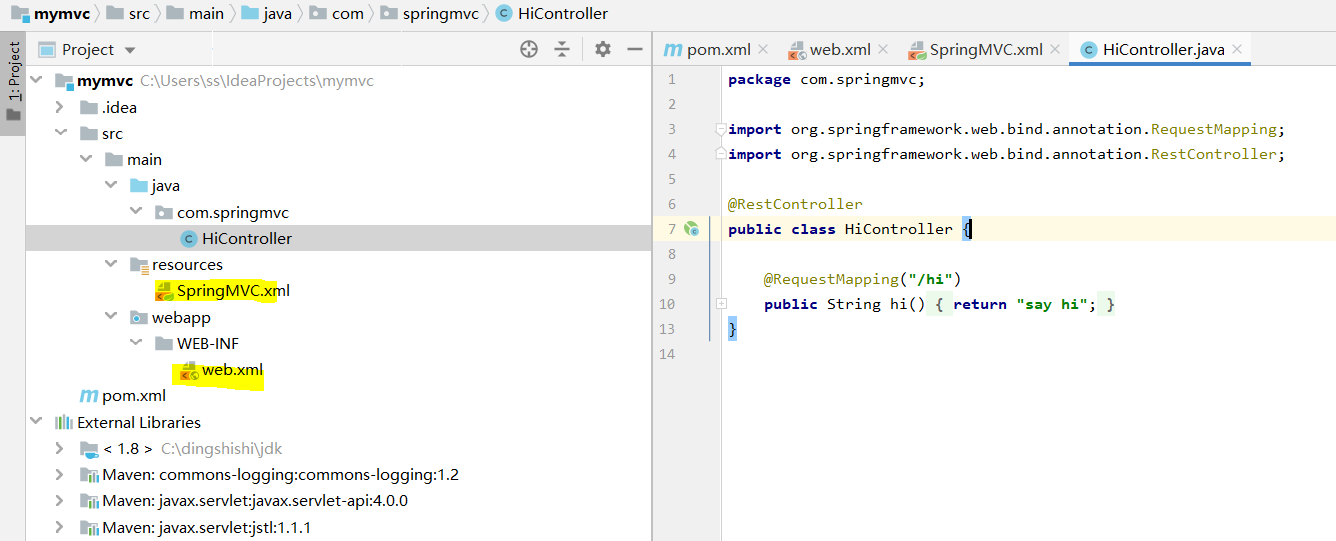
暂时就是这个鬼样子的结构,手动补全结构,

调整一下包:
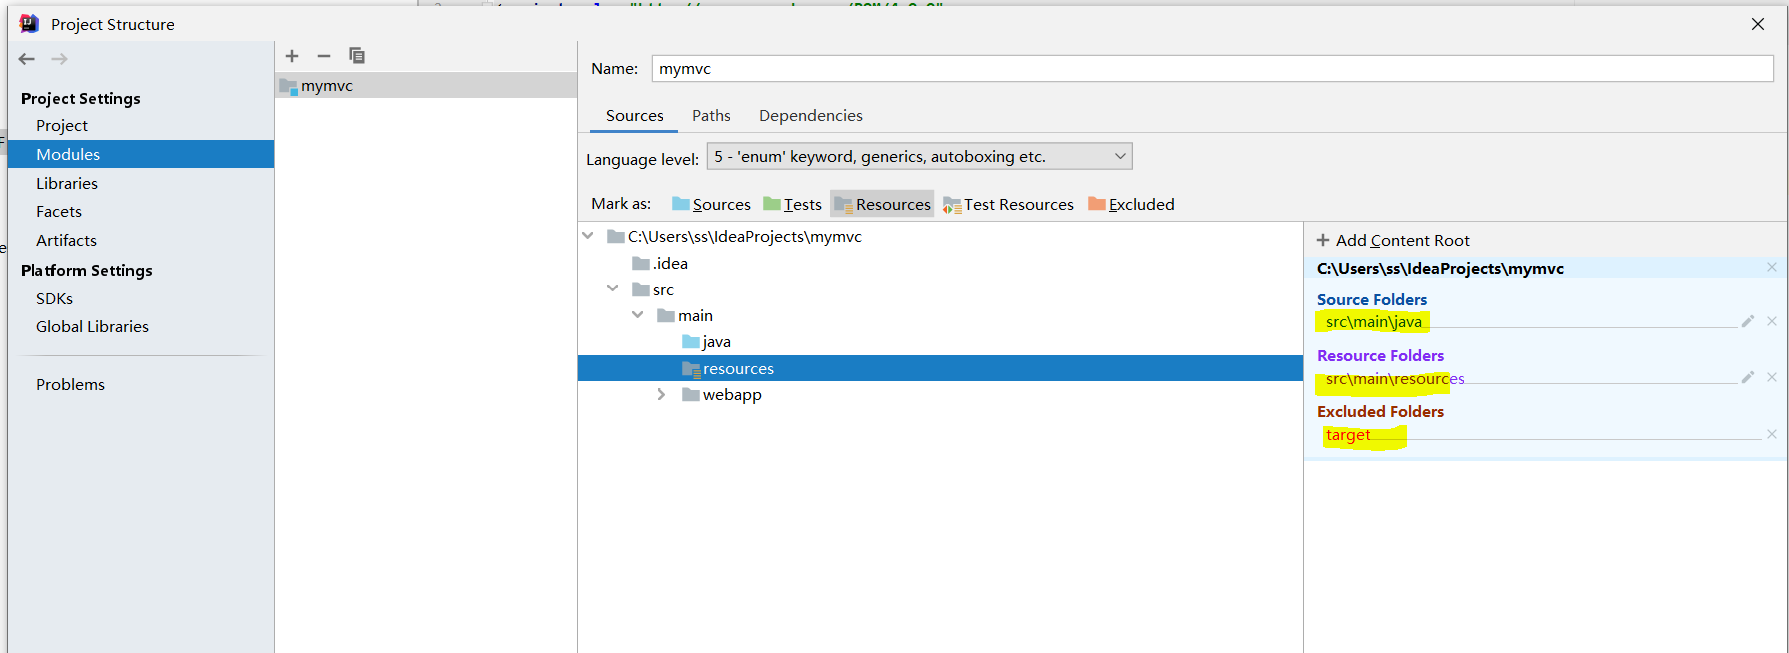
加入和pom中的依赖 和 web.xml和 springmvc.xml
注意这里别丢了 pom:
pom.xml:
<?xml version="1.0" encoding="UTF-8"?>
<project xmlns="http://maven.apache.org/POM/4.0.0"
xmlns:xsi="http://www.w3.org/2001/XMLSchema-instance"
xsi:schemaLocation="http://maven.apache.org/POM/4.0.0 http://maven.apache.org/xsd/maven-4.0.0.xsd">
<modelVersion>4.0.0</modelVersion>
<groupId>com.shishi</groupId>
<artifactId>mymvc</artifactId>
<version>1.0-SNAPSHOT</version>
<packaging>war</packaging>
<properties>
<project.build.sourceEncoding>UTF-8</project.build.sourceEncoding>
<maven.compiler.source>1.7</maven.compiler.source>
<maven.compiler.target>1.7</maven.compiler.target>
<spring-version>5.2.8.RELEASE</spring-version>
</properties>
<dependencies>
<dependency>
<groupId>org.springframework</groupId>
<artifactId>spring-context</artifactId>
<version>${spring-version}</version>
</dependency>
<dependency>
<groupId>org.springframework</groupId>
<artifactId>spring-webmvc</artifactId>
<version>5.2.8.RELEASE</version>
</dependency>
<dependency>
<groupId>commons-logging</groupId>
<artifactId>commons-logging</artifactId>
<version>1.2</version>
</dependency>
<dependency>
<groupId>junit</groupId>
<artifactId>junit</artifactId>
<version>4.11</version>
<scope>test</scope>
</dependency>
<dependency>
<groupId>javax.servlet</groupId>
<artifactId>javax.servlet-api</artifactId>
<version>4.0.0</version>
<scope>provided</scope>
</dependency>
<dependency>
<groupId>javax.servlet</groupId>
<artifactId>jstl</artifactId>
<version>1.1.1</version>
</dependency>
<dependency>
<groupId>taglibs</groupId>
<artifactId>standard</artifactId>
<version>1.1.1</version>
</dependency>
</dependencies>
</project>web.xml:
<?xml version="1.0" encoding="UTF-8"?>
<web-app xmlns:xsi="http://www.w3.org/2001/XMLSchema-instance"
xmlns="http://java.sun.com/xml/ns/javaee"
xsi:schemaLocation="http://java.sun.com/xml/ns/javaee http://java.sun.com/xml/ns/javaee/web-app_3_0.xsd"
id="WebApp_ID" version="3.0">
<servlet>
<servlet-name>SpringMVC</servlet-name>
<servlet-class>org.springframework.web.servlet.DispatcherServlet</servlet-class>
<init-param>
<param-name>contextConfigLocation</param-name>
<param-value>classpath:SpringMVC.xml</param-value>
</init-param>
<load-on-startup>1</load-on-startup>
</servlet>
<servlet-mapping>
<servlet-name>SpringMVC</servlet-name>
<url-pattern>/</url-pattern>
</servlet-mapping>
</web-app>springmvc.xml:
<?xml version="1.0" encoding="UTF-8"?>
<beans xmlns="http://www.springframework.org/schema/beans"
xmlns:xsi="http://www.w3.org/2001/XMLSchema-instance"
xmlns:context="http://www.springframework.org/schema/context"
xmlns:mvc="http://www.springframework.org/schema/mvc"
xsi:schemaLocation="http://www.springframework.org/schema/beans http://www.springframework.org/schema/beans/spring-beans.xsd http://www.springframework.org/schema/context https://www.springframework.org/schema/context/spring-context.xsd http://www.springframework.org/schema/mvc https://www.springframework.org/schema/mvc/spring-mvc.xsd">
<context:component-scan base-package="com.springmvc"></context:component-scan>
<bean id="internalResourceViewResolver" class="org.springframework.web.servlet.view.InternalResourceViewResolver">
<property name="prefix" value="/jsp/"></property>
<property name="suffix" value=".jsp"></property>
</bean>
<!--能访问到静态资源,但是URL和控制器中对应的方法没有映射关系-->
<mvc:default-servlet-handler/>
<mvc:annotation-driven></mvc:annotation-driven>
</beans>这已经是很精简版的了。
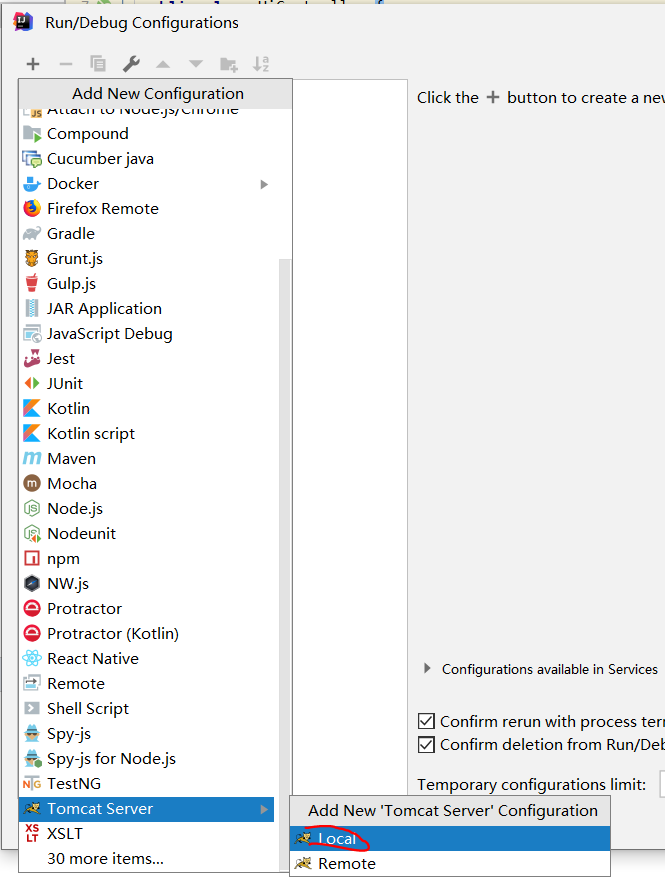
配置tomcat, 我在这里遇到了问题,记录详细点:

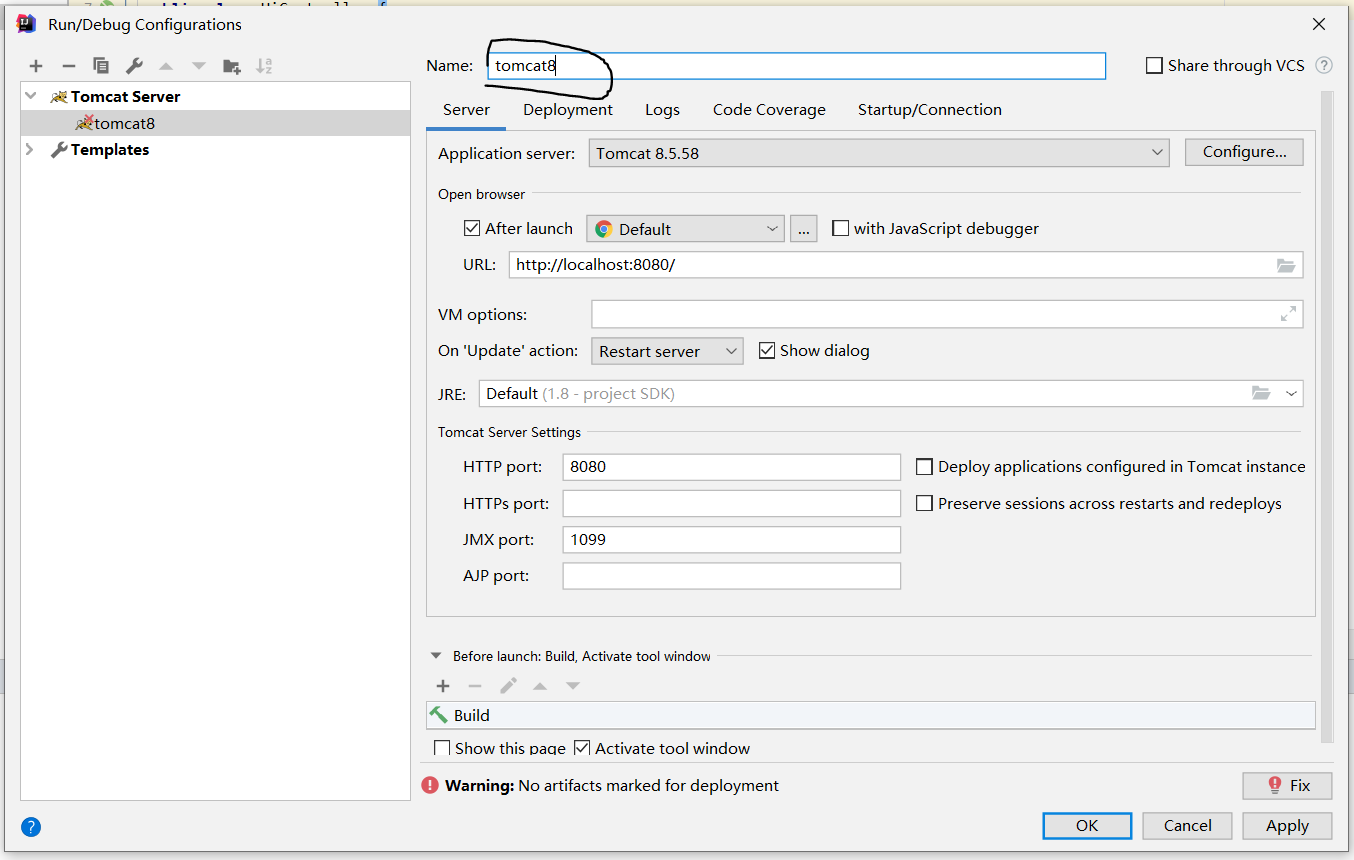
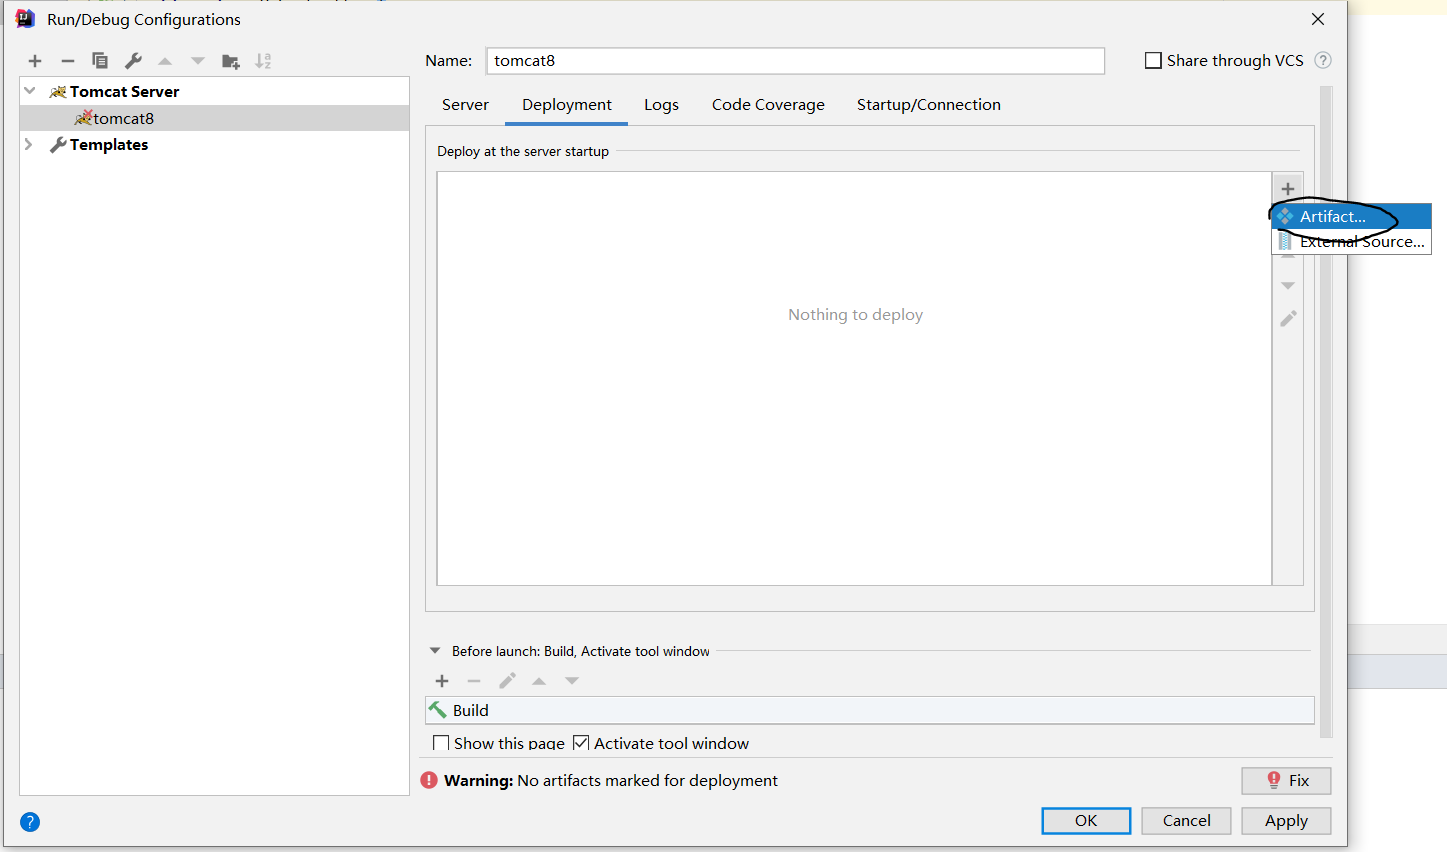
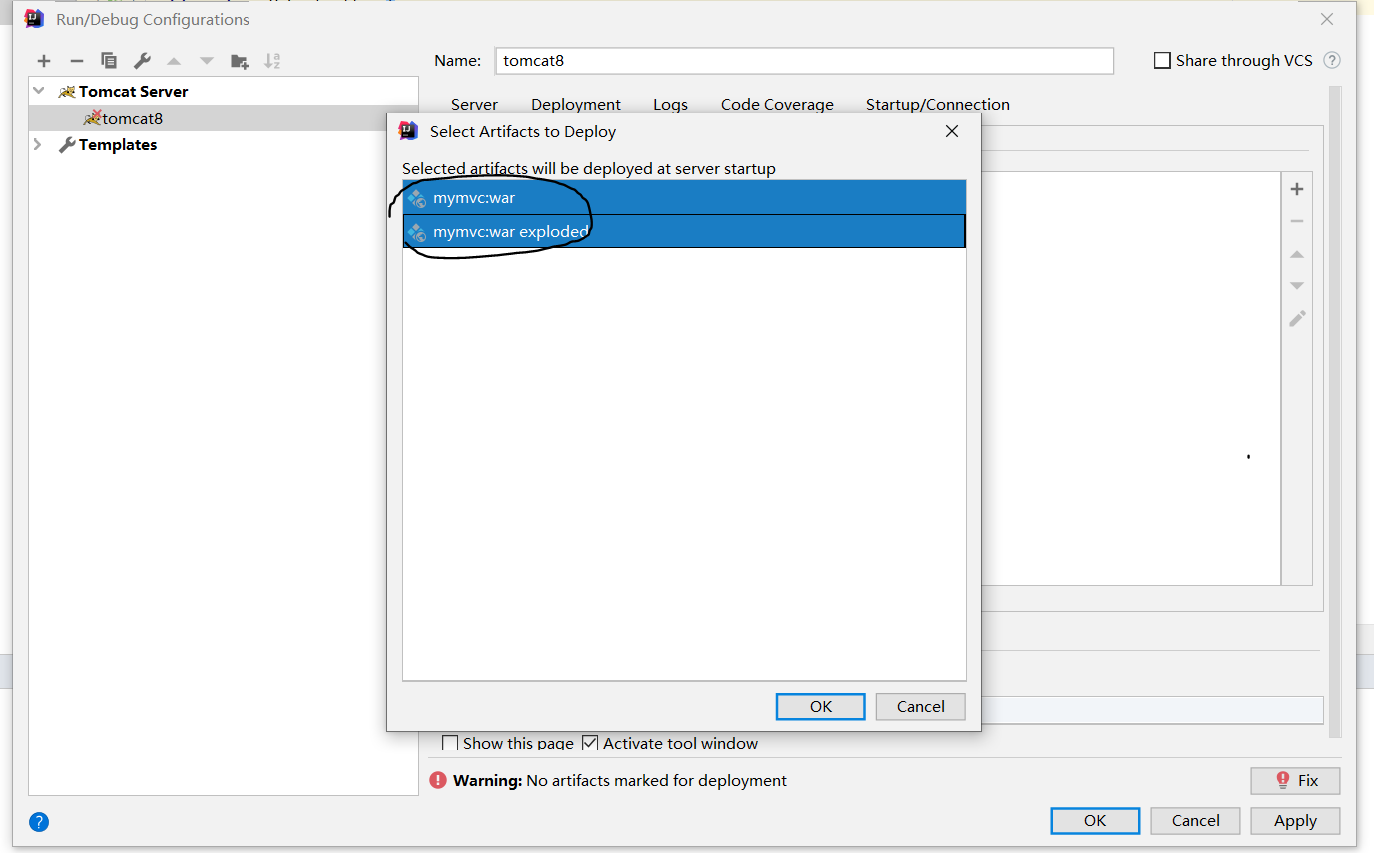
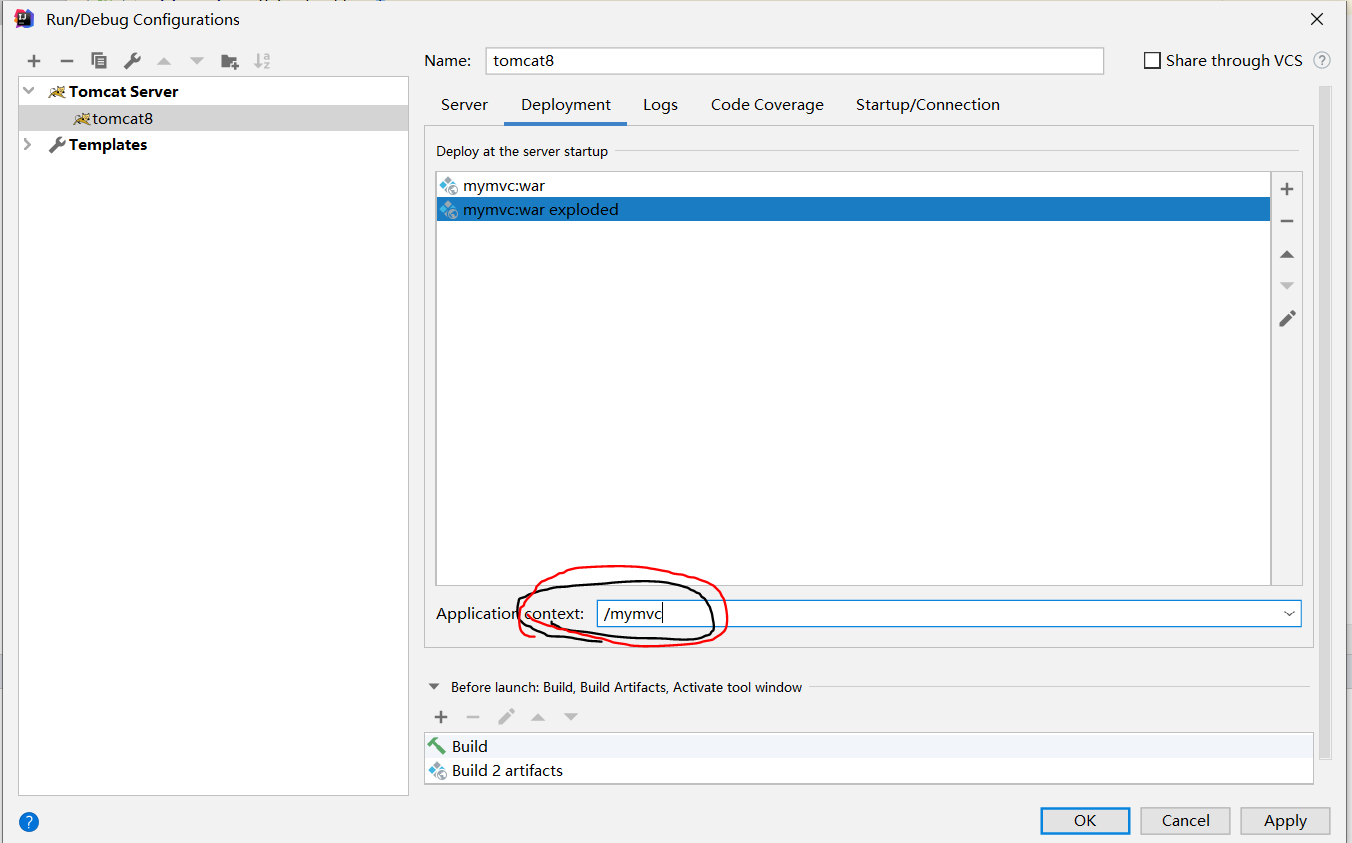
(上面删除了mymvc:war也是可以的。图就懒得替换了。)
ok
启动tomcat成功:

而且注意这里不要用http://localhost:8080/ 去试,会404.
以上就是Intellij搭建springmvc时常见问题的解决方法,小编相信有部分知识点可能是我们日常工作会见到或用到的。希望你能通过这篇文章学到更多知识。更多详情敬请关注亿速云行业资讯频道。
免责声明:本站发布的内容(图片、视频和文字)以原创、转载和分享为主,文章观点不代表本网站立场,如果涉及侵权请联系站长邮箱:is@yisu.com进行举报,并提供相关证据,一经查实,将立刻删除涉嫌侵权内容。