您好,登录后才能下订单哦!
密码登录
登录注册
点击 登录注册 即表示同意《亿速云用户服务条款》
本篇内容主要讲解“ASP .NET怎么实现可编辑输入自动匹配的下拉框”,感兴趣的朋友不妨来看看。本文介绍的方法操作简单快捷,实用性强。下面就让小编来带大家学习“ASP .NET怎么实现可编辑输入自动匹配的下拉框”吧!
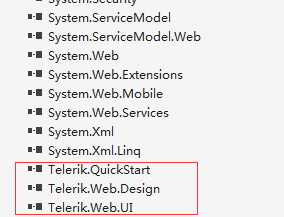
一. 引用dll文件

二. aspx前台页面应用该控件
<%@ Register TagPrefix="telerik" Namespace="Telerik.Web.UI" Assembly="Telerik.Web.UI" %>
    <%@ Register TagPrefix="qsf" Namespace="Telerik.QuickStart" %>
小区:
 <telerik:RadComboBox RenderMode="Lightweight" ID="DropDownList1" AllowCustomText="true" AutoPostBack="True" runat="server" Width="110px" Height="400px"
  EmptyMessage="请输入小区名称" OnSelectedIndexChanged="DropDownList1_SelectedIndexChanged" OnItemsRequested="DropDownList1_ItemsRequested" MarkFirstMatch="true" EnableLoadOnDemand="true"
   HighlightTemplatedItems="true" DropDownCssClass="exampleRadComboBox">
    </telerik:RadComboBox>
三. aspx.cs文件给下拉框绑定下拉选项数据
this.DropDownList1.DataSource = (new BLL_TArea()).GetAllAreaInfo();
   this.DropDownList1.DataTextField = "AREANAME";
   this.DropDownList1.DataValueField = "AREAGUID";
   this.DropDownList1.DataBind();
   DropDownList1.Items.FindItemByValue(BaseClass.Utility.Cookie.GetCookie("AreaGuid")).Selected = true;
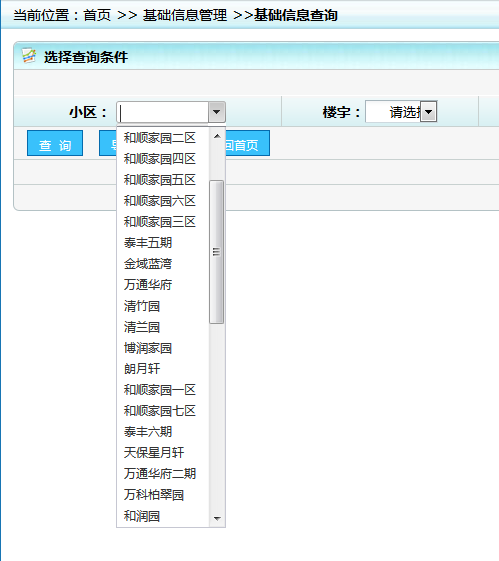
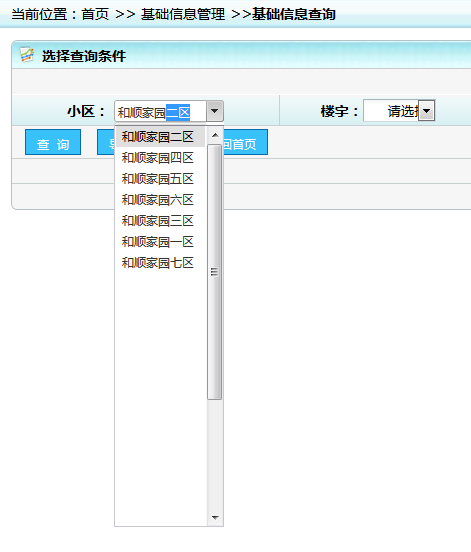
三. 检索效果
检索前:

检索后:

到此,相信大家对“ASP .NET怎么实现可编辑输入自动匹配的下拉框”有了更深的了解,不妨来实际操作一番吧!这里是亿速云网站,更多相关内容可以进入相关频道进行查询,关注我们,继续学习!
免责声明:本站发布的内容(图片、视频和文字)以原创、转载和分享为主,文章观点不代表本网站立场,如果涉及侵权请联系站长邮箱:is@yisu.com进行举报,并提供相关证据,一经查实,将立刻删除涉嫌侵权内容。