您好,登录后才能下订单哦!
密码登录
登录注册
点击 登录注册 即表示同意《亿速云用户服务条款》
使用TP5框架怎么实现多图上传功能?相信很多没有经验的人对此束手无策,为此本文总结了问题出现的原因和解决方法,通过这篇文章希望你能解决这个问题。
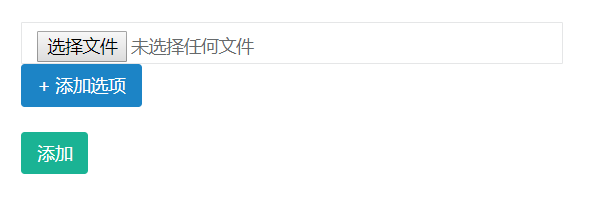
1、效果图(每点击一次‘添加选项',就会有一个新的 file 框来添加新的图片)
2、view
<!--不要忘了引入jquery文件-->
<!-- post传值方式和文件传输协议一定要加上 -->
<input type="file" name="image[]">
<input type="button" id="add" name="add" value="+ 添加选项">
<button type="submit" name="submit">添加</button>

<script type="text/javascript">
  $("#add").click(function(){
    $(this).before('<input type="file" name="image[]">');
  });
</script>
3、controller
//接收从view来的图片数组
$image=request()->file('image');

//实例化模型,并调用里面的添加图片的方法
$details = new Details();
$info = $details->add($image);
if($info === 1)
{
  return '操作成功';
}
else
{
  return '操作失败';
}
4、model
//将接收到的 $image foreach遍历添加
foreach($image as $image)
{
  //实例化模型
  $details = new Details();
  $time=date('Ymd',time());
  //将当前的时间戳定义为文件名
  $filename=time();
  //检测是否存在存放图片的文件夹
  if(!file_exists(ROOT_PATH . 'public' . DS .'static'. DS .'img'))
  {
    //创建文件
    mkdir(ROOT_PATH . 'public' . DS .'static'. DS .'img');
  }
  //上传图片
  $info=$image->move(ROOT_PATH . 'public' . DS .'static'. DS .'img'.DS.$time,$filename);
  //将图片路径存放在数据库中
  $details->url = $time.DS.$info->getFileName();
  $details->allowField(true)->save();
}
return 1;
看完上述内容,你们掌握使用TP5框架怎么实现多图上传功能的方法了吗?如果还想学到更多技能或想了解更多相关内容,欢迎关注亿速云行业资讯频道,感谢各位的阅读!
免责声明:本站发布的内容(图片、视频和文字)以原创、转载和分享为主,文章观点不代表本网站立场,如果涉及侵权请联系站长邮箱:is@yisu.com进行举报,并提供相关证据,一经查实,将立刻删除涉嫌侵权内容。