жӮЁеҘҪпјҢзҷ»еҪ•еҗҺжүҚиғҪдёӢи®ўеҚ•е“ҰпјҒ
иҝҷжңҹеҶ…е®№еҪ“дёӯе°Ҹзј–е°Ҷдјҡз»ҷеӨ§е®¶еёҰжқҘжңүе…іеҰӮдҪ•еңЁLaravel дёӯдҪҝз”ЁElasticsearch е®һзҺ°дёҖдёӘдёӯж–ҮжҗңзҙўеҠҹиғҪпјҢж–Үз« еҶ…е®№дё°еҜҢдё”д»Ҙдё“дёҡзҡ„и§’еәҰдёәеӨ§е®¶еҲҶжһҗе’ҢеҸҷиҝ°пјҢйҳ…иҜ»е®ҢиҝҷзҜҮж–Үз« еёҢжңӣеӨ§е®¶еҸҜд»ҘжңүжүҖ收иҺ·гҖӮ
Elasticsearch
Elasticsearch жҳҜдёҖдёӘеҹәдәҺ Apache Lucene(TM) зҡ„ејҖжәҗжҗңзҙўеј•ж“ҺпјҢж— и®әеңЁејҖжәҗиҝҳжҳҜдё“жңүйўҶеҹҹпјҢLuceneеҸҜ д»Ҙиў«и®ӨдёәжҳҜиҝ„д»ҠдёәжӯўжңҖе…ҲиҝӣгҖҒжҖ§иғҪжңҖеҘҪзҡ„гҖҒеҠҹиғҪжңҖе…Ёзҡ„жҗңзҙўеј•ж“Һеә“гҖӮ
дҪҶжҳҜпјҢLucene еҸӘжҳҜдёҖдёӘеә“гҖӮжғіиҰҒеҸ‘жҢҘе…¶ејәеӨ§зҡ„дҪңз”ЁпјҢдҪ йңҖдҪҝз”Ё Java 并иҰҒе°Ҷе…¶йӣҶжҲҗеҲ°дҪ зҡ„еә”з”ЁдёӯгҖӮLucene йқһеёёеӨҚжқӮпјҢдҪ йңҖиҰҒж·ұе…Ҙзҡ„дәҶи§ЈжЈҖзҙўзӣёе…ізҹҘиҜҶжқҘзҗҶи§Је®ғжҳҜеҰӮдҪ•е·ҘдҪңзҡ„гҖӮ
Elasticsearch д№ҹжҳҜдҪҝз”Ё Java зј–еҶҷ并дҪҝз”Ё Lucene жқҘе»әз«Ӣзҙўеј•е№¶е®һзҺ°жҗңзҙўеҠҹиғҪпјҢдҪҶжҳҜе®ғзҡ„зӣ®зҡ„жҳҜйҖҡиҝҮз®ҖеҚ•иҝһиҙҜзҡ„ RESTful API и®©е…Ёж–ҮжҗңзҙўеҸҳеҫ—з®ҖеҚ•е№¶йҡҗи—Ҹ Lucene зҡ„еӨҚжқӮжҖ§гҖӮ
дёҚиҝҮпјҢElasticsearch дёҚд»…д»…жҳҜ Lucene е’Ңе…Ёж–Үжҗңзҙўеј•ж“ҺпјҢе®ғиҝҳжҸҗдҫӣпјҡ
еҲҶеёғејҸзҡ„е®һж—¶ж–Ү件еӯҳеӮЁпјҢжҜҸдёӘеӯ—ж®өйғҪиў«зҙўеј•е№¶еҸҜиў«жҗңзҙў
е®һж—¶еҲҶжһҗзҡ„еҲҶеёғејҸжҗңзҙўеј•ж“Һ
еҸҜд»Ҙжү©еұ•еҲ°дёҠзҷҫеҸ°жңҚеҠЎеҷЁпјҢеӨ„зҗҶPBзә§з»“жһ„еҢ–жҲ–йқһз»“жһ„еҢ–ж•°жҚ®
иҖҢдё”пјҢжүҖжңүзҡ„иҝҷдәӣеҠҹиғҪиў«йӣҶжҲҗеҲ°дёҖеҸ°жңҚеҠЎеҷЁпјҢдҪ зҡ„еә”з”ЁеҸҜд»ҘйҖҡиҝҮз®ҖеҚ•зҡ„ RESTful APIгҖҒеҗ„з§ҚиҜӯиЁҖзҡ„е®ўжҲ·з«Ҝз”ҡиҮіе‘Ҫд»ӨиЎҢдёҺд№ӢдәӨдә’гҖӮдёҠжүӢ Elasticsearch йқһеёёз®ҖеҚ•пјҢе®ғжҸҗдҫӣдәҶи®ёеӨҡеҗҲзҗҶзҡ„зјәзңҒеҖјпјҢ并еҜ№еҲқеӯҰиҖ…йҡҗи—ҸдәҶеӨҚжқӮзҡ„жҗңзҙўеј•ж“ҺзҗҶи®әгҖӮе®ғејҖз®ұеҚіз”ЁпјҲе®үиЈ…еҚіеҸҜдҪҝз”ЁпјүпјҢеҸӘйңҖеҫҲе°‘зҡ„еӯҰд№ ж—ўеҸҜеңЁз”ҹдә§зҺҜеўғдёӯдҪҝз”ЁгҖӮ
Elasticsearch еңЁ Apache 2 license дёӢи®ёеҸҜдҪҝз”ЁпјҢеҸҜд»Ҙе…Қиҙ№дёӢиҪҪгҖҒдҪҝз”Ёе’Ңдҝ®ж”№гҖӮ
ElasticSearch е®үиЈ…
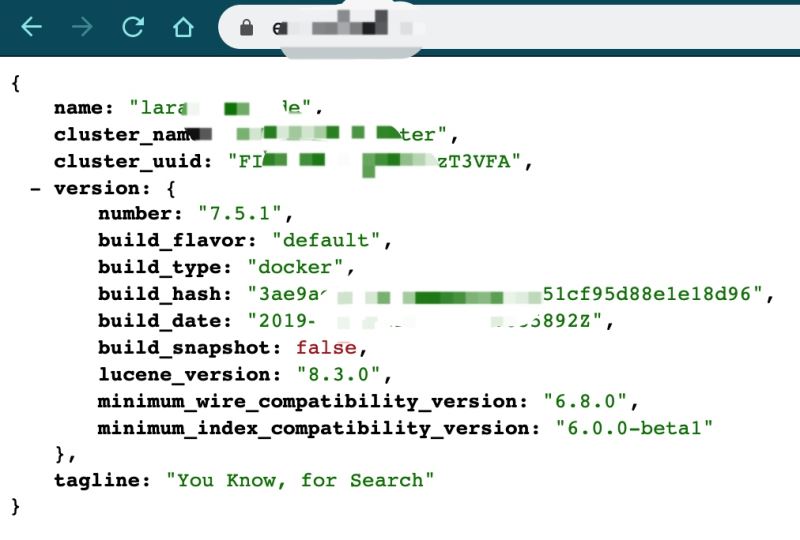
еңЁ Laradock дёӯе·Із»ҸйӣҶжҲҗдәҶ ElasticSearchгҖӮжҲ‘们еҸҜд»ҘзӣҙжҺҘдҪҝз”Ёпјҡ
docker-compose up -d elasticsearch
еҰӮжһңйңҖиҰҒе®үиЈ…жҸ’件пјҢжү§иЎҢе‘Ҫд»Өпјҡ
docker-compose exec elasticsearch /usr/share/elasticsearch/bin/elasticsearch-plugin install {plugin-name}
// йҮҚеҗҜе®№еҷЁ
docker-compose restart elasticsearchжіЁпјҡ
The vm.max_map_count kernel setting must be set to at least 262144 for production use.з”ұдәҺжҲ‘жҳҜ centos 7 зҺҜеўғпјҢзӣҙжҺҘи®ҫзҪ®еңЁзі»з»ҹи®ҫзҪ®пјҡ
й»ҳи®Өз”ЁжҲ·еҗҚе’ҢеҜҶз ҒпјҡгҖҢelasticгҖҚгҖҒгҖҢchangemeгҖҚпјҢз«ҜеҸЈеҸ·пјҡ9200sysctl -w vm.max_map_count=262144
ElasticHQ

ElasticHQ is an open source application that offers a simplified interface for managing and monitoring Elasticsearch clusters.Management and Monitoring for Elasticsearch.
http://www.elastichq.org/
Real-Time Monitoring
Full Cluster Management
Full Cluster Monitoring
Elasticsearch Version Agnostic
Easy Install - Always On
Works with X-Pack
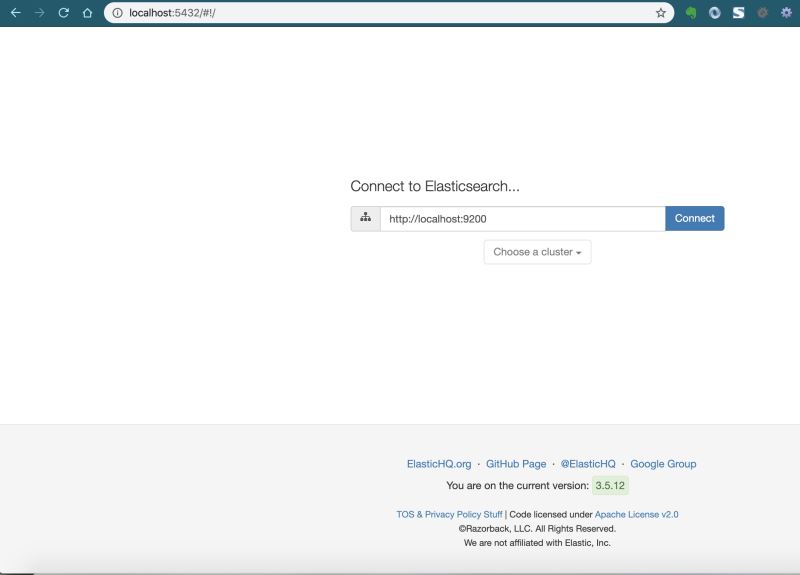
иҫ“е…ҘжҲ‘们зҡ„ Elasticsearch HostпјҢеҚіеҸҜиҝӣе…ҘеҗҺеҸ°гҖӮ
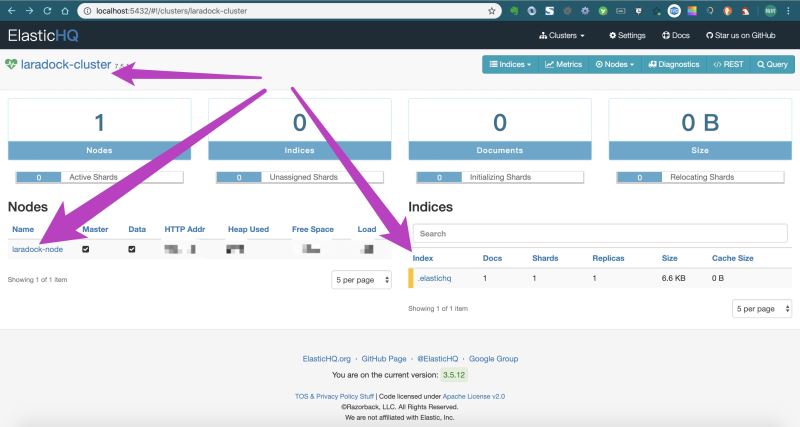
й»ҳи®Өзҡ„еҲӣе»әдәҶпјҡ
дёҖдёӘйӣҶзҫӨ clusterпјҡlaradock-cluster
дёҖдёӘиҠӮзӮ№ nodeпјҡlaradock-node
дёҖдёӘзҙўеј• indexпјҡ.elastichq
IK еҲҶиҜҚеҷЁе®үиЈ…
ElasticSearch дё»иҰҒжҳҜз”ЁдәҺиҮӘе·ұ blog жҲ–иҖ…е…¬дј—еҸ·ж–Үз« зҡ„жҗңзҙўдҪҝз”ЁпјҢжүҖд»ҘйңҖиҰҒйҖүжӢ©дёҖдёӘдёӯж–ҮеҲҶиҜҚеҷЁй…ҚеҗҲдҪҝз”ЁпјҢиҝҷйҮҢеҲҡејҖе§ӢжҺЁиҚҗдҪҝз”Ё IK еҲҶиҜҚеҷЁпјҢдёӢйқўејҖе§Ӣе®үиЈ…еҜ№еә” ElasticSearchзүҲжң¬ (7.5.1) дёҖиҮҙзҡ„жҸ’件пјҡ
https://github.com/medcl/elasticsearch-analysis-ik/releases
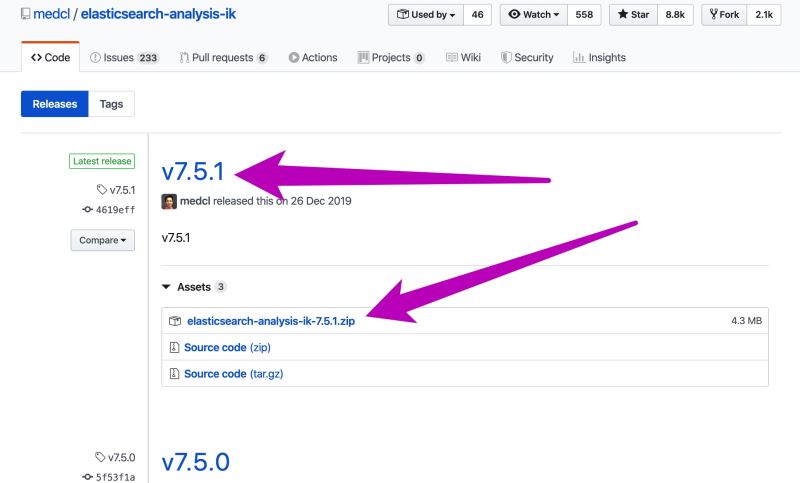
// е®үиЈ…жҸ’件 docker-compose exec elasticsearch /usr/share/elasticsearch/bin/elasticsearch-plugin install https://github.com/medcl/elasticsearch-analysis-ik/releases/download/v7.5.1/elasticsearch-analysis-ik-7.5.1.zip

жіЁпјҡеҸҜд»Ҙе°Ҷ zip ж–Ү件е…ҲдёӢиҪҪеӣһжқҘпјҢ然еҗҺеҶҚе®үиЈ…пјҢйҖҹеәҰдјҡеҝ«дәӣгҖӮ
жЈҖйӘҢеҲҶиҜҚж•Ҳжһң
ж №жҚ® Elasticsearch API жөӢиҜ•пјҢеҲҶиҜҚзҡ„ж•ҲжһңиҫҫеҲ°дәҶпјҡ
~ curl -X POST "http://your_host/_analyze?pretty" -H 'Content-Type: application/json' -d'
{
"analyzer": "ik_max_word",
"text": "жҲ‘жҳҜдёӯеӣҪдәә"
}
'
{
"tokens" : [
{
"token" : "жҲ‘",
"start_offset" : 0,
"end_offset" : 1,
"type" : "CN_CHAR",
"position" : 0
},
{
"token" : "жҳҜ",
"start_offset" : 1,
"end_offset" : 2,
"type" : "CN_CHAR",
"position" : 1
},
{
"token" : "дёӯеӣҪдәә",
"start_offset" : 2,
"end_offset" : 5,
"type" : "CN_WORD",
"position" : 2
},
{
"token" : "дёӯеӣҪ",
"start_offset" : 2,
"end_offset" : 4,
"type" : "CN_WORD",
"position" : 3
},
{
"token" : "еӣҪдәә",
"start_offset" : 3,
"end_offset" : 5,
"type" : "CN_WORD",
"position" : 4
}
]
}з»“еҗҲ Laravel
иҷҪ然 Elasticsearch е®ҳж–№жҸҗдҫӣдәҶеҜ№еә”зҡ„ PHP зүҲжң¬зҡ„жҸ’件пјҢдҪҶжҲ‘们иҝҳжҳҜеёҢжңӣе’Ң Laravel з»“еҗҲзҡ„жӣҙзҙ§еҜҶдәӣпјҢжүҖд»ҘиҝҷйҮҢйҖүжӢ©е’Ң Scout з»“еҗҲдҪҝз”ЁпјҢе…·дҪ“з”ЁеҲ°дәҶ tamayo/laravel-scout-elastic жҸ’件гҖӮ
composer require tamayo/laravel-scout-elastic

composer require laravel/scout

php artisan vendor:publish
йҖүжӢ©пјҡLaravel\Scout\ScoutServiceProvider

дҝ®ж”№й©ұеҠЁдёә elasticsearchпјҡ
'driver' => env('SCOUT_DRIVER', 'elasticsearch'),еҲӣе»әзҙўеј•
еҲӣе»әзҙўеј•жңүеҮ з§Қж–№жі•пјҢе…¶дёӯеҸҜд»ҘдҪҝз”Ё Ela еҸҜи§ҶеҢ–е·Ҙе…· ElasticHQ зӣҙжҺҘеҲӣе»әгҖӮ

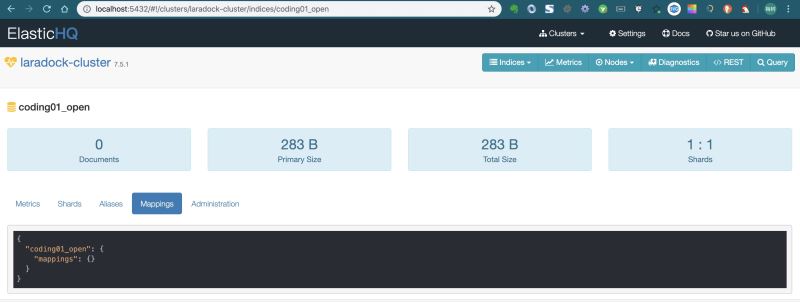
жҺҘдёӢжқҘжҲ‘们йңҖиҰҒжӣҙж–°иҝҷдёӘзҙўеј•пјҢиЎҘе…… Mappings иҝҷйғЁеҲҶпјҢеҸҜд»Ҙз”Ё PostmanгҖӮ
еҸҰдёҖз§Қж–№жі•жҳҜз”Ё Laravel иҮӘеёҰзҡ„ Artisan е‘Ҫд»ӨиЎҢеҠҹиғҪгҖӮ
иҝҷйҮҢжҲ‘们жҺЁиҚҗдҪҝз”Ё Artisan е‘Ҫд»ӨиЎҢгҖӮ
php artisan make:command ESOpenCommand
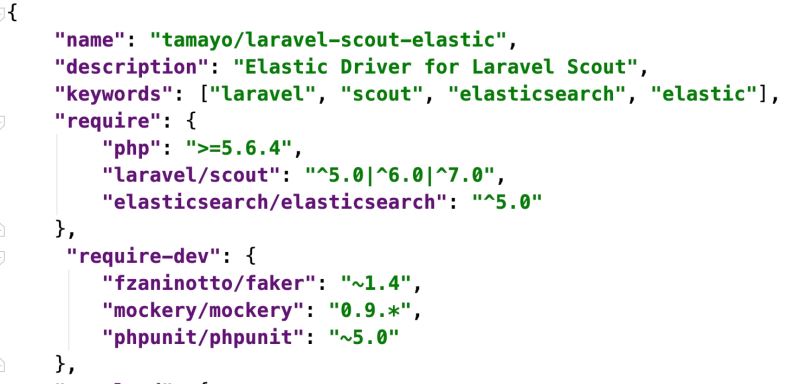
ж №жҚ®е®ҳзҪ‘жҸҗзӨәпјҢжҲ‘们еҸҜд»ҘеңЁ ESOpenCommand дёҠеҗ‘ Elasticsearch жңҚеҠЎеҷЁеҸ‘йҖҒ PUT иҜ·жұӮпјҢиҝҷйҮҢеҖҹеҠ© Elasticsearch жҸҗдҫӣзҡ„ PHP жҸ’件пјҢеңЁжҲ‘们дҪҝз”Ё tamayo/laravel-scout-elastic жҸ’件时пјҢе·Із»Ҹе®үиЈ…дәҶ Elasticsearch PHP жҸ’件пјҡ
дёӢйқўе°ұеҸҜд»ҘеҖҹеҠ©жҸ’件пјҢеҲӣе»әжҲ‘们зҡ„ IndexпјҢзӣҙжҺҘзңӢд»Јз Ғпјҡ
 public function handle()
  {
  $host = config('scout.elasticsearch.hosts');
  $index = config('scout.elasticsearch.index');
  $client = ClientBuilder::create()->setHosts($host)->build();

  if ($client->indices()->exists(['index' => $index])) {
    $this->warn("Index {$index} exists, deleting...");
    $client->indices()->delete(['index' => $index]);
  }

  $this->info("Creating index: {$index}");

  return $client->indices()->create([
    'index' => $index,
    'body' => [
      'settings' => [
        'number_of_shards' => 1,
        'number_of_replicas' => 0
      ],
      'mappings' => [
        '_source' => [
          'enabled' => true
        ],
        'properties' => [
          'id' => [
            'type' => 'long'
          ],
          'title' => [
            'type' => 'text',
            'analyzer' => 'ik_max_word',
            'search_analyzer' => 'ik_smart'
          ],
          'subtitle' => [
            'type' => 'text',
            'analyzer' => 'ik_max_word',
            'search_analyzer' => 'ik_smart'
          ],
          'content' => [
            'type' => 'text',
            'analyzer' => 'ik_max_word',
            'search_analyzer' => 'ik_smart'
          ]
        ],
      ]
    ]
  ]);
}
еҘҪдәҶпјҢжҲ‘们жү§иЎҢ Kibana зңӢеҲ°жҲ‘们已з»ҸеҲӣе»әеҘҪдәҶ Indexпјҡ
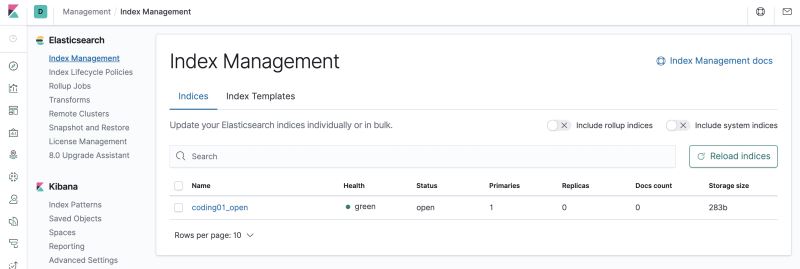
жіЁ Kibana жң¬ең° Docker е®үиЈ…пјҡеҗҺз»ӯдјҡйҮҚзӮ№иҜҙжҳҺ Kibana еҰӮдҪ•дҪҝз”Ё
docker run -d --name kibana -e ELASTICSEARCH_HOSTS=http://elasticsearch_host -p 5601:5601 -e SERVER_NAME=ki.test kibana:7.5.2
дёәдәҶйӘҢиҜҒ Index жҳҜеҗҰеҸҜз”ЁпјҢеҸҜд»ҘжҸ’е…ҘдёҖжқЎж•°жҚ®зңӢзңӢпјҡ
curl -XPOST your_host/coding01_open/_create/1 -H 'Content-Type:application/json' -d'
{"content":"дёӯйҹ©жё”иӯҰеҶІзӘҒи°ғжҹҘпјҡйҹ©иӯҰе№іеқҮжҜҸеӨ©жүЈ1иүҳдёӯеӣҪжё”иҲ№"}
еҸҜд»ҘйҖҡиҝҮжөҸи§ҲеҷЁзңӢзңӢеҜ№еә”зҡ„ж•°жҚ®пјҡ
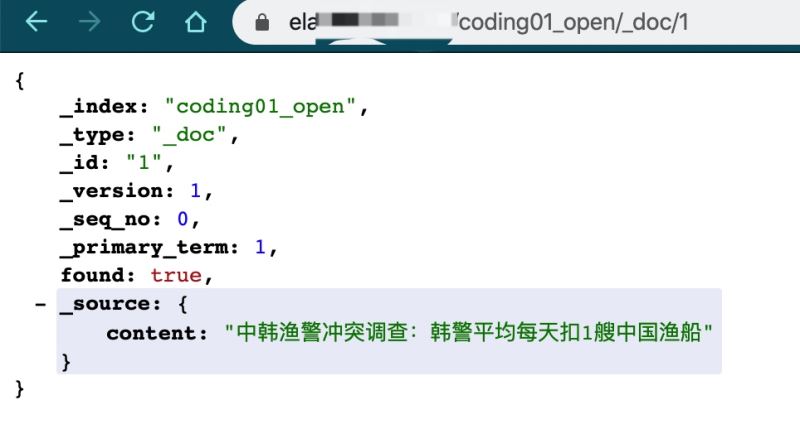
жңүдәҶ IndexпјҢдёӢдёҖжӯҘжҲ‘们е°ұеҸҜд»Ҙз»“еҗҲ LaravelпјҢеҜје…ҘгҖҒжӣҙж–°гҖҒжҹҘиҜўзӯүж“ҚдҪңдәҶгҖӮ
Laravel Model дҪҝз”Ё
Laravel жЎҶжһ¶е·Із»ҸдёәжҲ‘们жҺЁиҚҗдҪҝз”Ё Scout е…Ёж–ҮжҗңзҙўпјҢжҲ‘们еҸӘйңҖиҰҒеңЁ Article Model еҠ дёҠе®ҳж–№жүҖиҜҙзҡ„еҶ…е®№еҚіеҸҜпјҢеҫҲз®ҖеҚ•пјҢжҺЁиҚҗеӨ§е®¶зңӢ Scout дҪҝз”Ёж–ҮжЎЈпјҡhttps://learnku.com/docs/laravel/6.x/scout/5191пјҢдёӢйқўзӣҙжҺҘдёҠд»Јз Ғпјҡ
<?php
namespace App;
use App\Tools\Markdowner;
use Illuminate\Database\Eloquent\Model;
use Illuminate\Database\Eloquent\SoftDeletes;
use Laravel\Scout\Searchable;
class Article extends Model
{
use Searchable;
protected $connection = 'blog';
protected $table = 'articles';
use SoftDeletes;
/**
* The attributes that should be mutated to dates.
*
* @var array
*/
protected $dates = ['published_at', 'created_at', 'deleted_at'];
/**
* The attributes that are mass assignable.
*
* @var array
*/
protected $fillable = [
'user_id',
'last_user_id',
'category_id',
'title',
'subtitle',
'slug',
'page_image',
'content',
'meta_description',
'is_draft',
'is_original',
'published_at',
'wechat_url',
];
protected $casts = [
'content' => 'array'
];
/**
* Set the content attribute.
*
* @param $value
*/
public function setContentAttribute($value)
{
$data = [
'raw' => $value,
'html' => (new Markdowner)->convertMarkdownToHtml($value)
];
$this->attributes['content'] = json_encode($data);
}
/**
* иҺ·еҸ–жЁЎеһӢзҡ„еҸҜжҗңзҙўж•°жҚ®
*
* @return array
*/
public function toSearchableArray()
{
$data = [
'id' => $this->id,
'title' => $this->title,
'subtitle' => $this->subtitle,
'content' => $this->content['html']
];
return $data;
}
public function searchableAs()
{
return '_doc';
}
}Scout жҸҗдҫӣдәҶ Artisan е‘Ҫд»Ө import з”ЁжқҘеҜје…ҘжүҖжңүе·ІеӯҳеңЁзҡ„и®°еҪ•еҲ°жҗңзҙўзҙўеј•дёӯгҖӮ
php artisan scout:import "App\Article"

зңӢзңӢ KibanaпјҢе·Іеӯҳе…Ҙ 12 жқЎж•°жҚ®пјҢе’Ңж•°жҚ®еә“жқЎж•°еҗ»еҗҲгҖӮ

жңүдәҶж•°жҚ®пјҢжҲ‘们еҸҜд»ҘжөӢиҜ•зңӢзңӢиғҪдёҚиғҪжҹҘиҜўеҲ°ж•°жҚ®гҖӮ
иҝҳжҳҜдёҖж ·зҡ„пјҢеҲӣе»әдёҖдёӘе‘Ҫд»Өпјҡ
class ElasearchCommand extends Command
{
  /**
   * The name and signature of the console command.
   *
   * @var string
   */
  protected $signature = 'command:search {query}';

  /**
   * The console command description.
   *
   * @var string
   */
  protected $description = 'Command description';

  /**
   * Create a new command instance.
   *
   * @return void
   */
  public function __construct()
  {
    parent::__construct();
  }

  /**
   * Execute the console command.
   *
   * @return mixed
   */
  public function handle()
  {
    $article = Article::search($this->argument('query'))->first();
    $this->info($article->title);
  }
}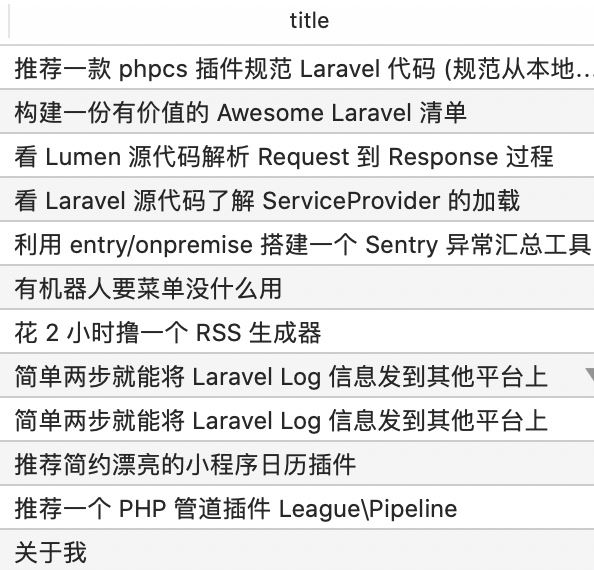
иҝҷжҳҜжҲ‘зҡ„ titlesпјҢжҲ‘йҡҸдҫҝиҫ“е…ҘдёҖдёӘе…ій”®еӯ—пјҡгҖҢжё…еҚ•гҖҚпјҢзңӢжҳҜеҗҰиғҪжҗңеҲ°гҖӮ

жҖ»з»“
ж•ҙдҪ“е®ҢжҲҗдәҶпјҡ
Elasticsearch е®үиЈ…пјӣ
Elasticsearch IK еҲҶиҜҚеҷЁжҸ’件е®үиЈ…пјӣ
Elasticsearch еҸҜи§ҶеҢ–е·Ҙе…· ElasticHQ е’Ң Kibana зҡ„е®үиЈ…е’Ңз®ҖеҚ•дҪҝз”Ёпјӣ
Scout зҡ„дҪҝз”Ёпјӣ
Elasticsearch е’Ң Scout з»“еҗҲдҪҝз”ЁгҖӮ
жҺҘдёӢжқҘе°ұиҰҒе°ҶжӣҙеӨҡзҡ„еҶ…е®№еӯҳе…Ҙ Elasticsearch дёӯпјҢдёәиҮӘе·ұзҡ„ blogгҖҒе…¬дј—еҸ·гҖҒиҮӘеҠЁеҢ–жҗңзҙўзӯүеңәжҷҜжҸҗдҫӣе…Ёж–ҮжҗңзҙўгҖӮ
дёҠиҝ°е°ұжҳҜе°Ҹзј–дёәеӨ§е®¶еҲҶдә«зҡ„еҰӮдҪ•еңЁLaravel дёӯдҪҝз”ЁElasticsearch е®һзҺ°дёҖдёӘдёӯж–ҮжҗңзҙўеҠҹиғҪдәҶпјҢеҰӮжһңеҲҡеҘҪжңүзұ»дјјзҡ„з–‘жғ‘пјҢдёҚеҰЁеҸӮз…§дёҠиҝ°еҲҶжһҗиҝӣиЎҢзҗҶи§ЈгҖӮеҰӮжһңжғізҹҘйҒ“жӣҙеӨҡзӣёе…ізҹҘиҜҶпјҢж¬ўиҝҺе…іжіЁдәҝйҖҹдә‘иЎҢдёҡиө„и®Ҝйў‘йҒ“гҖӮ
е…ҚиҙЈеЈ°жҳҺпјҡжң¬з«ҷеҸ‘еёғзҡ„еҶ…е®№пјҲеӣҫзүҮгҖҒи§Ҷйў‘е’Ңж–Үеӯ—пјүд»ҘеҺҹеҲӣгҖҒиҪ¬иҪҪе’ҢеҲҶдә«дёәдё»пјҢж–Үз« и§ӮзӮ№дёҚд»ЈиЎЁжң¬зҪ‘з«ҷз«ӢеңәпјҢеҰӮжһңж¶үеҸҠдҫөжқғиҜ·иҒ”зі»з«ҷй•ҝйӮ®з®ұпјҡis@yisu.comиҝӣиЎҢдёҫжҠҘпјҢ并жҸҗдҫӣзӣёе…іиҜҒжҚ®пјҢдёҖз»ҸжҹҘе®һпјҢе°Ҷз«ӢеҲ»еҲ йҷӨж¶үе«ҢдҫөжқғеҶ…е®№гҖӮ
жӮЁеҘҪпјҢзҷ»еҪ•еҗҺжүҚиғҪдёӢи®ўеҚ•е“ҰпјҒ