您好,登录后才能下订单哦!
密码登录
登录注册
点击 登录注册 即表示同意《亿速云用户服务条款》
这篇文章将为大家详细讲解有关利用python怎么对视频进行压缩,文章内容质量较高,因此小编分享给大家做个参考,希望大家阅读完这篇文章后对相关知识有一定的了解。
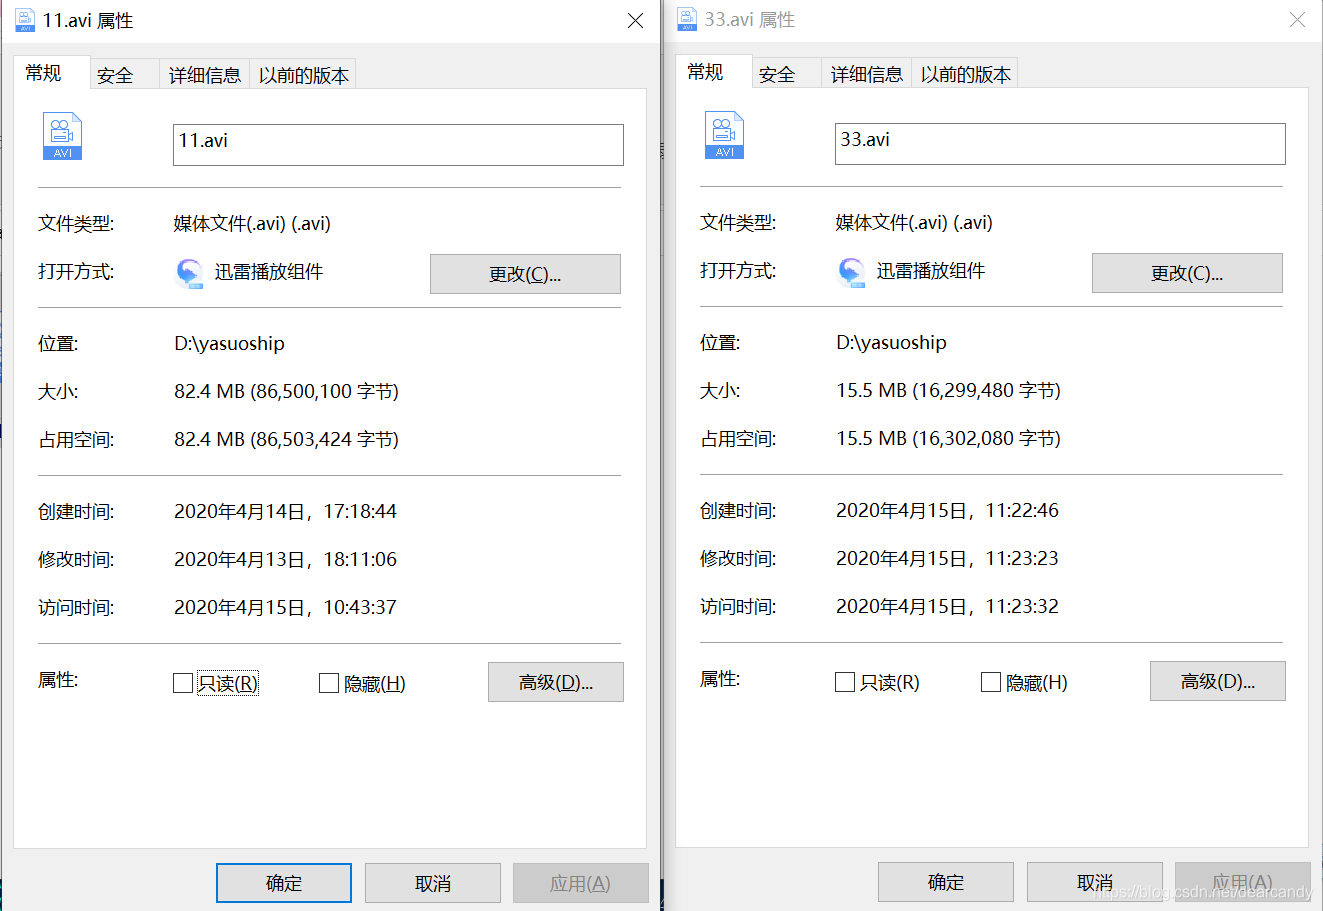
性能优良 压缩视频 从61M 到 11M或者80M到15M
视频看起来没有太大损伤
缺点:耗时20s (win10,CPU:intel i7 8G运存 )

由于压缩运算需要占用CPU资源,所以时间和性能其实很难兼顾,这个是我个人比较满意的一版 ,记录一下
话不多说,直接上代码
# 视频压缩第二版
import sys
import os
import zlib
import threading
import platform
from PIL import Image

class Compress_Pic_or_Video(object):
  def __init__(self,filePath,inputName,outName=""):
    self.filePath = filePath #文件地址
    self.inputName = inputName #输入的文件名字
    self.outName = outName #输出的文件名字
    self.system_ = platform.platform().split("-",1)[0]
    if self.system_ == "Windows":
      self.filePath = (self.filePath + "\\") if self.filePath.rsplit("\\",1)[-1] else self.filePath
    elif self.system_ == "Linux":
      self.filePath = (self.filePath + "/") if self.filePath.rsplit("/",1)[-1] else self.filePath
    self.fileInputPath = self.filePath + inputName
    self.fileOutPath = self.filePath + outName

  @property
  def is_video(self):
    videoSuffixSet = {"WMV","ASF","ASX","RM","RMVB","MP4","3GP","MOV","M4V","AVI","DAT","MKV","FIV","VOB"}
    suffix = self.fileInputPath.rsplit(".",1)[-1].upper()
    if suffix in videoSuffixSet:
      return True
    else:
      return False

  def SaveVideo(self):
    fpsize = os.path.getsize(self.fileInputPath) / 1024
    if fpsize >= 150.0: #大于150KB的视频需要压缩
      if self.outName:
        compress = "ffmpeg -i {} -r 10 -pix_fmt yuv420p -vcodec libx264 -preset veryslow -profile:v baseline -crf 23 -acodec aac -b:a 32k -strict -5 {}".format(self.fileInputPath,self.fileOutPath)
        isRun = os.system(compress)
      else:
        compress = "ffmpeg -i {} -r 10 -pix_fmt yuv420p -vcodec libx264 -preset veryslow -profile:v baseline -crf 23 -acodec aac -b:a 32k -strict -5 {}".format(self.fileInputPath, self.fileInputPath)
        isRun = os.system(compress)
      if isRun != 0:
        return (isRun,"没有安装ffmpeg")
      return True
    else:
      return True

  def Compress_Video(self):
    # 异步保存打开下面的代码,注释同步保存的代码
    thr = threading.Thread(target=self.SaveVideo)
    thr.start()
    #下面为同步代码
    # fpsize = os.path.getsize(self.fileInputPath) / 1024
    # if fpsize >= 150.0: # 大于150KB的视频需要压缩
    #   compress = "ffmpeg -i {} -r 10 -pix_fmt yuv420p -vcodec libx264 -preset veryslow -profile:v baseline -crf 23 -acodec aac -b:a 32k -strict -5 {}".format(
    #     self.fileInputPath, self.fileOutPath)
    #   isRun = os.system(compress)
    #   if isRun != 0:
    #     return (isRun, "没有安装ffmpeg")
    #   return True
    # else:
    #   return True

if __name__ == "__main__":
  b = sys.argv[1:]	#测试压缩
  savevideo = Compress_Pic_or_Video(b[0],b[1],b[2])
  print(savevideo.Compress_Video())
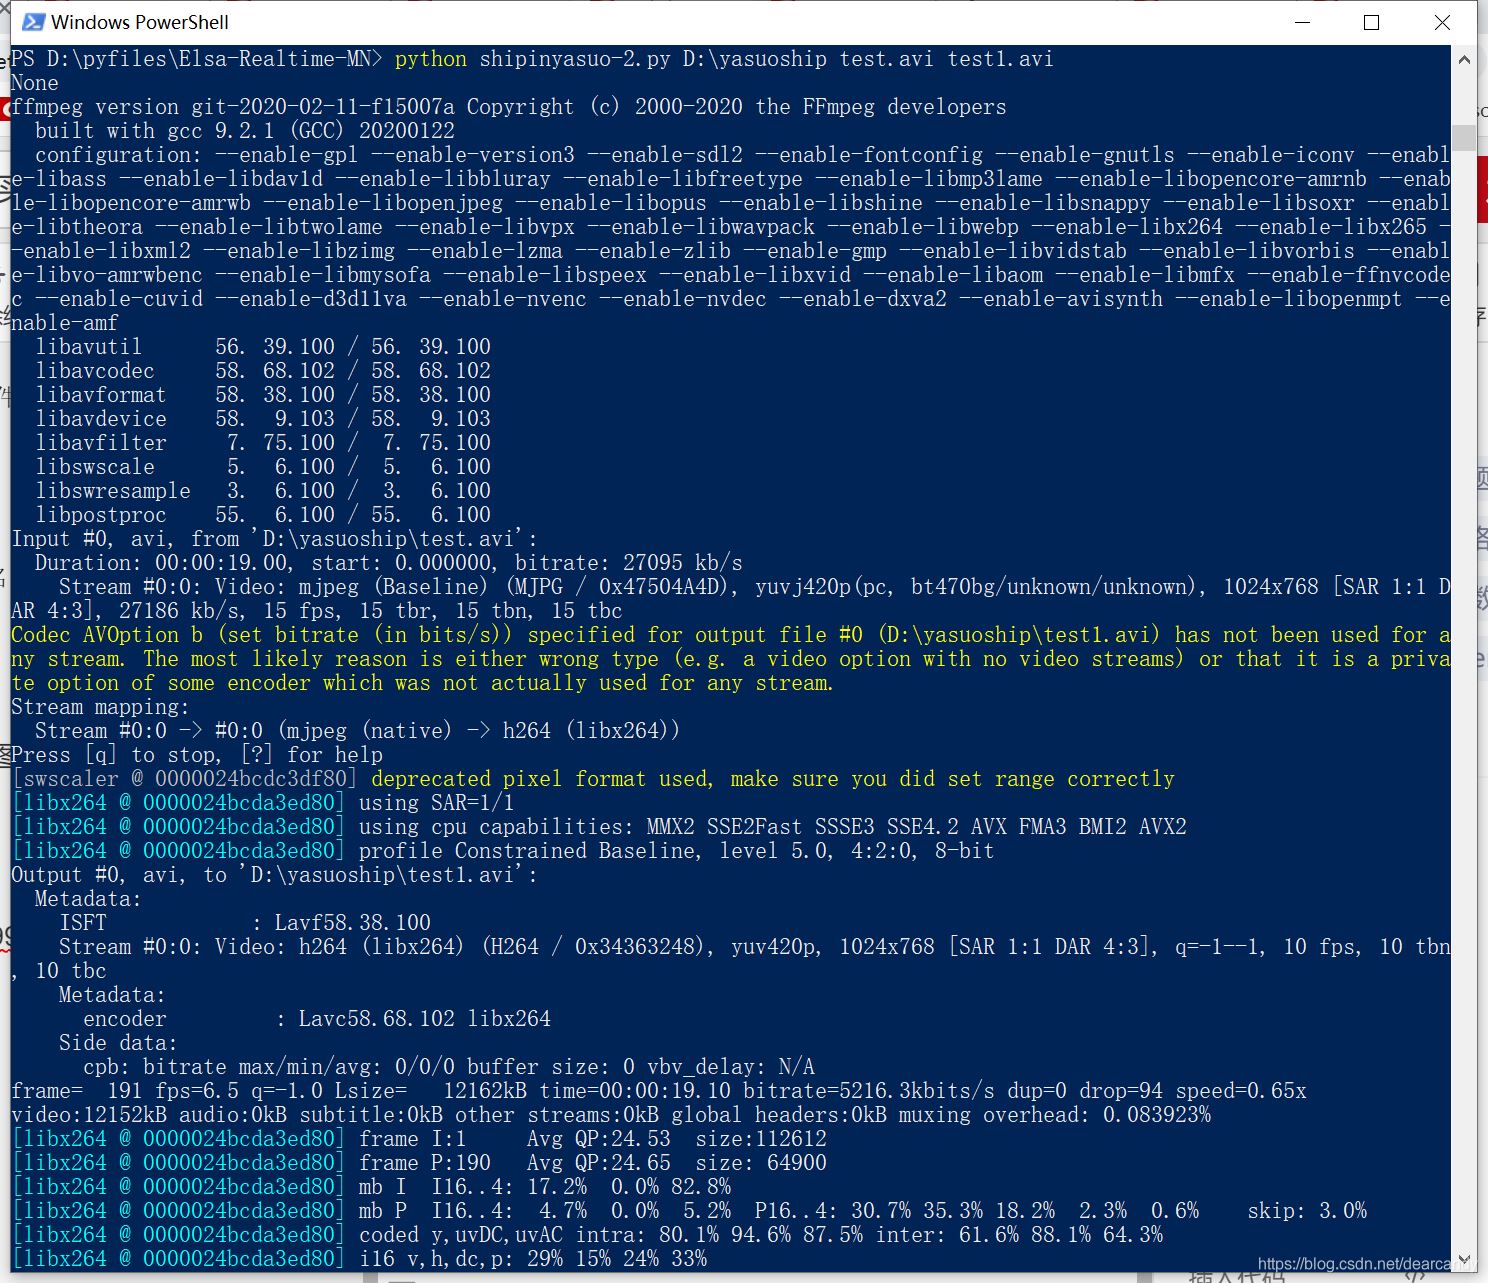
# 这一版性能优良 压缩 从61M 到 11M 视频看起来没有太大损伤 缺点:inteli7 8G运存 耗时20s在上述 .py文件所在目录下,shift+鼠标右键点击空白处,打开powershell窗口,运行以下命令:
python shipinyasuo-2.py D:\yasuoship test.avi test1.avi
我的文件名叫 shipinyasuo-2.py ,把这个文件名替换成自己的,
D:\yasuoship 替换成要压缩的视频的文件夹的绝对路径
test.avi 压缩的视频的文件名
test1.avi 压缩后的文件名 , 和要压缩的文件在同一目录下

关于利用python怎么对视频进行压缩就分享到这里了,希望以上内容可以对大家有一定的帮助,可以学到更多知识。如果觉得文章不错,可以把它分享出去让更多的人看到。
免责声明:本站发布的内容(图片、视频和文字)以原创、转载和分享为主,文章观点不代表本网站立场,如果涉及侵权请联系站长邮箱:is@yisu.com进行举报,并提供相关证据,一经查实,将立刻删除涉嫌侵权内容。