您好,登录后才能下订单哦!
密码登录
登录注册
点击 登录注册 即表示同意《亿速云用户服务条款》
这篇文章主要介绍了基于Ehcache如何实现Spring缓存,具有一定借鉴价值,感兴趣的朋友可以参考下,希望大家阅读完这篇文章之后大有收获,下面让小编带着大家一起了解一下。
缓存,通过将数据保存在缓冲区中,可以为以后的相同请求提供更快速的查询,同时可以避免方法的多次执行,从而提高应用的性能。
在企业级应用中,为了提升性能,Spring提供了一种可以在方法级别上进行缓存的缓存抽象。通过使用AOP原则,Spring对使用缓存的方法自动生成相应代理类,如果已经为提供的参数执行过该方法,那么就不必重新执行实际方法而是直接返回被缓存的结果。在基于Spring的Web应用中,为了启用缓存功能,需要使用缓存注解对待使用缓存的方法进行标记。
Spring缓存仅仅提供了一种抽象,一般在企业级的Java应用中我们通常选择使用第三方的缓存框架与Spring进行集成,比如:Ehcache、Guava和Hazelcast等。接下来我将使用Ehcache框架来详细说明在SSM开发模式下的缓存配置和使用
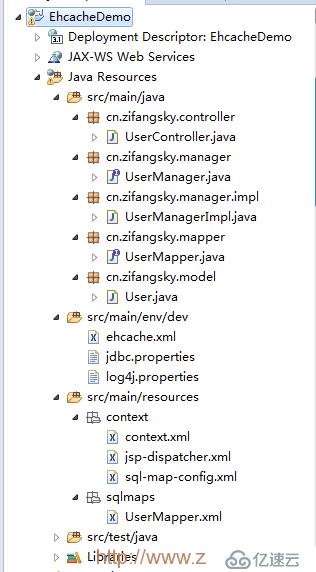
(1)新建Java Web项目,并导入相应jar包:
最后的项目结构图如下所示:

(2)在web.xml中配置SpringMVC需要处理的请求:
	<servlet>
		<servlet-name>springmvc</servlet-name>
		<servlet-class>org.springframework.web.servlet.DispatcherServlet</servlet-class>
		<init-param>
			<param-name>contextConfigLocation</param-name>
			<param-value>classpath:context/jsp-dispatcher.xml</param-value>
		</init-param>
		<load-on-startup>1</load-on-startup>
	</servlet>

	<servlet-mapping>
		<servlet-name>springmvc</servlet-name>
		<url-pattern>*.html</url-pattern>
	</servlet-mapping>
(3)准备项目后面需要用到的数据库环境:
我这里使用了MySQL5.x,数据库名是“ehcache_db”,建表语句如下所示:
/*
Navicat MySQL Data Transfer

Source Server         : sel
Source Server Version : 50519
Source Host           : localhost:3306
Source Database       : ehcache_db

Target Server Type    : MYSQL
Target Server Version : 50519
File Encoding         : 65001

Date: 2016-05-05 22:41:46
*/

SET FOREIGN_KEY_CHECKS=0;

-- ----------------------------
-- Table structure for user
-- ----------------------------
DROP TABLE IF EXISTS `user`;
CREATE TABLE `user` (
  `id` int(11) NOT NULL AUTO_INCREMENT,
  `name` varchar(32) DEFAULT NULL,
  `password` varchar(64) DEFAULT NULL,
  `email` varchar(64) DEFAULT NULL,
  `birthday` date DEFAULT NULL,
  PRIMARY KEY (`id`)
) ENGINE=InnoDB AUTO_INCREMENT=6 DEFAULT CHARSET=utf8;

-- ----------------------------
-- Records of user
-- ----------------------------
INSERT INTO `user` VALUES ('1', 'admin', '123456', 'admin@zifangsky.cn', '2009-06-30');
INSERT INTO `user` VALUES ('2', 'test', '123456', 'test@zifangsky.cn', '1990-12-12');
INSERT INTO `user` VALUES ('3', '333', '333', 'eee@zifangsky.cn', '2016-05-01');
INSERT INTO `user` VALUES ('4', '444', '444', '444@zifangsky.cn', '2016-06-14');
INSERT INTO `user` VALUES ('5', '555', '555', '555@zifangsky.cn', '2016-05-12');
(4)配置数据源以及Mybatis相关配置:
在数据源配置这里我采用了C3P0连接池,当然也可以使用其他的连接池,这里就不多说了,不熟悉的话可以把本测试项目的×××下来参考一下即可。同时,由于在本测试项目中使用了Mybatis框架,因此可以使用mybatis-generator插件来自动生成一些基本的xxModel、xxMapper.java和xxMapper.xml等文件,如果关于这个插件不熟悉的话可以参考下我以前写过的这篇文章:http://www.zifangsky.cn/431.html
(5)在UserMapper.xml中添加一段根据用户ID查用户名的SQL语句:
  <select id="selectUserNameById" resultType="java.lang.String" parameterType="java.lang.Integer" >
    select name
    from user
    where id = #{id,jdbcType=INTEGER}
  </select>
(6)对应的在UserMapper.java中添加上这个功能的接口:
    /**
	 * 通过用户Id查用户名
	 *
	 * @param id
	 *            用户id
	 * @return 用户名
	 */
	String selectUserNameById(Integer id);
(7)UserManager.java和UserManagerImpl.java:
实际上这两个类处于业务逻辑层,跟我们通常见到的xxService这种类是一样的功能
i)UserManager.java:
package cn.zifangsky.manager;

import cn.zifangsky.model.User;

public interface UserManager {
	int deleteByPrimaryKey(Integer id);

    int insert(User record);

    int insertSelective(User record);

    User selectByPrimaryKey(Integer id);

    User updateByPrimaryKeySelective(User record);

    int updateByPrimaryKey(User record);

    /**
	 * 通过用户Id查用户名
	 *
	 * @param id
	 *            用户id
	 * @return 用户名
	 */
	String selectUserNameById(Integer id);
}
几个基本的增删改查接口,跟UserMapper.java这个类是差不多的
ii)UserManagerImpl.java:
package cn.zifangsky.manager.impl;

import javax.annotation.Resource;

import org.springframework.stereotype.Service;

import cn.zifangsky.manager.UserManager;
import cn.zifangsky.mapper.UserMapper;
import cn.zifangsky.model.User;

@Service(value = "userManagerImpl")
public class UserManagerImpl implements UserManager {
	@Resource(name = "userMapper")
	private UserMapper userMapper;

	public int deleteByPrimaryKey(Integer id) {
		System.out.println("deleteByPrimaryKey方法开始执行:");

		return userMapper.deleteByPrimaryKey(id);
	}

	public int insert(User record) {
		return userMapper.insert(record);
	}

	public int insertSelective(User record) {
		return userMapper.insertSelective(record);
	}

	public User selectByPrimaryKey(Integer id) {
		System.out.println("selectByPrimaryKey方法开始执行:");

		return userMapper.selectByPrimaryKey(id);
	}

	public User updateByPrimaryKeySelective(User user) {
		System.out.println("updateByPrimaryKeySelective方法开始执行:");

		userMapper.updateByPrimaryKeySelective(user);

		return userMapper.selectByPrimaryKey(user.getId());
	}

	public int updateByPrimaryKey(User record) {
		return userMapper.updateByPrimaryKey(record);
	}

	public String selectUserNameById(Integer id) {
		System.out.println("selectUserNameById方法开始执行:");

		String resultName = userMapper.selectUserNameById(id);

		System.out.println("用户Id:" + id + ", 对应的用户名是: " + resultName);
		return resultName;
	}

}
在这个实现类中针对每个方法通过调用userMapper中的对应方法来完成了一些基本的增删改查功能。当然如果对这里出现的@Service和@Resource这两个基本的SpringMVC注解不熟悉的话可以参考下我以前写过的这篇文章:http://www.zifangsky.cn/459.html
实际上,我们后面在启用缓存功能时就是在这个类上的一些方法上添加注解,当然现在可以不用管,待会再说。
(8)在UserController.java中添加一个测试方法,用于测试基于SSM框架的开发环境是否搭建成功:
package cn.zifangsky.controller;

import javax.annotation.Resource;

import org.springframework.stereotype.Controller;
import org.springframework.web.bind.annotation.RequestMapping;
import org.springframework.web.bind.annotation.RequestParam;
import org.springframework.web.servlet.ModelAndView;

import cn.zifangsky.manager.UserManager;
import cn.zifangsky.model.User;

@Controller
public class UserController {
	@Resource(name="userManagerImpl")
	private UserManager userManager;

	@RequestMapping(value="/test.html")
	public String user(@RequestParam(name="userId",required=false) Integer userId){
		User user = userManager.selectByPrimaryKey(userId);

		System.out.println("用户名: " + user.getName());
		System.out.println("邮箱: " + user.getEmail());

		return "success";
	}

}
(9)测试基于SSM框架的开发环境:
启动项目后在浏览器中访问:http://localhost:9080/EhcacheDemo/test.html?userId=1
如果出现在控制台中打印出了以下内容,则说明我们的测试环境已经搭建成功了
用户名: admin
邮箱: admin@zifangsky.cn
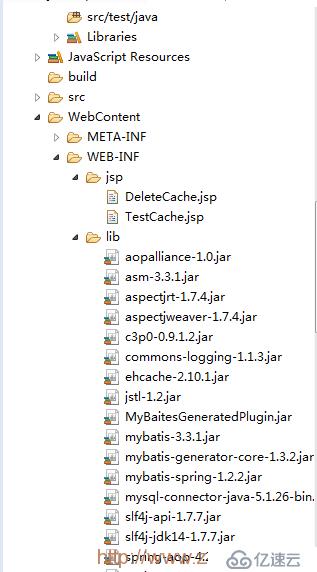
(1)导入相关jar包
这里就不多说了,下载Ehcache的jar包并导入进去即可,也可以参考上面的项目结构图
(2)新建ehcache.xml:
<?xml version="1.0" encoding="UTF-8"?>
<ehcache xmlns:xsi="http://www.w3.org/2001/XMLSchema-instance"
	xsi:noNamespaceSchemaLocation="http://ehcache.org/ehcache.xsd">

	<diskStore path="java.io.tmpdir" />
	<defaultCache maxElementsInMemory="1000" eternal="false"
		timeToIdleSeconds="120" timeToLiveSeconds="120" overflowToDisk="false" />

	<cache name="myCache" maxElementsOnDisk="20000"
		maxElementsInMemory="10000"
		timeToIdleSeconds="0"
    	timeToLiveSeconds="600"
        eternal="true"
        overflowToDisk="true"
        diskPersistent="true"
        memoryStoreEvictionPolicy="LFU" />
</ehcache>

<!--
	<diskStore>==========当内存缓存中对象数量超过maxElementsInMemory时,将缓存对象写到磁盘缓存中(需对象实现序列化接口)

	<diskStore path="">==用来配置磁盘缓存使用的物理路径,Ehcache磁盘缓存使用的文件后缀名是*.data和*.index name=================缓存名称,cache的唯一标识(ehcache会把这个cache放到HashMap里)

	maxElementsOnDisk====磁盘缓存中最多可以存放的元素数量,0表示无穷大 maxElementsInMemory==内存缓存中最多可以存放的元素数量,若放入Cache中的元素超过这个数值,则有以下两种情况 :
		1)若overflowToDisk=true,则会将Cache中多出的元素放入磁盘文件中
		2)若overflowToDisk=false,则根据memoryStoreEvictionPolicy策略替换Cache中原有的元素

	eternal==============缓存中对象是否永久有效,即是否永驻内存,true时将忽略timeToIdleSeconds和timeToLiveSeconds

	timeToIdleSeconds====缓存数据在失效前的允许闲置时间(单位:秒),仅当eternal=false时使用,默认值是0表示可闲置时间无穷大,此为可选属性
		即访问这个cache中元素的最大间隔时间,若超过这个时间没有访问此Cache中的某个元素,那么此元素将被从Cache中清除

	timeToLiveSeconds====缓存数据在失效前的允许存活时间(单位:秒),仅当eternal=false时使用,默认值是0表示可存活时间无穷大
		即Cache中的某元素从创建到清楚的生存时间,也就是说从创建开始计时,当超过这个时间时,此元素将从Cache中清除

	overflowToDisk=======内存不足时,是否启用磁盘缓存(即内存中对象数量达到maxElementsInMemory时,Ehcache会将对象写到磁盘中)
		会根据标签中path值查找对应的属性值,写入磁盘的文件会放在path文件夹下,文件的名称是cache的名称,后缀名是data

	diskPersistent=======是否持久化磁盘缓存,当这个属性的值为true时,系统在初始化时会在磁盘中查找文件名为cache名称,后缀名为index的文件
                     这个文件中存放了已经持久化在磁盘中的cache的index,找到后会把cache加载到内存
                     要想把cache真正持久化到磁盘,写程序时注意执行net.sf.ehcache.Cache.put(Element element)后要调用flush()方法

	diskExpiryThreadIntervalSeconds==磁盘缓存的清理线程运行间隔,默认是120秒

	diskSpoolBufferSizeMB============设置DiskStore(磁盘缓存)的缓存区大小,默认是30MB

	memoryStoreEvictionPolicy========内存存储与释放策略,即达到maxElementsInMemory限制时,Ehcache会根据指定策略清理内存
                     共有三种策略,分别为LRU(最近最少使用)、LFU(最常用的)、FIFO(先进先出)
-->
这个文件是缓存的一些具体配置,有不懂的地方可以参考下注释中的内容
(3)在context.xml中添加缓存相关的配置:
	<!-- 缓存配置 -->
	<!-- 启用缓存注解功能  -->
	<cache:annotation-driven cache-manager="cacheManager" />
	<!-- Spring自己的基于java.util.concurrent.ConcurrentHashMap实现的缓存管理器(该功能是从Spring3.1开始提供的) -->
	<!-- <bean id="cacheManager" class="org.springframework.cache.support.SimpleCacheManager">
		<property name="caches"> <set> <bean name="myCache" class="org.springframework.cache.concurrent.ConcurrentMapCacheFactoryBean"/>
		</set> </property> </bean> -->
	<!-- 若只想使用Spring自身提供的缓存器,则注释掉下面的两个关于Ehcache配置的bean,并启用上面的SimpleCacheManager即可 -->
	<!-- Spring提供的基于的Ehcache实现的缓存管理器 -->

	<bean id="cacheManagerFactory"
		class="org.springframework.cache.ehcache.EhCacheManagerFactoryBean">
		<property name="configLocation" value="classpath:ehcache.xml" />
	</bean>
	<bean id="cacheManager" class="org.springframework.cache.ehcache.EhCacheCacheManager">
		<property name="cacheManager" ref="cacheManagerFactory" />
	</bean>
(4)测试缓存效果:
i)在UserManagerImpl.java的selectUserNameById方法上添加@Cacheable注解,表示启用缓存:
	// 测试,自定义了key:'selectUserNameById_' + #id
	// 同时设置了id=2才启动缓存,当然实际开发并不会设置这种条件
	// @Cacheable(value="myCache",key="'selectUserNameById_' + #id"
	// ,condition="#id == 2")
	// @Cacheable(value="myCache",key="'selectUserNameById_' + #id" ,unless="#id
	// != 2")
	@Cacheable(value = "myCache", key = "'selectUserNameById_' + #id")
	public String selectUserNameById(Integer id) {
		System.out.println("selectUserNameById方法开始执行:");

		String resultName = userMapper.selectUserNameById(id);

		System.out.println("用户Id:" + id + ", 对应的用户名是: " + resultName);
		return resultName;
	}
从上面的代码可以看出,为了使用缓存,我们在这个方法上添加了一个@Cacheable注解。这个注解的含义是:有这个注解的方法将启用缓存功能,Spring将会自动生成代理类,根据这里的key值来判断此次查询是否已经被缓存过,如果被缓存过则直接从缓存中取得该方法的执行结果,如果没被缓存过那么将会实际执行这个方法并将结果进行缓存。这里的value对应的是我们在ehcache.xml文件中配置的一项具体的缓存参数配置。还要说明的是,这里的key值使用了Spring表达式语言(即:SpEL),为的就是通过一个唯一的id对每条user表中的数据建立不同的缓存,以此避免多个查询结果混淆。
同时,从我上面的注释可以看出,condition和unless参数可以用于生成有条件的缓存,可以根据在满足一定条件的情况下才对执行结果进行缓存。这里就不多说了,自己尝试一下就懂了。
当然,Spring的缓存除了@Cacheable这个注解外,还有@CacheEvict和@CachePut这两个常用注解,分别表示删除指定缓存和更新指定缓存。这两个注解的使用方法我们下面再说
ii)在UserController.java中添加一个测试方法:
	@RequestMapping(value="/ehcache.html")
	public ModelAndView testEhcache(@RequestParam(name="userId") Integer userId){
		ModelAndView modelAndView = new ModelAndView("TestCache");
		String userName = userManager.selectUserNameById(userId);

		modelAndView.addObject("userId", userId);
		if(userName != null){
			modelAndView.addObject("userName", userName);
		}
		else{
			modelAndView.addObject("userName", "null_ehcache");
		}

		return modelAndView;
	}
iii)对应的WebContent/WEB-INF/jsp/TestCache.jsp:
<%@ page language="java" contentType="text/html; charset=UTF-8"
    pageEncoding="UTF-8"%>
<%
String path = request.getContextPath();
String basePath = request.getScheme()+"://"+request.getServerName()+":"+request.getServerPort()+path+"/";
%>
<html>
<head>
<meta http-equiv="Content-Type" content="text/html; charset=UTF-8">
<base href="<%=basePath%>">
<title>测试SpringMVC的缓存——ehcache</title>
</head>
<body>
	<div align="center">
		用户Id是${userId },对应的用户名是 ${userName }
	</div>
</body>
</html>
iv)运行项目,并测试:
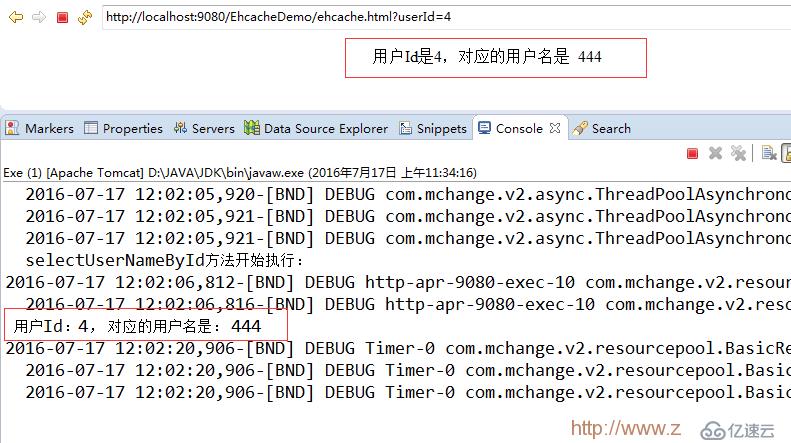
在浏览器中访问:http://localhost:9080/EhcacheDemo/ehcache.html?userId=4
可以发现,不仅显示了对应的jsp页面,同时控制台还输出了:
用户Id:4, 对应的用户名是: 444
表明第一次请求时是执行了selectUserNameById这个方法的
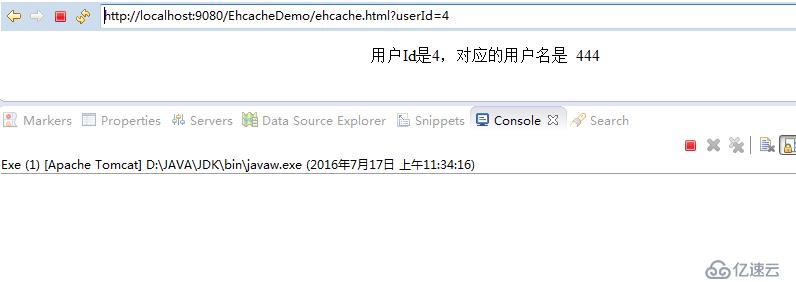
接下来我们清除控制台输出,再次访问:http://localhost:9080/EhcacheDemo/ehcache.html?userId=4
可以发现,jsp页面中的内容不变,但是控制台中并没有输出任何内容,也就是说在这次请求中并没有执行selectUserNameById这个方法,而是从缓存中直接取得的缓存值。因此,到这里缓存就配置成功了
(1)@CacheEvict注解的使用:
@CacheEvict注解定义了相关方法负责从给定的缓存存储器中移除某些缓存值。虽然大多数的缓存框架都提供了缓存数据的有效时间,但是使用这个注解可以立即显式地从缓存存储器中删除过时的数据。这个注解通常用于在执行删除操作时使用
i)在UserManagerImpl.java的deleteByPrimaryKey方法上添加@CacheEvict注解:
	//@CacheEvict(value = "myCache", allEntries = true)  //清空所有缓存内容
	// 在删除一条数据时同时删除该数据的缓存
	@CacheEvict(value="myCache",key="'selectUserNameById_' + #id")
	public int deleteByPrimaryKey(Integer id) {
		System.out.println("deleteByPrimaryKey方法开始执行:");

		return userMapper.deleteByPrimaryKey(id);
	}
与@Cacheable注解一样,@CacheEvict也提供了value、condition、key等属性,我们可以使用SpEL表达式自定义键和条件。此外,@CacheEvict注解还提供了两个特殊的属性,分别是:allEntries和beforeInvocation。分别表示是否清空指定的缓存存储器中的所有的缓存内容;是否在方法执行之前或者之后完成删除缓存操作。当然默认情况下,@Cacheable是在方法调用之后执行删除缓存操作
ii)UserController.java中添加一个删除方法:
	@RequestMapping(value="/delete.html")
	public ModelAndView deleteEhcache(@RequestParam(name="userId") Integer userId){
		ModelAndView modelAndView = new ModelAndView("DeleteCache");

		int status = userManager.deleteByPrimaryKey(userId);
		modelAndView.addObject("userId", userId);
		if(status == 1)
			modelAndView.addObject("status", "成功");
		else
			modelAndView.addObject("status", "失败");

		return modelAndView;
	}
iii)这个操作对应的视图文件WebContent/WEB-INF/jsp/DeleteCache.jsp:
<%@ page language="java" contentType="text/html; charset=UTF-8"
    pageEncoding="UTF-8"%>
<%
String path = request.getContextPath();
String basePath = request.getScheme()+"://"+request.getServerName()+":"+request.getServerPort()+path+"/";
%>
<html>
<head>
<meta http-equiv="Content-Type" content="text/html; charset=UTF-8">
<base href="<%=basePath%>">
<title>测试SpringMVC的缓存——ehcache</title>
</head>
<body>
	<div align="center">
		删除用户Id是${userId }的数据,执行状态: ${status }
	</div>
</body>
</html>
iv)运行项目并测试:
项目启动后在浏览器中访问:http://localhost:9080/EhcacheDemo/ehcache.html?userId=5
执行完之后,显示视图如下:

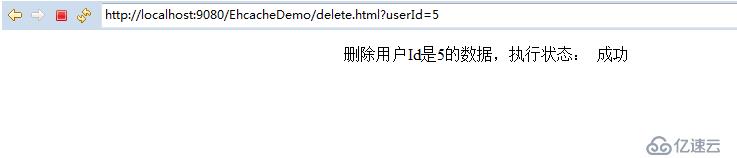
紧接着再访问:http://localhost:9080/EhcacheDemo/delete.html?userId=5
执行完之后,显示视图如下:
最后,我们再次访问:http://localhost:9080/EhcacheDemo/ehcache.html?userId=5
执行完之后,显示视图如下:
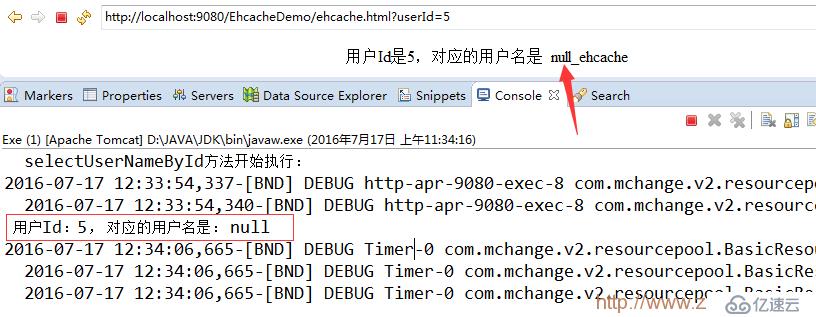
可以发现,这个操作重新执行了selectUserNameById方法,并且没有从数据库中查询到id=5的用户名,说明不仅在数据库中删掉了该条记录同时userId=5的缓存也已经被删掉了
(2)@CachePut注解的使用:
对于标注了@CachePut注解的方法,它首先执行该方法,然后将返回值放到缓存中。通俗来讲,@CachePut有两个功能:
如果缓存存储器中已经有某个key的缓存了,那么在执行完标注了@CachePut注解的方法后,将会更新缓存存储器中这个key的缓存
如果缓存存储器中没有某个key的缓存,那么在执行完标注了@CachePut注解的方法后,将会在缓存存储器中使用这个方法的返回值来添加上这个key的缓存
i)在UserManagerImpl.java的selectByPrimaryKey方法和updateByPrimaryKeySelective方法上添加上对应的注解:
	/**
	 * 由于返回值是一个对象,因此启动缓存需要User这个类能够序列化, 也就是implements Serializable
	 */
	@Cacheable(value = "myCache", key = "'select_' + #id")
	public User selectByPrimaryKey(Integer id) {
		System.out.println("selectByPrimaryKey方法开始执行:");

		return userMapper.selectByPrimaryKey(id);
	}

	// 每次都会执行方法,并将返回值存入对应的缓存中(如果该key的缓存存在则更新,如果不存在则添加该key的缓存)
//	@CachePut(value = "myCache", key = "'select_' + #user.getId()")
	@CachePut(value = "myCache", key = "'select_' + #user.id")
	public User updateByPrimaryKeySelective(User user) {
		System.out.println("updateByPrimaryKeySelective方法开始执行:");

		userMapper.updateByPrimaryKeySelective(user);
		/**
		 * 用返回值更新缓存
		 *
		 * 不能直接返回一个int类型的状态,不然因为跟selectByPrimaryKey(Integer id)这个方法定义的缓存
		 * 的返回值不一样,因此项目运行报错
		 * */
		return userMapper.selectByPrimaryKey(user.getId());
	}
为了避免混淆,因此在生成缓存时没有使用selectUserNameById这个方法,而是使用了selectByPrimaryKey这个方法,同时key值的前缀也定义了一个不一样的“select_”
同时因为返回值是一个User对象,因此要想启动缓存就需要User这个类能够序列化, 也就是implements Serializable
public class User implements Serializable{
	private static final long serialVersionUID = 4780025517769228888L;
	//其他的内容不变,这里就不粘贴这部分代码了
}
ii)在UserController.java中添加上对应的查询和更新方法:
	@RequestMapping(value="/update.html")
	public void updateEhcache(@RequestParam(name="userId") Integer userId,@RequestParam(name="name") String name){
		User u = new User();
		u.setId(userId);
		u.setName(name);

		userManager.updateByPrimaryKeySelective(u);
	}

	@RequestMapping(value="/select.html")
	public ModelAndView selectEhcache(@RequestParam(name="userId") Integer userId){
		ModelAndView modelAndView = new ModelAndView("TestCache");
		User u = userManager.selectByPrimaryKey(userId);

		modelAndView.addObject("userId", userId);
		if(u != null){
			modelAndView.addObject("userName", u.getName());
		}else{
			modelAndView.addObject("userName", "null_select");
		}

		return modelAndView;
	}
iii)测试@CachePut注解更新已存在的缓存:
重新启动项目后,在浏览器中访问:http://localhost:9080/EhcacheDemo/select.html?userId=2
执行完之后,显示视图如下:
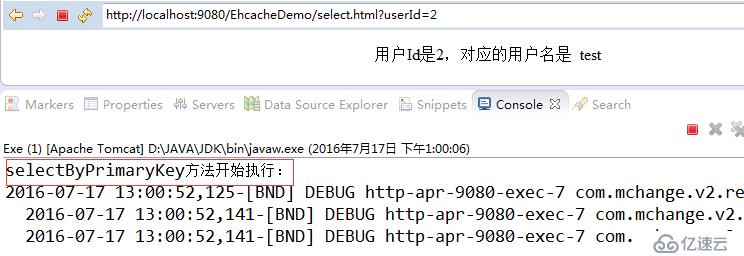
接着在浏览器中访问:http://localhost:9080/EhcacheDemo/update.html?userId=2&name=user2
执行完之后,再次访问:http://localhost:9080/EhcacheDemo/select.html?userId=2
执行完之后,显示视图如下:
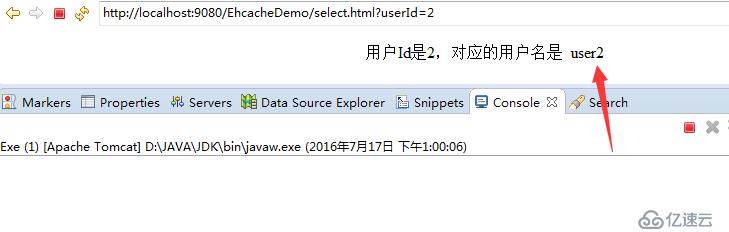
可以发现,userId=2的缓存已经更新了,并且这次没有执行selectByPrimaryKey这个方法。这就可以说明@CachePut注解可以用于更新已经存在的缓存
iv)测试@CachePut注解更新并添加不存在的缓存:
在上面测试的基础上,在浏览器中直接访问:http://localhost:9080/EhcacheDemo/update.html?userId=3&name=user3
执行完之后,显示视图如下:
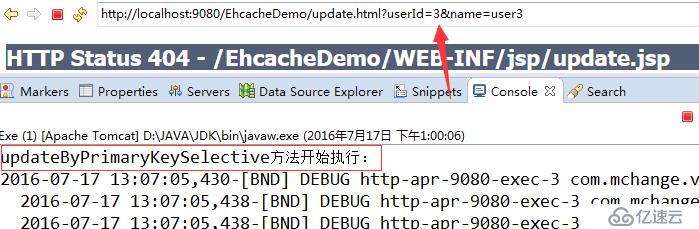
然后再次访问:http://localhost:9080/EhcacheDemo/select.html?userId=3
执行完之后,显示视图如下:
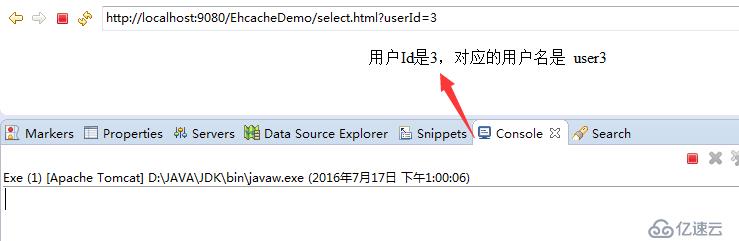
可以发现,这次操作并没有执行selectByPrimaryKey这个方法但是userId=3的缓存已经添加到缓存存储器中去了,说明在添加了@CachePut注解的updateByPrimaryKeySelective方法在第一次执行完之后不仅更新了数据库,同时也使用返回值在缓存存储器中添加上了userId=3的User缓存
感谢你能够认真阅读完这篇文章,希望小编分享的“基于Ehcache如何实现Spring缓存”这篇文章对大家有帮助,同时也希望大家多多支持亿速云,关注亿速云行业资讯频道,更多相关知识等着你来学习!
免责声明:本站发布的内容(图片、视频和文字)以原创、转载和分享为主,文章观点不代表本网站立场,如果涉及侵权请联系站长邮箱:is@yisu.com进行举报,并提供相关证据,一经查实,将立刻删除涉嫌侵权内容。