您好,登录后才能下订单哦!
密码登录
登录注册
点击 登录注册 即表示同意《亿速云用户服务条款》
1.系统环境:centos7.2 —— x86_64
[root@salt1 ~]# cat /etc/centos-release
CentOS Linux release 7.2.1511 (Core)
[root@salt1 ~]# uname -a
Linux salt1 3.10.0-327.el7.x86_64 #1 SMP Thu Nov 19 22:10:57 UTC 2015 x86_64 x86_64 x86_64 GNU/Linux
2.安装redis
先决条件:首先安装epel-release(epel源)
[root@salt1 ~]# yum -y install epel-release
然后安装redis
[root@salt1 ~]# yum -y install redis
[root@salt1 ~]# rpm -q redis
redis-2.8.19-2.el7.x86_64
[root@salt1 ~]# redis-
redis-benchmark redis-check-aof redis-check-dump redis-cli redis-sentinel redis-server redis-shutdown
redis-server:redis服务器的daemon启动程序
redis-cli: redis命令行客户端操作工具,当让也可以用telnet根据其纯文本协议来操作;
redis-benchmark:redis性能测试工具,测试redis在你的系统及你的配置下的读写性能;
redis-check-aof:对于更新日志appendonly.conf检查,是否可用,类似检查mysql binlog的工具;
redis-check-dump:用于本地数据库rdb文件的检查;
3.启动redis服务
先备份一下redis的配置文件(个人习惯,先备份再操作)
[root@salt1 ~]# cp /etc/redis.conf{,.bak}
redis启动时最好指定其配置文件,因为redis几乎所有的控制都在其配置文件;
redis-server : redis服务器的daemon启动程序
/etc/redis.conf : redis的配置文件
& : 后台启动
[root@salt1 ~]# redis-server /etc/redis.conf &
[1] 9462
[root@salt1 ~]# ps -ef | grep redis
root 9462 2767 0 03:59 pts/0 00:00:00 redis-server 127.0.0.1:6379
root 9466 2767 0 03:59 pts/0 00:00:00 grep --color=auto redis
然后再看下日志
[root@salt1 ~]# tail -30 /var/log/redis/redis.log
[9462] 11 Aug 03:59:54.037 * Increased maximum number of open files to 10032 (it was originally set to 1024).
_._
_.-``__ ''-._
_.-`` `. `_. ''-._ Redis 2.8.19 (00000000/0) 64 bit
.-`` .-```. ```\/ _.,_ ''-._
( ' , .-` | `, ) Running in stand alone mode
|`-._`-...-` __...-.``-._|'` _.-'| Port: 6379
| `-._ `._ / _.-' | PID: 9462
`-._ `-._ `-./ _.-' _.-'
|`-._`-._ `-.__.-' _.-'_.-'|
| `-._`-._ _.-'_.-' | http://redis.io
`-._ `-._`-.__.-'_.-' _.-'
|`-._`-._ `-.__.-' _.-'_.-'|
| `-._`-._ _.-'_.-' |
`-._ `-._`-.__.-'_.-' _.-'
`-._ `-.__.-' _.-'
`-._ _.-'
`-.__.-'
[9462] 11 Aug 03:59:54.038 # Server started, Redis version 2.8.19
[9462] 11 Aug 03:59:54.039 # WARNING overcommit_memory is set to 0! Background save may fail under low memory condition. To fix this issue add 'vm.overcommit_memory = 1' to /etc/sysctl.conf and then reboot or run the command 'sysctl vm.overcommit_memory=1' for this to take effect.
[9462] 11 Aug 03:59:54.039 # WARNING you have Transparent Huge Pages (THP) support enabled in your kernel. This will create latency and memory usage issues with Redis. To fix this issue run the command 'echo never > /sys/kernel/mm/transparent_hugepage/enabled' as root, and add it to your /etc/rc.local in order to retain the setting after a reboot. Redis must be restarted after THP is disabled.
[9462] 11 Aug 03:59:54.040 # WARNING: The TCP backlog setting of 511 cannot be enforced because /proc/sys/net/core/somaxconn is set to the lower value of 128.
[9462] 11 Aug 03:59:54.040 * The server is now ready to accept connections on port 6379
×××字体为:问题
红色字体为:解决办法
×××字体解释:
1.后台保存在低内存下可能会失败
vm.overcommit_memory 参数
默认值为0
0:当用户空间请求更多的内存时,内核尝试估算出剩余可用的内存;
1:内核允许超量使用内存,直到用完为止;主要用于科学计算;
2:内核会使用一个绝不过量使用内存的算法,即系统整个内存地址空间不能超过swap+50%的ram值,50%参数的设定是在overcommit_ratio中设定;
2.启用了THP(页面内存透明化)在你的内核具体解释看 后边的网址,里头解释的更详细 http://os.51cto.com/art/201103/249821.htm
3.tcp backlog 设置为511 不能执行,原因是/proc/sys/net/core/somaxconn的值较低
backlog 是网络连接过程中,某种状态的队列长度,如果并发高,那么会导致backlog的队列被占满,服务器就会丢掉传进来的其他连接,然后就会出现客户点连接失败的情形;
http://jingyan.baidu.com/article/84b4f565e60f8560f6da3227.html
所以底下就开始执行对应的操作
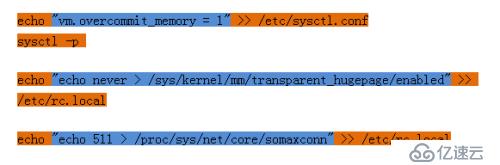
注意:蓝色字体为需要注意的地方
echo "vm.overcommit_memory = 1" >> /etc/sysctl.conf
sysctl -p
echo "echo never > /sys/kernel/mm/transparent_hugepage/enabled" >> /etc/rc.local
echo "echo 511 > /proc/sys/net/core/somaxconn" >> /etc/rc.local
下面是一个截图,需要对比的伙伴可以对一下
相信经过上面3行的配置,你的redis不会再报类似的警告了,当然你还需要在redis.conf文件中指定redis允许使用的内存大小(下章介绍),否则你的服务器撑不了两天
4.关闭redis服务
1)redis-shutdown #默认会保存后关闭
2)redis-cli shutdown save #
5.连接redis
[root@salt1 ~]# redis-cli
127.0.0.1:6379>
6.简单操作
127.0.0.1:6379> set id 001 #创建key-vlaue
OK
127.0.0.1:6379> get id #查找key
"001"
127.0.0.1:6379> del id #删除key
(integer) 1
127.0.0.1:6379> get id
(nil)
127.0.0.1:6379> exists id #查询id是否存在
(integer) 1
127.0.0.1:6379> del id
(integer) 1
127.0.0.1:6379> exists id
(integer) 0
127.0.0.1:6379> keys * #获取所有key
127.0.0.1:6379> set k1 v1
OK
127.0.0.1:6379> set k2 v2
OK
127.0.0.1:6379> set k3 v3
OK
127.0.0.1:6379> keys * #获取所有key
1) "k2"
2) "k3"
3) "k1"
127.0.0.1:6379> dbsize #获取所有key-value数
(integer) 3
redis默认有16个库,但是无法查看到(库的多少可以在redis.conf中配置)
127.0.0.1:6379> select 1 #切换到第二个库(从0开始数)
OK
127.0.0.1:6379[1]> keys *
(empty list or set)
127.0.0.1:6379[1]> set name 123
OK
127.0.0.1:6379[1]> keys *
1) "name"
127.0.0.1:6379[1]> select 0
OK
127.0.0.1:6379> keys *
1) "k2"
2) "k3"
3) "k1"
127.0.0.1:6379> select 15
OK
127.0.0.1:6379> select 16
(error) ERR invalid DB index
好了redis的安装就先说到这儿了
免责声明:本站发布的内容(图片、视频和文字)以原创、转载和分享为主,文章观点不代表本网站立场,如果涉及侵权请联系站长邮箱:is@yisu.com进行举报,并提供相关证据,一经查实,将立刻删除涉嫌侵权内容。