您好,登录后才能下订单哦!
这篇文章主要介绍了如何使用webview适配H5上传照片或者视频文件,具有一定借鉴价值,感兴趣的朋友可以参考下,希望大家阅读完这篇文章之后大有收获,下面让小编带着大家一起了解一下。
一、需要实现的功能:
用H5实现的App中需要在H5获取手机中的照片或者视频文件上传到服务器。

二、分析实现方法:
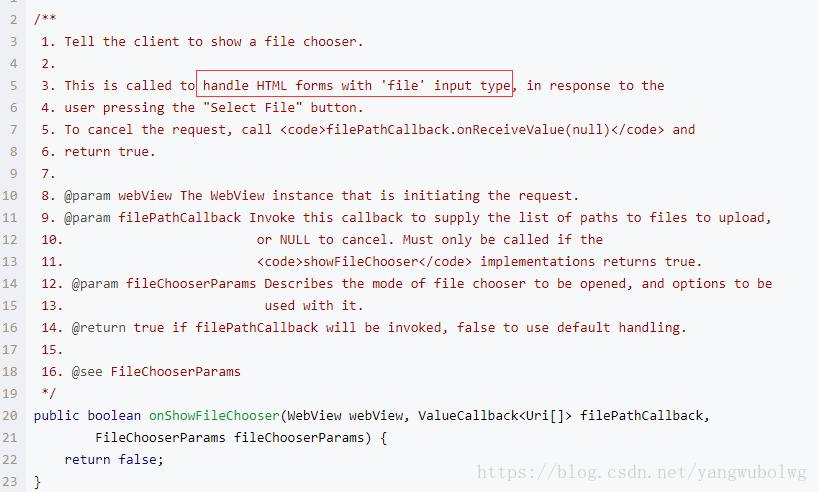
由于不懂前端开发,不知道H5中有 input file之类的标签控件,可以用来选择文件,刚开始的思路还是想着native 端是否要通过提供inputstream流方式,将文件内容传递给JS。后来和前端沟通之后,H5在电脑端都是用input 设置type为 file 来实现文件选择功能,于是才开始搜索资料,发现时需要在webview中设置 setWebChromeClient ,其中有对input 的响应回调:
三、具体实现:
前端代码
<input type="file" accept="*/*" name="choose file">
<input type="file" accept="image/*" name="choose image">
<input type="file" accept="video/*" name="choose video">
<input type="file" accept="image/example" name="take photo and upload image">
<input type="file" accept="video/example" name="take video and upload video">
native端代码:
@RequiresApi(api = Build.VERSION_CODES.LOLLIPOP)
@Override
public boolean onShowFileChooser(WebView webView,
                                 ValueCallback<Uri[]> filePathCallback,
                                 WebChromeClient.FileChooserParams fileChooserParams) {
    mFilePathCallbacks = filePathCallback;
    // TODO: 根据标签中得接收类型,启动对应的文件类型选择器
    String[] acceptTypes = fileChooserParams.getAcceptTypes();
    for (String type : acceptTypes) {
        Log.d(TAG, "acceptTypes=" + type);
    }
    // 针对拍照后马上进入上传状态处理
    if ((acceptTypes.length > 0) && acceptTypes[0].equals("image/example")) {
        Log.d(TAG, "onShowFileChooser takePhoto");
        Intent it = CameraFunction.takePhoto(mContext);
        startActivityForResult(it, TAKE_PHOTO_AND_UPLOAD_REQUEST);
        return true;
    }

    // 针对录像后马上进入上传状态处理
    if ((acceptTypes.length > 0) && acceptTypes[0].equals("video/example")) {
        Log.d(TAG, "onShowFileChooser record video");
        Intent it = CameraFunction.recordVideo(mContext);
        startActivityForResult(it, RECORD_VIDEO_AND_UPLOAD_REQUEST);
        return true;
    }

    Intent intent = new Intent(Intent.ACTION_GET_CONTENT);
    intent.addCategory(Intent.CATEGORY_OPENABLE);
    if (acceptTypes.length > 0) {
        if (acceptTypes[0].contains("image")) {
            intent.setType("image/*");
        } else if (acceptTypes[0].contains("video")) {
            intent.setType("video/*");
        } else {
            intent.setType("*/*");
        }
    } else {
        intent.setType("*/*");
    }

    WebViewActivity.this.startActivityForResult(Intent.createChooser(intent, "File Chooser"),
            REQUEST_FILE_PICKER);
    return true;
}
回调设置uri
/**
 * 设置input 标签出发的回调选择文件路径,优先使用path参数,
 * 其次使用uri参数
 * @param uriParam
 * @param pathParam
 */
private void setFilePathCallback(Uri uriParam, String pathParam) {
    //都为空,则设置null
    if (uriParam == null && pathParam == null) {
        if (mFilePathCallback != null) {
            mFilePathCallback.onReceiveValue(null);
        }
        if (mFilePathCallbacks != null) {
            mFilePathCallbacks.onReceiveValue(null);
        }
    } else if (null != pathParam) { // 优先使用path
        if (mFilePathCallback != null) {
            Uri uri = Uri.fromFile(new File(pathParam));
            mFilePathCallback.onReceiveValue(uri);
        }
        if (mFilePathCallbacks != null) {
            Uri uri = Uri.fromFile(new File(pathParam));
            mFilePathCallbacks.onReceiveValue(new Uri[] { uri });
        }
    } else if (null != uriParam) { //其次使用uri
        if (mFilePathCallback != null) {
            String path = UriUtils.getPath(getApplicationContext(), uriParam);
            Uri uri = Uri.fromFile(new File(path));
            mFilePathCallback.onReceiveValue(uri);
        }
        if (mFilePathCallbacks != null) {
            String path = UriUtils.getPath(getApplicationContext(), uriParam);
            Uri uri = Uri.fromFile(new File(path));
            mFilePathCallbacks.onReceiveValue(new Uri[] { uri });
        }
    }

    mFilePathCallback = null;
    mFilePathCallbacks = null;

}
针对各个请求场景进行处理:
public void onActivityResult(int requestCode, int resultCode, Intent intent) {感谢你能够认真阅读完这篇文章,希望小编分享的“如何使用webview适配H5上传照片或者视频文件”这篇文章对大家有帮助,同时也希望大家多多支持亿速云,关注亿速云行业资讯频道,更多相关知识等着你来学习!
免责声明:本站发布的内容(图片、视频和文字)以原创、转载和分享为主,文章观点不代表本网站立场,如果涉及侵权请联系站长邮箱:is@yisu.com进行举报,并提供相关证据,一经查实,将立刻删除涉嫌侵权内容。