您好,登录后才能下订单哦!
密码登录
登录注册
点击 登录注册 即表示同意《亿速云用户服务条款》
这篇文章将为大家详细讲解有关Laravel如何重写日志,小编觉得挺实用的,因此分享给大家做个参考,希望大家阅读完这篇文章后可以有所收获。
更改目的:
重写了日志格式
加入trace,一次请求的唯一标识
加入error级别信息推送,事例中使用企业微信群助手
让我们可以更及时、更优雅、更方便追踪日志信息
有助于初学者了解Laravel框架
1。将文件 AppTool.php、Logger.php、LogServiceProvider.php复制到 app/Providers文件夹下,将文件BaseCommand.php复制到App\Console下
2 。在config/app.php→providers中加入
'providers' => [
 ……
 // 注册日志
  App\Providers\LogServiceProvider::class
 ……
 ];
3。在项目中使用如下方式调用
// php-fpm方式调用 日志路径 /opt/logs/xxx.log /opt/logs/xxx.error
\Log::info("info");
\Log::debug("debug");
\Log::error("error");
// 在cli方式调用 日志路径 /opt/clogs/xxx.log /opt/clogs/xxx.error
app('cLog')->info("info");
app('cLog')->debug("debug");
app('cLog')->error("error");4。在日志级别为error时,会执行推送,本事例中采用企业微信群推送
  /**
   * 推送错误信息
   * @param $message
   */
  public function pushErrorMessage($message)
  {
    $content = "app:". static::getAppName() ."
src: ". static::getRequestSource() ."
trace:". self::getTrace() ."
url:". static::$uri_info ."
error: ". $message ."
time:". date("Y-m-d H:i:s");
    // 测试群
    $url = "xxxxxxxxxxxx";
    $result = app('\GuzzleHttp\Client')->request('POST', $url, [
      \GuzzleHttp\RequestOptions::JSON=>[
        "msgtype"=> "text",
        "text"=> [
          "content" => $content
        ]
      ]
    ]);
    $body = \GuzzleHttp\json_decode($result->getBody()->getContents(), true);
  }
5 。日志内容
注意事项:
修改如下代码不同版本bind部分会有所不同,具体根据\Illuminate\Foundation\Application::registerCoreContainerAliases中log信息修改。
如laravel6.x中为'log' => [\Illuminate\Log\LogManager::class, \Psr\Log\LoggerInterface::class],,
修改方式就如下方代码
……
    // 注入全局容器
    $app->instance('Log', $logger);
    $app->bind('Psr\Log\LoggerInterface', function (Application $app) {
      return $app['log']->getLogger();
    });
    $app->bind('\Illuminate\Log\LogManager', function (Application $app) {
      return $app['log'];
    });
……有关console中使用时,建议重写\Illuminate\Console\Command::info、\Illuminate\Console\Command::line、\Illuminate\Console\Command::error,然后所有console继承BaseCommand
demo代码块:
use App\Console\BaseCommand;
class Demo extends BaseCommand
{
protected $signature = 'command:demo';
protected $description = 'demo';
public function __construct()
{
parent::__construct();
}
public function handle()
{
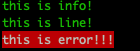
$this->info('this is info!');
$this->line('this is line!');
$this->error('this is error!!!');
}
}demo 命令行输出:
关于“Laravel如何重写日志”这篇文章就分享到这里了,希望以上内容可以对大家有一定的帮助,使各位可以学到更多知识,如果觉得文章不错,请把它分享出去让更多的人看到。
免责声明:本站发布的内容(图片、视频和文字)以原创、转载和分享为主,文章观点不代表本网站立场,如果涉及侵权请联系站长邮箱:is@yisu.com进行举报,并提供相关证据,一经查实,将立刻删除涉嫌侵权内容。