жӮЁеҘҪпјҢзҷ»еҪ•еҗҺжүҚиғҪдёӢи®ўеҚ•е“ҰпјҒ
еҜҶз Ғзҷ»еҪ•
зҷ»еҪ•жіЁеҶҢ
зӮ№еҮ» зҷ»еҪ•жіЁеҶҢ еҚіиЎЁзӨәеҗҢж„ҸгҖҠдәҝйҖҹдә‘з”ЁжҲ·жңҚеҠЎжқЎж¬ҫгҖӢ
иҝҷзҜҮж–Үз« дё»иҰҒд»Ӣз»ҚдәҶеҰӮдҪ•дҪҝз”ЁSpringBootиҮӘе®ҡд№үstarterпјҢе…·жңүдёҖе®ҡеҖҹйүҙд»·еҖјпјҢж„ҹе…ҙи¶Јзҡ„жңӢеҸӢеҸҜд»ҘеҸӮиҖғдёӢпјҢеёҢжңӣеӨ§е®¶йҳ…иҜ»е®ҢиҝҷзҜҮж–Үз« д№ӢеҗҺеӨ§жңү收иҺ·пјҢдёӢйқўи®©е°Ҹзј–еёҰзқҖеӨ§е®¶дёҖиө·дәҶи§ЈдёҖдёӢгҖӮ
springbootдёҖз§Қе…Ёж–°зҡ„зј–зЁӢ规иҢғпјҢе…¶и®ҫи®Ўзӣ®зҡ„жҳҜз”ЁжқҘз®ҖеҢ–ж–°Springеә”з”Ёзҡ„еҲқе§Ӣжҗӯе»әд»ҘеҸҠејҖеҸ‘иҝҮзЁӢпјҢSpringBootд№ҹжҳҜдёҖдёӘжңҚеҠЎдәҺжЎҶжһ¶зҡ„жЎҶжһ¶пјҢжңҚеҠЎиҢғеӣҙжҳҜз®ҖеҢ–й…ҚзҪ®ж–Ү件гҖӮ
е·ҘзЁӢз”ұxxx-sprig-boot-starterе’Ңxxx-sprig-boot-starter-configureдёӨдёӘжЁЎеқ—з»„жҲҗпјӣ
xxx-sprig-boot-starterжЁЎеқ—
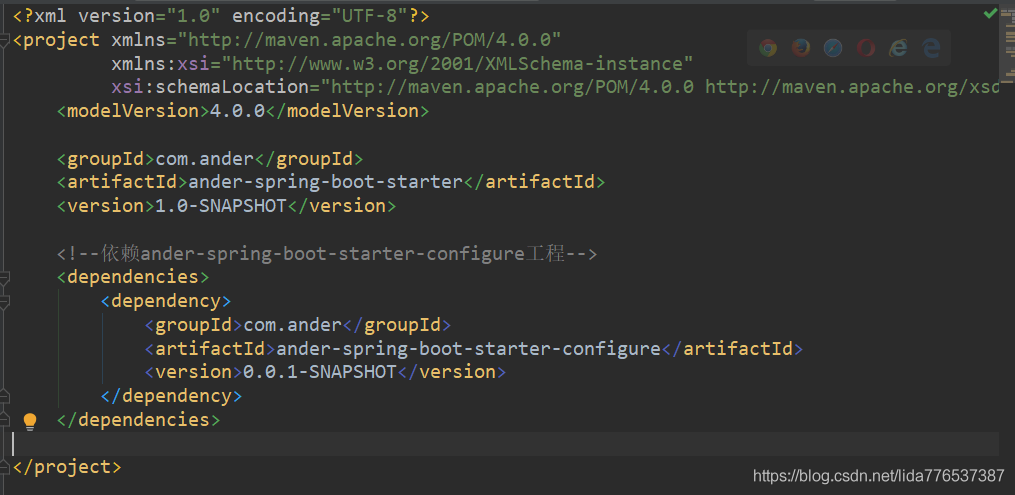
еҸӘз”ЁжқҘеҒҡдҫқиө–еҜје…Ҙ
дҫқиө–дәҺ xxx-sprig-boot-starter-configureжЁЎеқ—пјҢжІЎжңүе®һйҷ…д»Јз Ғ
<?xml version="1.0" encoding="UTF-8"?> <project xmlns="http://maven.apache.org/POM/4.0.0" xmlns:xsi="http://www.w3.org/2001/XMLSchema-instance" xsi:schemaLocation="http://maven.apache.org/POM/4.0.0 http://maven.apache.org/xsd/maven-4.0.0.xsd"> <modelVersion>4.0.0</modelVersion> <groupId>com.ander</groupId> <artifactId>ander-spring-boot-starter</artifactId> <version>1.0-SNAPSHOT</version> <!--дҫқиө–ander-spring-boot-starter-configureе·ҘзЁӢ--> <dependencies> <dependency> <groupId>com.ander</groupId> <artifactId>ander-spring-boot-starter-configure</artifactId> <version>0.0.1-SNAPSHOT</version> </dependency> </dependencies> </project>
xxx-sprig-boot-starter-configureжЁЎеқ—
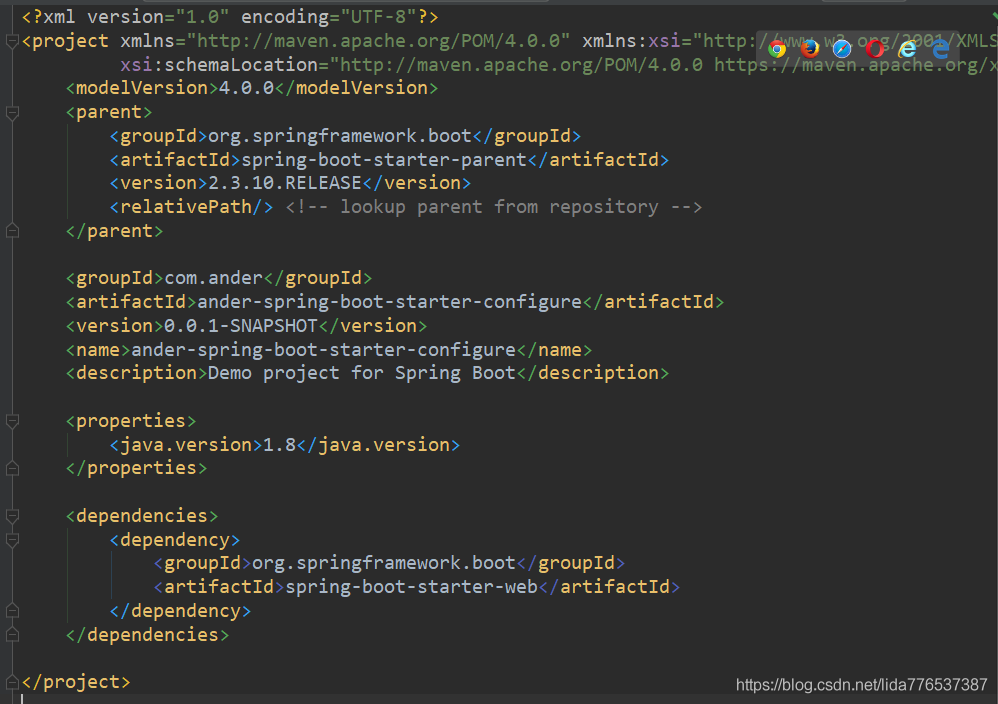
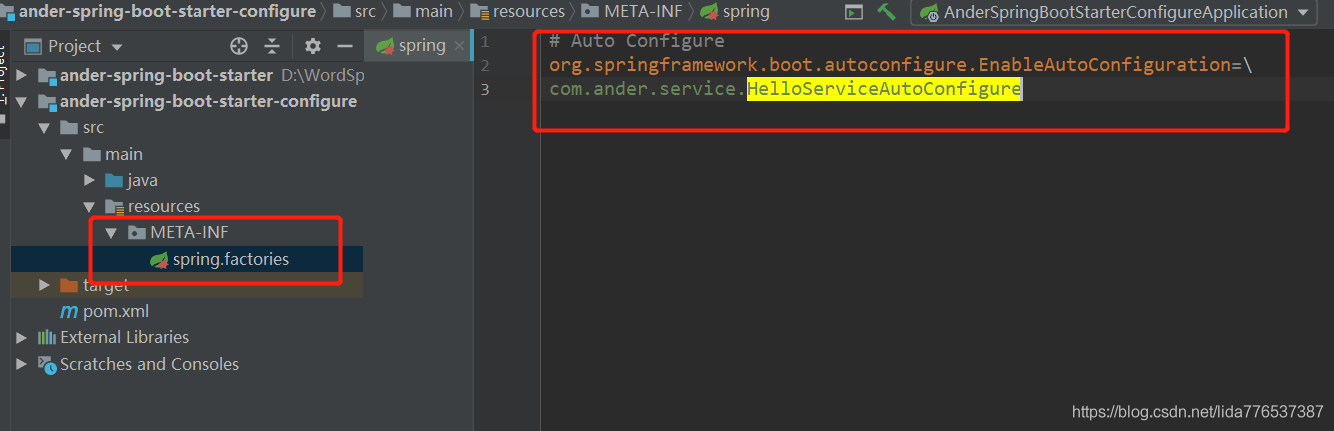
дё“й—ЁиҮӘеҠЁй…ҚзҪ®жЁЎеқ—
дҫқиө–дәҺspring-boot-starter-web
<?xml version="1.0" encoding="UTF-8"?>
<project xmlns="http://maven.apache.org/POM/4.0.0" xmlns:xsi="http://www.w3.org/2001/XMLSchema-instance"
         xsi:schemaLocation="http://maven.apache.org/POM/4.0.0 https://maven.apache.org/xsd/maven-4.0.0.xsd">
    <modelVersion>4.0.0</modelVersion>
    <parent>
        <groupId>org.springframework.boot</groupId>
        <artifactId>spring-boot-starter-parent</artifactId>
        <version>2.3.10.RELEASE</version>
        <relativePath/> <!-- lookup parent from repository -->
    </parent>

    <groupId>com.ander</groupId>
    <artifactId>ander-spring-boot-starter-configure</artifactId>
    <version>0.0.1-SNAPSHOT</version>
    <name>ander-spring-boot-starter-configure</name>
    <description>Demo project for Spring Boot</description>

    <properties>
        <java.version>1.8</java.version>
    </properties>

    <dependencies>
        <dependency>
            <groupId>org.springframework.boot</groupId>
            <artifactId>spring-boot-starter-web</artifactId>
        </dependency>
    </dependencies>

</project>
/**
* ServiceеұӮ
*
* @Author: Ander
* @Date: 2021-05-04
*/
public class HelloService {
private HelloServiceProperties helloServiceProperties;
public String helloService(String name) {
return helloServiceProperties.getPrefix() + " "+ name + " " + helloServiceProperties.getSuffix();
}
public HelloServiceProperties getHelloServiceProperties() {
return helloServiceProperties;
}
public void setHelloServiceProperties(HelloServiceProperties helloServiceProperties) {
this.helloServiceProperties = helloServiceProperties;
}
}/**
* еұһжҖ§й…ҚзҪ®зұ»
*
* @Author: Ander
* @Date: 2021-05-04
*/
@ConfigurationProperties(prefix = "com.ander")
public class HelloServiceProperties {
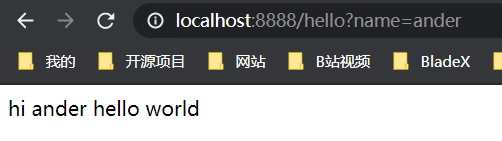
private String prefix = "hi";
private String suffix = "hello world";
public String getPrefix() {
return prefix;
}
public void setPrefix(String prefix) {
this.prefix = prefix;
}
public String getSuffix() {
return suffix;
}
public void setSuffix(String suffix) {
this.suffix = suffix;
}
}@EnableConfigurationProperties({HelloServiceProperties.class})дҪңз”Ёпјҡи®©xxxPropertiesз”ҹж•ҲеҠ е…ҘеҲ°е®№еҷЁдёӯ
/**
* иҮӘе®ҡд№үstarterиҮӘеҠЁй…ҚзҪ®зұ»
*
* @Date: 2021-05-04
*/
@Configuration
@ConditionalOnWebApplication // жҢҮе®ҡwebеә”з”ЁжүҚз”ҹж•Ҳ
@EnableConfigurationProperties({HelloServiceProperties.class})
public class HelloServiceAutoConfigure {
@Autowired
private HelloServiceProperties helloServiceProperties;
@Bean
public HelloService helloService() {
HelloService helloService = new HelloService();
helloService.setHelloServiceProperties(helloServiceProperties);
return helloService;
}
}
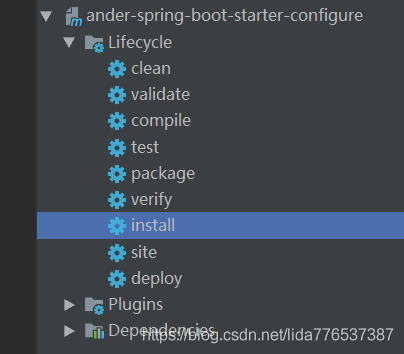
жіЁж„Ҹе…Ҳе®үиЈ…xxx-spring-boot-starter-configureпјҢеҶҚе®үиЈ…xxx-spring-boot-starter
/**
* starterжөӢиҜ•жҺ§еҲ¶зұ»
*
* @Author: Ander
* @Date: 2021-05-05
*/
@RestController
public class StarterTestController {
@Autowired
private HelloService helloService;
@GetMapping("hello")
public String hello(String name) {
return helloService.helloService(name);
}
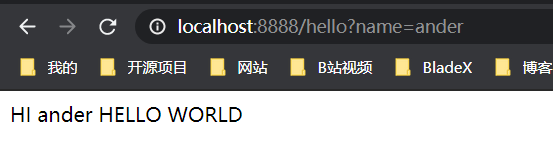
}server.port=8888
com.ander.prefix=HI
com.ander.suffix=HELLO WORLD
ж„ҹи°ўдҪ иғҪеӨҹи®Өзңҹйҳ…иҜ»е®ҢиҝҷзҜҮж–Үз« пјҢеёҢжңӣе°Ҹзј–еҲҶдә«зҡ„вҖңеҰӮдҪ•дҪҝз”ЁSpringBootиҮӘе®ҡд№үstarterвҖқиҝҷзҜҮж–Үз« еҜ№еӨ§е®¶жңүеё®еҠ©пјҢеҗҢж—¶д№ҹеёҢжңӣеӨ§е®¶еӨҡеӨҡж”ҜжҢҒдәҝйҖҹдә‘пјҢе…іжіЁдәҝйҖҹдә‘иЎҢдёҡиө„и®Ҝйў‘йҒ“пјҢжӣҙеӨҡзӣёе…ізҹҘиҜҶзӯүзқҖдҪ жқҘеӯҰд№ !
е…ҚиҙЈеЈ°жҳҺпјҡжң¬з«ҷеҸ‘еёғзҡ„еҶ…е®№пјҲеӣҫзүҮгҖҒи§Ҷйў‘е’Ңж–Үеӯ—пјүд»ҘеҺҹеҲӣгҖҒиҪ¬иҪҪе’ҢеҲҶдә«дёәдё»пјҢж–Үз« и§ӮзӮ№дёҚд»ЈиЎЁжң¬зҪ‘з«ҷз«ӢеңәпјҢеҰӮжһңж¶үеҸҠдҫөжқғиҜ·иҒ”зі»з«ҷй•ҝйӮ®з®ұпјҡis@yisu.comиҝӣиЎҢдёҫжҠҘпјҢ并жҸҗдҫӣзӣёе…іиҜҒжҚ®пјҢдёҖз»ҸжҹҘе®һпјҢе°Ҷз«ӢеҲ»еҲ йҷӨж¶үе«ҢдҫөжқғеҶ…е®№гҖӮ
жӮЁеҘҪпјҢзҷ»еҪ•еҗҺжүҚиғҪдёӢи®ўеҚ•е“ҰпјҒ