您好,登录后才能下订单哦!
这篇文章将为大家详细讲解有关如何通过MS Office for Mac的Legacy Package进行CVE-2018-8412漏洞分析,文章内容质量较高,因此小编分享给大家做个参考,希望大家阅读完这篇文章后对相关知识有一定的了解。
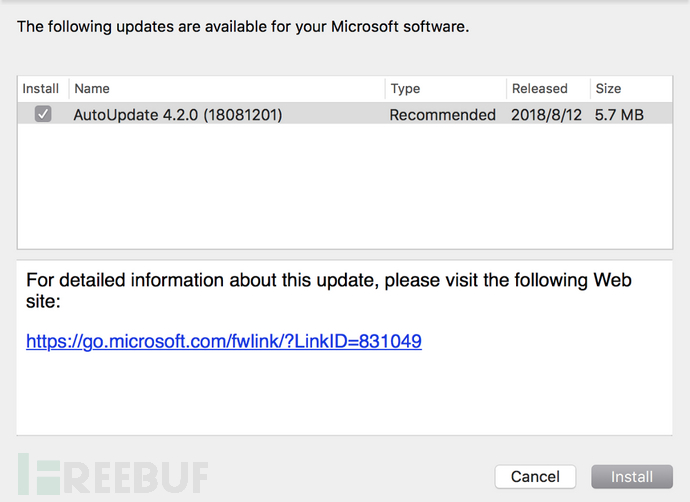
注:补丁已经发布,请及时将你的MAU升级到18081201

Microsoft Autoupdate Helper 3.18(180410) + legacy SilverLight insecure installer package EoP
影响范围:Microsoft Office for Mac 2016和SkypeForBusiness(16.17.0.65)
本报告中涉及两个主要缺陷:
1.代码签名验证绕过;
2.不安全的installer模块加载。
在/Library/PrivilegedHelperTools/com.microsoft.autoupdate.helper中有一个XPC服务com.microsoft.autoupdate.helper。
该服务是基于NSXPCConnection的,并且仅提供了两个XPC接口:
@protocol MAUHelperToolProtocol
- (void)logString:(NSString *)arg1 atLevel:(int)arg2 fromAppName:(NSString *)arg3;
- (void)installUpdateWithPackage:(NSString *)arg1 withXMLPath:(NSString *)arg2 withReply:(void (^)(NSString *))arg3;
@end
在XPC建立连接的时候,会检查对方pid对应的代码签名是否在白名单列表之内:
char __cdecl -[MAUHelperTool listener:shouldAcceptNewConnection:](MAUHelperTool *self, SEL a2, id a3, id a4)
{
  ...

  caller_pid = (unsigned __int64)objc_msgSend(v6, "processIdentifier", self);
  ksecguestattrpid = kSecGuestAttributePid;
  number_with_pid = objc_msgSend(&OBJC_CLASS___NSNumber, "numberWithInt:", caller_pid);
  pid_as_nsnumber = objc_retainAutoreleasedReturnValue(number_with_pid);
  _dict = objc_msgSend(
            &OBJC_CLASS___NSDictionary,
            "dictionaryWithObjects:forKeys:count:",
            &pid_as_nsnumber,
            &ksecguestattrpid,
            1LL);
  attributes = objc_retainAutoreleasedReturnValue(_dict);
  objc_release(pid_as_nsnumber);
  guest_code = 0LL;
  v12 = 0;
  if ( !(unsigned int)SecCodeCopyGuestWithAttributes(0LL, attributes, 0LL, &guest_code) )// kSecCSDefaultFlags
  {
    v43 = 0LL;
    v12 = 0;
    if ( !(unsigned int)SecRequirementCreateWithString(
                          CFSTR("(identifier \"com.microsoft.autoupdate2\" or identifier \"com.microsoft.autoupdate.fba\") and anchor apple generic and certificate 1[field.1.2.840.113635.100.6.2.6] and certificate leaf[field.1.2.840.113635.100.6.1.13] and certificate leaf[subject.OU] = UBF8T346G9"),
                          0LL,
                          &v43) )
      v12 = (unsigned int)SecCodeCheckValidity(guest_code, 0LL, v43) == 0;
    if ( v43 )
      CFRelease(v43);
以下是两种(可能)的绕过方法:
首先,它使用pid这是不可信任的,因为exec*函数可以将进程本身替换为另一个进程,且可以保持前一个pid不变。具体请参阅 MacOS/iOS userspace entitlement checking is racy和Don’t Trust the PID!
实际上这种方法是不可利用的。当调用者尝试替换自身时,失效的处理程序会被调用,这会导致[MAUHelperTool shouldExit]方法返回true。
v30 = _NSConcreteStackBlock;
    v31 = -1040187392;
    v32 = 0;
    v33 = sub_100002748;
    v34 = &unk_100008440;
    v19 = (void *)objc_retain(v27, v7);
    v35 = v19;
    objc_copyWeak(&v36, &v43);
    objc_msgSend(v7, "setInvalidationHandler:", &v30);
    v20 = objc_msgSend(v19, "loggingConnections");
    v21 = (void *)objc_retainAutoreleasedReturnValue(v20);
    objc_msgSend(v21, "performSelectorOnMainThread:withObject:waitUntilDone:", "addObject:", v7, 1LL);
    objc_release(v21);
__int64 __fastcall sub_100002748(__int64 a1)
{
  void *v1; // rax
  void *v2; // r14
  __int64 v3; // rbx
  v1 = objc_msgSend(*(void **)(a1 + 32), "loggingConnections");
  v2 = (void *)objc_retainAutoreleasedReturnValue(v1);
  v3 = objc_loadWeakRetained(a1 + 40);
  objc_msgSend(v2, "performSelectorOnMainThread:withObject:waitUntilDone:", "removeObject:", v3, 1LL);
  objc_release(v3);
  return objc_release(v2);
}
然后主事件循环将终止该进程。
另一种方法是使用DYLD_* env spawn一个有效进程来启用动态代码注入。
由于以下文件不受保护,因此可以滥用它们来绕过签名检查:
/Library/Application Support/Microsoft/MAU2.0/Microsoft AutoUpdate.app/Contents/MacOS/Microsoft AutoUpdate
/Library/Application Support/Microsoft/MAU2.0/Microsoft AutoUpdate.app/Contents/MacOS/Microsoft AU Daemon.app/Contents/MacOS/Microsoft AU Daemon
如果你想要保护这些二进制文件,可以使用以下任一方法:
1.库验证,将-o library添加到“Other Code Signing Flags”;
2.macho文件的Header中有名为__RESTRICT的Segment段,且该段有名为__restrict的sections,则macho就会阻止进程的依附。
3.使用entitlements签名MachO文件。
现在,我已具备与XPC通信的能力。
MAU 提供的接口有一个 - [MAUHelperTool installUpdateWithPackage:withXMLPath:withReply:],它接受来自XPC客户端的路径并会安装它,但它会锁定包文件并在包上执行数字签名验证!

我无论如何都无法绕过pkg文件上的签名验证。因此,我决定放弃对它的绕过。
在检查了一些有效包之后,我找到了legacy SilverLight installer:https://www.microsoft.com/getsilverlight/Get-Started/Install/Default。
$ pkgutil --check-sign /Volumes/Silverlight/silverlight.pkg
Package "silverlight.pkg":
   Status: signed by a certificate trusted by Mac OS X
   Certificate Chain:
    1. Developer ID Installer: Microsoft Corporation (UBF8T346G9)
       SHA1 fingerprint: 9B 6B 91 3B B1 3F 68 26 12 20 EC 72 11 F0 F2 0E 92 E4 B1 EB
       -----------------------------------------------------------------------------
    2. Developer ID Certification Authority
       SHA1 fingerprint: 3B 16 6C 3B 7D C4 B7 51 C9 FE 2A FA B9 13 56 41 E3 88 E1 86
       -----------------------------------------------------------------------------
    3. Apple Root CA
       SHA1 fingerprint: 61 1E 5B 66 2C 59 3A 08 FF 58 D1 4A E2 24 52 D1 98 DF 6C 60
此外,这里的post-install脚本也引起了我的注意。
设置全局写入权限:
pushd /Library/Internet\ Plug-Ins/
rm -rf WPFe.plugin/
chown -R root:admin Silverlight.plugin/
chmod -R 775 Silverlight.plugin/
popd
pushd /Library/Application\ Support/Microsoft/
chown -R root:admin Silverlight/
chmod -R 775 Silverlight/
popd
pushd /Library/Application\ Support/
chown root:admin Microsoft/
chmod 775 Microsoft/
有趣的命令:
_PRIBX=`ls -r "/Library/Application Support/Microsoft/PlayReady/Cache" | grep .key | awk '{if (NR==1) {print $1}}' `
    if [ "$_PRIBX" ]
    then
        _PRIBXVER=`./PlayReadyGetIBXVersionTool "/Library/Application Support/Microsoft/PlayReady/Cache/"$_PRIBX`
        if [ "$_PRIBXVER" = "mspribx.1.5.8" ]
pushd "/tmp/SilverlightInstallTools"
_SPRDResult=`./rundylib "/Library/Internet Plug-Ins/Silverlight.plugin/Contents/MacOS/SLMSPRBootstrap.dylib"`
以及使用rundylib打开一个固定路径的链接库。
这个rundylib是干嘛的?正如它的名字一样。
int __cdecl main(int argc, const char **argv, const char **envp)
{
  ...
  v3 = argv[1];
  if ( !v3 )
  {
    puts("ERROR: Invalid path ");
    return 1;
  }
  v5 = dlopen(v3, 5);
}
那么PlayReadyGetIBXVersionTool呢?
signed int __cdecl GetDyLibVersion(const char *path, unsigned int *a2, unsigned int *a3, unsigned int *a4)
{
  ...
  handle = dlopen(path, 1);
  if ( handle )
  {
    v6 = _dyld_image_count();
    for ( i = 0; ; ++i )
    {
      if ( i == v6 )
        goto LABEL_22;
      v8 = _dyld_get_image_name(i);
      if ( !v8 )
      {
        v9 = dlerror();
        printf("Image name not found or index out of range. Error: %s\n", v9);
        v5 = 5;
        goto LABEL_21;
      }
      if ( !strcmp(v8, path) )
        break;
    }
    v10 = _dyld_get_image_header(i);
    if ( !v10 )
    {
它的作用是在特权进程中,加载并执行来自“Cache”的共享库,以获取其版本信息。
/Library/Internet Plug-Ins/Silverlight.plugin/Contents/MacOS/SLMSPRBootstrap.dylib
和
/Library/Application Support/Microsoft/PlayReady/Cache
均可由非特权用户写入。但替换SLMSPRBootstrap.dylib需要条件竞争,比较难以控制;而Cache则不存在这个问题。
利用步骤如下:
1.DYLD_INSERT_LIBRARIES注入“Microsoft AutoUpdate”;
2.将易受攻击的SilverLight installer放置在某路径下,发送XPC到updaterhelper请求安装;
3.创建cache文件夹,并将共享库放置在root目录中;
4.安装程序被执行,我们的恶意代码则将由rooted进程加载。
关于如何通过MS Office for Mac的Legacy Package进行CVE-2018-8412漏洞分析就分享到这里了,希望以上内容可以对大家有一定的帮助,可以学到更多知识。如果觉得文章不错,可以把它分享出去让更多的人看到。
免责声明:本站发布的内容(图片、视频和文字)以原创、转载和分享为主,文章观点不代表本网站立场,如果涉及侵权请联系站长邮箱:is@yisu.com进行举报,并提供相关证据,一经查实,将立刻删除涉嫌侵权内容。