жӮЁеҘҪпјҢзҷ»еҪ•еҗҺжүҚиғҪдёӢи®ўеҚ•е“ҰпјҒ
еҜҶз Ғзҷ»еҪ•
зҷ»еҪ•жіЁеҶҢ
зӮ№еҮ» зҷ»еҪ•жіЁеҶҢ еҚіиЎЁзӨәеҗҢж„ҸгҖҠдәҝйҖҹдә‘з”ЁжҲ·жңҚеҠЎжқЎж¬ҫгҖӢ
Virtual WireжЁЎејҸеҸҜд»ҘеңЁдёҚж”№еҸҳеҺҹжңүзҪ‘з»ңжӢ“жү‘з»“жһ„зҡ„жғ…еҶөдёӢпјҢе®һзҺ°е®үе…ЁгҖӮйңҖиҰҒдёӨдёӘжҺҘеҸЈдёәдёҖз»„иҝӣиЎҢз»‘е®ҡгҖӮеҸҜд»Ҙе®һзҺ°жүҖжңүзҡ„е®үе…ЁйҳІжҠӨеҠҹиғҪпјҢж”ҜжҢҒNATгҖӮеҗҢж—¶еҸҜд»Ҙе®һзҺ°е®үе…ЁеҢәеҹҹй—ҙVLAN Tagзҡ„жҺ§еҲ¶гҖӮ
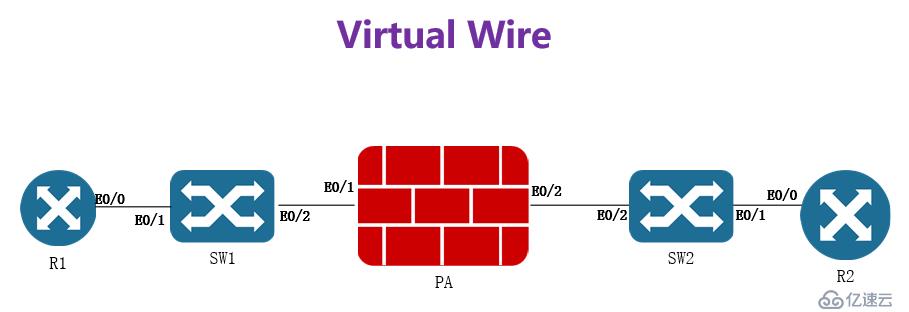
| еәҸеҸ· | и®ҫеӨҮеҗҚз§° | жҺҘеҸЈ | жҺҘеҸЈдҝЎжҒҜ | еӨҮжіЁ |
|---|---|---|---|---|
| 1 | R1 | E0/0 | 10.0.0.1/24 | |
| 2 | SW1 | E0/1 | VLAN2 | |
| E0/2 | Trunk | |||
| 3 | SW2 | E0/1 | VLAN2 | |
| E0/2 | Trunk | |||
| 4 | PA | E1/1 | Virtual Wire | еҢәеҹҹпјҡUntrust |
| E1/2 | Virtual Wire | еҢәеҹҹпјҡTrust | ||
| 5 | R2 | E0/1 | 10.0.0.2/24 | ејҖеҗҜtelnet |
R1пјҡ
------------
en
conf t
interface e0/0
ip address 10.0.0.1 255.255.255.0
no shutdown
R2пјҡ
------------
en
conf t
hostname R1
interface e0/0
ip address 10.0.0.2 255.255.255.0
no shutdown
exit
line vty 0 4
password cisco
SW1пјҡ
------------
en
conf t
hostname SW1
vlan 2
exit
interface e0/1
switch mode access
no shutdown
exit
interface Ethernet0/2
switchport trunk encapsulation dot1q
switchport mode trunk
exit
================================================
SW2пјҡ
------------
en
conf t
hostname SW2
vlan 2
exit
interface e0/1
switch mode access
no shutdown
exit
interface Ethernet0/2
switchport trunk encapsulation dot1q
switchport mode trunk
exit

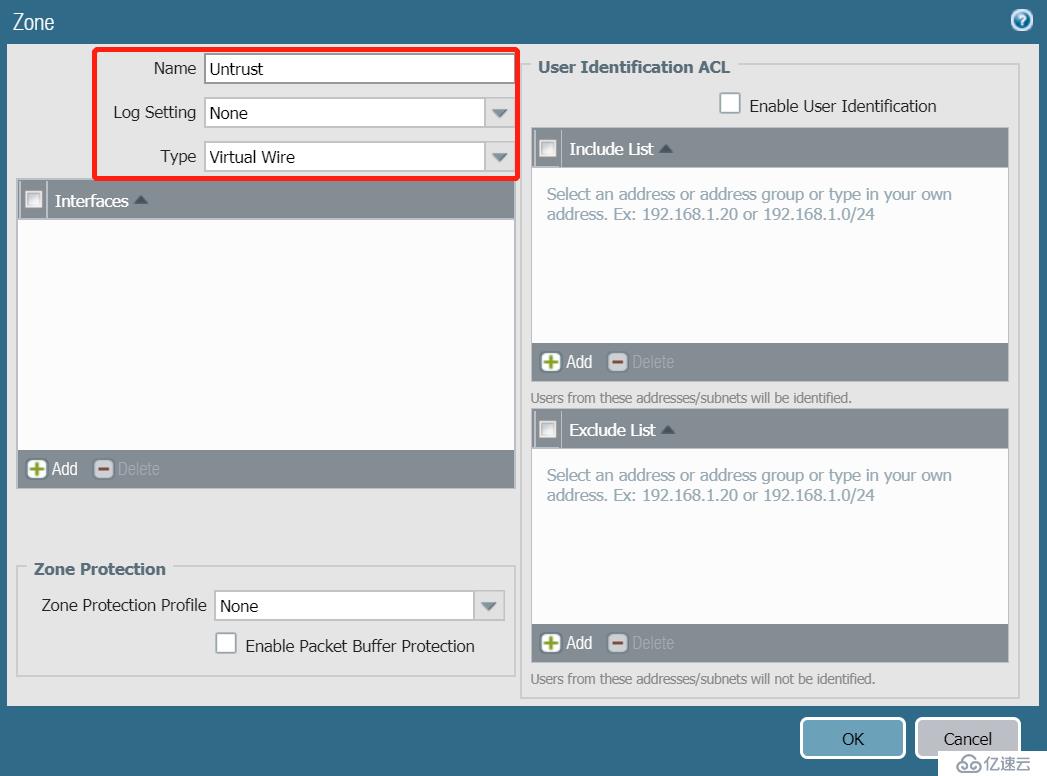
еҲӣе»әZone Trustе’ҢUntrust


гҖҗPolicyгҖ‘-гҖҗSecurityгҖ‘
иҜҙжҳҺпјҡй…ҚзҪ®е®ҢжҲҗеҗҺпјҢи®°еҫ—Commit
е…ҚиҙЈеЈ°жҳҺпјҡжң¬з«ҷеҸ‘еёғзҡ„еҶ…е®№пјҲеӣҫзүҮгҖҒи§Ҷйў‘е’Ңж–Үеӯ—пјүд»ҘеҺҹеҲӣгҖҒиҪ¬иҪҪе’ҢеҲҶдә«дёәдё»пјҢж–Үз« и§ӮзӮ№дёҚд»ЈиЎЁжң¬зҪ‘з«ҷз«ӢеңәпјҢеҰӮжһңж¶үеҸҠдҫөжқғиҜ·иҒ”зі»з«ҷй•ҝйӮ®з®ұпјҡis@yisu.comиҝӣиЎҢдёҫжҠҘпјҢ并жҸҗдҫӣзӣёе…іиҜҒжҚ®пјҢдёҖз»ҸжҹҘе®һпјҢе°Ҷз«ӢеҲ»еҲ йҷӨж¶үе«ҢдҫөжқғеҶ…е®№гҖӮ
жӮЁеҘҪпјҢзҷ»еҪ•еҗҺжүҚиғҪдёӢи®ўеҚ•е“ҰпјҒ