您好,登录后才能下订单哦!
---Elasticsearch 分布式安装步骤
考虑需要安装elasticsearch-head作为web展示 所以首先安装nodejs 主要是利用npm
wget https://npm.taobao.org/mirrors/node/v11.0.0/node-v11.0.0.tar.gz
tar –zxvf node-v11.0.0.tar.gz
cd node-v11.0.0
yum install gcc gcc-c++
./configure
Make
Make install
开始安装elasticsearch
1. 安装3台虚拟机
2. 安装jdk
解压 tar –zxvf elasticsearch7.2.2
切换用户 su cm(elasticsearch 不能在root用户下启动)
a) 修改config/elasticsearch.yml
cluster.name: es-app #集群名称,可以自行修改
node.name: es-1 #节点名称,自行修改
network.host: 192.168.235.133 #主机地址,这里写本机IP
http.port: 9200 #端口
http.cors.enabled: true #设置跨域
http.cors.allow-origin: "*" #设置访问
b) 再启动查看不能启动原因
[1]: max file descriptors [4096] for elasticsearch process is too low, increase to at least [65536]
[2]: max virtual memory areas vm.max_map_count [65530] is too low, increase to at least [262144]
i. 问题 1 系统最大文件数太低
修改 vi /etc/security/limits.conf 文件末尾追加
cm soft nofile 65536
cm hard nofile 131072
cm soft nproc 4096
cm hard nproc 4096
ii. 问题 2 虚拟内存太低
修改vi /etc/sysctl.conf文件末尾追加
vm.max_map_count=655360
切换到root权限
sysctl -p
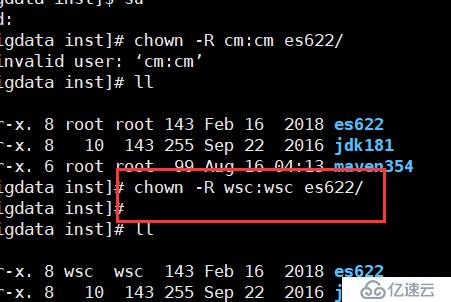
iii. java.nio.file.AccessDeniedException: …/elasticsearch-6.2.2/config/jvm.options
chown 用户名 elasticsearch-6.2.2安装目录路径 -R
a) tar –zxvf elasticsearch-head-master
b) npm install
c) npm run start
cluster.name: es-app #集群名称,可以自行修改
node.name: es-2 #节点名称,自行修改
network.host: 192.168.235.132 #主机地址,这里写本机IP
http.port: 9200 #端口
discovery.zen.ping.unicast.hosts: ["192.168.235.133"]#设置集群的指挥
开始安装LogStash
nodejs文件是c编写的,需要先yum install gcc gcc-c++
然后直接make进行编译nodejs文件


免责声明:本站发布的内容(图片、视频和文字)以原创、转载和分享为主,文章观点不代表本网站立场,如果涉及侵权请联系站长邮箱:is@yisu.com进行举报,并提供相关证据,一经查实,将立刻删除涉嫌侵权内容。