您好,登录后才能下订单哦!
密码登录
登录注册
点击 登录注册 即表示同意《亿速云用户服务条款》
本文小编为大家详细介绍“CentOS7下LAMP及基于https的虚拟化主机怎么实现”,内容详细,步骤清晰,细节处理妥当,希望这篇“CentOS7下LAMP及基于https的虚拟化主机怎么实现”文章能帮助大家解决疑惑,下面跟着小编的思路慢慢深入,一起来学习新知识吧。
系统环境:
centos 7
apache 2.4
php 5.4
mariadb 5.5
项目需求:
创建3个虚拟主机,分别架设phpmyadmin,wordpress,discuz
其中phpmyadmin提供https服务.
一、使用yum安装环境所需组件
httpd,php,php-mysql,mariadb-server
# yum install httpd php php-mysql mariadb-server
二、关闭selinux并配置防火墙
1.为了测试方便,先关闭selinux
临时关闭:
setenforce 0
永久关闭:
vim /etc/sysconfig/selinux
selinux=disabled
2.在centos 7自带防火墙中添加80,443,3306端口
查看firewall运行状态
# firewall-cmd --state
添加端口
# firewall-cmd --add-port=80/tcp --permanent
# firewall-cmd --add-port=443/tcp --permanent
# firewall-cmd --add-port=3306/tcp --permanent
重载firewall配置
# firewall-cmd --reload
查看已有规则
# iptables -l -n
三、测试一下各软件是否正常
1.启动httpd并测试访问:
# systemctl start httpd
没什么意外的话,此时浏览器访问测试页应该是成功的.
2.测试数据库
启动mariadb
# systemctl start mariadb
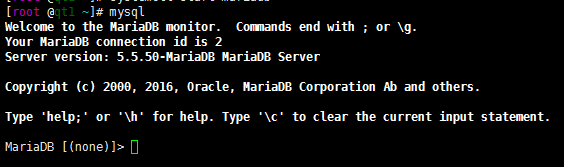
能进入mariadb命令行即可
# mysql
3.查看php版本,我的版本是5.4.16
# php -v

四、配置apache
1.新建所需文件夹
在/web/vhosts下创建三个虚拟主机分别需要的文件夹 ,pma,wp,dz
# mkdir -p /web/vhosts/{pma,wp,dz}
2.赋予apache用户对整个/web目录的访问权:
# chown -r apache:apache /web
3.创建测试页面
# vim /web/vhosts/pma/index.php
内容为:
 <?php
    echo "this is pma"
    ?>
    # vim /web/vhosts/wp/index.php
    内容为:
    <?php
    echo "this is wp"
    ?>
    # vim /web/vhosts/dz/index.php
    内容为:
    <?php
    echo "this is dz"
    ?>
4.取消欢迎页,否则会有干扰
# mv /etc/httpd/conf.d/welcome.conf /etc/httpd/conf.d/welcome.conf.bak
5.添加三个虚拟主机
创建一个叫vhosts.conf配置文件
# vim /etc/httpd/conf.d/vhosts.conf
内容:
  <virtualhost *:80>
    documentroot /web/vhosts/pma
    servername pma.buybybuy.com
    errorlog logs/pma.err
    customlog logs/pma.access combined
    </virtualhost>
    <directory "/web/vhosts/pma">
    options indexes followsymlinks
    allowoverride none
    require all granted
    </directory>
    <virtualhost *:80>
    documentroot /web/vhosts/wp
    servername wp.buybybuy.com
    errorlog logs/wp.err
    customlog logs/wp.access combined
    </virtualhost>
    <directory "/web/vhosts/wp">
    options indexes followsymlinks
    allowoverride none
    require all granted
    </directory>
    <virtualhost *:80>
    documentroot /web/vhosts/dz
    servername dz.buybybuy.com
    errorlog logs/dz.err
    customlog logs/dz.access combined
    </virtualhost>
    <directory "/web/vhosts/dz">
    options indexes followsymlinks
    allowoverride none
    require all granted
    </directory>
6.重新载入httpd配置:
# systemctl reload httpd
7.测试一下三个虚拟主机:
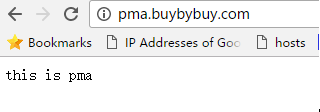

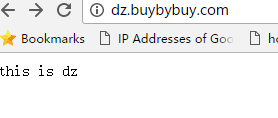
测试成功!
五、配置mariadb
1.刚安装完mariadb后先初始化安全设置
运行安全初始化脚本
# /usr/bin/mysql_secure_installation
以下给出我自己的选项作为参考
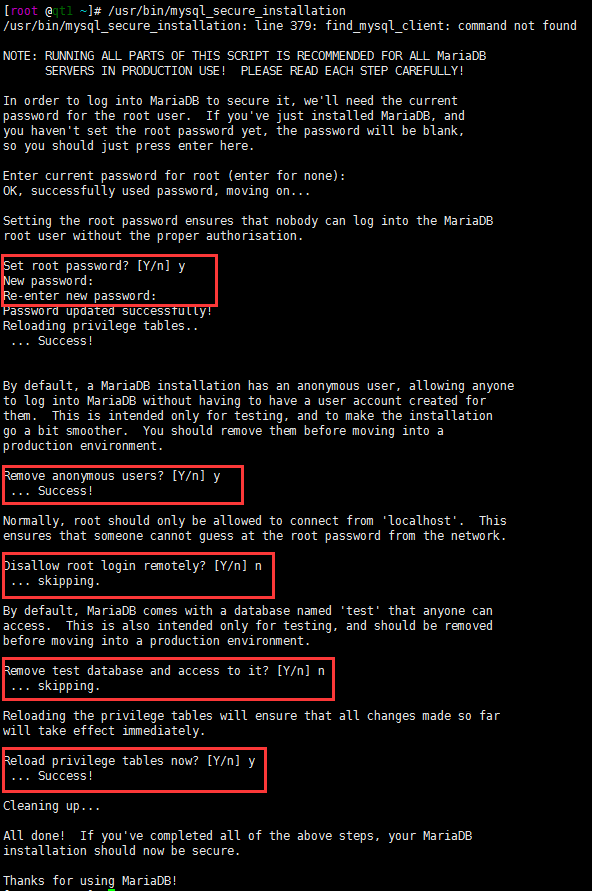
1)是否设置root用户密码? (是)
2)是否删除匿名用户? (是)
3)禁止root用户远程登录吗? (否,但如果生产环境推荐禁止)
4)要删除测试数据库吗? (否,如果将来有测试需求就保留)
5)重载授权表吗? (是,刚刚的设置立即生效)
2.附上root用户改密码命令
 # mysql
    set password for 'root'@'localhost'=password('123456');
    set password for 'root'@'127.0.0.1'=password('123456');
六.安装程序包
1.安装phpmyadmin,discuz,wordpress
下载安装包到家目录
可以用wget或者使用ftp工具,我这里因为用了xshell连接服务器,所以直接使用了配套的xftp将控制机中的安装包直接扔进家目录.

2.确保已安装必要的压缩/解压缩工具
我这里缺少bzip2,zip和unzip,所以
# yum -y install bzip2 zip unzip
分别解压缩
# unzip discuz_x3.2_sc_utf8.zip -d discuz_x3.2_sc_utf8
    # tar -xf wordpress-4.5.3-zh_cn.tar.gz
    # tar -xf phpmyadmin-4.4.15.8-all-languages.tar.bz2
3.分别复制到定义好的虚拟主机目录下,注意只复制需要的文档
 # cp -a phpmyadmin-4.4.15.8-all-languages/* /web/vhosts/pma/
    # cp -a wordpress/* /web/vhosts/wp/
    # cp -a discuz_x3.2_sc_utf8/upload/* /web/vhosts/dz/
七、调试网站
1.配置phpmyadmin
#cd /web/vhosts/pma
找到默认配置文件并重命名为标准名称
# cp config.sample.inc.php config.inc.php
编辑配置文件
大概17行找到
$cfg['blowfish_secret'] = '';
这里需要加入一个随机字串,可以在bash下用以下命令生成:
# tr -d 'a-za-z0-9' < /dev/urandom | head -30 | md5sum
比如生成的字串为
e2d8e1132dc737b3dc1f05cd44c0cc9e
将生成的字串加入到上面的参数的引号中.如图:
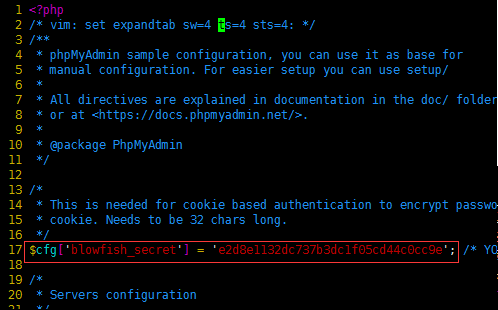
保存退出.
访问pma.buybybuy.com的时候发现程序报错:

意思是需要mbstring模块支持,mbstring是一个多语言包.
所以要安装这个包
# yum install php-mbstring
重载httpd以便配置生效
# systemctl reload httpd
重新访问pma.buybybuy.com,页面成功打开
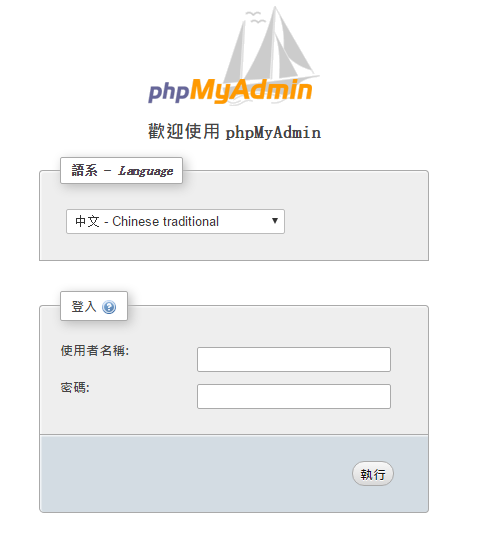
此时可以使用之前配置的mysql的root用户登陆.
2.创建所需数据库
为了安装wordpress和discuz,可以先使用phpmyadmin来为他们创建数据库.
新增->填写数据库名称->选择排序编码->建立

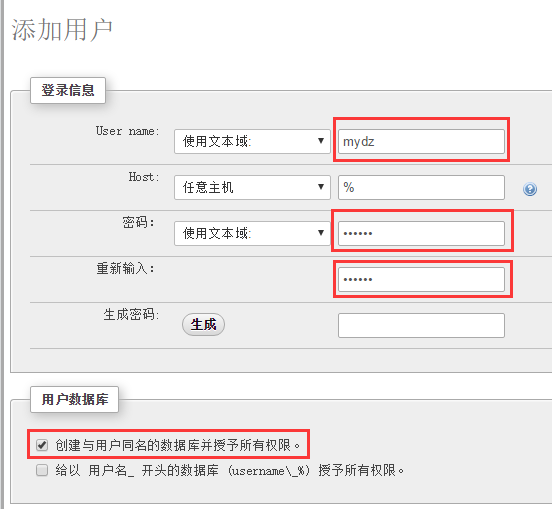
另外我们希望每个网站可以使用单独的数据库用户进行访问,所以这里为每个数据库创建自己的用户并绑定到对应的数据库.
回到首页->用户->添加用户

为了方便,我将数据库名与对应的用户名保持一致,可以按下图来创建
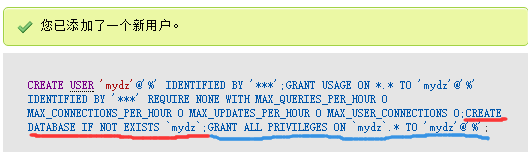
因为已经提前创建数据库,所以红色下划线的命令会跳过创建数据库的步骤,后面蓝色下划线的命令会把用户绑定给这个数据库.
3.配置wordpress
进入wp目录
# cd /web/vhosts/wp
复制一个配置文件并重命名为配置文件的标准名称
# cp wp-config-sample.php wp-config.php
编辑配置文件
# vim /web/vhosts/wp/wp-config.php
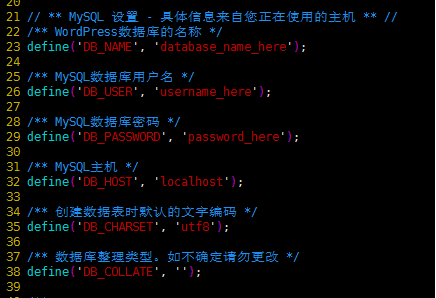
修改对应的值.
访问wp.buybybuy.com和dz.buybybuy.com,会显示安装界面.分别使用之前设定的参数安装即可.
八、给pma.buybybuy.com配置https
1.确保openssl已安装,因为要使用openssl生成自签名证书
# httpd -m | grep ssl
如果没有则安装
# yum install mod_ssl openssl
2.配置ca服务器
我的方法是先配置一台ca服务器 (centos a),之后再让当前这台服务器(centos b)向centos a申请认证.
3.配置ca服务器(centos a)
3.1 初始化ca服务,创建所需要的文件
# cd /etc/pki/ca/
# touch index.txt //创建索引文件
# echo 01 > serial //创建序列号文件
3.2 ca自签证书
生成私钥
# (umask 077; openssl genrsa -out /etc/pki/ca/private/cakey.pem 2048)
使用私钥生成签名证书
# openssl req -new -x509 -key /etc/pki/ca/private/cakey.pem -days 7300 -out /etc/pki/ca/cacert.pem
4.申请证书(centos b):
4.1 创建一个存放证书的目录
# mkdir /etc/httpd/ssl
# cd /etc/httpd/ssl
4.2 生成秘钥
# (umask 007;openssl genrsa -out httpd.key 1024)
4.3 生成请求文件
# openssl req -new -key httpd.key -out httpd.csr
4.4 填表,按照自己情况写
country name (2 letter code) [xx]:cn
state or province name (full name) []:beijing
locality name (eg, city) [default city]:beijing
organization name (eg, company) [default company ltd]:quintin ltd
organizational unit name (eg, section) []:ops
common name (eg, your name or your server's hostname) []:pma.buybybuy.com
email address []:admin@buybybuy.com
4.5 把生成的文件发送到ca服务器 centos a,这里我使用scp命令:
# scp httpd.csr root@192.168.3.67:/tmp/
4.6 按照提示操作成功之后,httpd.csr 应该已经在centos a的/tmp/目录中.
5.签署证书(centos a):
5.1 签署,有效期十年
# openssl ca -in /tmp/httpd.csr -out /etc/pki/ca/certs/pma.buybybuy.com.crt -days 3650
5.2 将生成的crt传回centos b
# scp /etc/pki/ca/certs/pma.buybybuy.com.crt root@192.168.3.77:/etc/httpd/ssl/
5.3 按照提示操作成功之后,pma.buybybuy.com.crt 应该已经在centos b的/etc/httpd/ssl/目录中.
6.配置ssl(centos b):
6.1 事先备份
# cd /etc/httpd/conf.d/
# cp ssl.conf{,.bak}
6.2 编辑ssl.conf
# vim ssl.conf
以下为修改项
<virtualhost _default_:443>
=>
<virtualhost *:443>
基本设置
documentroot "/web/vhosts/pma"
servername pma.buybybuy.com:443
证书位置
sslcertificatefile /etc/pki/tls/certs/localhost.crt
=>
sslcertificatefile /etc/httpd/ssl/pma.buybybuy.com.crt
私钥位置
sslcertificatekeyfile /etc/pki/tls/private/localhost.key
=>
sslcertificatekeyfile /etc/httpd/ssl/httpd.key
保存退出.
6.3 检查配置文件语法错误:
# httpd -t
6.4 重启httpd:
# systemctl restart httpd
6.5 查看443端口是否已开启:
# ss -tnl

6.6 去浏览器访问格式:
看见https字样就对了.但会提示无效,添加信任即可.

读到这里,这篇“CentOS7下LAMP及基于https的虚拟化主机怎么实现”文章已经介绍完毕,想要掌握这篇文章的知识点还需要大家自己动手实践使用过才能领会,如果想了解更多相关内容的文章,欢迎关注亿速云行业资讯频道。
免责声明:本站发布的内容(图片、视频和文字)以原创、转载和分享为主,文章观点不代表本网站立场,如果涉及侵权请联系站长邮箱:is@yisu.com进行举报,并提供相关证据,一经查实,将立刻删除涉嫌侵权内容。