您好,登录后才能下订单哦!
密码登录
登录注册
点击 登录注册 即表示同意《亿速云用户服务条款》
这篇文章主要讲解了“springboot2.1.6集成elasticsearch6.4.3如何实现全文搜索”,文中的讲解内容简单清晰,易于学习与理解,下面请大家跟着小编的思路慢慢深入,一起来研究和学习“springboot2.1.6集成elasticsearch6.4.3如何实现全文搜索”吧!
由于项目需要elasticsearch做全文搜索,其基本介绍如下:
简介:ElasticSearch是一个基于Lucene的搜索服务器。它提供了一个分布式多用户能力的全文搜索引擎,基于RESTful web接口。Elasticsearch是用Java开发的,并作为Apache许可条款下的开放源码发布,是当前流行的企业级搜索引擎。设计用于云计算中,能够达到实时搜索,稳定,可靠,快速,安装使用方便。官方客户端在Java、.NET(C#)、PHP、Python、Apache Groovy、Ruby和许多其他语言中都是可用的。根据DB-Engines的排名显示,Elasticsearch是最受欢迎的企业搜索引擎,其次是Apache Solr,也是基于Lucene。
springboot整合elasticsearch常有方式主要有三种:
1.Java API
基于TCP和ES通信,官方已经明确表示在ES 7.0版本中将弃用TransportClient客户端,且在8.0版本中完全移除它,所以不提倡。
2.REST Client
上面的方式1是基于TCP和ES通信的(而且TransPort将来会被抛弃……),官方也给出了基于HTTP的客户端REST Client(推荐使用),官方给出来的REST Client有Java Low Level REST Client和Java Hight Level REST Client两个,前者兼容所有版本的ES,后者是基于前者开发出来的,只暴露了部分API.
3.spring-data-elasticsearch
除了上述方式,Spring也提供了本身基于SpringData实现的一套方案spring-data-elasticsearch
spring-data-elasticsearch集成Es这种方式,封装了比较常见的es操作,和JPA操作数据库一样便捷,只需要继承 ElasticsearchRepository就可以实现常见的es操作了。
public interface UserESRepository extends ElasticsearchRepository<UserBean, Long> {}在测试的过程中,鼓捣了两天多都好无进展,始终报如下错误:
Caused by: org.elasticsearch.client.transport.NoNodeAvailableException: None of the configured nodes are available: [{#transport#-1}{kgdgqCDKRlm9rjdj2B_s8A}{47.89.250.94}{47.89.250.94:9300}]看了很多博客,基本上说是端口和cluster-name 不对应的造成的,可是改了之后还是报错,后来才知道版本不对应造成的。
依赖文件build.gradle:
plugins {
	id 'org.springframework.boot' version '2.1.6.RELEASE'
	id 'java'
}

apply plugin: 'io.spring.dependency-management'

group = 'com.example'
version = '0.0.1-SNAPSHOT'
sourceCompatibility = '1.8'

repositories {
	mavenCentral()
}

dependencies {
	implementation 'org.springframework.boot:spring-boot-starter-data-elasticsearch'
	implementation 'org.springframework.boot:spring-boot-starter-web'
	testImplementation 'org.springframework.boot:spring-boot-starter-test'
}
配置文件application.yml:
spring:
  data:
    elasticsearch:
      cluster-name: EStest
      cluster-nodes: 127.0.0.1:9300


server:
  port: 8080
到官网:https://www.elastic.co/cn/downloads/past-releases/官网
可以下载历史版本,最新版本为(7.2.0),不建议使用最新的

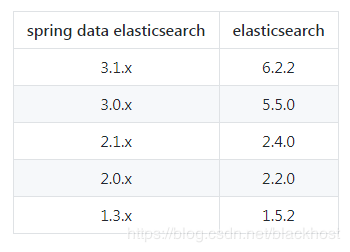
我使用的版本:
| springboot版本 | Elasticsearch版本 |
|---|---|
| 2.1.6 | 6.4.3 |
下载后文件目录:
进入config文件夹后,修改 elasticsearch.yml :
# ======================== Elasticsearch Configuration =========================
#
# NOTE: Elasticsearch comes with reasonable defaults for most settings.
#       Before you set out to tweak and tune the configuration, make sure you
#       understand what are you trying to accomplish and the consequences.
#
# The primary way of configuring a node is via this file. This template lists
# the most important settings you may want to configure for a production cluster.
#
# Please consult the documentation for further information on configuration options:
# https://www.elastic.co/guide/en/elasticsearch/reference/index.html
#
# ---------------------------------- Cluster -----------------------------------
#
# Use a descriptive name for your cluster:
#
cluster.name: EStest
#
# ------------------------------------ Node ------------------------------------
#
# Use a descriptive name for the node:
#
node.name: node-1
#
# Add custom attributes to the node:
#
#node.attr.rack: r1
#
# ----------------------------------- Paths ------------------------------------
#
# Path to directory where to store the data (separate multiple locations by comma):
#
#path.data: /path/to/data
#
# Path to log files:
#
#path.logs: /path/to/logs
#
# ----------------------------------- Memory -----------------------------------
#
# Lock the memory on startup:
#
#bootstrap.memory_lock: true
#
# Make sure that the heap size is set to about half the memory available
# on the system and that the owner of the process is allowed to use this
# limit.
#
# Elasticsearch performs poorly when the system is swapping the memory.
#
# ---------------------------------- Network -----------------------------------
#
# Set the bind address to a specific IP (IPv4 or IPv6):
#
network.host: 0.0.0.0
#
# Set a custom port for HTTP:
#
http.port: 9200
#
# For more information, consult the network module documentation.
#
# --------------------------------- Discovery ----------------------------------
#
# Pass an initial list of hosts to perform discovery when new node is started:
# The default list of hosts is ["127.0.0.1", "[::1]"]
#
#discovery.zen.ping.unicast.hosts: ["host1", "host2"]
#
# Prevent the "split brain" by configuring the majority of nodes (total number of master-eligible nodes / 2 + 1):
#
#discovery.zen.minimum_master_nodes:
#
# For more information, consult the zen discovery module documentation.
#
# ---------------------------------- Gateway -----------------------------------
#
# Block initial recovery after a full cluster restart until N nodes are started:
#
#gateway.recover_after_nodes: 3
#
# For more information, consult the gateway module documentation.
#
# ---------------------------------- Various -----------------------------------
#
# Require explicit names when deleting indices:
#
#action.destructive_requires_name: true


http.cors.enabled: true
http.cors.allow-origin: "*"
node.master: true
node.data: true
提示: 这里的cluster.name: EStest 要与application.yml中的cluster-name: EStest保持一致
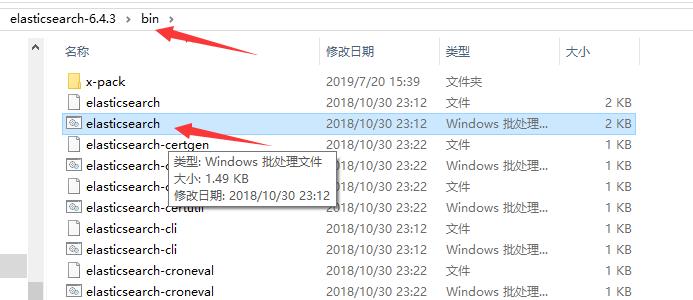
启动 elasticsearch 脚本,双击即可启动
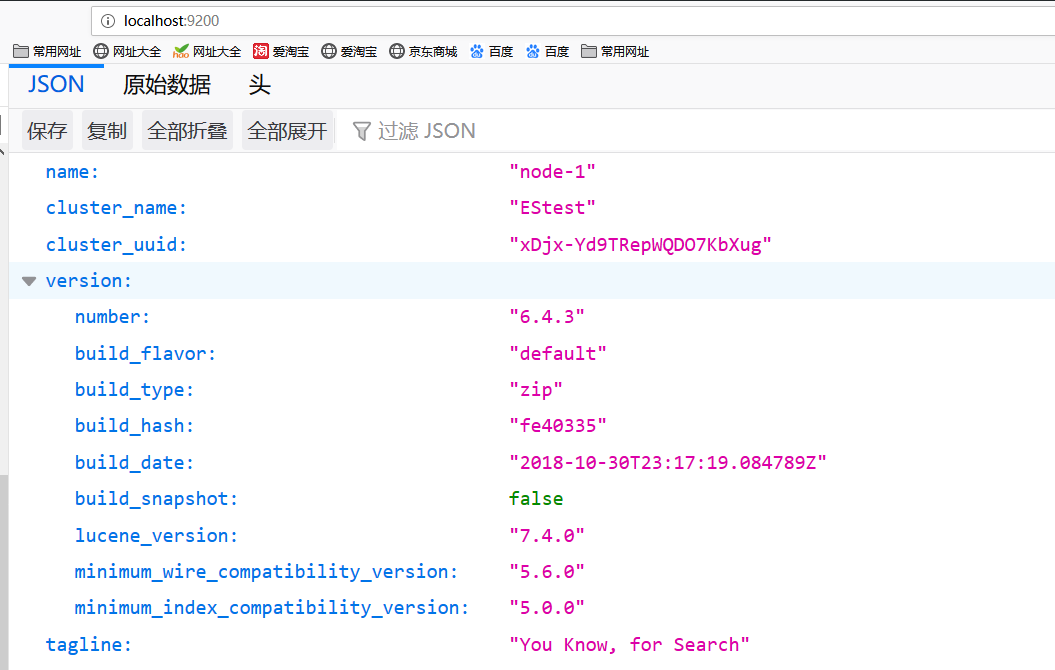
在浏览器中输入http://localhost:9200/ ,出现如下就说明启动成功:
<1>创建实体:
package com.example.demo;


import com.fasterxml.jackson.annotation.JsonFormat;
import lombok.Data;
import lombok.experimental.Accessors;
import org.springframework.data.annotation.Id;
import org.springframework.data.elasticsearch.annotations.Document;
import org.springframework.data.elasticsearch.annotations.Field;
import org.springframework.data.elasticsearch.annotations.FieldType;

import java.io.Serializable;


/*
 *@Description: Blog实体
 *@ClassName: BlogModel
 *@Author: zzq
 *@Date: 2019/7/19 17:47
 *@Version: 1.0
 */
@Data
@Accessors(chain = true)

@Document(indexName = "blog", type = "user")
public class BlogModel implements Serializable {

    private static final long serialVersionUID = 1L;

    @Id
    private Long id;
    @Field(type = FieldType.Text, analyzer = "ik_max_word")
    private String title;

    //@Field(type = FieldType.Date, format = DateFormat.basic_date)

    public BlogModel(){

    }
    public BlogModel(Long id, String title) {
        this.id = id;
        this.title = title;
    }

    public Long getId() {
        return id;
    }

    public void setId(Long id) {
        this.id = id;
    }

    public String getTitle() {
        return title;
    }

    public void setTitle(String title) {
        this.title = title;
    }

    @Override
    public String toString() {
        return "BlogModel{" +
                "id='" + id + '\'' +
                ", title='" + title + '\'' +
                '}';
    }
}
<2> 创建操作数据的Repository
package com.example.demo;

import org.springframework.data.elasticsearch.repository.ElasticsearchRepository;

/*
 *@Description: 数据仓库
 *@ClassName: BlogRepository
 *@Author: zzq
 *@Date: 2019/7/19 17:48
 *@Version: 1.0
 */
public interface BlogRepository extends ElasticsearchRepository<BlogModel, String> {
}
<3>创建controller
package com.example.demo;
import org.springframework.beans.factory.annotation.Autowired;
import org.springframework.stereotype.Repository;
import org.springframework.web.bind.annotation.GetMapping;
import org.springframework.web.bind.annotation.RequestMapping;
import org.springframework.web.bind.annotation.RestController;
import java.util.List;
/*
*@Description: controller
*@ClassName: BlogController
*@Author: zzq
*@Date: 2019/7/19 17:49
*@Version: 1.0
*/
@RestController
@RequestMapping("/blog")
@Repository
public class BlogController {
@Autowired
private BlogRepository blogRepository;
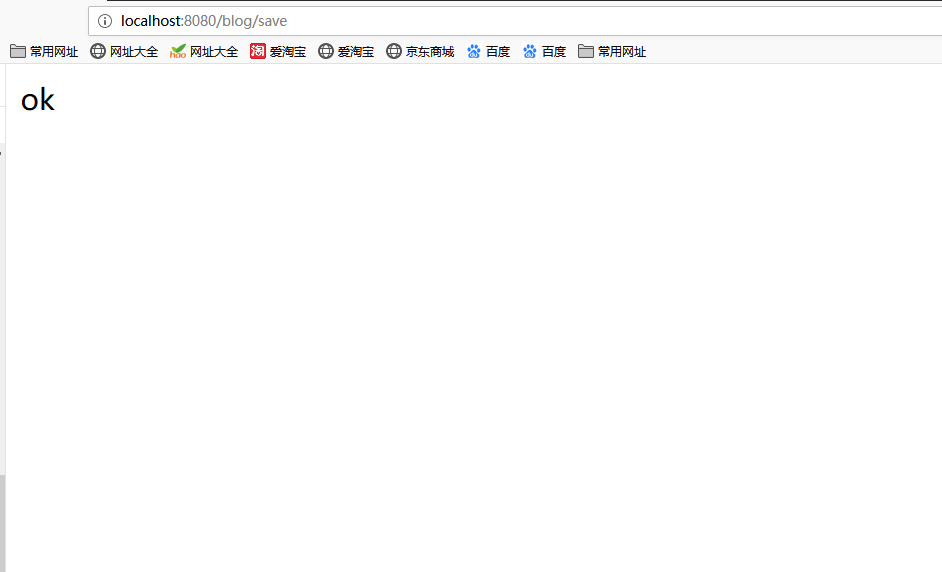
@GetMapping("/save")
public String add() {
BlogModel blogModel = new BlogModel();
blogModel.setTitle("superheros");
blogRepository.save(blogModel);
return "ok";
}
private String title = "";
@GetMapping("/get")
public String get(){
Iterable<BlogModel> list = (List<BlogModel>) blogRepository.findAll();
list.forEach(blogModel -> {
title += blogModel.toString() + "\n";
});
return title;
}
}<4>启动入口
package com.example.demo;

import org.springframework.boot.SpringApplication;
import org.springframework.boot.autoconfigure.SpringBootApplication;

@SpringBootApplication
public class ElasticsearchApplication {

	public static void main(String[] args) {
		SpringApplication.run(ElasticsearchApplication.class, args);
	}

}
查询:
d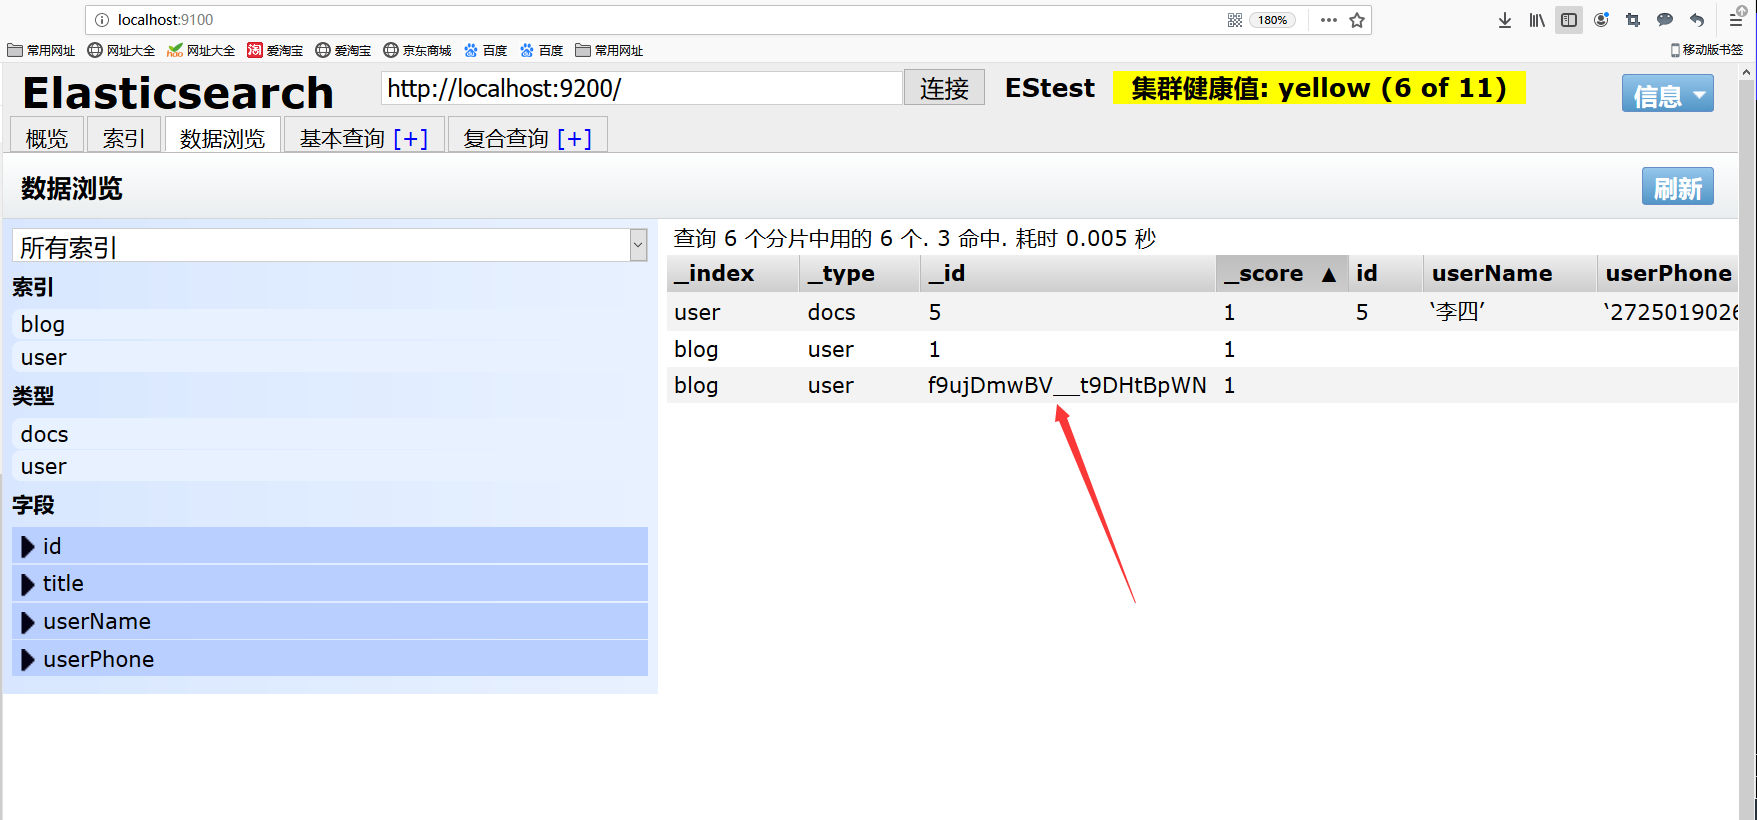
感谢各位的阅读,以上就是“springboot2.1.6集成elasticsearch6.4.3如何实现全文搜索”的内容了,经过本文的学习后,相信大家对springboot2.1.6集成elasticsearch6.4.3如何实现全文搜索这一问题有了更深刻的体会,具体使用情况还需要大家实践验证。这里是亿速云,小编将为大家推送更多相关知识点的文章,欢迎关注!
免责声明:本站发布的内容(图片、视频和文字)以原创、转载和分享为主,文章观点不代表本网站立场,如果涉及侵权请联系站长邮箱:is@yisu.com进行举报,并提供相关证据,一经查实,将立刻删除涉嫌侵权内容。