您好,登录后才能下订单哦!
密码登录
登录注册
点击 登录注册 即表示同意《亿速云用户服务条款》
本篇内容主要讲解“SpringBoot整合Mybatis,解决TypeAliases配置失败的问题如何解决”,感兴趣的朋友不妨来看看。本文介绍的方法操作简单快捷,实用性强。下面就让小编来带大家学习“SpringBoot整合Mybatis,解决TypeAliases配置失败的问题如何解决”吧!
在应用MyBatis时,使用对象关系映射,将对象和Aliase映射起来。
在Mybatis的文档明确写出,如果你没有明确定义实体类的Aliase,框架会自动将Class Name自动作为别名。
那么问题来了,当使用java -jar xxx.jar&启动的时候,会报出以下错误,
Error resolving class. Cause: org.apache.ibatis.type.TypeException: Could not resolve type alias 'XXXXX'.Cause: java.lang.ClassNotFoundException: Cannot find class: XXXXX
从异常信息来看,明显就是无法从本地检索到alise对应的类,并最终导致sqlSessionFactory等初始化失败。而且吊轨的是,直接在Idea中启动是没有问题的,启动jar包才会出现这个问题
参考博主A_Beaver的文章,原来mybatis的facroty需要加载SpringBoot独特的虚拟文件系统,才能识别类路径
public SpringBootVFS() {
    this.resourceResolver = new PathMatchingResourcePatternResolver(getClass().getClassLoader());
}
从以上代码看,其实是通过PathMatchingResourcePatternResolver实现资源的加载
修复该问题只需要在mybatis的配置类中,设置一下factory即可,
@Bean(name = "masterSqlSessionFactory")
    @Primary
    public SqlSessionFactory sqlSessionFactory(@Qualifier("masterDataSource") DataSource dataSource) throws Exception {
        SqlSessionFactoryBean bean = new SqlSessionFactoryBean();
        bean.setDataSource(dataSource);
        bean.setVfs(SpringBootVFS.class);//设置SpringBootVFS
        bean.setTypeAliasesPackage("com.fulan.domain.red");
        ...
}1.1 创建项目
1.2 修改POM文件,添加相关依赖
修改pom.xml文件,在其中添加下面依赖。
<!--Thymeleaf启动器-->
		<dependency>
			<groupId>org.springframework.boot</groupId>
			<artifactId>spring-boot-starter-thymeleaf</artifactId>
		</dependency>
		<dependency>
			<groupId>org.springframework.boot</groupId>
			<artifactId>spring-boot-starter-web</artifactId>
		</dependency>
		<!--mybatis启动器-->
		<dependency>
			<groupId>org.mybatis.spring.boot</groupId>
			<artifactId>mybatis-spring-boot-starter</artifactId>
			<version>2.1.3</version>
		</dependency>
		<!--jdbc启动器-->
		<dependency>
			<groupId>org.springframework.boot</groupId>
			<artifactId>spring-boot-starter-jdbc</artifactId>
		</dependency>
		<!--数据库驱动坐标-->
		<dependency>
			<groupId>mysql</groupId>
			<artifactId>mysql-connector-java</artifactId>
			<version>8.0.12</version>
		</dependency>
		<!--Druid数据源依赖-->
		<dependency>
			<groupId>com.alibaba</groupId>
			<artifactId>druid</artifactId>
			<version>1.1.10</version>
		</dependency>
1.3 配置数据源
在application.yml文件中配置如下代码。
spring:
  datasource:
    driver-class-name: com.mysql.cj.jdbc.Driver
    url: jdbc:mysql://localhost:3306/test?useUnicode=true&characterEnconding=utf-8&useSSL=false&serverTimezone=GMT%2B8
    username: root
    password: root
    type: com.alibaba.druid.pool.DruidDataSource
2.1 添加generator插件坐标
<!--配置generator插件-->
			<plugin>
				<groupId>org.mybatis.generator</groupId>
				<artifactId>mybatis-generator-maven-plugin</artifactId>
				<version>1.4.0</version>
				<dependencies>
					<dependency>
						<groupId>mysql</groupId>
						<artifactId>mysql-connector-java</artifactId>
						<version>8.0.12</version>
					</dependency>
				</dependencies>
				<!--指定配置文件的路径-->
				<configuration>
					<configurationFile>${project.basedir}/src/main/resources/generator.xml</configurationFile>
					<verbose>true</verbose>
					<overwrite>true</overwrite>
				</configuration>
			</plugin>
2.2 添加generator配置文件
将文件命名为generator.xml,在src/main/resources中添加。
<?xml version="1.0" encoding="UTF-8"?> <!DOCTYPE generatorConfiguration PUBLIC "-//mybatis.org//DTD MyBatis Generator Configuration 1.0//EN" "http://mybatis.org/dtd/mybatis-generator-config_1_0.dtd"> <generatorConfiguration> <context id="testTables" targetRuntime="MyBatis3"> <commentGenerator> <!-- 是否去除自动生成的注释 true:是 : false:否 --> <property name="suppressAllComments" value="true" /> </commentGenerator> <!-- 数据库连接信息:驱动类、连接地址、用户名、密码--> <jdbcConnection driverClass="com.mysql.cj.jdbc.Driver" connectionURL="jdbc:mysql://localhost:3306/test?useUnicode=true&characterEnconding=utf-8&useSSL=false&serverTimezone=UTC" userId="root" password="root"> </jdbcConnection> <!-- 默认false,把JDBC DECIMAL 和 NUMERIC 类型解析为 Integer true,把JDBC DECIMAL 和 NUMERIC 类型解析为java.math.BigDecimal --> <javaTypeResolver> <property name="forceBigDecimals" value="false" /> </javaTypeResolver> <!--targetProject:生成PO类的位置--> <javaModelGenerator targetPackage="com.example.springbootmybatis.pojo" targetProject=".\src\main\java"> <!--enableSubPackages:是否让schema作为包的后缀--> <property name="enableSubPackages" value="false" /> <!-- 从数据库返回的值被清理前后的空格 --> <property name="trimStrings" value="true" /> </javaModelGenerator> <!--对应的mapper.xml文件 --> <sqlMapGenerator targetPackage="com.example.springbootmybatis.mapper" targetProject=".\src\main\java"> <!--enableSubPackages:是否让schema作为包的后缀--> <property name="enableSubPackages" value="false" /> </sqlMapGenerator> <!-- 对应的Mapper接口类文件 --> <javaClientGenerator type="XMLMAPPER" targetPackage="com.example.springbootmybatis.mapper" targetProject="./src/main/java"> <!--enableSubPackages:是否让schema作为包的后缀--> <property name="enableSubPackages" value="false" /> </javaClientGenerator> <!-- 指定数据库表 --> <table schema="" tableName="users"></table> <!-- 列出要生成代码的所有表,这里配置的是不生成Example文件 --> <!-- <table tableName="userinfo" domainObjectName="UserInfoPO" --> <!-- enableCountByExample="false" enableUpdateByExample="false" --> <!-- enableDeleteByExample="false" enableSelectByExample="false" --> <!-- selectByExampleQueryId="false"> --> <!-- <property name="useActualColumnNames" value="false" /> --> <!-- </table> --> </context> </generatorConfiguration>
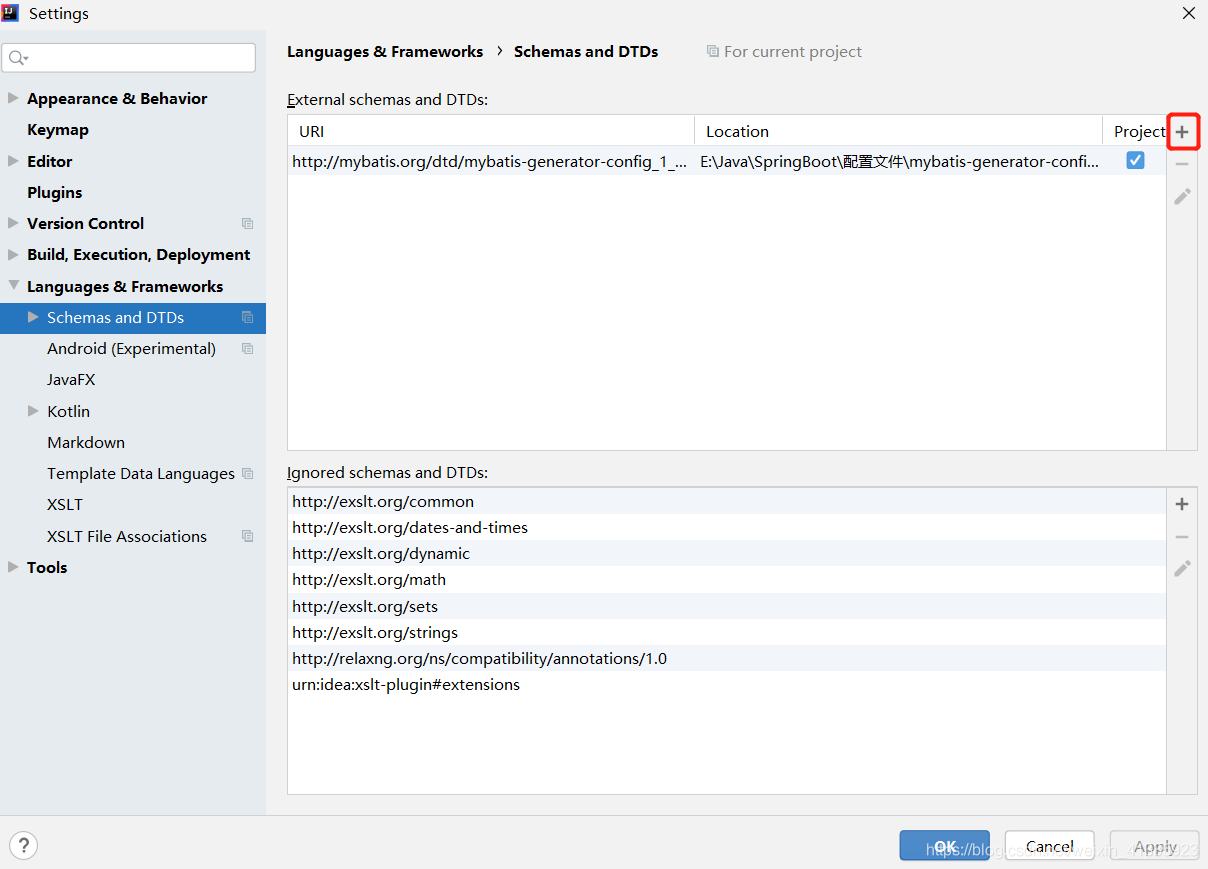
2.3 添加generator配置文件的DTD文件
可以在工具栏中的File->Settings中添加,也可以直接在文件中按alt+shift自动添加。
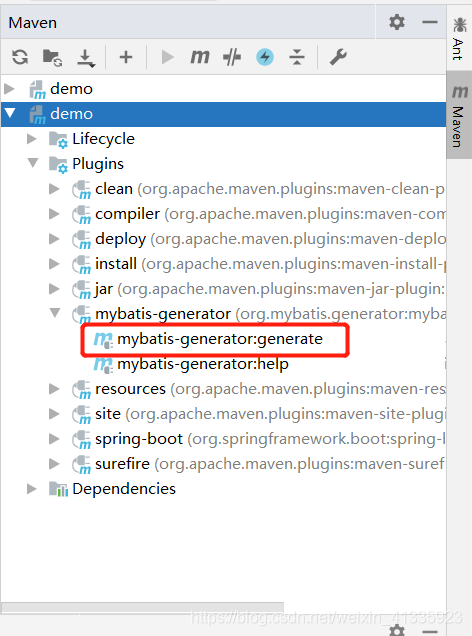
2.4 运行generator插件生成代码

3.1 添加资源拷贝插件坐标
<!--配置资源拷贝插件-->
		<resources>
			<resource>
				<directory>src/main/java</directory>
				<includes>
					<include>**/*.xml</include>
				</includes>
			</resource>
			<resource>
				<directory>src/main/resources</directory>
				<includes>
					<include>**/*.yml</include>
				</includes>
			</resource>
		</resources>
3.2 修改启动类添加@MapperScan注解
package com.example.springbootmybatis;
import org.mybatis.spring.annotation.MapperScan;
import org.springframework.boot.SpringApplication;
import org.springframework.boot.autoconfigure.SpringBootApplication;
@SpringBootApplication
@MapperScan("com.example.springbootmybatis.mapper")//指定扫描接口与映射配置文件的包名
public class DemoApplication {
	public static void main(String[] args) {
		SpringApplication.run(DemoApplication.class, args);
	}
}mybatis: # 扫描classpath中mapper目录下的映射配置文件,针对于映射文件放到了resources目录下 mapper-locations: classpath:/mapper/*.xml # 定义包别名,使用pojo时可以直接使用pojo的类型名称不用加包名 type-aliases-package: com.example.springbootmybatis.pojo
5.1 创建页面
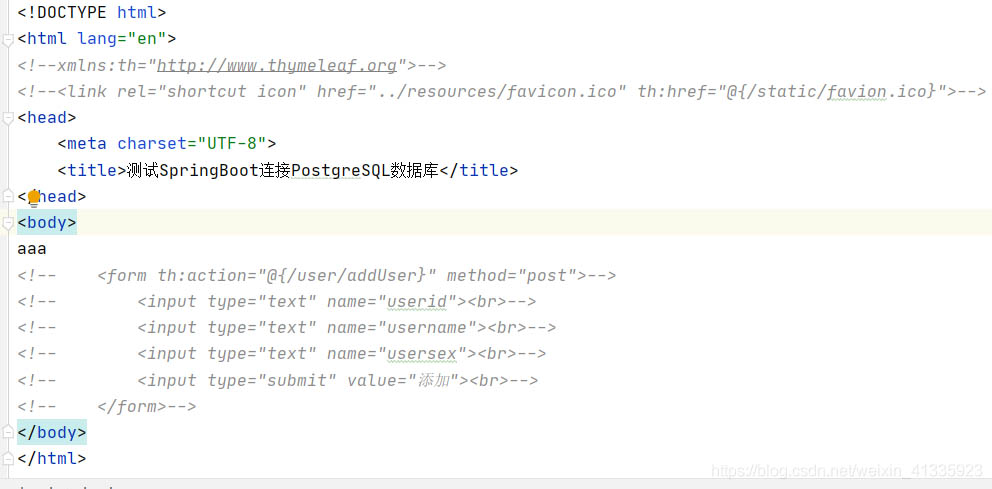
<!DOCTYPE html>
<html lang="en" xmlns:th="http://www.thymeleaf.org">
<link rel="shortcut icon" href="../resources/favicon.ico" th:href="@{/static/favion.ico}">
<head>
    <meta charset="UTF-8">
    <title>测试SpringBoot连接PostgreSQL数据库</title>
</head>
<body>
    <form th:action="@{/user/addUser}" method="post">
        <input type="text" name="userid"><br>
        <input type="text" name="username"><br>
        <input type="text" name="usersex"><br>
        <input type="submit" value="添加"><br>
    </form>
</body>
</html>
5.2 创建Controller
5.2.1 PageController
package com.example.springbootmybatis.controller;
import org.springframework.stereotype.Controller;
import org.springframework.web.bind.annotation.PathVariable;
import org.springframework.web.bind.annotation.RequestMapping;
/**
 * 页面跳转Controller
 */
@Controller
public class PageController {
    /**
     * 页面跳转方法
     */
    @RequestMapping("/{page}")
    public String showPage(@PathVariable String page){
        return page;
    }
}
5.2.2 UsersController
package com.example.springbootmybatis.controller;
import com.example.springbootmybatis.pojo.Users;
import com.example.springbootmybatis.service.UsersService;
import org.springframework.beans.factory.annotation.Autowired;
import org.springframework.stereotype.Controller;
import org.springframework.web.bind.annotation.PostMapping;
import org.springframework.web.bind.annotation.RequestMapping;
import org.springframework.web.bind.annotation.RestController;
/**
 * 用户管理Controller
 */
@RestController
@RequestMapping("/user")
public class UsersController {
    @Autowired
    private UsersService usersService;
    /**
     * 添加用户
     */
    @PostMapping("/addUser")
    public String addUsers(Users users){
        try {
            this.usersService.addUsers(users);
        } catch (Exception e){
            e.printStackTrace();
            return "error";
        }
        return "redirect:/ok";
    }
}
5.3 创建Service 接口实现类Impl
/**
 * 用户管理业务层
 */
@Service
public class UsersServiceImpl implements UsersService {
    @Autowired
    private UsersMapper usersMapper;
    @Override
    @Transactional
    public void addUsers(Users users) {
        this.usersMapper.insert(users);
    }
}
接口
public interface UsersService {
    void addUsers(Users users);
}1. Mybatis Generator自动生成,数据库的同名表也会生产的问题
[WARNING] Table Configuration users matched more than one table (test..users,performance_schema..users)
[WARNING] Cannot obtain primary key information from the database, generated objects may be incomplete
在 MyBatis Generator官网 中对这一问题做出了解答。
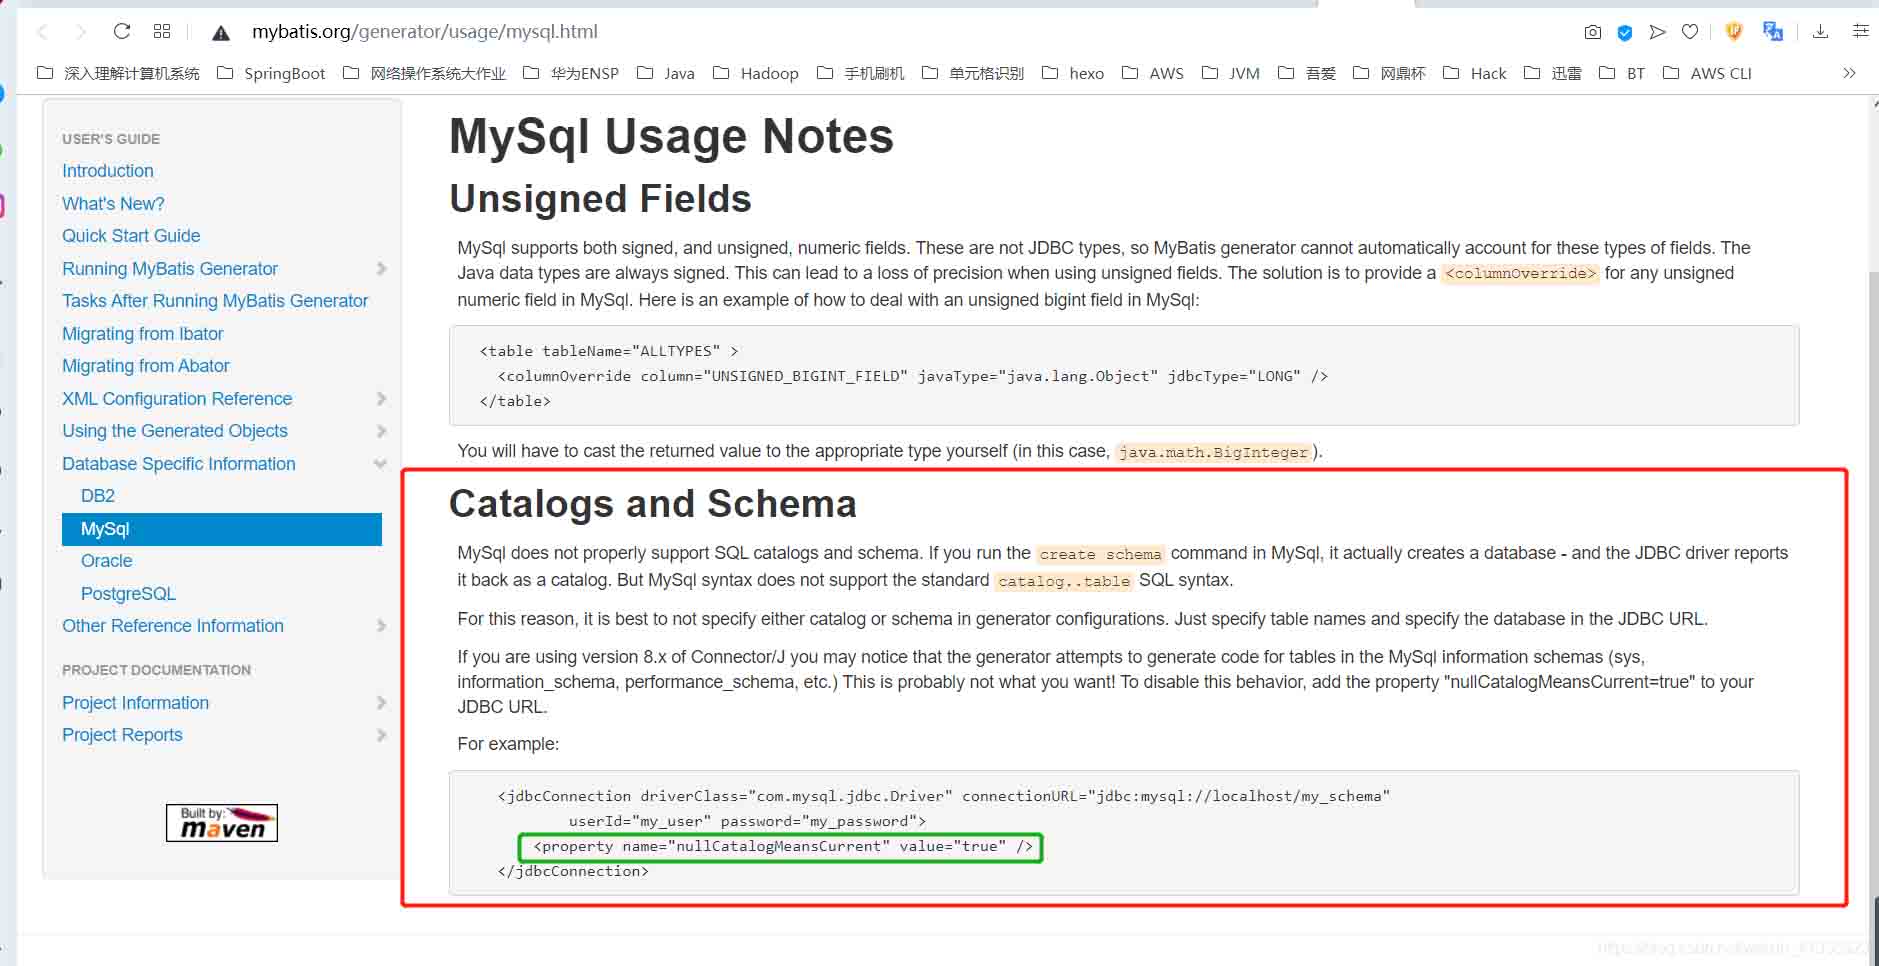
翻译如下:Mysql 无法正常支持 SQL catalogs 和 schema。因此,最好不要在 generator 配置文件中指定 catalog 以及schema,仅需指定数据表的名字并在 JDBC URL 中指定数据库即可。如果使用 mysql-connector-java 8.x 版本,generator 会为MySql中信息数据库(sys, information_schema, performance_schema)的表生成代码,若要避免这种操作,请在 JDBC URL 中加入属性“nullCatalogMeansCurrent=true”。
修改配置文件generator.xml
<jdbcConnection driverClass="com.mysql.cj.jdbc.Driver" connectionURL="jdbc:mysql://localhost:3306/test?useUnicode=true&characterEnconding=utf-8&useSSL=false&serverTimezone=UTC" userId="username" password="password"> <property name="nullCatalogMeansCurrent" value="true"/> </jdbcConnection>
2. 页面出现500错误
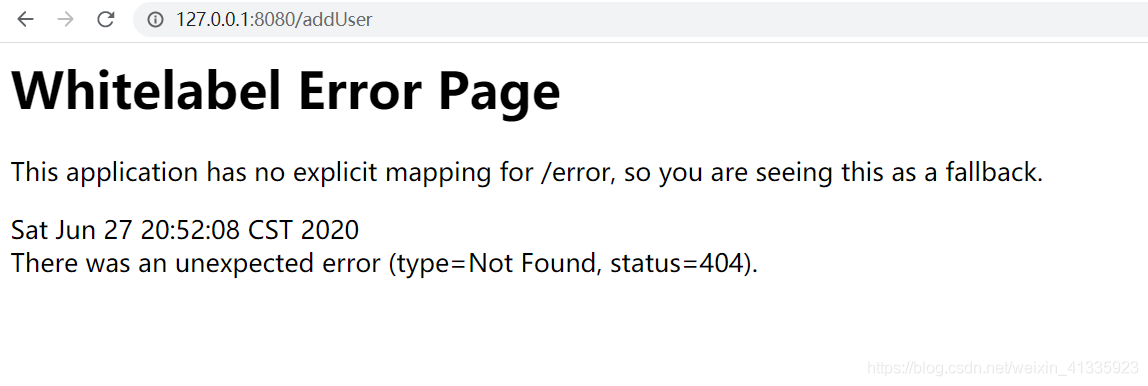
2020-06-27 14:23:42.459 ERROR 19676 --- [nio-8080-exec-1] o.a.c.c.C.[.[.[/].[dispatcherServlet] : Servlet.service() for servlet [dispatcherServlet] in context with path [] threw exception [Circular view path [addUsers]: would dispatch back to the current handler URL [/addUsers] again. Check your ViewResolver setup! (Hint: This may be the result of an unspecified view, due to default view name generation.)] with root cause
javax.servlet.ServletException: Circular view path [addUsers]: would dispatch back to the current handler URL [/addUsers] again. Check your ViewResolver setup! (Hint: This may be the result of an unspecified view, due to default view name generation.)
at org.springframework.web.servlet.view.InternalResourceView.prepareForRendering(InternalResourceView.java:210) ~[spring-webmvc-5.2.7.RELEASE.jar:5.2.7.RELEASE]
at
查了很多博客,但是都不是自己的问题,自己的问题是在pom.xml配置文件中的资源路径中,没有写所有,而是单独的xml和yml配置文件。要加载所有的静态资源。
<!--原本的-->
<!--资源文件的路径-->
			<resource>
				<directory>src/main/resources</directory>
				<includes>
					<include>**/*.yml</include>
                    <include>**/*.xml</include>
				</includes>
				<!-- <filtering>false</filtering>-->
			</resource>
<!--修改后的-->
<!--资源文件的路径-->
			<resource>
				<directory>src/main/resources</directory>
				<includes>
					<include>**/*.*</include>
				</includes>
				<!-- <filtering>false</filtering>-->
			</resource>
到此,相信大家对“SpringBoot整合Mybatis,解决TypeAliases配置失败的问题如何解决”有了更深的了解,不妨来实际操作一番吧!这里是亿速云网站,更多相关内容可以进入相关频道进行查询,关注我们,继续学习!
免责声明:本站发布的内容(图片、视频和文字)以原创、转载和分享为主,文章观点不代表本网站立场,如果涉及侵权请联系站长邮箱:is@yisu.com进行举报,并提供相关证据,一经查实,将立刻删除涉嫌侵权内容。