您好,登录后才能下订单哦!
本篇内容主要讲解“怎么使用spring ResponseEntity处理http响应”,感兴趣的朋友不妨来看看。本文介绍的方法操作简单快捷,实用性强。下面就让小编来带大家学习“怎么使用spring ResponseEntity处理http响应”吧!
使用spring时,达到同一目的通常有很多方法,对处理http响应也是一样。本文我们学习如何通过ResponseEntity设置http相应内容、状态以及头信息。
ResponseEntity标识整个http相应:状态码、头部信息以及相应体内容。因此我们可以使用其对http响应实现完整配置。
如果需要使用ResponseEntity,必须在请求点返回,通常在spring rest中实现。ResponseEntity是通用类型,因此可以使用任意类型作为响应体:
@GetMapping("/hello")
ResponseEntity<String> hello() {
    return new ResponseEntity<>("Hello World!", HttpStatus.OK);
}
可以通过编程方式指明响应状态,所以根据不同场景返回不同状态:
@GetMapping("/age")
ResponseEntity<String> age(
  @RequestParam("yearOfBirth") int yearOfBirth) {
    if (isInFuture(yearOfBirth)) {
        return new ResponseEntity<>(
          "Year of birth cannot be in the future",
          HttpStatus.BAD_REQUEST);
    }
    return new ResponseEntity<>(
      "Your age is " + calculateAge(yearOfBirth),
      HttpStatus.OK);
}
另外,还可以设置http响应头:
@GetMapping("/customHeader")
ResponseEntity<String> customHeader() {
    HttpHeaders headers = new HttpHeaders();
    headers.add("Custom-Header", "foo");
    return new ResponseEntity<>(
      "Custom header set", headers, HttpStatus.OK);
}
而且, ResponseEntity提供了两个内嵌的构建器接口: HeadersBuilder 和其子接口 BodyBuilder。因此我们能通过ResponseEntity的静态方法直接访问。
最简单的情况是相应包括一个主体及http 200响应码:
@GetMapping("/hello")
ResponseEntity<String> hello() {
    return ResponseEntity.ok("Hello World!");
}
大多数常用的http 响应码,可以通过下面static方法:
BodyBuilder accepted();
BodyBuilder badRequest();
BodyBuilder created(java.net.URI location);
HeadersBuilder<?> noContent();
HeadersBuilder<?> notFound();
BodyBuilder ok();
另外,可以能使用BodyBuilder status(HttpStatus status)和BodyBuilder status(int status) 方法设置http状态。使用ResponseEntity BodyBuilder.body(T body)设置http响应体:
@GetMapping("/age")
ResponseEntity<String> age(@RequestParam("yearOfBirth") int yearOfBirth) {
    if (isInFuture(yearOfBirth)) {
        return ResponseEntity.badRequest()
            .body("Year of birth cannot be in the future");
    }
    return ResponseEntity.status(HttpStatus.OK)
        .body("Your age is " + calculateAge(yearOfBirth));
}
也可以自定义头信息:
@GetMapping("/customHeader")
ResponseEntity<String> customHeader() {
    return ResponseEntity.ok()
        .header("Custom-Header", "foo")
        .body("Custom header set");
}
因为BodyBuilder.body()返回ResponseEntity 而不是 BodyBuilder,需要最后调用。注意使用HeaderBuilder 不能设置任何响应体属性。
尽管ResponseEntity非常强大,但不应该过度使用。在一些简单情况下,还有其他方法能满足我们的需求,使代码更整洁。
典型spring mvc应用,请求点通常返回html页面。有时我们仅需要实际数据,如使用ajax请求。这时我们能通过@ResponseBody注解标记请求处理方法,审批人能够处理方法结果值作为http响应体。
当请求点成功返回,spring提供http 200(ok)相应。如果请求点抛出异常,spring查找异常处理器,由其返回相应的http状态码。对这些方法增加@ResponseStatus注解,spring会返回自定义http状态码。
Spring 也允许我们直接 javax.servlet.http.HttpServletResponse 对象;只需要申明其作为方法参数:
@GetMapping("/manual")
void manual(HttpServletResponse response) throws IOException {
    response.setHeader("Custom-Header", "foo");
    response.setStatus(200);
    response.getWriter().println("Hello World!");
}
但需要说明,既然spring已经提供底层实现的抽象和附件功能,我们不建议直接操作response。
总结:本文我们介绍了spring提供多种方式处理http响应,以及各自的优缺点,希望对你有帮助。
可以添加HttpStatus状态码的HttpEntity的扩展类。被用于RestTemplate和Controller层方法
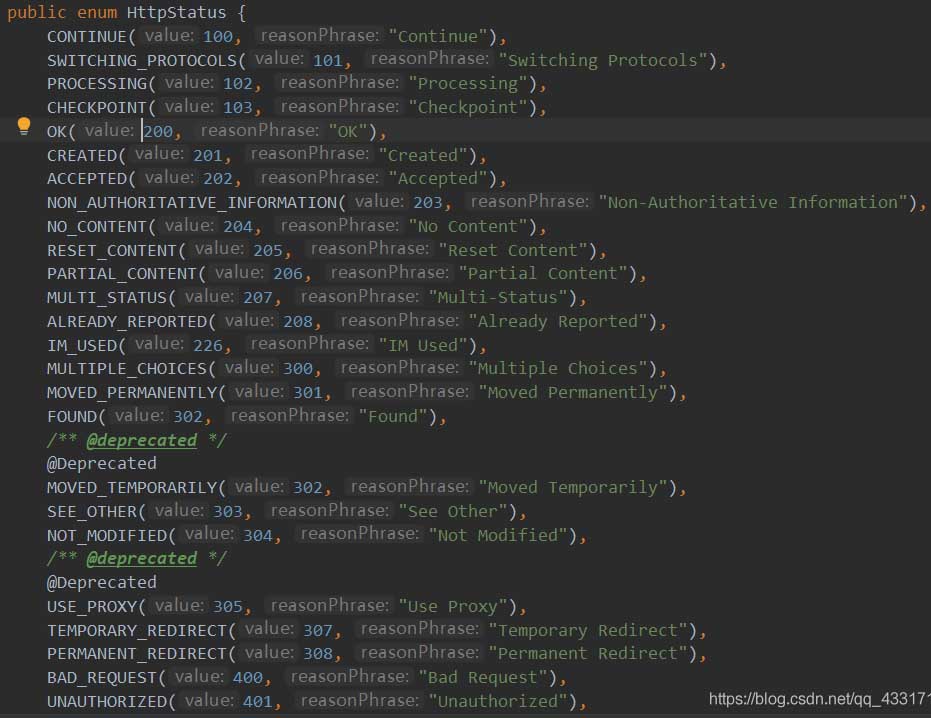
和HttpHeaders(消息头:请求头和响应头)HttpStatus的状态码有以下几种

在不是ResponseEntity的情况下才去检查有没有@ResponseBody注解。如果响应类型是ResponseEntity可以不写@ResponseBody注解,写了也没有关系。
简单的说@ResponseBody可以直接返回Json结果,@ResponseEntity不仅可以返回json结果,还可以定义返回的HttpHeaders和HttpStatus
public ResponseEntity<List<Category>> queryCategoriesByPid(@RequestParam(value = "pid",defaultValue = "0") Long pid){
        if(pid == null || pid.longValue()<0){
            // 响应400,相当于ResponseEntity.status(HttpStatus.BAD_REQUEST).build();
            return ResponseEntity.badRequest().build();
        }
        //ResponseEntity.status(HttpStatus.NOT_FOUND).body(null);
       // ResponseEntity.notFound().build();
        // ResponseEntity.ok(null);
        List<Category> categoryList = this.categoryService.queryCategoriesByPid(pid);
        if(CollectionUtils.isEmpty(categoryList)){
            // 响应404
            return ResponseEntity.notFound().build();
        }
        return ResponseEntity.ok(categoryList);
    }
到此,相信大家对“怎么使用spring ResponseEntity处理http响应”有了更深的了解,不妨来实际操作一番吧!这里是亿速云网站,更多相关内容可以进入相关频道进行查询,关注我们,继续学习!
免责声明:本站发布的内容(图片、视频和文字)以原创、转载和分享为主,文章观点不代表本网站立场,如果涉及侵权请联系站长邮箱:is@yisu.com进行举报,并提供相关证据,一经查实,将立刻删除涉嫌侵权内容。