您好,登录后才能下订单哦!
密码登录
登录注册
点击 登录注册 即表示同意《亿速云用户服务条款》
这篇文章主要介绍“怎么使用sharding-jdbc实现水平分表”,在日常操作中,相信很多人在怎么使用sharding-jdbc实现水平分表问题上存在疑惑,小编查阅了各式资料,整理出简单好用的操作方法,希望对大家解答”怎么使用sharding-jdbc实现水平分表”的疑惑有所帮助!接下来,请跟着小编一起来学习吧!
CREATE TABLE `student_1` (
`ID`  bigint(20) NOT NULL ,
`NAME`  varchar(50) CHARACTER SET utf8mb4 COLLATE utf8mb4_bin NOT NULL ,
`AGE`  int(11) NOT NULL ,
`GENDER`  varchar(1) CHARACTER SET utf8mb4 COLLATE utf8mb4_bin NOT NULL ,
PRIMARY KEY (`ID`)
);
此处未指定主键自增,因为两张表的id不能重复,所以只能从后端传入id。
<dependency>
    <groupId>org.springframework.boot</groupId>
    <artifactId>spring-boot-starter-jdbc</artifactId>
</dependency>
<dependency>
    <groupId>org.springframework.boot</groupId>
    <artifactId>spring-boot-starter-web</artifactId>
</dependency>
<!-- Druid连接池 -->
<dependency>
    <groupId>com.alibaba</groupId>
    <artifactId>druid</artifactId>
    <version>1.1.20</version>
</dependency>

<!-- Mysql驱动依赖 -->
<dependency>
    <groupId>mysql</groupId>
    <artifactId>mysql-connector-java</artifactId>
</dependency>

<!-- MybatisPlus -->
<dependency>
    <groupId>com.baomidou</groupId>
    <artifactId>mybatis-plus-boot-starter</artifactId>
    <version>3.0.5</version>
</dependency>

<!-- Sharding-JDBC -->
<dependency>
    <groupId>org.apache.shardingsphere</groupId>
    <artifactId>sharding-jdbc-spring-boot-starter</artifactId>
    <version>4.0.0-RC1</version>
</dependency>

<!-- lombok -->
<dependency>
    <groupId>org.projectlombok</groupId>
    <artifactId>lombok</artifactId>
</dependency>

<dependency>
    <groupId>org.springframework.boot</groupId>
    <artifactId>spring-boot-test</artifactId>
    <scope>test</scope>
</dependency>

<dependency>
    <groupId>junit</groupId>
    <artifactId>junit</artifactId>
    <scope>test</scope>
</dependency>

<dependency>
    <groupId>org.springframework.boot</groupId>
    <artifactId>spring-boot-starter-test</artifactId>
    <scope>test</scope>
    <exclusions>
        <exclusion>
            <groupId>org.junit.vintage</groupId>
            <artifactId>junit-vintage-engine</artifactId>
        </exclusion>
    </exclusions>
</dependency>
spring.main.allow-bean-definition-overriding=true

# 配置Sharding-JDBC的分片策略
# 配置数据源,给数据源起名g1,g2...此处可配置多数据源
spring.shardingsphere.datasource.names=g1

# 配置数据源具体内容:连接池,驱动,地址,用户名,密码
# 由于上面配置数据源只有g1因此下面只配置g1.type,g1.driver-class-name,g1.url,g1.username,g1.password
spring.shardingsphere.datasource.g1.type=com.alibaba.druid.pool.DruidDataSource
spring.shardingsphere.datasource.g1.driver-class-name=com.mysql.cj.jdbc.Driver
spring.shardingsphere.datasource.g1.url=jdbc:mysql://localhost:3306/sharding_db?characterEncoding=utf-8&useUnicode=true&useSSL=false&serverTimezone=UTC
spring.shardingsphere.datasource.g1.username=root
spring.shardingsphere.datasource.g1.password=123456

# 配置表的分布,表的策略
spring.shardingsphere.sharding.tables.student.actual-data-nodes=g1.student_$->{1..2}

# 指定student表 主键gid 生成策略为 SNOWFLAKE
spring.shardingsphere.sharding.tables.student.key-generator.column=id
spring.shardingsphere.sharding.tables.student.key-generator.type=SNOWFLAKE

# 指定分片策略 约定id值是偶数添加到student_1表,如果id是奇数添加到student_2表
spring.shardingsphere.sharding.tables.student.table-strategy.inline.sharding-column=id
spring.shardingsphere.sharding.tables.student.table-strategy.inline.algorithm-expression=student_$->{id % 2 + 1}

# 打开sql输出日志
spring.shardingsphere.props.sql.show=true
或者是yml格式
spring:
  main:
    allow-bean-definition-overriding: true
  shardingsphere:
    datasource:
      g1:
        driver-class-name: com.mysql.cj.jdbc.Driver
        password: 123456
        type: com.alibaba.druid.pool.DruidDataSource
        url: jdbc:mysql://localhost:3306/sharding_db?characterEncoding=utf-8&useUnicode=true&useSSL=false&serverTimezone=UTC
        username: root
      names: g1
    props:
      sql:
        show: true
    sharding:
      tables:
        student:
          actual-data-nodes: g1.student_$->{1..2}
          key-generator:
            column: id
            type: SNOWFLAKE
          table-strategy:
            inline:
              algorithm-expression: student_$->{id % 2 + 1}
sharding-column: id@Data
public class Student {
private Long id;
private String name;
private int age;
private String gender;
}@Repository
public interface StudentMapper extends BaseMapper<Student> {
}@SpringBootTest
class ShardingJdbcDemoApplicationTests {
@Autowired
private StudentMapper studentMapper;
@Test
public void test01() {
for (int i = 0; i < 10; i++) {
Student student = new Student();
student.setName("wuwl");
student.setAge(27);
student.setGender("男");
studentMapper.insert(student);
}
}
}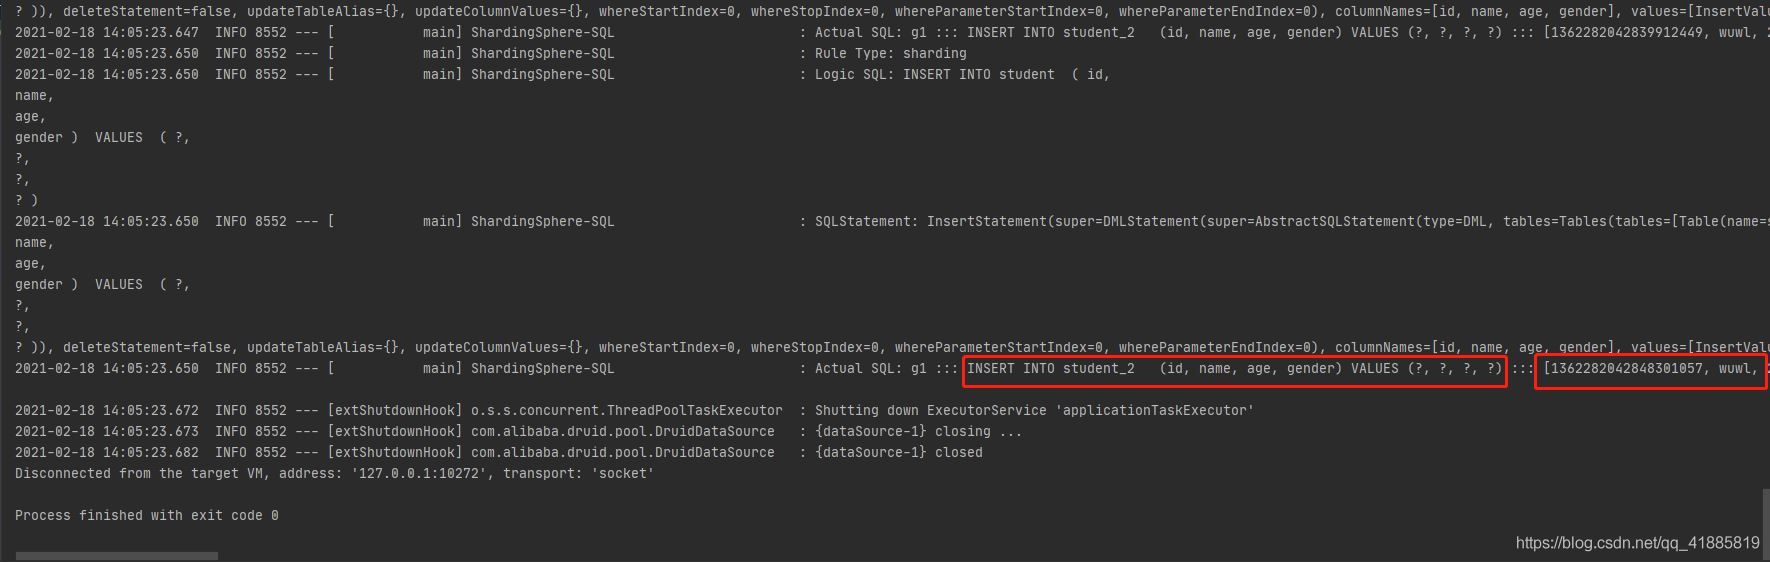
执行成功,主键通过雪花算法在后端生成,传入到数据库中,根据奇偶性进行分表。
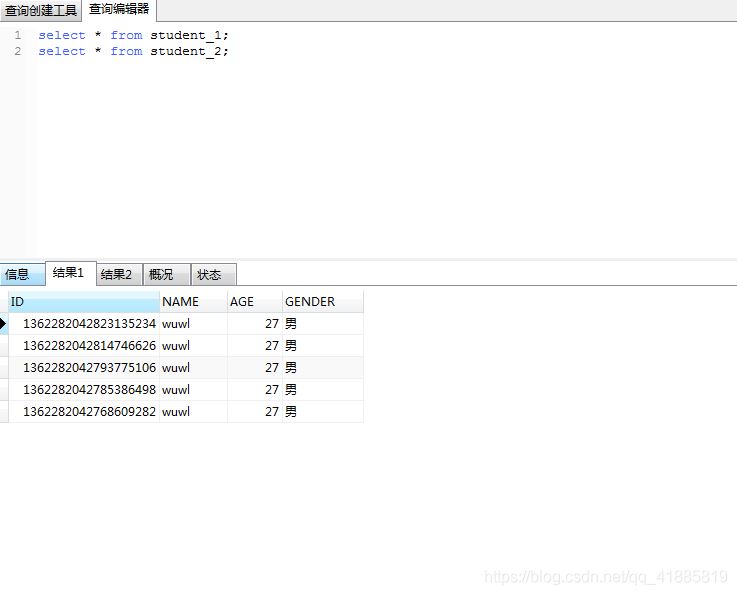
student_1表数据:
student_2表数据:
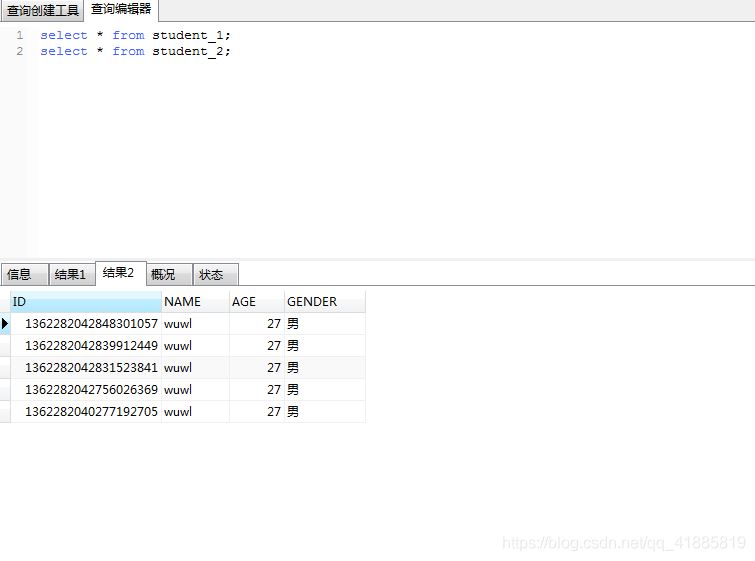
两张表的数据分别有5条,但这只是因为雪花算法生成的id奇数偶数各5个,不是1:1的关系,需要注意。
主键生成后,根据策略插入到对应的表中,从打印出来的sql可以证明这一点。
通过mapper接口的selectById方法进行查询时,会先根据主键策略判断在哪个库,再直接去那个库根据主键查询。而如果是通过其它条件查询,或者是多个id的selectById方法查询,又是如何的呢?
@Test
    public void test03() {
        List<Long> list = new ArrayList<>();
        list.add(1362282042768609282l);
        list.add(1362282040277192705l);
        List<Student> studentList = studentMapper.selectBatchIds(list);
        System.out.println(studentList);
    }
取了两张表的id进行查询。
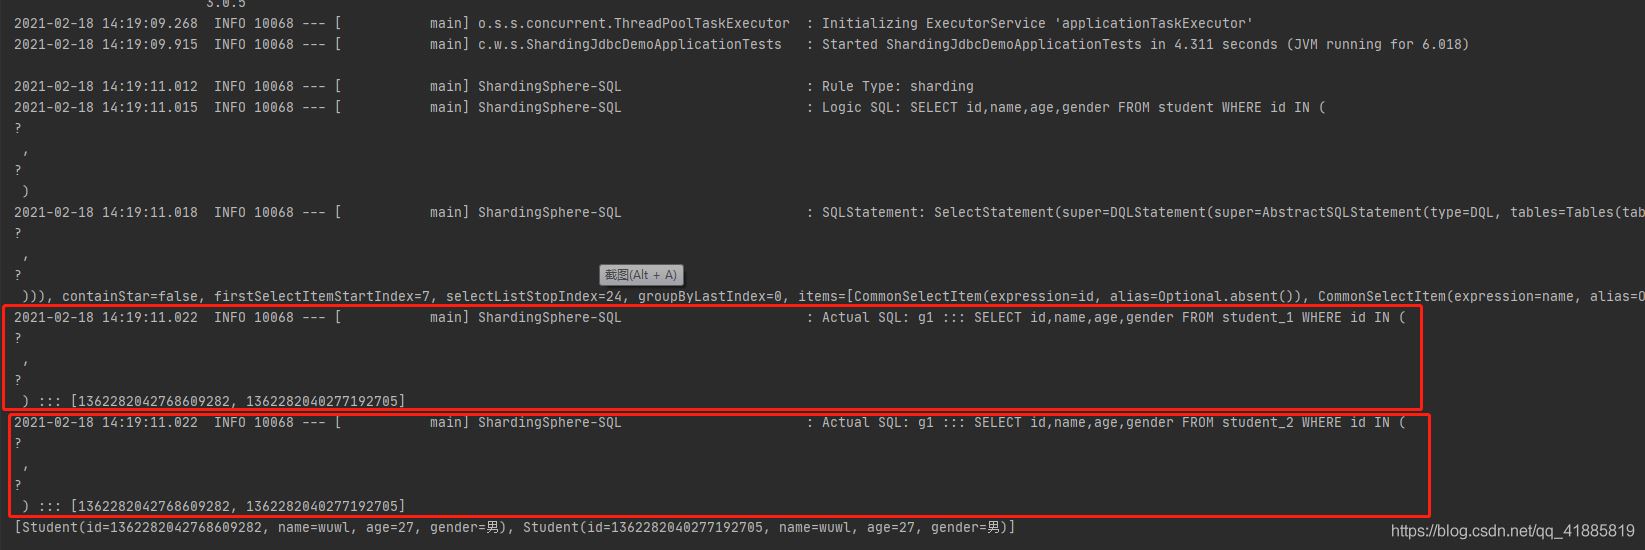
执行同样的sql,在两张表中都查询一遍,再组合结果。
如果所有的id,都来自同一张表,那是否会去多个表中重复查询呢?
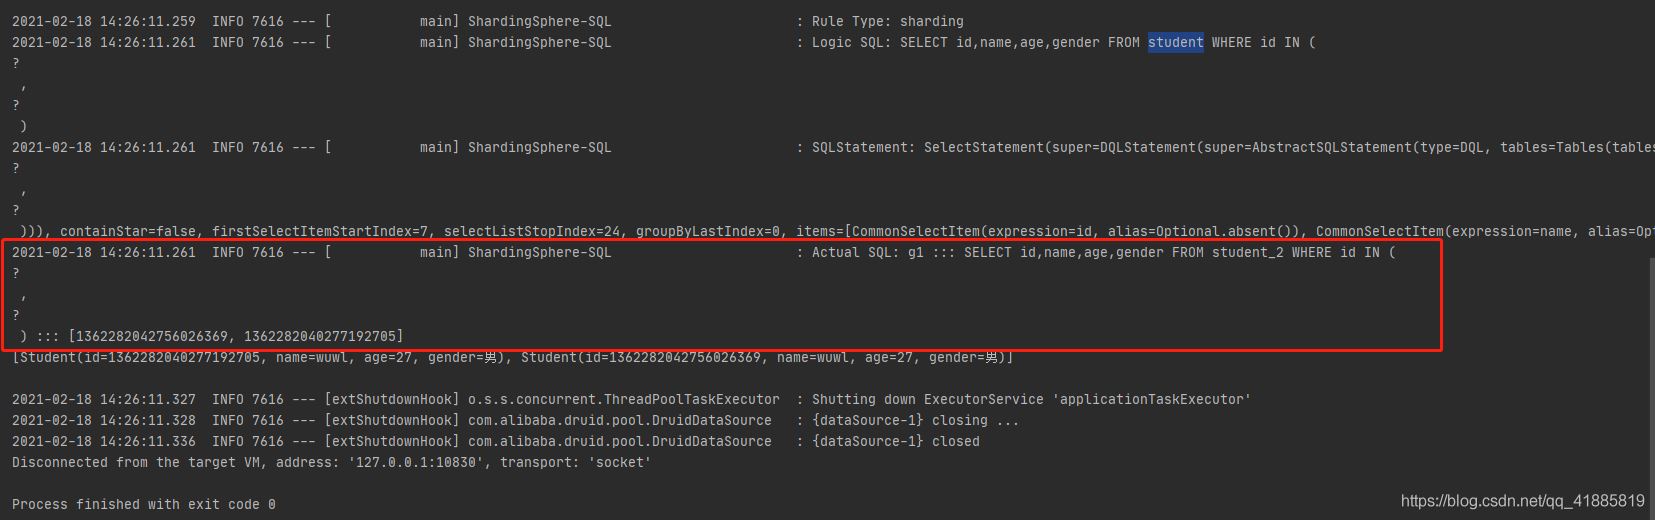
只执行了一遍。所以,在执行查询时,sharding会先判断是否可以确定需要的数据来自那张表,如果能,则直接去那一张表中查询数据即可,而如果不能确定,则会多个表重复查询,以确定查询结果的完整性。
到此,关于“怎么使用sharding-jdbc实现水平分表”的学习就结束了,希望能够解决大家的疑惑。理论与实践的搭配能更好的帮助大家学习,快去试试吧!若想继续学习更多相关知识,请继续关注亿速云网站,小编会继续努力为大家带来更多实用的文章!
免责声明:本站发布的内容(图片、视频和文字)以原创、转载和分享为主,文章观点不代表本网站立场,如果涉及侵权请联系站长邮箱:is@yisu.com进行举报,并提供相关证据,一经查实,将立刻删除涉嫌侵权内容。