您好,登录后才能下订单哦!
今天小编给大家分享一下C#中怎么创建控制Windows服务的相关知识点,内容详细,逻辑清晰,相信大部分人都还太了解这方面的知识,所以分享这篇文章给大家参考一下,希望大家阅读完这篇文章后有所收获,下面我们一起来了解一下吧。
针对一种特殊的应用, 不需要显示GUI, 希望常驻在Windows服务当中,在必要的时候我们可以进行启动或开机启动。
这个时候我们就可以创建WindowsService 来实现。
下面演示了使用VisualStudio2019创建一个基于.NetFramework的Windows服务
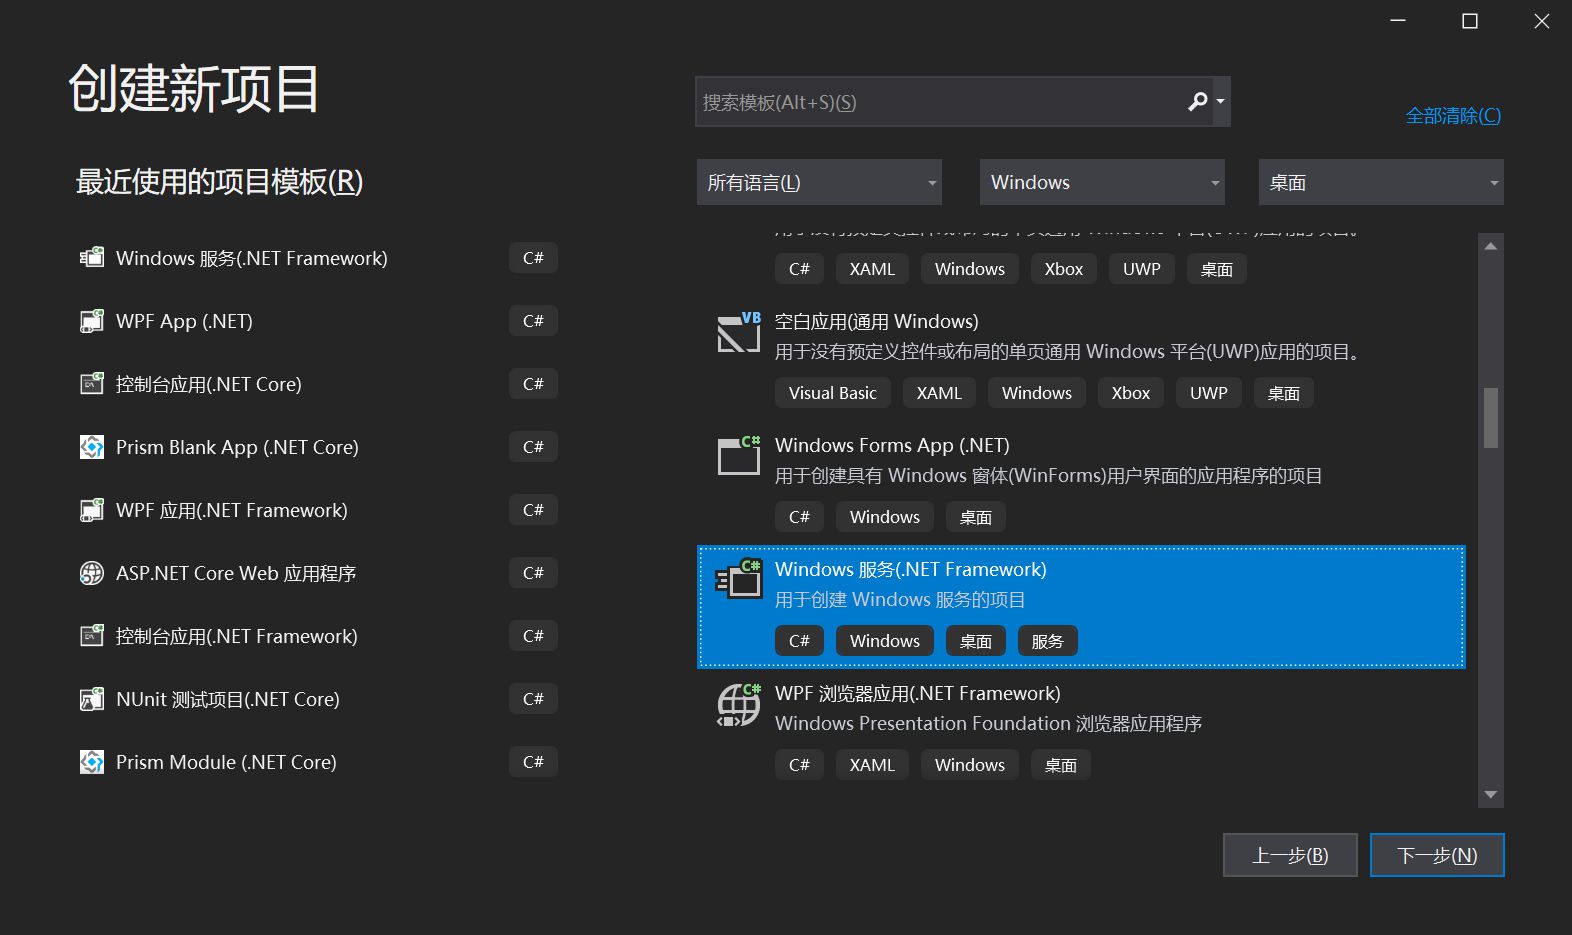
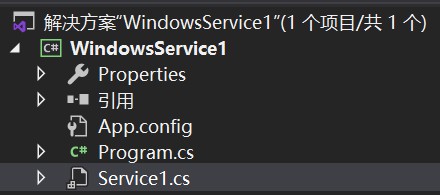
项目结构如下所示:
包含了一个启动项以及一个服务类
右键查看 Service1代码, 如下所示, 包含了重写OnStart方法以及OnStop方法:
     public partial class Service1 : ServiceBase
    {
        public Service1()
        {
            InitializeComponent();
        }

        protected override void OnStart(string[] args)
        {
        }

        protected override void OnStop()
        {
        }
    }
当服务被启动, 即启动OnStart方法内执行的代码, 而在ServiceBase当中, 同样提供了多种类型的方法被重写。

当我们写完了该服务的执行代码之后, 下一步我们要为其添加一个安装程序。
双击Service1.cs, 然后右键添加安装程序,如下所示:
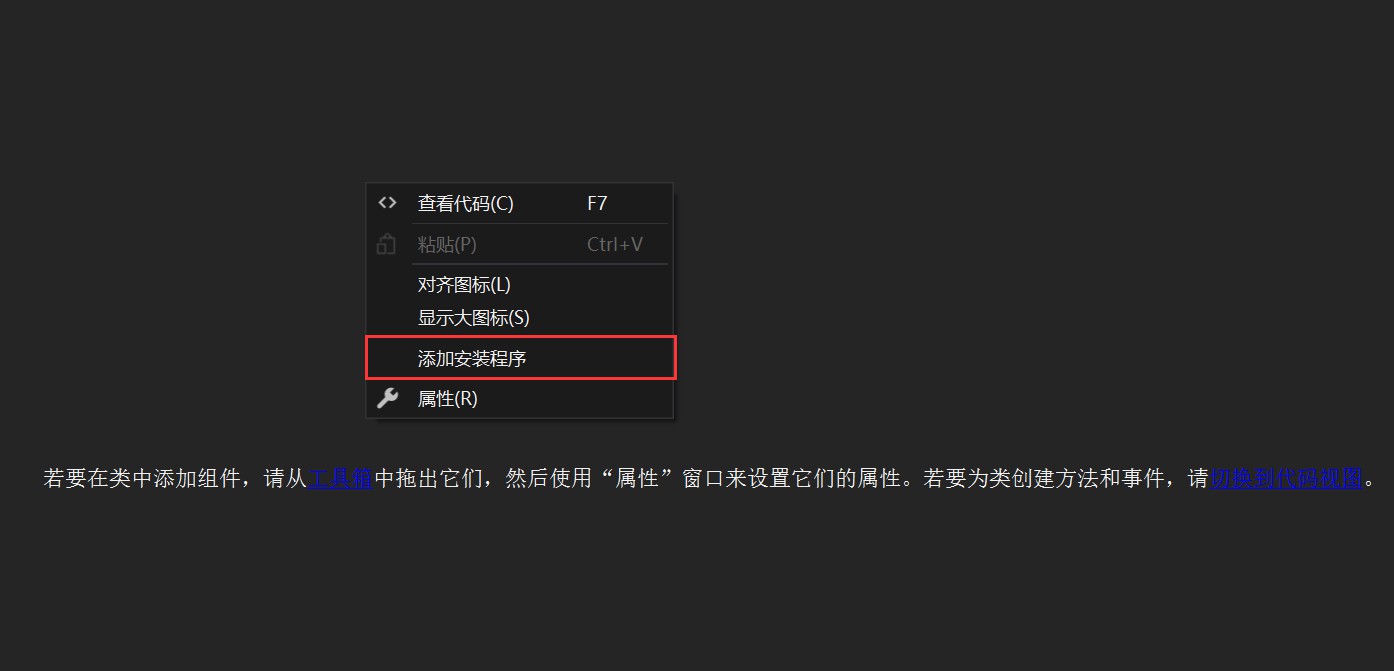
此时, 项目结构当中新增了一个默认名:ProjectInstaller.cs类, 而对应的设计页面如下所示:

查看该类的属性,如下所示:
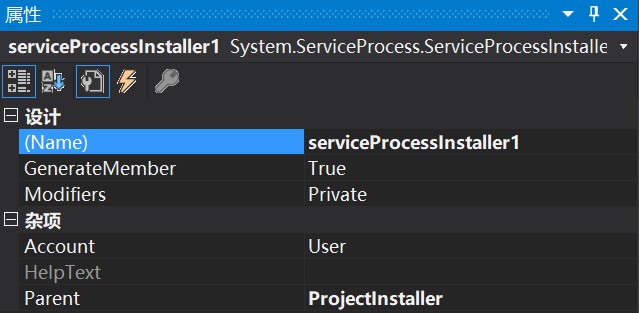
说明:
Account: 默认设置为User, 当 Account 属性为时 User , Username 和 Password 属性用于定义用于运行服务应用程序的帐户。
Username和 Password 对允许服务在除系统帐户之外的其他帐户下运行。 例如,如果没有用户登录,则可以允许服务在重新启动时自动启动。 如果保留 Username 或 Password 为空,并且将设置 Account 为 User ,则在安装时系统将提示您输入有效的用户名和密码。
还可以指定服务在本地系统帐户下运行,或以本地或网络服务运行。 ServiceAccount有关帐户类型的详细信息,请参阅枚举:

查看该类的属性,如下所示:
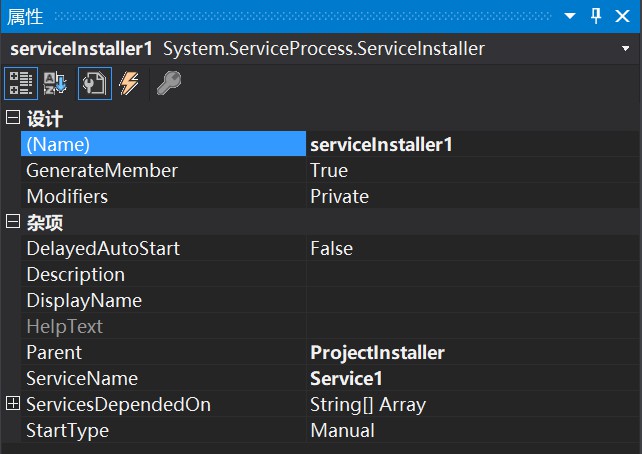
注: 该类扩展 ServiceBase 来实现服务。 在安装服务应用程序时由安装实用工具调用该类。
说明:
DelayedAutoStart : 若要延迟该服务的自动启动,则为 true;否则为 false。 默认值为 false。
Description : 服务的说明。 默认值为空字符串("")。
DisplayName : 与服务关联的名称,常用于交互工具。
ServiceName: 要安装的服务的名称。 该值必须在安装实用工具尝试安装服务以前进行设置。
ServicesDependedOn : 在与该安装程序关联的服务运行以前必须运行的一组服务。
StartType : 表示服务的启动方式。 默认值为 Manual,指定在计算机重新启动后服务将不会自动启动。
创建完成服务之后, 接下来就是针对服务进行控制, 现在,可以使用 ServiceController 类来连接和控制现有服务的行为。
ServiceController: 表示 Windows 服务并允许连接到正在运行或者已停止的服务、对其进行操作或获取有关它的信息。
通过ServiceController,我们可以获取本机的Service服务,以及启动、暂停、延续、挂起、关闭、刷新等动作, 如下所示:
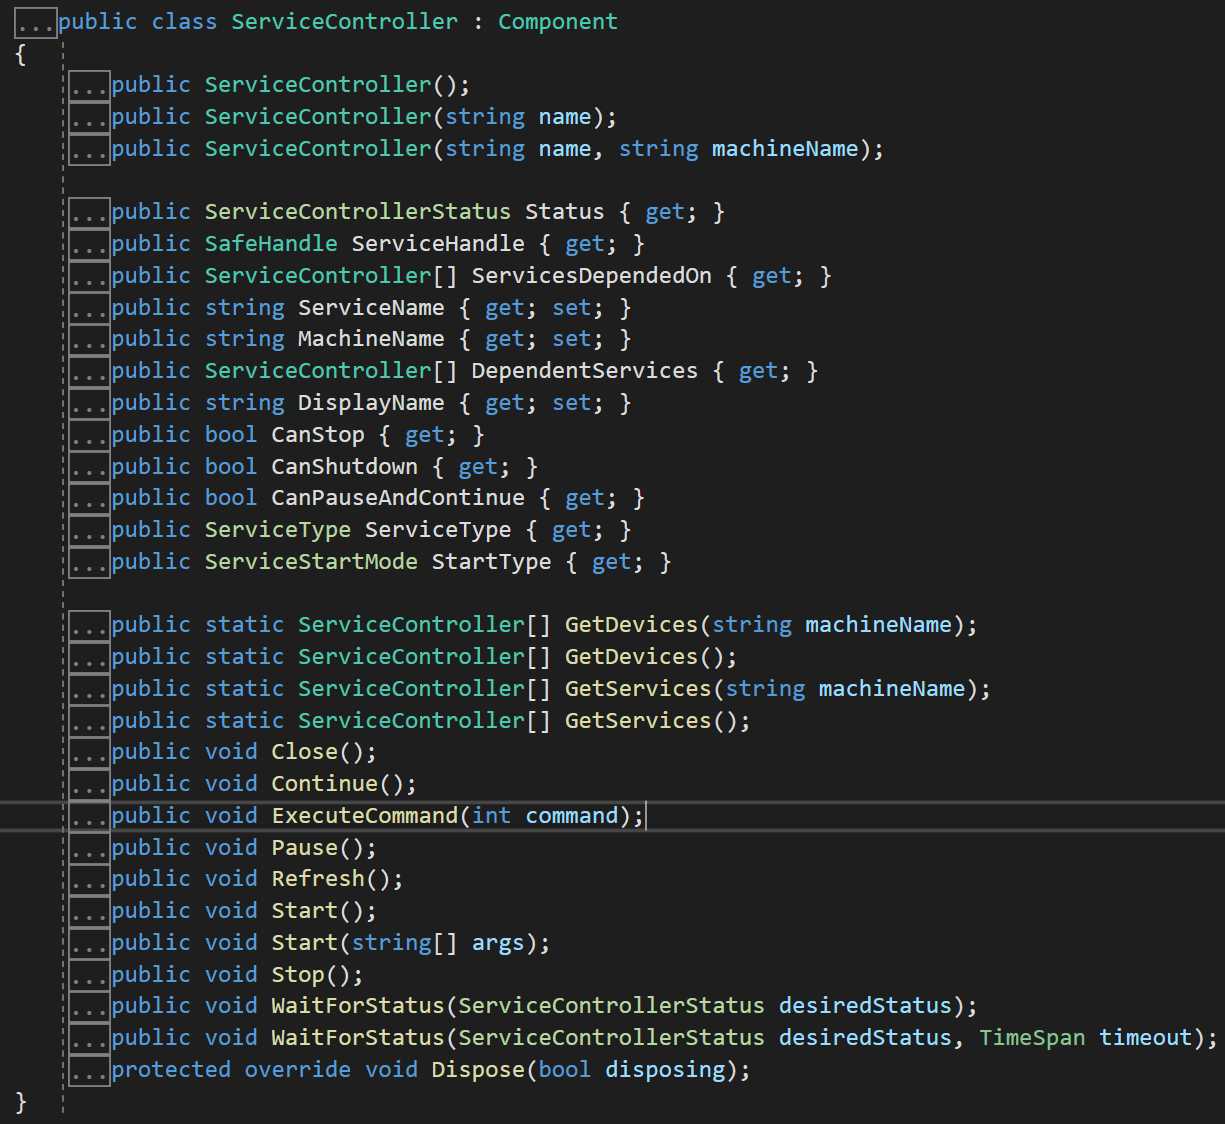
下面的示例演示如何使用 ServiceController 类来控制 Service1 服务示例。
using System;
using System.ServiceProcess;
using System.Diagnostics;
using System.Threading;

namespace ServiceControllerSample
{
    class Program
    {
        public enum SimpleServiceCustomCommands
        { StopWorker = 128, RestartWorker, CheckWorker };
        static void Main(string[] args)
        {
            ServiceController[] scServices;
            scServices = ServiceController.GetServices();

            foreach (ServiceController scTemp in scServices)
            {

                if (scTemp.ServiceName == "Service1")
                {
                    // Display properties for the Simple Service sample
                    // from the ServiceBase example.
                    ServiceController sc = new ServiceController("Simple Service");
                    Console.WriteLine("Status = " + sc.Status);
                    Console.WriteLine("Can Pause and Continue = " + sc.CanPauseAndContinue);
                    Console.WriteLine("Can ShutDown = " + sc.CanShutdown);
                    Console.WriteLine("Can Stop = " + sc.CanStop);
                    if (sc.Status == ServiceControllerStatus.Stopped)
                    {
                        sc.Start();
                        while (sc.Status == ServiceControllerStatus.Stopped)
                        {
                            Thread.Sleep(1000);
                            sc.Refresh();
                        }
                    }
                    // Issue custom commands to the service
                    // enum SimpleServiceCustomCommands
                    //    { StopWorker = 128, RestartWorker, CheckWorker };
                    sc.ExecuteCommand((int)SimpleServiceCustomCommands.StopWorker);
                    sc.ExecuteCommand((int)SimpleServiceCustomCommands.RestartWorker);
                    sc.Pause();
                    while (sc.Status != ServiceControllerStatus.Paused)
                    {
                        Thread.Sleep(1000);
                        sc.Refresh();
                    }
                    Console.WriteLine("Status = " + sc.Status);
                    sc.Continue();
                    while (sc.Status == ServiceControllerStatus.Paused)
                    {
                        Thread.Sleep(1000);
                        sc.Refresh();
                    }
                    Console.WriteLine("Status = " + sc.Status);
                    sc.Stop();
                    while (sc.Status != ServiceControllerStatus.Stopped)
                    {
                        Thread.Sleep(1000);
                        sc.Refresh();
                    }
                    Console.WriteLine("Status = " + sc.Status);
                    String[] argArray = new string[] { "ServiceController arg1", "ServiceController arg2" };
                    sc.Start(argArray);
                    while (sc.Status == ServiceControllerStatus.Stopped)
                    {
                        Thread.Sleep(1000);
                        sc.Refresh();
                    }
                    Console.WriteLine("Status = " + sc.Status);
                    // Display the event log entries for the custom commands
                    // and the start arguments.
                    EventLog el = new EventLog("Application");
                    EventLogEntryCollection elec = el.Entries;
                    foreach (EventLogEntry ele in elec)
                    {
                        if (ele.Source.IndexOf("Service1.OnCustomCommand") >= 0 |
                            ele.Source.IndexOf("Service1.Arguments") >= 0)
                            Console.WriteLine(ele.Message);
                    }
                }
            }
        }
    }
}
//This sample displays the following output if the Simple Service
//sample is running:
//Status = Running
//Can Pause and Continue = True
//Can ShutDown = True
//Can Stop = True
//Status = Paused
//Status = Running
//Status = Stopped
//Status = Running
//4:14:49 PM - Custom command received: 128
//4:14:49 PM - Custom command received: 129
//ServiceController arg1
//ServiceController arg2能够控制我们创建的服务的前提是, 该服务已安装在我们调试的设备上, 我们可以通过AssemblyInstaller 类来进行安装。
在下面的示例中, AssemblyInstaller 通过调用 AssemblyInstaller 构造函数来创建。 设置此对象的属性,并 Install Commit 调用和方法以安装 MyAssembly.exe 程序集。
using System;
using System.Configuration.Install;
using System.Collections;
using System.Collections.Specialized;

class AssemblyInstaller_Example
{
   static void Main()
   {
      IDictionary mySavedState = new Hashtable();

      Console.WriteLine( "" );

      try
      {
         // Set the commandline argument array for 'logfile'.
         string[] commandLineOptions = new string[ 1 ] {"/LogFile=example.log"};

         // Create an object of the 'AssemblyInstaller' class.
         AssemblyInstaller myAssemblyInstaller = new
                     AssemblyInstaller( "MyAssembly.exe" , commandLineOptions );

         myAssemblyInstaller.UseNewContext = true;

         // Install the 'MyAssembly' assembly.
         myAssemblyInstaller.Install( mySavedState );

         // Commit the 'MyAssembly' assembly.
         myAssemblyInstaller.Commit( mySavedState );
      }
      catch (Exception e)
      {
         Console.WriteLine( e.Message );
      }
   }
}下面的示例演示的 Uninstall 方法 Installer 。 Uninstall方法在的派生类中被重写 Installer 。
// Override 'Uninstall' method of Installer class.
public override void Uninstall( IDictionary mySavedState )
{
   if (mySavedState == null)
   {
      Console.WriteLine("Uninstallation Error !");
   }
   else
   {
      base.Uninstall( mySavedState );
      Console.WriteLine( "The Uninstall method of 'MyInstallerSample' has been called" );
   }
}
以上就是“C#中怎么创建控制Windows服务”这篇文章的所有内容,感谢各位的阅读!相信大家阅读完这篇文章都有很大的收获,小编每天都会为大家更新不同的知识,如果还想学习更多的知识,请关注亿速云行业资讯频道。
免责声明:本站发布的内容(图片、视频和文字)以原创、转载和分享为主,文章观点不代表本网站立场,如果涉及侵权请联系站长邮箱:is@yisu.com进行举报,并提供相关证据,一经查实,将立刻删除涉嫌侵权内容。