您好,登录后才能下订单哦!
密码登录
登录注册
点击 登录注册 即表示同意《亿速云用户服务条款》
这篇文章主要介绍“Vue如何实现省市区三级联动el-select组件”,在日常操作中,相信很多人在Vue如何实现省市区三级联动el-select组件问题上存在疑惑,小编查阅了各式资料,整理出简单好用的操作方法,希望对大家解答”Vue如何实现省市区三级联动el-select组件”的疑惑有所帮助!接下来,请跟着小编一起来学习吧!

<template>
  <div class="areaSelect flex">
    <!-- 省选择框 -->
    <el-select
      filterable
      :disabled="disabled"
      v-model="province"
      :size="size"
      placeholder="省"
      @change="changeCode($event,0)">
      <el-option
        v-for="item in provinceList"
        :key="item.value"
        :label="item.label"
        :value="item.value">
      </el-option>
    </el-select>
    <!-- 市选择框 -->
    <el-select
      filterable
      :disabled="disabled"
      class="center_select"
      v-model="city"
      placeholder="市"
      @change="changeCode($event,1)">
      <el-option
        v-for="item in cityList"
        :key="item.value"
        :label="item.label"
        :value="item.value">
      </el-option>
    </el-select>
    <!-- 区选择框 -->
    <el-select
      filterable
      :disabled="disabled"
      v-model="area"
      placeholder="区"
      @change="changeCode($event,2)">
      <el-option
        v-for="item in areaList"
        :key="item.value"
        :label="item.label"
        :value="item.value">
      </el-option>
    </el-select>
  </div>
</template>
<script>
  export default {
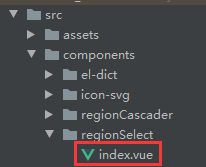
    name: 'regionSelect',
    props: {
      size: '',
      disabled: {
        size: String,
        type: Boolean,
        default: false
      },
      code: {
        type: Object,
        default: () => {
          return {
            areaCode: '',
            areaName: '',
            cityCode: '',
            cityName: '',
            provinceCode: '',
            provinceName: ''
          }
        }
      }
    },
    data () {
      return {
        province: '',
        city: '',
        area: '',
        provinceList: [],
        cityList: [],
        areaList: []
      }
    },
    watch: {
      code (val) {
        if (val.areaName && val.areaName !== '') {
          this.province = val.provinceCode
          this.city = val.cityCode
          this.area = val.areaCode
          this.provinceCity(val.provinceCode)
          this.cityArea(val.cityCode)
        } else {
          this.cityList = []
          this.areaList = []
        }
      }
    },
    mounted () {
      if (this.code.areaName && this.code.areaName !== '') {
        this.province = this.code.provinceCode
        this.city = this.code.cityCode
        this.area = this.code.areaCode
        this.provinceCity(this.code.provinceCode)
        this.cityArea(this.code.cityCode)
      }
      this.getProvince()
    },
    methods: {
      resetArea () {
        this.province = ''
        this.city = ''
        this.area = ''
      },
      // 当 type == 0 ,data 表示省编码
      // 当 type == 1 ,data 表示市编码
      changeCode (data, type) {
        if (type === 0) {
          this.city = ''
          this.area = ''
          this.provinceCity(data)
        }
        if (type === 1) {
          this.area = ''
          this.cityArea(data)
        }
        if (this.province !== '' && this.city !== '' && this.area !== '') {
          this.$emit(
            'code', [{
              code: this.province,
              name: this.provinceList.find(
                (val) => val.value === this.province
              ).label
            }, {
              code: this.city,
              name: this.cityList.find(
                (val) => val.value === this.city
              ).label
            }, {
              code: this.area,
              name: this.areaList.find(
                (val) => val.value === this.area
              ).label
            }]
          )
        }
      },
      // 从后台获得省数据列表
      async getProvince () {
        let result = []
        let url = '/base/division/provinceList'
        let data = await this.$http.get(url)
        data.data.data.map((item) => {
          result.push({
            label: item.name,
            value: item.code
          })
        })
        this.provinceList = result
      },
      // 依据省编码获得市数据列表
      async provinceCity (code) {
        let result = []
        let url = '/base/division/cityList'
        let data = await this.$http({
          url: url,
          method: 'get',
          params: {
            provinceCode: code
          }
        })


        data.data.data.map((item) => {
          result.push({
            label: item.name,
            value: item.code
          })
        })
        this.cityList = result
      },
      // 依据市编码获得区数据列表
      async cityArea (code) {
        let url = '/base/division/districtList'
        let data = await this.$http({
          url: url,
          method: 'get',
          params: {
            cityCode: code
          }
        })
        let result = []
        data.data.data.map((item) => {
          result.push({
            label: item.name,
            value: item.code
          })
        })
        this.areaList = result
      }
    }
  }
</script>
<style>
  .center_select {
    margin: 0 10px;
  }


  .global_form .areaSelect {
    width: 70%;
  }


  .global_form .areaSelect .el-select {
    width: 33.33%;
  }
</style>// 行政区划三级选择
import RegionSelect from './components/regionSelect'
// 行政区划三级选择
Vue.use(RegionSelect)
// 行政区划三级选择
Vue.component('regionSelect', RegionSelect)<regionSelect :code="item.value" :disabled="item.disabled" :size="layout.size" @code="changeCode($event,item.prop)" v-if="item.type==='region'" ref="selectArea" ></regionSelect>
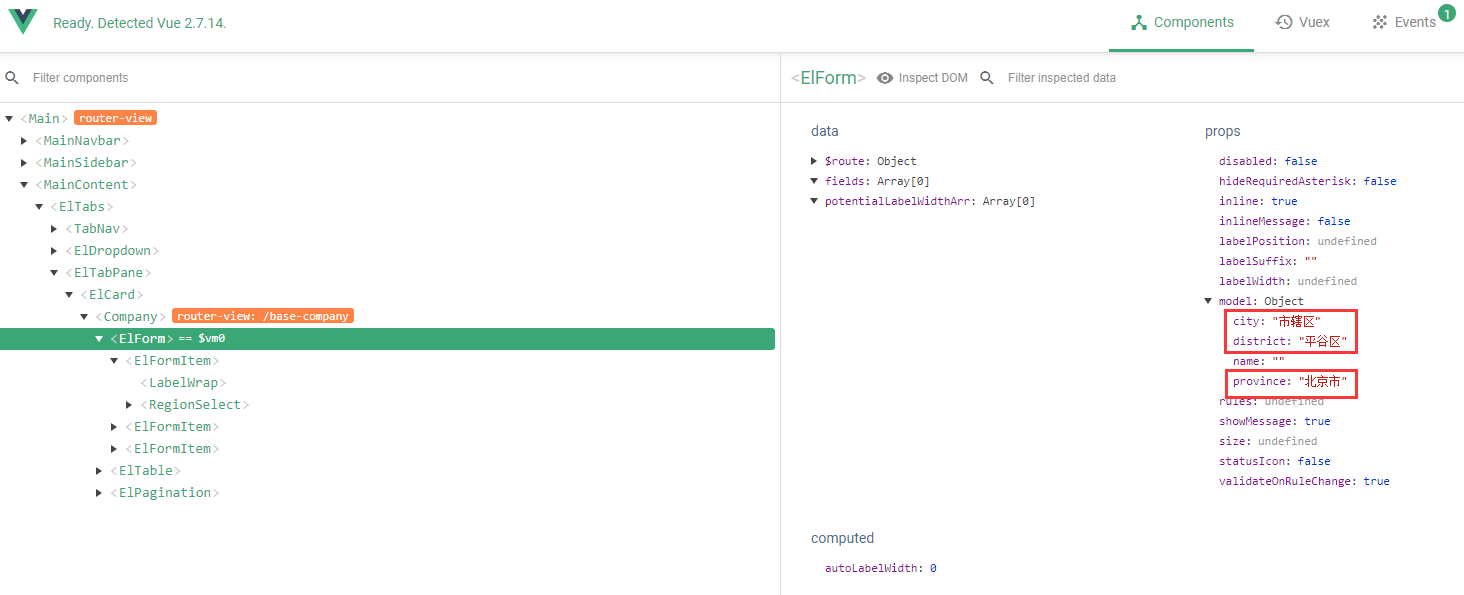
searchForm: {
  province: '', // 省
  city: '', // 市
  district: '' // 区
},
item: { // 省市区 select 自定义组件传参部分
  value: '',
  type: 'region',
  disabled: false
},
layout: { // 选择框样式,用于传参
  size: ''
},// 省市区选择框改变时,传递出来已选择的值
changeCode (data, prop) {
this.searchForm.province = data[0].name
this.searchForm.city = data[1].name
this.searchForm.district = data[2].name
},
// 重置选择框
resetForm () {
this.$refs.selectArea[0].resetArea() // 清除省市区
}

到此,关于“Vue如何实现省市区三级联动el-select组件”的学习就结束了,希望能够解决大家的疑惑。理论与实践的搭配能更好的帮助大家学习,快去试试吧!若想继续学习更多相关知识,请继续关注亿速云网站,小编会继续努力为大家带来更多实用的文章!
免责声明:本站发布的内容(图片、视频和文字)以原创、转载和分享为主,文章观点不代表本网站立场,如果涉及侵权请联系站长邮箱:is@yisu.com进行举报,并提供相关证据,一经查实,将立刻删除涉嫌侵权内容。