您好,登录后才能下订单哦!
环境:
jdk 8
eclipse-oxygen
tomcat 7.088
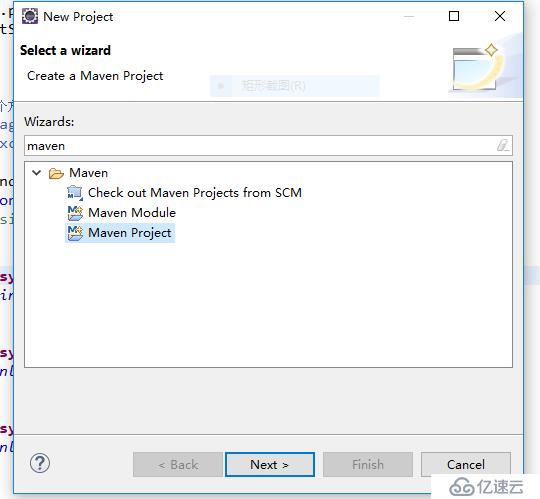
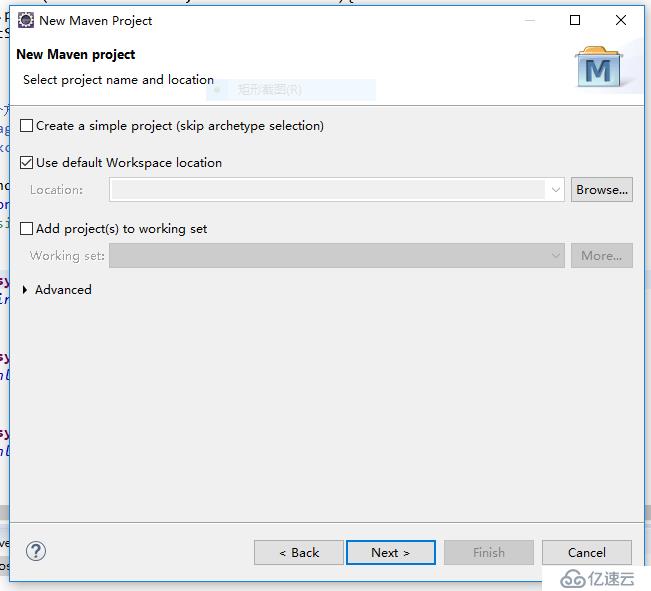
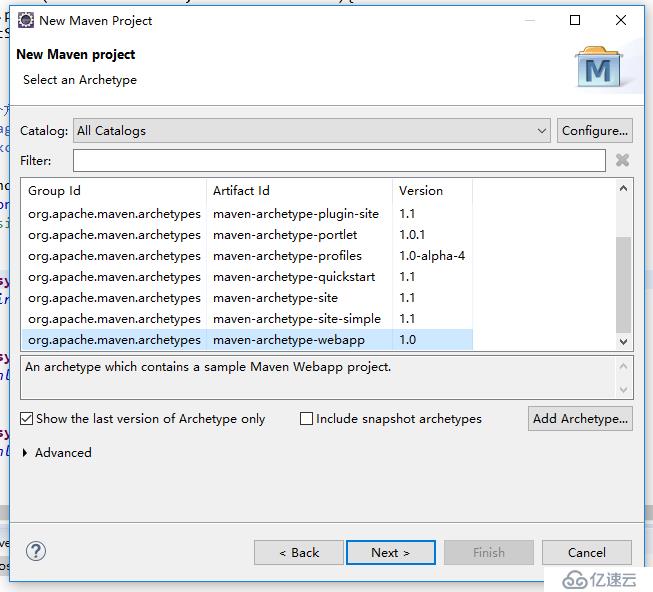
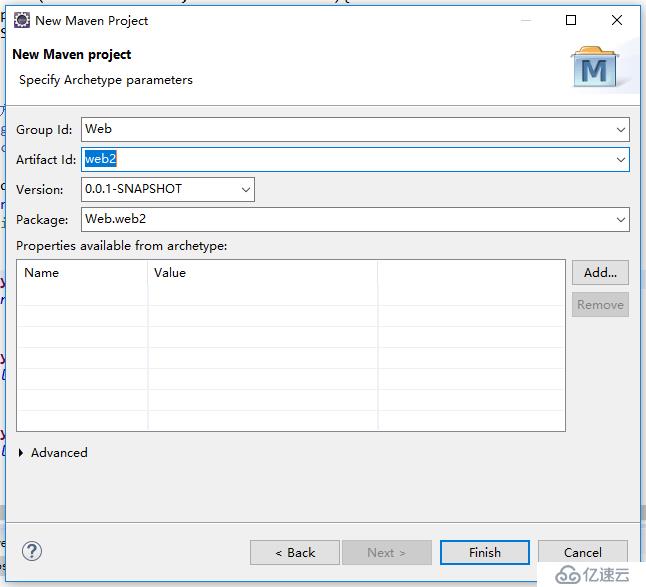
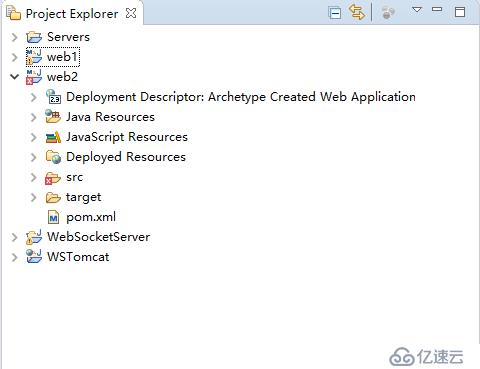
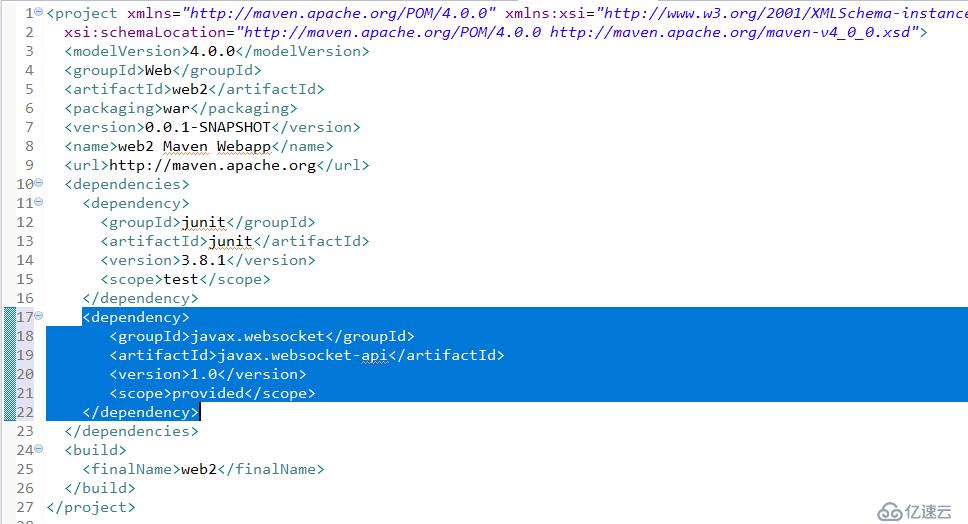
<dependency>
   <groupId>javax.websocket</groupId>
   <artifactId>javax.websocket-api</artifactId>
   <version>1.0</version>
   <scope>provided</scope>
</dependency>
再来解决报错的问题
先在你的项目下新建个folder,libs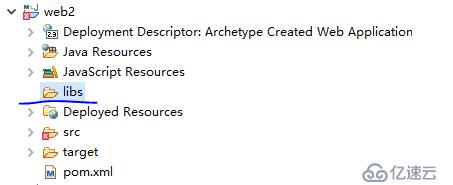
找到你的 tomcat目录/lib/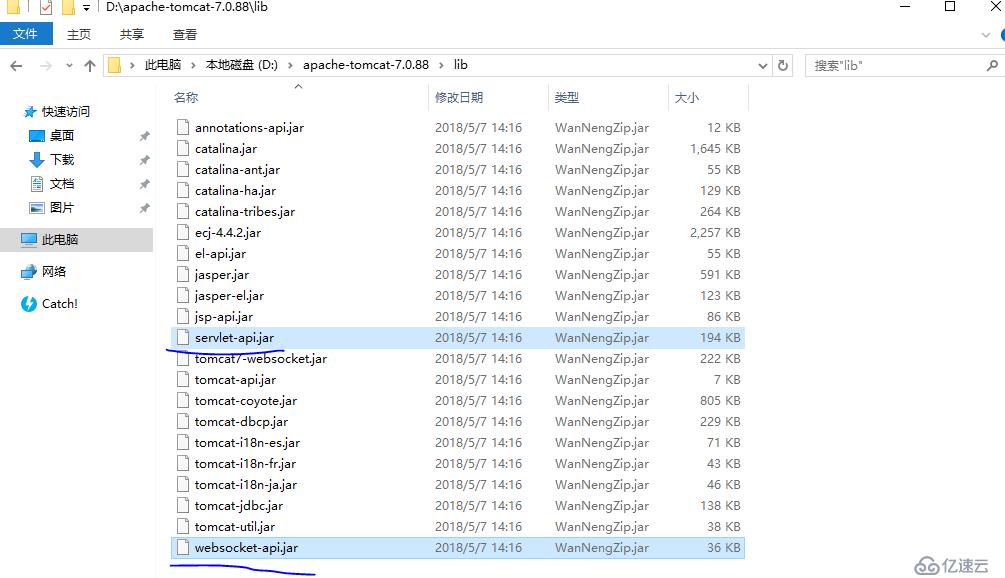
把上图中标示的两个jar包:serverlet-api.jar websocket-api.jar考到你刚建的libs文件夹中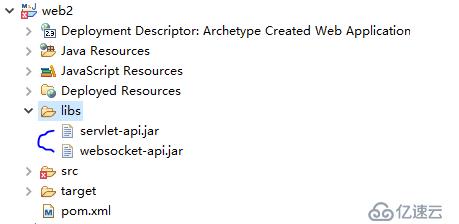
然后把这两个jar包Add to Build Path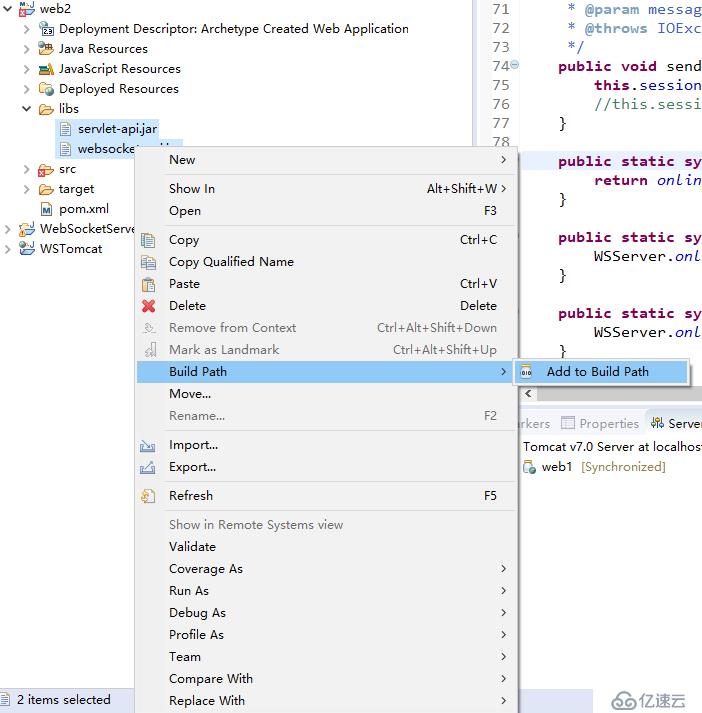
这样就不报错了,也就是说Websocket服务端开发的准备OK了。
下面就开始写服务端了
用的是注解注入,一个脚本就OK
package com.r.server;

import java.io.IOException;
import java.util.concurrent.ConcurrentHashMap;

import javax.websocket.*;
import javax.websocket.server.ServerEndpoint;

@ServerEndpoint("/ws")
public class WSServer
{
    //静态变量,用来记录当前在线连接数。应该把它设计成线程安全的。
    private static int onlineCount = 0;

    private static ConcurrentHashMap<Session, WSServer> ssMap= new ConcurrentHashMap<Session, WSServer>();

    //与某个客户端的连接会话,需要通过它来给客户端发送数据
    private Session session;

    /**
     * 连接建立成功调用的方法
     * @param session  可选的参数。session为与某个客户端的连接会话,需要通过它来给客户端发送数据
     */
    @OnOpen
    public void onOpen(Session session){
        this.session = session;
        ssMap.put(session, this);
        addOnlineCount();           //在线数加1
        System.out.println("有新连接加入!当前在线人数为" + getOnlineCount());
    }

    /**
     * 连接关闭调用的方法
     */
    @OnClose
    public void onClose(){
        ssMap.remove(this.session);
        subOnlineCount();           //在线数减1
        System.out.println("有一连接关闭!当前在线人数为" + getOnlineCount());
    }

    /**
     * 收到客户端消息后调用的方法
     * @param message 客户端发送过来的消息
     * @param session 可选的参数
     */
    @OnMessage
    public void onMessage(String message, Session session) {
        System.out.println("来自客户端的消息:" + message);
        WSServer tmp = ssMap.get(session);
        try {
            tmp.sendMessage(message);
        } catch (IOException e1) {
            e1.printStackTrace();
        }
    }

    /**
     * 发生错误时调用
     * @param session
     * @param error
     */
    @OnError
    public void onError(Session session, Throwable error){
        System.out.println("发生错误");
        error.printStackTrace();
    }

    /**
     * 这个方法与上面几个方法不一样。没有用注解,是根据自己需要添加的方法。
     * @param message
     * @throws IOException
     */
    public void sendMessage(String message) throws IOException{
        this.session.getBasicRemote().sendText(message);
        //this.session.getAsyncRemote().sendText(message);
    }

    public static synchronized int getOnlineCount() {
        return onlineCount;
    }

    public static synchronized void addOnlineCount() {
        WSServer.onlineCount++;
    }

    public static synchronized void subOnlineCount() {
        WSServer.onlineCount--;
    }
}
这段代码也是从网上拷的,但是经过了我的修改
@ServerEndpoint("/ws")这行代码表示的是在项目运行在tomcat服务器上时,这个websockt服务器的地址是:
ws://localhost:8080/web2/ws ,其中web2是之前建项目时的Artifect Id,本例是web2
这里每个session就是每个客户端的连接
ssMap是线程安全的Map,每当有客户端连接,就将客户端加入这个map中
原先的OnMessage方法,是收到消息后把消息群发给所有客户端,有点聊天室的意思,我把它改成,谁发的消息就发送回给谁
再修改index.jsp(这个就是测试用)
<%@ page contentType="text/html;charset=UTF-8" %>
<html>
<head>
    <meta charset="UTF-8">
    <title>Java后端WebSocket的Tomcat实现</title>
</head>
<body>
    Welcome<br/><input id="text" type="text"/>
    <button onclick="send()">发送消息</button>
    <hr/>
    <button onclick="closeWebSocket()">关闭WebSocket连接</button>
    <hr/>
    <div id="message"></div>
</body>

<script type="text/javascript">
    var websocket = null;
    //判断当前浏览器是否支持WebSocket
    if ('WebSocket' in window) {
        //websocket = new WebSocket("ws://localhost:8080/web1/websocket");
        websocket = new WebSocket("ws://localhost:8080/web2/ws");
    }
    else {
        alert('当前浏览器 Not support websocket')
    }

    //连接发生错误的回调方法
    websocket.onerror = function () {
        setMessageInnerHTML("WebSocket连接发生错误");
    };

    //连接成功建立的回调方法
    websocket.onopen = function () {
        setMessageInnerHTML("WebSocket连接成功");
    }

    //接收到消息的回调方法
    websocket.onmessage = function (event) {
        setMessageInnerHTML(event.data);
    }

    //连接关闭的回调方法
    websocket.onclose = function () {
        setMessageInnerHTML("WebSocket连接关闭");
    }

    //监听窗口关闭事件,当窗口关闭时,主动去关闭websocket连接,防止连接还没断开就关闭窗口,server端会抛异常。
    window.onbeforeunload = function () {
        closeWebSocket();
    }

    //将消息显示在网页上
    function setMessageInnerHTML(innerHTML) {
        document.getElementById('message').innerHTML += innerHTML + '<br/>';
    }

    //关闭WebSocket连接
    function closeWebSocket() {
        websocket.close();
    }

    //发送消息
    function send() {
        var message = document.getElementById('text').value;
        websocket.send(message);
    }
</script>
</html>
最后把项目添加到tomcat,运行tomcat(在eclipse中操作)
然后打开浏览器,360啊火狐啊Chrome啊之类的,输入这个项目的路径
http://localhost:8080/web2
这样会打开index.jsp
打开后页面自动连接websocket服务
发送消息,服务器接收到并会返回给客户端
点击关闭WebSocket连接会断开连接
这几项操作在Tomcat服务端也有显示
这就是简单的服务器端和测试jsp页面
免责声明:本站发布的内容(图片、视频和文字)以原创、转载和分享为主,文章观点不代表本网站立场,如果涉及侵权请联系站长邮箱:is@yisu.com进行举报,并提供相关证据,一经查实,将立刻删除涉嫌侵权内容。