您好,登录后才能下订单哦!
密码登录
登录注册
点击 登录注册 即表示同意《亿速云用户服务条款》
这篇文章给大家分享的是有关layui表格自动刷新的方法的内容。小编觉得挺实用的,因此分享给大家做个参考。一起跟随小编过来看看吧。
第一步:搭建环境。
1、layui的环境搭建非常简单,跟query差不多。只要引入尽可以直接使用。
1.1:引入js和样式
2、如果做完整的前后天交互请求,则需要搭建响应的后台环境。(本次不介绍后台环境的搭建)


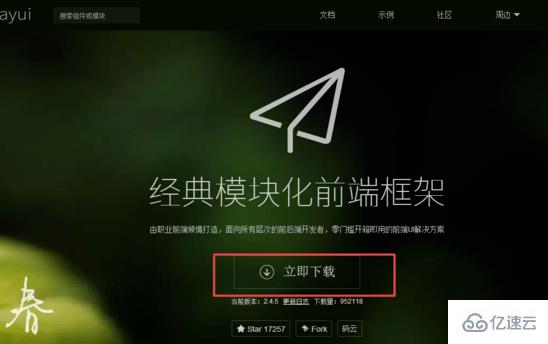
第二步:下载layui。
网址:https://www.layui.com/
1、第一步打开layui下载网址
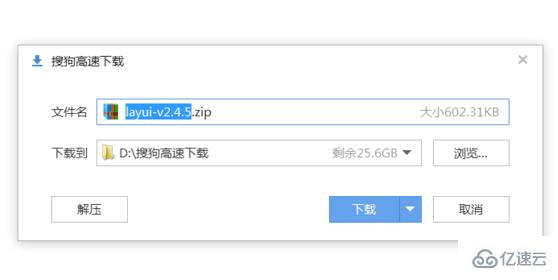
2、下载layui的依赖包
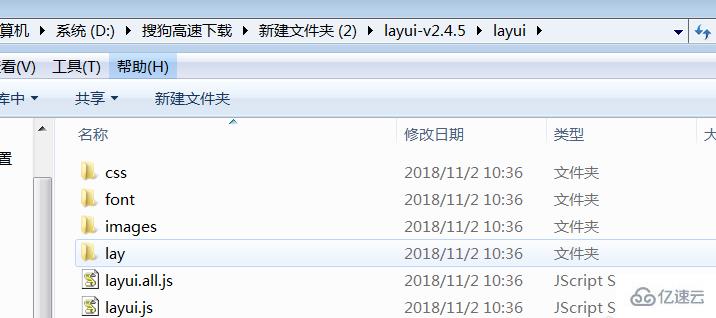
3、查看依赖包。
第三步:代码实现。
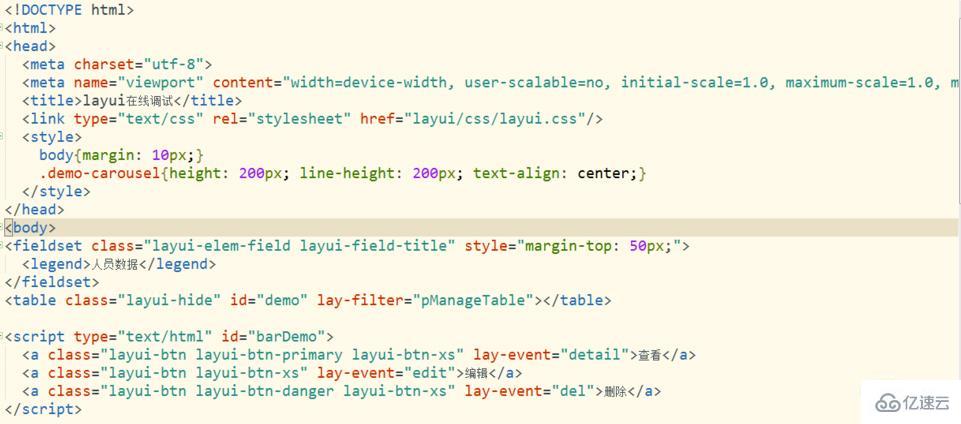
1、html代码部分的实现
<fieldset class="layui-elem-field layui-field-title" style="margin-top: 50px;">
  <legend>人员数据</legend>
</fieldset>
<table class="layui-hide" id="demo" lay-filter="pManageTable"></table>

<script type="text/html" id="barDemo">
  <a class="layui-btn layui-btn-primary layui-btn-xs" lay-event="detail">查看</a>
  <a class="layui-btn layui-btn-xs" lay-event="edit">编辑</a>
  <a class="layui-btn layui-btn-danger layui-btn-xs" lay-event="del">删除</a>
</script>
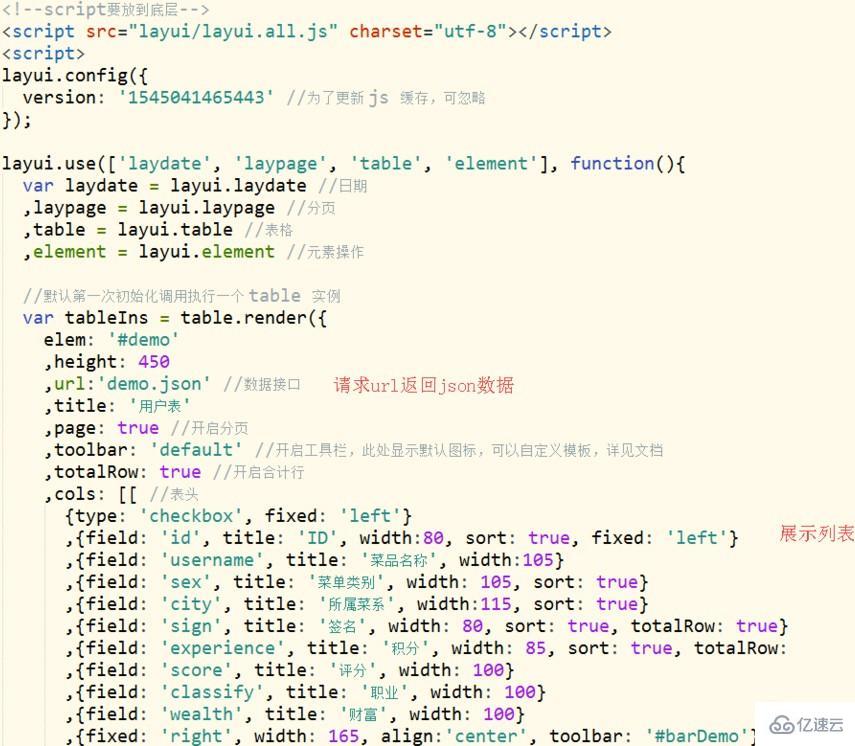
2、js代码的实现。
<script src="layui/layui.all.js" charset="utf-8"></script>
<script>
layui.config({
  version: '1545041465443' //为了更新 js 缓存,可忽略
});

layui.use(['laydate', 'laypage', 'table', 'element'], function(){
  var laydate = layui.laydate //日期
  ,laypage = layui.laypage //分页
  ,table = layui.table //表格
  ,element = layui.element //元素操作

  //默认第一次初始化调用执行一个 table 实例
  var tableIns = table.render({
    elem: '#demo'
    ,height: 450
    ,url:'demo.json' //数据接口
    ,title: '用户表'
    ,page: true //开启分页
    ,toolbar: 'default' //开启工具栏,此处显示默认图标,可以自定义模板,详见文档
    ,totalRow: true //开启合计行
    ,cols: [[ //表头
      {type: 'checkbox', fixed: 'left'}
      ,{field: 'id', title: 'ID', width:80, sort: true, fixed: 'left'}
      ,{field: 'username', title: '菜品名称', width:105}
      ,{field: 'sex', title: '菜单类别', width: 105, sort: true}
      ,{field: 'city', title: '所属菜系', width:115, sort: true}
      ,{field: 'sign', title: '签名', width: 80, sort: true, totalRow: true}
      ,{field: 'experience', title: '积分', width: 85, sort: true, totalRow: true}
      ,{field: 'score', title: '评分', width: 100}
      ,{field: 'classify', title: '职业', width: 100}
      ,{field: 'wealth', title: '财富', width: 100}
      ,{fixed: 'right', width: 165, align:'center', toolbar: '#barDemo'}
    ]]
  });
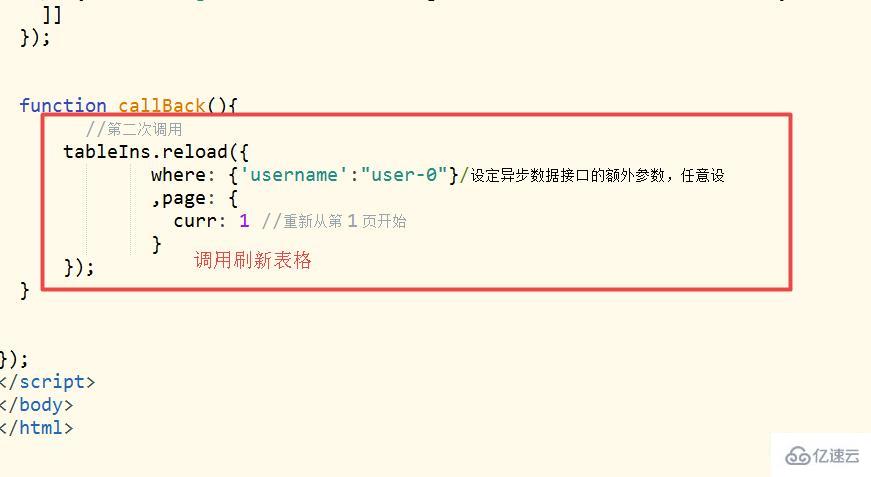
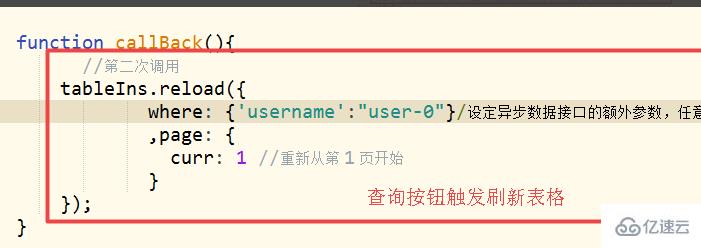
按钮或者js定时调用,查询按钮调用
  function callBack(){
  //第二次调用
 tableIns.reload({
    where: {'username':"user-0"}/设定异步数据接口的额外参数,任意设
    ,page: {
      curr: 1 //重新从第 1 页开始
    }
 });
  }


});
第四步:测试。
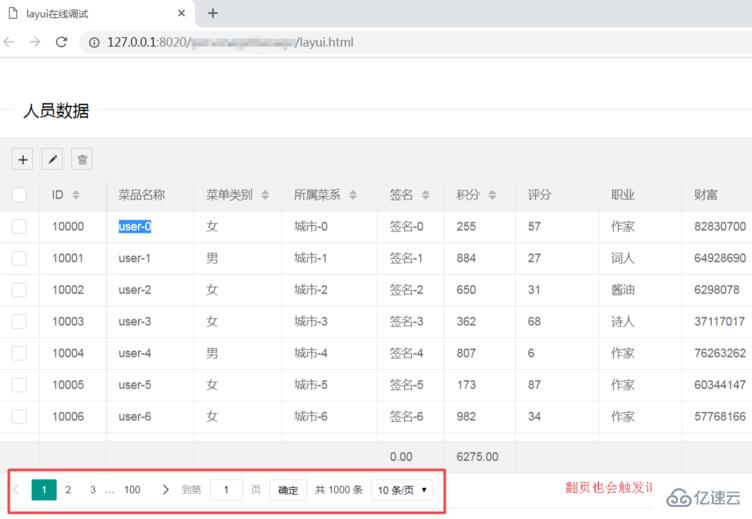
1、打开页面数据表格展示成功。
2、点击翻页按钮的页数,刷新表格
3、调用layui的请求刷新页面。
感谢各位的阅读!关于layui表格自动刷新的方法就分享到这里了,希望以上内容可以对大家有一定的帮助,让大家可以学到更多知识。如果觉得文章不错,可以把它分享出去让更多的人看到吧!
免责声明:本站发布的内容(图片、视频和文字)以原创、转载和分享为主,文章观点不代表本网站立场,如果涉及侵权请联系站长邮箱:is@yisu.com进行举报,并提供相关证据,一经查实,将立刻删除涉嫌侵权内容。