您好,登录后才能下订单哦!
密码登录
登录注册
点击 登录注册 即表示同意《亿速云用户服务条款》
这篇文章将为大家详细讲解有关怎么在Vmware中添加磁盘,文章内容质量较高,因此小编分享给大家做个参考,希望大家阅读完这篇文章后对相关知识有一定的了解。
创建Linux时分配磁盘空间随着使用的增加,使用率逐渐升高,此时需要在添加或者扩展一下磁盘。
比如:此Linux(CentOS 7.3)的磁盘为20G,目前已经使用到接近80%
[root@mail ~]# cat /etc/redhat-release
CentOS Linux release 7.3.1611 (Core)
[root@mail ~]# df
Filesystem         1K-blocks   Used Available Use% Mounted on
/dev/mapper/cl_angular-root 17811456 13985948  3825508 79% /
devtmpfs           1521180    0  1521180  0% /dev
tmpfs             1532160    0  1532160  0% /dev/shm
tmpfs             1532160   8776  1523384  1% /run
tmpfs             1532160    0  1532160  0% /sys/fs/cgroup
/dev/sda1           1038336  123500  914836 12% /boot
tmpfs             306432    0  306432  0% /run/user/0
[root@mail ~]#
扩展磁盘或者添加磁盘
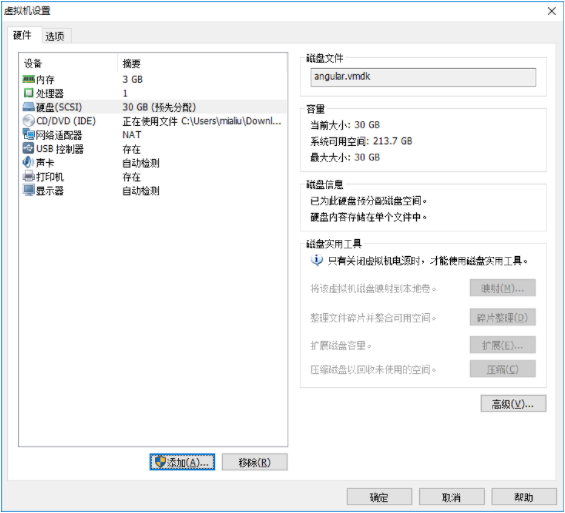
Vmware下有两种方式:
添加磁盘
扩展磁盘
注意:扩展磁盘需要在此虚拟机停止的状态下进行,同时扩展的数字是扩展后的预期大小,比如事前为20G,希望扩展10G,应该输入30。这篇文章使用扩展磁盘的方式。
确认状态
扩展后,重新启动linux,发现df状态没有变化
[root@mail ~]# df
Filesystem         1K-blocks   Used Available Use% Mounted on
/dev/mapper/cl_angular-root 17811456 13985948  3825508 79% /
devtmpfs           1521180    0  1521180  0% /dev
tmpfs             1532160    0  1532160  0% /dev/shm
tmpfs             1532160   8776  1523384  1% /run
tmpfs             1532160    0  1532160  0% /sys/fs/cgroup
/dev/sda1           1038336  123500  914836 12% /boot
tmpfs             306432    0  306432  0% /run/user/0
[root@mail ~]#
使用fdisk确认磁盘空间是否已经扩展
[root@mail ~]# fdisk -l
Disk /dev/sda: 32.2 GB, 32212254720 bytes, 62914560 sectors
Units = sectors of 1 * 512 = 512 bytes
Sector size (logical/physical): 512 bytes / 512 bytes
I/O size (minimum/optimal): 512 bytes / 512 bytes
Disk label type: dos
Disk identifier: 0x0005ba89
  Device Boot   Start     End   Blocks  Id System
/dev/sda1  *    2048   2099199   1048576  83 Linux
/dev/sda2     2099200  41943039  19921920  8e Linux LVM
Disk /dev/mapper/cl_angular-root: 18.2 GB, 18249416704 bytes, 35643392 sectors
Units = sectors of 1 * 512 = 512 bytes
Sector size (logical/physical): 512 bytes / 512 bytes
I/O size (minimum/optimal): 512 bytes / 512 bytes
Disk /dev/mapper/cl_angular-swap: 2147 MB, 2147483648 bytes, 4194304 sectors
Units = sectors of 1 * 512 = 512 bytes
Sector size (logical/physical): 512 bytes / 512 bytes
I/O size (minimum/optimal): 512 bytes / 512 bytes
[root@mail ~]#
可以看到“Disk /dev/sda: 32.2 GB”,已经扩展了10G空间。
扩展分区
[root@mail ~]# fdisk /dev/sda
Welcome to fdisk (util-linux 2.23.2).
Changes will remain in memory only, until you decide to write them.
Be careful before using the write command.
Command (m for help): n
Partition type:
  p  primary (2 primary, 0 extended, 2 free)
  e  extended
Select (default p): p
Partition number (3,4, default 3):
First sector (41943040-62914559, default 41943040):
Using default value 41943040
Last sector, +sectors or +size{K,M,G} (41943040-62914559, default 62914559):
Using default value 62914559
Partition 3 of type Linux and of size 10 GiB is set
Command (m for help): t
Partition number (1-3, default 3): 3
Hex code (type L to list all codes): L
 0 Empty      24 NEC DOS     81 Minix / old Lin bf Solaris
 1 FAT12      27 Hidden NTFS Win 82 Linux swap / So c1 DRDOS/sec (FAT-
 2 XENIX root   39 Plan 9     83 Linux      c4 DRDOS/sec (FAT-
 3 XENIX usr    3c PartitionMagic 84 OS/2 hidden C: c6 DRDOS/sec (FAT-
 4 FAT16 <32M   40 Venix 80286   85 Linux extended c7 Syrinx
 5 Extended    41 PPC PReP Boot  86 NTFS volume set da Non-FS data
 6 FAT16      42 SFS       87 NTFS volume set db CP/M / CTOS / .
 7 HPFS/NTFS/exFAT 4d QNX4.x     88 Linux plaintext de Dell Utility
 8 AIX       4e QNX4.x 2nd part 8e Linux LVM    df BootIt
 9 AIX bootable  4f QNX4.x 3rd part 93 Amoeba     e1 DOS access
 a OS/2 Boot Manag 50 OnTrack DM   94 Amoeba BBT   e3 DOS R/O
 b W95 FAT32    51 OnTrack DM6 Aux 9f BSD/OS     e4 SpeedStor
 c W95 FAT32 (LBA) 52 CP/M      a0 IBM Thinkpad hi eb BeOS fs
 e W95 FAT16 (LBA) 53 OnTrack DM6 Aux a5 FreeBSD     ee GPT
 f W95 Ext'd (LBA) 54 OnTrackDM6   a6 OpenBSD     ef EFI (FAT-12/16/
10 OPUS      55 EZ-Drive    a7 NeXTSTEP    f0 Linux/PA-RISC b
11 Hidden FAT12  56 Golden Bow   a8 Darwin UFS   f1 SpeedStor
12 Compaq diagnost 5c Priam Edisk   a9 NetBSD     f4 SpeedStor
14 Hidden FAT16 <3 61 SpeedStor    ab Darwin boot   f2 DOS secondary
16 Hidden FAT16  63 GNU HURD or Sys af HFS / HFS+   fb VMware VMFS
17 Hidden HPFS/NTF 64 Novell Netware b7 BSDI fs     fc VMware VMKCORE
18 AST SmartSleep 65 Novell Netware b8 BSDI swap    fd Linux raid auto
1b Hidden W95 FAT3 70 DiskSecure Mult bb Boot Wizard hid fe LANstep
1c Hidden W95 FAT3 75 PC/IX      be Solaris boot  ff BBT
1e Hidden W95 FAT1 80 Old Minix
Hex code (type L to list all codes): 8e
Changed type of partition 'Linux' to 'Linux LVM'
Command (m for help): w
The partition table has been altered!
Calling ioctl() to re-read partition table.
WARNING: Re-reading the partition table failed with error 16: Device or resource busy.
The kernel still uses the old table. The new table will be used at
the next reboot or after you run partprobe(8) or kpartx(8)
Syncing disks.
[root@mail ~]#
执行 partprobe或者重启
执行 partprobe命令用于将磁盘分区表变化信息通知内核,并请求操作系统重新加载分区表,可以避免必须重新启动的问题,这里我们reboot一下。
分区确认
通过fdisk可以确认到已经添加了sda3
[root@mail ~]# fdisk -l
Disk /dev/sda: 32.2 GB, 32212254720 bytes, 62914560 sectors
Units = sectors of 1 * 512 = 512 bytes
Sector size (logical/physical): 512 bytes / 512 bytes
I/O size (minimum/optimal): 512 bytes / 512 bytes
Disk label type: dos
Disk identifier: 0x0005ba89
  Device Boot   Start     End   Blocks  Id System
/dev/sda1  *    2048   2099199   1048576  83 Linux
/dev/sda2     2099200  41943039  19921920  8e Linux LVM
/dev/sda3    41943040  62914559  10485760  8e Linux LVM
Disk /dev/mapper/cl_angular-root: 18.2 GB, 18249416704 bytes, 35643392 sectors
Units = sectors of 1 * 512 = 512 bytes
Sector size (logical/physical): 512 bytes / 512 bytes
I/O size (minimum/optimal): 512 bytes / 512 bytes
Disk /dev/mapper/cl_angular-swap: 2147 MB, 2147483648 bytes, 4194304 sectors
Units = sectors of 1 * 512 = 512 bytes
Sector size (logical/physical): 512 bytes / 512 bytes
I/O size (minimum/optimal): 512 bytes / 512 bytes
[root@mail ~]#
扩展vg
基本LVM知识,进行vg扩展,不再赘述。
[root@mail ~]# pvcreate /dev/sda3
 Physical volume "/dev/sda3" successfully created.
[root@mail ~]# vgs
 VG     #PV #LV #SN Attr  VSize VFree
 cl_angular  1  2  0 wz--n- 19.00g  0
[root@mail ~]# vgextend cl_angular /dev/sda3
 Volume group "cl_angular" successfully extended
[root@mail ~]# vgs
 VG     #PV #LV #SN Attr  VSize VFree
 cl_angular  2  2  0 wz--n- 28.99g 10.00g
[root@mail ~]#
扩展lv
可以将此lv全部添加或者部分添加,我们这里全部添加。
[root@mail ~]# lvs
 LV  VG     Attr    LSize Pool Origin Data% Meta% Move Log Cpy%Sync Convert
 root cl_angular -wi-ao---- 17.00g
 swap cl_angular -wi-ao---- 2.00g
[root@mail ~]# lvextend /dev/cl_angular/root /dev/sda3
 Size of logical volume cl_angular/root changed from 17.00 GiB (4351 extents) to 26.99 GiB (6910 extents).
 Logical volume cl_angular/root successfully resized.
[root@mail ~]# lvs
 LV  VG     Attr    LSize Pool Origin Data% Meta% Move Log Cpy%Sync Convert
 root cl_angular -wi-ao---- 26.99g
 swap cl_angular -wi-ao---- 2.00g
[root@mail ~]#
df状态确认
此时df状态还没有变化
[root@mail ~]# df
Filesystem         1K-blocks   Used Available Use% Mounted on
/dev/mapper/cl_angular-root 17811456 13986168  3825288 79% /
devtmpfs           1521180    0  1521180  0% /dev
tmpfs             1532160    0  1532160  0% /dev/shm
tmpfs             1532160   8808  1523352  1% /run
tmpfs             1532160    0  1532160  0% /sys/fs/cgroup
/dev/sda1           1038336  123500  914836 12% /boot
tmpfs             306432    0  306432  0% /run/user/0
[root@mail ~]#
xfs_growfs
使用xfs_growfs可以将xfs文件系统进行online方式的扩展,它会将data block进行调整。
[root@mail ~]# xfs_growfs /dev/mapper/cl_angular-root
meta-data=/dev/mapper/cl_angular-root isize=512  agcount=4, agsize=1113856 blks
     =            sectsz=512  attr=2, projid32bit=1
     =            crc=1    finobt=0 spinodes=0
data   =            bsize=4096  blocks=4455424, imaxpct=25
     =            sunit=0   swidth=0 blks
naming  =version 2       bsize=4096  ascii-ci=0 ftype=1
log   =internal        bsize=4096  blocks=2560, version=2
     =            sectsz=512  sunit=0 blks, lazy-count=1
realtime =none          extsz=4096  blocks=0, rtextents=0
data blocks changed from 4455424 to 7075840
[root@mail ~]#
再次确认df状态, 添加的10G空间已经有效,使用率也降到了50%。
[root@mail ~]# df
Filesystem         1K-blocks   Used Available Use% Mounted on
/dev/mapper/cl_angular-root 28293120 13986252 14306868 50% /
devtmpfs           1521180    0  1521180  0% /dev
tmpfs             1532160    0  1532160  0% /dev/shm
tmpfs             1532160   8808  1523352  1% /run
tmpfs             1532160    0  1532160  0% /sys/fs/cgroup
/dev/sda1           1038336  123500  914836 12% /boot
tmpfs             306432    0  306432  0% /run/user/0
[root@mail ~]#
关于怎么在Vmware中添加磁盘就分享到这里了,希望以上内容可以对大家有一定的帮助,可以学到更多知识。如果觉得文章不错,可以把它分享出去让更多的人看到。
免责声明:本站发布的内容(图片、视频和文字)以原创、转载和分享为主,文章观点不代表本网站立场,如果涉及侵权请联系站长邮箱:is@yisu.com进行举报,并提供相关证据,一经查实,将立刻删除涉嫌侵权内容。