您好,登录后才能下订单哦!
密码登录
登录注册
点击 登录注册 即表示同意《亿速云用户服务条款》
这篇文章给大家分享的是有关Python如何实现PS滤镜功能之波浪特效的内容。小编觉得挺实用的,因此分享给大家做个参考,一起跟随小编过来看看吧。
使用Python实现PS滤镜的波浪特效
import numpy as np
from skimage import img_as_float
import matplotlib.pyplot as plt
from skimage import io
import numpy.matlib
import math
file_name2='D:/Visual Effects/PS Algorithm/4.jpg'
img=io.imread(file_name2)
img = img_as_float(img)
row, col, channel = img.shape
img_out = img * 1.0
alpha = 70.0
beta = 30.0
degree = 20.0
center_x = (col-1)/2.0
center_y = (row-1)/2.0
xx = np.arange(col)
yy = np.arange(row)
x_mask = numpy.matlib.repmat (xx, row, 1)
y_mask = numpy.matlib.repmat (yy, col, 1)
y_mask = np.transpose(y_mask)
xx_dif = x_mask - center_x
yy_dif = center_y - y_mask
x = degree * np.sin(2 * math.pi * yy_dif / alpha) + xx_dif
y = degree * np.cos(2 * math.pi * xx_dif / beta) + yy_dif
x_new = x + center_x
y_new = center_y - y
int_x = np.floor (x_new)
int_x = int_x.astype(int)
int_y = np.floor (y_new)
int_y = int_y.astype(int)
for ii in range(row):
  for jj in range (col):
    new_xx = int_x [ii, jj]
    new_yy = int_y [ii, jj]
    if x_new [ii, jj] < 0 or x_new [ii, jj] > col -1 :
      continue
    if y_new [ii, jj] < 0 or y_new [ii, jj] > row -1 :
      continue
    img_out[ii, jj, :] = img[new_yy, new_xx, :]
plt.figure (1)
plt.title('www.jb51.net')
plt.imshow (img)
plt.axis('off')
plt.figure (2)
plt.title('www.jb51.net')
plt.imshow (img_out)
plt.axis('off')
plt.show()
附录:PS 滤镜——波浪 wave
%%% Wave
%%% 波浪效果
clc;
clear all;
close all;
addpath('E:\PhotoShop Algortihm\Image Processing\PS Algorithm');
I=imread('4.jpg');
Image=double(I);
% Image=0.2989 * I(:,:,1) + 0.5870 * I(:,:,2) + 0.1140 * I(:,:,3);
[row, col,channel]=size(Image);
R=floor(max(row, col)/2);
Image_new=Image;
Degree=30; % 控制扭曲的程度
Center_X=(col+1)/2;
Center_Y=(row+1)/2;
for i=1:row
for j=1:col
x0=j-Center_X;
y0=Center_Y-i;
x=Degree*sin(2*pi*y0/128)+x0;
y=Degree*cos(2*pi*x0/128)+y0;
x=x+col/2;
y=row/2-y;
if(x>1 && x<col && y<row && y>1)
x1=floor(x);
y1=floor(y);
p=x-x1;
q=y-y1;
Image_new(i,j,:)=(1-p)*(1-q)*Image(y1,x1,:)+p*(1-q)*Image(y1,x1+1,:)...
+q*(1-p)*Image(y1+1,x1,:)+p*q*Image(y1+1,x1+1,:);
end
end
end
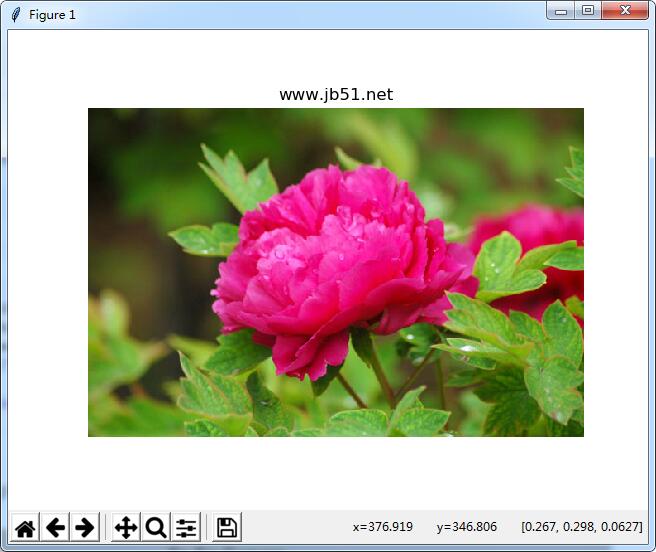
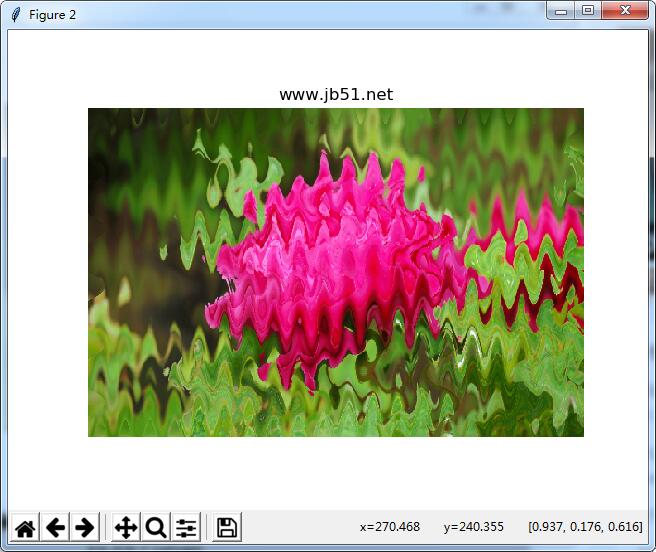
figure, imshow(Image_new/255);本例Python运行效果:
原图
效果图
感谢各位的阅读!关于“Python如何实现PS滤镜功能之波浪特效”这篇文章就分享到这里了,希望以上内容可以对大家有一定的帮助,让大家可以学到更多知识,如果觉得文章不错,可以把它分享出去让更多的人看到吧!
免责声明:本站发布的内容(图片、视频和文字)以原创、转载和分享为主,文章观点不代表本网站立场,如果涉及侵权请联系站长邮箱:is@yisu.com进行举报,并提供相关证据,一经查实,将立刻删除涉嫌侵权内容。